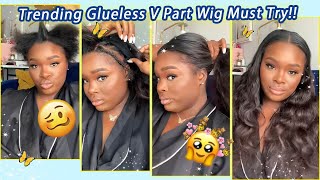
Perfect V-Part Kinky Curly Wig | How To Blend A Twa With Curly Extensions Ft Klaiyi Hair #Vpartwig
- Posted on 24 July, 2022
- Sew-In Hair Extensions
- By Anonymous
Hey y'all! Thank you so much for tuning in to another one of my videos! If you like my content make sure you like this video and subscribe before you leave!
Inspo from @Caroline A.
Hair links:
Direct Link to Hair: https://www.klaiyihair.com/products/kl...
my personal link: https://signal4domain.com/click?redire...
Connect with me on Instagram and Twitter @audiizzzy
Email me for SERIOUS Business Inquiries ONLY : [email protected] l
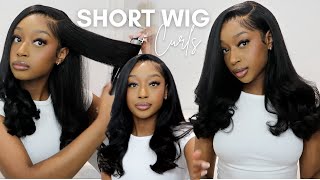
Hey everybody welcome back to my channel today we're going to be going over this v part wig. So i bought this from clay hair, and this is a v part wig that you can put on without leave out, but i like it with leave out because it just looks more natural. This is just me here just starting to part my hair, because i want to do a side part, as you saw. The finished look is the side part, and i first saw this wig on another youtuber and i'll have her information down below, because she definitely inspired me with this. Look because i usually do see people with v parts, but i'm not really a middle part girly, especially when it comes to um, curly hair. So when i saw her do the side part i said okay, we could. We could do something with this. So i'm parting on my hair and the wig is called a b part. So you want to part your hair out in a v um part literally, like part, your hair, in kind of like a v pattern when you're going in with your comb, don't do like a? U like, you would do for a? U part: do a v you'll see me doing it the wrong way, um, because i was in a rush. So if mine is not a v, but it was close enough and i ended up being able to adjust it as i went along so now, i'm just going in and i'm parting off the rest of my hair for the v part. This is just going to be the side part, and this is my really short part of my hair. So this is a little harder to blend, but i'll show you guys later and then i'm going to go in with some water and some gel, because i want to slick down the rest of my hair. So it's not in the way, while i'm doing the wig and it'll just make it easier for me to put the combs in in order for the wig to stay. So this is me just putting the wig on and just trying to see where i want it placed at. If you have your hair parted into a b part. This would be much easier, but i was in a rush - and i was part of my hair more like into you, and it really doesn't matter that much, but i do feel like it'll be easier if you part into a v going with the you know the Way the wig is supposed to be built, so i'm just putting the combs in, as you can see, i'm putting bobby pins in. If you blend it right, you might not be able to see the bobby pins, but i don't think it really matters. If you can see a bobby pin or two because most people put bobby pins um on their hair with side parts stuff like that, so i don't really mind it showing and it still looks pretty natural, but because my size of my hair is so short. It'S not going to stay like the comb. Yeah it'll help with a little security, but it didn't really help as much as i thought it would so. I put in extra bobby pins because i need a little bit more reinforcement. So now i'm gon na just go in and start defining my part and start blending the hair into the wig. I'M gon na define my part a little bit more and then i'm going to start going in with a couple of products to start the blend. I first start off with some water i'm going to spray my hair with water, not that much so not too much. We don't want her to be soaking wet. We just need a little dampness and then i'm going with some leave-in conditioner just for moisture purposes. You don't really have to do that. I'M just going to work that into my hair, i'm going to start off with the shorter side first, but i'm going to do it on both sections. So now i'm going to wet the wig and you don't want this to be damp. You want to get her soaking wet. So do the opposite here for what you do for your hair, because you want to make sure that you can go in and really define it. So i'm cutting some extra pieces off because i unfortunately had to um redo this video, because my first video got cut. So if you want to get the most natural look that you can possibly get, you want to do a little bit of shaping. You want to cut the ends. You want to do a little bit of like layers around the front of your face to kind of frame your face. I don't have any videos of me doing it because, like i said my camera is a hater and i accidentally put on the wrong setting and it wouldn't. Let me um put the videos onto my phone and my tablet. So now i'm going to go in with some mousse a lot of bodies, milk and honey moves to be exact and i'm just going to put a whole bunch on there, because this hair needs a lot of water and product because it will get frizzy. If you don't put anything on it, if you like that, look um kind of like a poofy, almost afro type. Look, then that's fine, but i just really wasn't going for that. Look for this day now, i'm gon na go in with some extreme wet line gel to blend my hair. In with the wig, i don't put any gel in the wig because i just like i didn't want to make it crunchy. I wanted it to mimic, not try as best as possible whenever i put gel in my hair for wash and goes it just never really worked out for me. So i'm just putting the gel on both sections that i took out and i'm just putting my hair over the v part to kind of conceal it and after i put it over because it's not going to stay without a bobby pin, i'm going to bobby pin It down, if you need to take out any more hairs or like little small baby hairs to kind of blend it like i'm doing now, then i definitely recommend that, because it makes it look a little bit more natural, especially when you can see kind of where The wig ends, so if you notice that you can see somewhere - oh that's, the the v part track. Try to cover it up a little bit baby here. Stick it up with some gel and then um just keep it moving. So now i'm going in and i'm going to gel my hair and the wig together, like i'm, going to you, know not kind of interlock them but wrinklet them together to make it look as seamless as possible and i'm doing that with extreme line gel. But i'm also doing it with got2b glue gel, because that is really like the foundation of my whole wig. Look that i'm doing today, because that's the only thing that really kept my hair laying down i'm only using streamline gel, because it was the only thing that i had left um. I personally don't really like extreme line gel, but that's a topic for another day. So i'm going in and i'm using the got to be glue all over my hair. If you don't like the way it makes your hair feel you can find another alternative. But this is what i like to do, just to kind of make sure that it's getting blended in and twisting the hair into my own, because it just makes it look more natural. Just because i think it looks more natural. I do put a bobby pin on this side too. It'S mostly concealed with the hair around it, but if you can see it a little bit, i don't feel like. It looks bad because a lot of people put bobby pins in their hair for styles, and it's a very common thing. So now that i'm done with that, i'm just going in on the other side and i'm going to go in and do the same thing with the mousse and the water and touch up anything on the other side that i see that i want to define more. So the last step is me just doing some finishing touches by me doing my edges with a little bit of edge control and then fixing any hairs or any lumps or bumps that i saw that i really didn't like um as you're doing this wig. You just want to find the right placement so that you can't really see the v part wig, because it's not bulky, but for somebody who doesn't have that much hair, it's going to be a little bit harder for you to blend it. So just take your time. Be patient put some gossip music on if you need to, because that's what i do and i'm starting to get frustrated with certain things, and i definitely did that while i was doing my hair the first time around so like i said this is me just doing Finishing touches and then i'm just going to adjust my bobby pin because i just really didn't like it digging into my scalp, but i really was feeling it and i was like hold on let's, let's readjust this and i was kind of like twisting my hair back. So i feel like that would look a little bit more natural too, and i'm just going to put the bobby pin back in there and that's the final look um. This is going to be my new go-to wig. I have another curly wig like this, but it's not a v part. It'S a closure wig, and i really really love that one too, and that has been my go-to, but this especially with how hot it's been. This is a look okay. So this is the final look. This is a picture of what it looks like dry um. It'S really cute really natural and i think you guys will really benefit from getting this wig. So if you have any questions, just let me know but i'll see you guys in the next video bye
Comments
FALL FOR AUDI: Just a hair update for you guys…I’ve been wearing this unit for about 2 weeks on and off and I LOVE IT. I genuinely love it and I’ve gotten soooo many compliments. I have slept in this wig and I’ve had little to no issues with tangling or sheddding. If I’ve slept on it awhile without brushing it I’ll expect a little tangling but it nothing major. This wig is BOMB. I do have an affiliate link but I purchased this wig with my own money so I’m not lying when I say this hair is worth the purchase!
Gabrielle Grant: This turned out so nice!!!