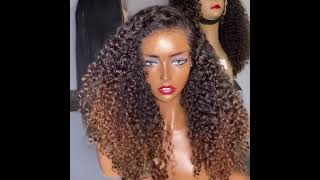
Hair Extension Transformation - Diy Ombre, Blending & Styling
- Posted on 25 January, 2019
- Sew-In Hair Extensions
- By Anonymous
Hey guys! Today's video is all about the new hair extensions that were sent my way by Sixstar hair . Won't spoil anything in the description but watch me transform my hair with these extensions, as I ombre them myself, style them into my hair and hear my final thoughts on these extensions! As you may know, I love wearing hair extensions to change up my look and I wanted to get these specifically to add that highlighted effect to my hair. Let me know your thoughts and hope you enjoy the video!
*LET'S CONNECT:
-Instagram: https://www.instagram.com/em.mag/
-Business email: [email protected]
*PRODUCT INFO:
Discount code: LEMILIE. $10 off for your order.
This clip in hair extension is from https://www.sixstarhair.com/
Hair name: Deluxe Star Clip In Hair Extension
Hair material: 100% virgin remy human hair
Hair Length: 20 inch
Hair Color: 18# Dirty Blonde
Hair Weight: 160gram/set
Content: 1 set of 10 pieces 20 clips
1 piece of 8 inch weft with 3 clips
1 piece of 7 inch weft with 3 clips
2 pieces of 6 inch wefts with 3 clips
2 pieces of 4 inch wefts with 2 clips
4 pieces of 1.5 inch wefts with 1 clip
Link to this beautiful hair: https://bit.ly/2MlIS5J
Email: [email protected]
Instagram: https://www.instagram.com/sixstarhair
*This video is NOT sponsored. Sixstar has kindly sent me the products for free, however I was not paid to make a review. All opinions are 100% honest, as they will always be :)
#diy #ombre #hairextensions #wavyhair
Hey everybody welcome back to my channel, so today's video is going to be a hair extension transformation. Video, I'm just gon na do extensions and you guys will see like it. Is that what I do to really transform my hair and make it look good with them. I'M really excited to show you guys. I know I do get funky. Sometimes I'm wondering why I wear extensions, because my hair has born a lot under this thick to begin with. Honestly, if you guys are hair extension auras, like you might understand what I mean like. Sometimes it just gives that glam effect ear looks whether your hair is like down half up up. It just gets like a really nice look, so I'm really excited that. I just got any ones to show you, so these ones are from a brand called the six star luxury hair extensions actually haven't heard of them prior to making this video, but they did reach out and asked me if I'd be willing to do an honest review. So that's exactly what I'll be doing. You guys will see exactly how I feel as I go along. I have not stalled them. I don't know how they're gon na look on my hair, so you will get like a very first impression type of situation. So the extensions that I got are the deluxe star 160 gram, a clip in hair extensions and the color number 18 being the dirty blonde color. But if you guys go on the six-star website, you will see there are so many different options of different colors and different thicknesses as well. I got the regular 160 grams set and if they go for $ 119, which is honestly very affordable for how much hair it actually comes with, it's definitely a good steal and it is real human hair, which is obviously very good because you can style it. You can do whatever you want and I'm just letting you guys know once I got them shipped. It took two days to get to my house. I don't know if their shipping is always that quick. I just really wanted to show that positive experience with you guys. It comes with a total of 10 clips for three clips to two clips and for one clips in this really cute satiny bag and yeah. That'S what you guys need to know in terms of the description and now, let's get back into the video. So this is how I look like straight out of a bag. It comes with a water here. It comes with 160 grams of hair. This is the color that I've got. I know there are a lot lighter than my hair and you guys are like what are you thinking, but that's part of this video you guys are gon na see me die them, cut them really stall them into my hair. So it's gon na be a whole process to get them to actually look realistic and I'm actually excited to see what I do. I know idea how it's gon na turn out, but I have a bit of hope. So this is how they look like next to my hair. You guys can see they look quite thick, they're extremely soft and I love the color hasn't get natural a bit of like a highlight situation going on, but they've not really just has like different tones kind of meshed into the hair, which I find looks really nice. Anyways, you guys are gon na see everything from A to Z. I hope you guys enjoy this and without further ado, let's get into the video okay. So once you've protected your table, I am now taking all the tools. I will need to complete the ombre process. So that includes a comb, the actual dye. I am using a box dye from Garnier the olia line in the color for dark brown, I'm taking out all the contents from the box, which includes step 1 and step 2 being the developer and the actual dye with a bottle applicator as well that it comes With it also comes with a conditioner and some gloves, of course, so instead of using their applicator, I will actually be taking a plastic bowl and mixing in the developer and a die together in there and then just using a brush applicator that I bought from the Pharmacy now I will start the actual dyeing process. First, I will dip in my brush applicator into the bowl and work my way down the extensions going above three inches down just to add a natural shadow to the root area. Then I will take my comb and dip it into the diet as well and just brush down a little bit just to give a bit less of a harsh line. To avoid the harsh line, you can also just take the brush applicator and just alternate by brushing horizontally and vertically in certain areas. Don'T forget to flip the extensions on the other side as well, just to make sure you're really saturating all the hair and there's no gaps or extra later hair is peeking through. If you guys want a much more thorough tutorial and are bringing your extensions, I do strongly suggest watching my at home tutorial, which is much more detailed and gives you guys a lot of awesome tips, which I will be sure to link for you guys as well. So once I have repeated the same process to all the hair, you're gon na leave that process for about 30 minutes and then just start rinsing them out in the sink. I started by just rinsing out the dye parts of the hair, so just wetting that and then going in with my macadamia shampoo with the rest of the hair. I am using the macadamia one because it is color safe and sulfate free. So you know I do love it even on my natural hair, so I used it on that and I really liked it and once all of that was done, of course, you do need to condition it a little bit mainly concentrating on the ends, but I worked My way up a little bit and I just used the conditioner that came in the box to blow-dry the hair. I actually put the extensions into a drawer and let the rest of the hair hang out which made it a million times easier to actually blow dry, because I had both hands to work with. I was able to use my round brush and it made it look really good and volumize, and it just avoided me having to use my straightener after okay guys. I just finished, dyeing and blow drying the extensions, and this is how they look like. I will definitely show you guys some close-ups as well, but you guys can see that there is a lot of shadow going on because of the darkness, and I think it's gon na look a lot better. Once it's put into my hair now, because I have a lot of darkness around here - and I want it look as natural as possible now in terms of the quality of the extensions now they feel just as soft as when I purchased them. They feel amazing. Actually, nothing there's no damage whatsoever and if anything, they look thicker now I feel like often when you wash extensions, there's more body afterwards because of the way it's blow-dried and stuff, and it actually looks thicker. So I feel like it's gon na blend much better. Now that it's washed, so I doesn't recommend you guys doing that before putting on extensions general, just washing them, but yeah I'm moving on. I want to take this clip off and I'm ready to style the extensions into my hair, okay. So the first thing I'm going to do is go from ear to ear, but just kind of go downwards a little bit, because I want to start my first two row quite low but not too low, because I don't want it to peak through. So I'm just going to section the hair off and just teasing the hair upwards. So I'm going to spray this with hair spray, and I'm going to take. Is the B clip right now and clip that in because his hair comes with a lot of clips? I actually like to double them, so I'm going to take another to be clip. I just put it right above it, so the first clip I cut is like a little bit lower. It'S not right right right off the face at the top, and then I'm just going to clip this one or literally right at 4:12. So they lay right under each other like this, and you guys can see that there is a little bit more hair not to work with continuing on. I will now section my hair ear to ear and just staying straight. It'S about an inch above the first layer. You guys can see now the clips do not show through I'm going to be taking the widest out of all of them. This is also three clips, but it is wider. You can tell there is more going on, so I will take that and clip it in and what's good is that I feel the clips from the other one. So it kind of almost supports these. I don't feel the need to tease all the layers, so this is how this looks like. I can tell you guys right now, though, the clips to feel extremely sturdy, like I know some clips slip, these do not. They are very sturdy, actually do not feel the need to tease my hair at all. Now you guys can see that I didn't go low enough, like I can tell that I should have maybe went a little bit lower now. A finish, on course, is on my hair again, so I'm very okay with the fact that it's higher up, because when I die it'll it'll work, but for now I do recommend if you guys want to add a little bit of a shadow. I think don't want to dye them or you just didn't go as low like I did. I would recommend taking a root touch-up spray, so this one is from L'Oreal and I got it in my color. This is dark brown and what to take it? That'S right, and you guys see it instantly - gives a beautiful effect the other side as well. So that's not now that I feel like it looks a little bit more, even and kind of lower kind of blends a little bit better. I'M gon na keep going down like I normally would think I might do like one other layer, because I don't like to go too high up. I definitely do not want the clips to show through so now I'm going to go about an inch above the ear. Maybe a bit higher we'll take another to be click-through. Now you guys can see, I have more room, so I will be taking two one Eclipse and just putting them on each side again. Okay, so up to now I have put one two three four. I put four like wider ones and then two one clips so a total of six clips and I actually still have one two two two clips and two one clip. So it definitely comes with a lot of hair. Let'S see if this blends like this and I'll see from here, if I want to add more or not, I'm going to put down the rest of my hair brushes with the extensions when the first step to styling is obviously just brushing everything together. Okay, let me just stand up and see what this looks like okay, so I could definitely see my hair a little bit right now and the extensions here. I actually love how the exceptions. Look though, I feel like it adds a really nice amount of thickness and length, but because of the color difference, I obviously need to add a little bit more clips, which is exactly what I'll do so I'll. Take the two clips right here and section off now more the front of minor a little bit beautiful. Oh my god, why my makeup soon, hey, maybe don't go so close to your face on you spray! This. Let me just fix that quickly! Alright! So now that I have finished clipping that, let's see what that looks like okay, that looks a lot better. That looks a lot better. Okay, alright! So I'm getting a little happier with how this is looking like and I'm going to just put one more clip on the other side, again, sectioning the side, all right, taking my other two clip okay. So now it's looking more like highlight, so you can definitely see the different tones in my hair. But honestly, when you do have ombre hair, you tend to have different tones anyway. So I'm okay with that, but it definitely adds that like blondish. Look that I really like, especially that's the ends you know like when you wear something black or dark, underneath you really get to see. That contrast more so I'm really into that. I'M gon na just brush this out and keep in mind this is my hair. Look pretty straight with the extension, so normally when you're astray, really it's the hardest to blend, but I find in terms of how its blending into my hair it's adding a lot of thickness, and I don't know I see that a nice gradient, like I'm very happy With this to be honest with you um now we can actually get to the cutting and styling. I didn't even cut it yet I don't know if I want to what I recommend to those of you who do something I always do is cut them. I cut all the extensions the same length to begin with and from there I start just like cutting natural layers to see like okay, where does my hair notch on the end and it kind of just like cut pieces accordingly, but I always like the ends to Be like all straight because that really makes it look more natural and just thick. I love thick thick ends, so yeah, I'm really a happy with this look at this okay. So now that we're done, we can style it a little bit. So what I like to do to style it is, I just take I like to actually style the extensions on my hair at the same time, because it just makes it look that much more natural, as I just like to curl my hair with the extensions. So I'm going to take this and open up the clamp yeah just this is a one inch curling iron, but I like that open clarify because it cutting is more of a ways, but sometimes I do both. It honestly depends. So I'm going to see how I feel as I go, and I might do all so. What I like to do is start off like that and then just take the ends and curl it the regular way or if you want to just go all the way up and kind of gives like more of like a tight effect. Okay, so now this is how the curl looks like I'm going to actually take it and curl it right back up in the same direction as I curled it, because I do want it to set when it's hot, so that when it gets cool, it stays like That it's much more likely to stay curled if you set it so I'm going to take this clip, clip it into place and then just keep going. So basically this side of my face, I want the curls to go away from my face. So that's what I'm doing all the curls are going in the same direction. I'M like shocked with how everything blends it without me cutting it. I'M like really happy so far with how things are looking I find a one. A figure is styled, I'm sure it's gon na. Look that much better. Well, that's what I'm hoping for, but I'm happy as it is. So I'm gon na just keep on doing this. Okay. So once I'm done doing this slide, I'm basically why to keep the curls going in the same direction on this slide. So, instead of it going away from my face, I'm gon na make you go towards my face here until I get to the very front section of my hair, because that's the face framing hair, and I want that to go away from my face. Hopefully that makes sense, but I don't want to bore you guys with the same exact process all along my hair. So I will fast forward this and I will see you guys once I get to this side like my hair gee, thanks, alright guys, so I'm at the end of this side. If you guys can see, this is like the whole front section, and I do want it to kind of go away from my face, so I will be going in the opposite direction now to finish this off so now, instead of kind of wrapping it in orders, I'M going to take my curler and wrap it upwards, really put it away for all the outer bits that aren't well curled inside. That'S when I do the other method of like rocking it with the clown, because it ensures that my ends are also curled. So it looks like this right now, but you guys can see the ends aren't perfect, so I kind of go in at this point and just wrap it up just like what I can do it kind of gives like that. Bouncy effect. Alright. Okay, so I feel like normally, I would leave these clips in for longer, but this side of my head actually feels like they've cooled off, so I'm gon na take them out and show you guys what the curls look like. So it actually makes the curl even more bouncy and it's gon na make sure it lasts longer. I really like this method and because you guys could see that I curled my hair with the extensions at the same time they're within the same curl. So you really can't see at this point where my hair is versus, where the extensions are I find it just looks extremely well blended, so I'm just going to with my fingers kind of separate the curls a little bit and like this is like instant body. It'S crazy. It really adds a lot of thickness. I love it so what I want to do. I really want that old Hollywood glam want to brush it a tiny bit with a brush, but take the comb and kind of just like go like this with it, because I want the ends to look really just like thick. If that makes sense - and you guys can see what I mean - that how it does that - and this is the hair - so I mean technically - I can leave the clips in a little bit longer, but it's still gon na look curled enough. So I will show you this side as well, once everything is done being set, you take out the clips okay, so final thoughts, I'm obsessed like I feel like I just got out of the hairdresser. It literally gives me that exact blonde that I was going for it has lightness to it. I like the fact that I dye them, obviously because it blends better with the roots, but it gives a little nice amount of lightness. My hair looks healthier, so I don't have to like physically bleach it and ruin it. It gives a beautiful amount of thickness a bit of length which is nice. I didn't want too much. These are 20 inches they're, not too long, and they go thick from root. 10, which is literally one of the first things I look for this - is real running human hair. So, of course you guys can't tell you could saw them, you can dye them and it will not ruin the integrity of the hair, they're, very good body. You feel it and they're 119 dollars like can't find that for like, usually like, I have other tensions that don't get me wrong. I love them, but it was double the price. So I mean you definitely get your money's worth here. It'S pretty evident. You guys can see it firsthand, I'm very very happy and I can't stop touching my hair. Sorry, that's annoying! No, but I'm really happy about it. I think I just got out of the salon seriously, so let me know down below. If you guys have further questions for me, I will make sure to answer all of you. I love connecting with you guys in that way. I really hope this was helpful and I will see you guys all in my next video bye, everyone
Comments
MARIA CONTRERAS: Nono you’re doing it the wrong way. Wet the extensions and let them air dry until they are damp. Dye them DAMP and use your fingers to softly feather down the shadow. The damp hair is going to make the dye melt down nicely. Don’t need to let it process for 30 minutes either if you want a shadow.. literally 7 minutes will do it and it’ll look less blotchy. Also going from SUPER dark to that light you should use at least two different tones of hair dye to get an ombre look. I swear no hate at all but there are many things you could’ve done differently for a better result and also for your followers to not ruin their extensions as they are expensive.
Susan Underwood: Thank you for making this video it was very helpful. I followed your instructions and it turned out perfect
Lana DeMars: As a hairstylist I’d say get a color match as toning them to have the same tonal color at each level so neutral brown to neutral blond or tone both ashy, pearl, golden, etc... also u don’t need developer or the chemicals from box color. Just add a color depositing toner to hair/extensions. I hate to be a know it all I’m not I’m just sharing info as I am trained to color and apply hair extensions
Aesthetics Skincare and Ink: Thanks for the great video! Very informative, love your technique ❤️
Rosemary S: You’re gorgeous doll! Thanks for the video so helpful
Mike and Mom: Wow, absolutely beautiful!❤️
mandy: it gives a beautiful vibrant highlight look!
Corey J: You're so pretty omg! & you slayed this look.
Tenacious Dee: Love it
Giovanna T: Really love your videos!! Love from Brazil ❤️
Adriana Furtado: Wow love the out come super pretty
Coco Chanel: WOW can you do my hair please!?? the hair looks incredible and you styled it so well!!! Thanks for sharing! Never heard of the brand but I'll for sure take a look , I'm looking for affordable remy hair and these look rly pretty :)
Lori Brooks: End result is gorgeous, but it seems like you could have arrived there more easily with balayage extensions with the roots and clips dark (Luxy has them). Even though you dyed the roots dark, the clips were still blonde. Just my thoughts.
Lily Delane: Curling it really saved the whole look
Morgan Crutchfield: For someone buying extensions for the first time, what brand would you genuinely recommend?
chappidi sirisha: The DIY which u have tried with dark brown will it stay like that or it will go off after washing them for more than 4 to 5 tyms . B/w love the way how u blend diff colours to look amazing
nicely done: looks great!
Calli Cohen: Love you hahaha when you sprayed your face ♥️♥️♥️
sindee 213: Do u know if I can dye bellami blonde expressions to darker ombre?
Miszpink Lorcsa: What is the spray you using? Does it come off after washing the hair?
Alyssa Pallotta: You’re adorable and I loved listening to you but those two shades of blonde kinda clashed a little♥️
Melissa Considine: Loveeeee
Usfoods72: ✨Fab.
Becca Xx: what lipstick are you wearing? :)
M K: love ur accent
Ken Leung: Why you don’t trying on classic method on your curling iron just using clamp? Trying clamp at the top slide to middle curling through until the end! Which heat setting you using on your hair and extensions?
Narta K.: Its not the same haircolore and it dont looks good !
Chloefountain: Are you Canadian?
Carmen Lopez: Doesn't look good
Alyssa Lee: Girl...these hair extensions are NOT your color lol