How To: Ombre' Tutorial | Bleaching Brazilian Virgin Hair Extensions
- Posted on 05 January, 2016
- Sew-In Hair Extensions
- By Anonymous
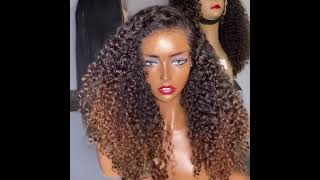
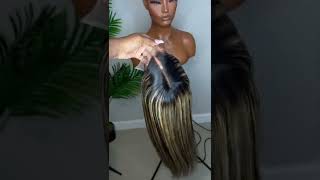
Who doesn't love a good ombre' look? Check out this video for a quick tutorial on bleaching virgin hair extensions.
To purchase extensions www.luxuryhairhouse.com
Hair Specs
3 bundles on 16" Virgin Brazilian Straight Extensions
Original Hair Color: Natural Black
Custom coloring is available! Just send an email with your request to [email protected]
What I Used
* 30 Volume Salon Care Developer
* Clairol BW2 Powder Lightener
* Mixing Bowl
* Application Brush
* Black Vinyl Gloves
* Aluminum Foil
Contact Details
Website: www.luxuryhairhouse.com
IG: @provirginhairep
Email: [email protected]
Phone: 317-586-8419
Music: The Sweetest Sin by Loveshadow (ccmixter.org)
Hey loves Happy New Year back with another video. If you want to see how I achieved this ombre book, please stay tuned, okay, so to initiate any bleaching process for hair extensions. You gon na need a few things number one. Please make sure that your working surface is covered. I chose to use aluminum foil because that's the only thing that I had on hand, but it also picked up a mixing brush a mixing bowl BW 2 Clair law powder Lightner and also some 30 volume developer. It is not recommended that you use 40 or 50 volume developer as the risk of damaging your hair extensions, so stick to anything between 10, 20 and 30, all right, so first things. First, okay, pour your powder lightning! Inside of your mixing bowls. I bought one pack of the boots will be enough for this, so, as you can see, it kind of scraping every little bit that I possibly can out of this miniature package, and this particular bleach actually is a one to two mix when it when it comes To the developer, so using my little mixing Cup, I'm pouring in two ounces of developer. Now, typically, you really don't have to be precise when it comes to the measurements, but because this is my first time doing, hair extensions. I wanted to be as accurate as possible. So go ahead, pour that in and then you can start to mix it until it's a bit creamy consistency, and once your bleach is all mixed, you can do this one of two ways you can unravel the bundle, um and kind of apply the bleach that way, But because my workspace was literally a square, I just kind of thinning out the hair extension that's evenly as possible and then once they're, all feigned out go ahead and start painting on the bridge. The is recording this process make sure that you actually flip the hair extensions over so that you can actually reach both sides of hair, and you are about to see a little bit of a flip fail. So I have to pick the hair extensions back up and then repin them out, while the other notes, new is kind of spread them out over the foil and then for change its impeach, the opposite in the day and as you can see, I'm actually reaching about 3/4 of pan just to make sure that they blend the oil at the root and after you are done, go ahead and wrap it in aluminum foil and go ahead and set it aside to process for about the next 30 to 45 minutes just check on it. Intermittently, because here can actually process a little bit quicker, but once the processing time has been dismal was about 35 minutes, you can take the hair and begin to rinse out the excess bleach under cold water and so far I will really loose this hombre color. So just go ahead and rinse the hair until the water runs clear, letting you know that you have got out all of the excess product. Then, once the hair is always, I am taking my shiny silver conditioning shampoo, just putting a little bit in my hands and making sure it's all lathered up, and it's going to show for the distinctions to make sure that they are clean as well. Conditions. Make sure that, as you are going through this step, do not wash the hair roughly at all, because if you do, you can break the left and that can cause the hair to share it. And nobody want to share the extensions so go ahead. And shampoo and rinse again under cold water, make sure that the water runs clear, letting you know all of the excess shampoo out go ahead kind of strain them a little bit, but be very gentle, and then you can set them aside to allow them to air Dry or you can blow dries on the extensions using medium heat once they are all dry. This is the end result and, as you can see, I achieved a nice wide look and that they are ready to be applied into the hair and styled and straightened. And if you liked this video, please make sure you comment like and subscribe, and I will see you in the next one.
Comments
Random Person: Thank you so much . This was so simple and helpful . Continue to make more of these !
Darlene B: Thank you for making this simple. You also explained what developer to use. I was wondering what’s the difference. Thanks
super star: Easy n straight to the point.Thanks
Angelis M. Sanchéz: Hey! I love your video. You explain this so clearly. I appreciate this so much. It made me gain the self confidence as a first timer to dye my own extensions.Though I wonder, what can I do if i want the very tips of the hair lighter? Like for example lets say, I achieved the penny blonde color, but I also want the very tips more lighter blonde.. How can I do this? Do I leave the tips longer in the aluminium foil? thank you!
Tam Frazier: Great video! It helps me to try this for the first time
jlove 7861: one of the most helpful videos I've seen thank u do much
Marry Pitts: Every Video i see they have new bundles . U cant dye old bundles?
Princess Lillian: hey hood job!!! wanna be YouTube Buddie