Installing Tape In Hair Extensions | Relaxed Hair| Diy Kinky Straight Tape-In Diy
- Posted on 30 May, 2022
- Tape-In Hair Extensions
- By Anonymous
Hey Lovely People!
So I tried tape-ins for the first time and I think I did pretty good! Once I feel like I've mastered it I will be sure to do a detailed tutorial! I also plan to do an update video to keep you all in the loop of how it holds up.
Feel free to ask any questions you may have in the comments below.
I hope you enjoyed this video!
HAIR EXTENSIONS (18"-18"-16"): https://www.aliexpress.com/item/325680...
CLARIFYING SHAMPOO (SULPHATE FREE): https://www.amazon.com/OGX-Purifying-C...
HAIR GRIPPER: https://www.amazon.com/TRU-BARBER-GRIP...
FLAT IRON: https://www.amazon.com/BaBylissPRO-Nan...
Don't forget to LIKE, SHARE, COMMENT & SUBSCRIBE!! Thank you all for the support!
Follow me on Instagram: @Journeywithshadz
Stay Blessed,
Shaddae.
Song: Valcos - A New Light [NCS Release]
Music provided by NoCopyrightSounds
Free Download/Stream: http://ncs.io/anewlight
Watch: http://youtu.be/o_v9WSImGIU
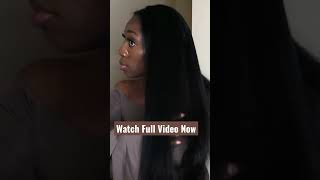
Hey guys welcome back to my channel journey with shads. I am shade in today's video i'll, be showing you how i was able to achieve this look with tapens um. I had no prior experience with taping, so if you're kind of in the same boat as me, definitely stick around and i'll show you how i was able to achieve this look um, it's giving what it's supposed to give. I i really like it um, i'm in love, if i'm being honest it it's like, i mean guys. This looks like it's coming out of my head. If i'm being honest um but yeah, i think i'll be wearing it mostly because it's the summer in the top but anyways. If this is something that you're interested in seeing stay tuned, don't forget to like share comments and subscribe to your girls channel and let's get started so the hair i got. Um i'll, definitely link it below. I got it from aliexpress. It was super, affordable, um and seeing it was my first time you know i wanted to. I don't want to spend it back. I don't want to spend a bag any time i'm buying here, to be honest, because it's just not for me um, so yeah it comes like this each bundle our group has like 20 pieces. I got three bundles um, so that's 60 pieces and of course you need two pieces to make one sandwich so yeah, so it came like a natural um, a natural black, and i had dyed my hair black. So i dyed this too, but now it it's not really matching it's giving two different colors. It'S given two different blacks, but we'll see how it works out. Um i did wash the hair, so i washed it um what else i washed! I washed my hair this morning as well. Um. One thing you want to do is make sure that um, you shampoo um your scalp like really good and don't put any conditioner on it. That'S what i saw most people saying so that's what i did so we'll see how that works out um, but yeah, i'm going to start and see how it goes. Hopefully. So, right now you can see me sectioning my hair. I'Ve already sectioned off the front. Part of my hair - and i am going to be doing a middle part, so i kind of just made that part um from the beginning. I used two scrunchies to hold those two pieces together, just to keep it away from the rest of my hair. In the back, i'm doing my sections there, i'm not doing a straight line, i'm kind of making it very slant. You want to make sure that you want to be able to put your hair up in a ponytail. So to do that, you have to kind of do a diagonal part as opposed to like a straight back part. So hopefully that makes sense right here. I am using the tail of my comb just to make sure that i'm not seeing the tail through my hair. You just want to make sure that you're not able to you know when you do put your hair up in a ponytail. You don't want your tapes to be showing, so this is a way to kind of make sure that doesn't happen. I am straightening up my lines right now. Also you want to make sure you have at least two mirrors or just some way to see the back of your head. If you don't have anyone assisting you because guys the hardest part of this was actually seeing the back of my head? I am working with two mirrors, so i have a mirror in the front and you can see the one in the back that helped out a lot um. I don't know why i haven't done this sooner, even when i'm braiding my hair, i'm gon na start doing this. So i like how my parts look. I can't see the comb through it, so i'm just using an elastic band to secure it really tightly. So when i am doing i'm doing a little victory, dance, um so yeah, this is what it's looking like after i've done. All my sections um, i did a section in the back. You can see that part right there and that's what i'm that's, where i'm going to put my first tape in right there, so that line that you see there. That'S where i will be starting the tape ins so right now, i'm showing you the back of my head and where i'm about to put the tape um. So the taping comes with a paper. That'S over it that kind of keeps the adhesive hidden, and so i'm just taking that off and what i'll do is i'll leave a little bit of space. I want to see about a third of an inch of space between my root and where i put the tape in you, don't want to put it at your roots or directly in your route, because it's gon na um. It won't be able to flip over when you want to. You know put your hair in a ponytail and stuff like that, so that's me just making sure that it flips fine and the position in was okay, so after you put it on your hair, the next thing you want to do is do a part under where You put the tape, the tape in um. You want to remove from the part any excess of hair. That'S left! You want to make sure that there's not too many too many too much hair between the first tape and the one that you put under it, because i believe that will cause it not to stick as well. I struggled with aligning the two tapes together, guys like that, was also one of the biggest struggles for me. So if you have someone that can help you, i say: let them help you, because it was a struggle to just get them aligned. I wouldn't say even now: some of them are not aligned, so you just try your best they're still fine they're, so functioning fine. So don't worry too much about that. The velcros that i do have in my hair um. I did get those from amazon and they are linked below so after i have put a row of tape, ins and what you're seeing right now is the first row that i did. I have a total of four taken, so two sandwiches and i did flat iron. It so it's looking a bit straighter and less kinky than what it looked like before um. I started off flat ironing as i went along, but i did stop that after a while and just did it at the end, so you'll see what that looks like um to do the second row i kinda. I didn't do it too thin, because i didn't want too much hair in my head, because i already do have a thick hair, i'm going more less for thickness and more like length if that makes sense. So i kind of maybe did like an inch and a half um worth of thickness or maybe two inches. I don't know i'm bad with like measurements, but just know that it was quite a bit of hair um. It wasn't too thick, but it was, i would say, an inch, and so what you see me doing right now is just doing that part um, trying to get it as straight as possible. One thing you want to do is to make sure that you have two mirrors, so you can see that i'm working with tumors, i have one in the front, and i have one in the back. I think this is very important, especially if you're doing this by yourself, so this is after i've put in my second row, just as me just making sure that it looks fine, it's able to be put up in a ponytail. I have a total of 10 tapens at this point. I have two in the back in the very back and like three in the second row fast forward. You see i'm already at the front of my head, so yeah you can see me placing the tape in um about one third of an inch, maybe less away from my root and, as i explained earlier, you want to part beneath that tape in and you just Want to get a take away any excess hair that did not stick to the tape aligning the front pieces were so much easier. As you can imagine like look at me pro, i would say the hard part about the front is just figuring out where to align. I'M not not telling where to place the tape in, because you want to make sure you put it in a place where you know it blends in with like, if you have kind of bangs or like. If your hair is a bit more blunt cut like it kind of blends in a bit, but also like you're, still able to put your hair in a ponytail, so i was pretty satisfied um with how it was looking. So what i'll pretty much do is just do the same to the other side. So again, i'm just you know, making sure it's kinda aligned, because what you don't want is for your tape in especially at the front to be like not in the same position on each side, because it's you know it won't, look so uniform so again putting the Tape in a bit away from your roots remove excess hair that did not stick to the tape and then you just want to get your your next tape in to just sandwich, align it to um to it, um press it together. I clearly didn't do that here, but um. I know some i've seen people use the flat iron to kinda. I guess seal it, but i did not do that because i just didn't want to um. I was fine with just using my fingers to squeeze them together. Right here you can see that i feel like it needed more. So what i did was, i cut a piece one piece into two pieces and i'll just put that where you see me parting, i didn't want too big of a piece there because it is at the front, so i didn't want to run the risk of it, Showing too much so what i did was you know, as you saw me, do i cut it in half and then i'll just be using that one piece, the two halves to um put at the front of my hair and you can see it's blending so much Better um before you could definitely see you know just where my hair stopped and where the hair was, but with just putting this little piece. It made a huge difference. So don't feel as if you have to put a lot in to kind of, especially at the front, to kind of get that blend. You can see that i just put a small piece there and it started looking so much better and blending so much better. So yeah, i kind of saw that i kind of needed a piece back there. So also, i would say at the front you just want to make sure that you're kind of just looking at it and just seeing where you might need here. I don't have a science to this. I was really just observing looking at okay, what looks very choppy and what you know might need a bit more. So that's what i did and i positioned i decided to position um a tape in right there as well. You know the drill take out excess hair that did not stick to the tape and then once you're, okay with how it's looking and it feels right, then you just get your next piece and you make your sandwich girl, because this is hot girl summer and we Trying to you know we trying to turn up for the summer with nice, long, hair, um but yeah. What i'll do is um. What i'm doing here. Just you know seeing how it looks i like how it looks: okay, okay, girl get it get it get it and um i'll pretty much just do the same to the next side, so you see me um, just trying to figure out where to put it. So this is what it's looking like before i flat iron it. You can see right there there's a huge chunk that does not have any tape, and so after seeing that what i did was i i decided to put a piece there um. I wanted to put it in the center um, so it wasn't like too much of my like my that extension kind of just fell in between. So i want to say i i placed it there first, but then i think i'm going to remove it because it wasn't like in the center as much as i wanted to did i remove it. I think i did yeah i did, but you know now looking back at it, it looked. It looked fine where i put it the first time, but whatever i can't see the back of my head, but just know that you want to kind of do like a 360. Look at your hair. Look how it's looking. I would say this probably would have been a better blend. Had i had my hair been the same color, it probably wouldn't have looked as bad, so yeah. I just decided to put another piece right there. I want to say in total i used um 10 guys. I think i used a around. I didn't use the full 60, i want to say i might have like 10 pieces left, so i use maybe around 50 pieces or like 40, something i i did not use all three bundles um or groups whatever they call it. But so one of my worries was that getting 60 pieces wouldn't be enough, but it was more than enough. I feel like i have a good chunk of hair in my head. I don't think i need it anymore, if i'm being honest, because i already have thick hair. So maybe if you do have thinner hair, then you might use the full 60 or you might need some more. So look at girl trying to see if it can go on a ponytail, okay car also don't come from my edges. I have not gotten a relaxer in like three months and i tried my best to get my hair as straight as possible, but i cannot, you know those small pieces of hair i couldn't really get, but this is how it looks before i flat ironed um. My the hair - it's not perfect, but it flat ironed it and i wanted to say i clipped it a bit um because i wanted it to not be so. You know so thin at the ends, and this is what it's looking like. I am in love at this point. I hope you enjoyed the video um. I tried my best to kind of show you guys what i did. This was not a tutorial, so if you're looking for more of a tutorial, do let me know because i will take these out at some point and put them back in so if you're looking for a more detailed tutorial, um just comment below and let me know Again, i am not a professional, so i did what i could um i'll. Definitely do maybe an update on how you know how things go as the weeks go by, but i mean who can tell me it's not my hair hot girl summer. Here we come but anyways. I hope you enjoyed the video, as i said before, don't forget to like share comment and subscribe to your girls channel and i'll see you guys in the next video bye


Comments
0tismadaline: I love it and you are looking absolutely gorgeous