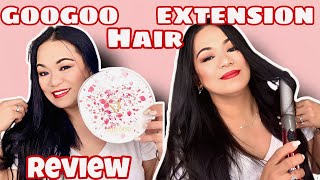
Goo Goo Hair 18" Balayage Tape In Hair Extensions Fitting & Review | Clare Walch
- Posted on 11 September, 2022
- Tape-In Hair Extensions
- By Anonymous
#googoohairextensions #tapeinextensions #diytapeinextensions
GOO GOO HAIR 18" BALAYAGE TAPE IN HAIR EXTENSIONS Fitting & Review | Clare Walch
Hello!
Watch me fit and review the 18" REMY 100% Human Hair Tape In Extensions from Goo Goo hair.
Enjoy!
Clare x
Product Link:
Hair in the video: https://bit.ly/3KK9886
Goo Goo Tape in Hair Extensions
Hair Length: 18inch
Hair Color: Platinum Blonde Balayage (17/22/60)
Weight: 50g/pack
Hot Selling Collection: https://bit.ly/3Qcjte2
Discount Code: Clare15 for 15% off
Goo Goo Hair is dedicated to the development of the high quality hair extensions.
We are so excited to provide you with the highest quality human hair extensions to make your hair dreams come true, giving you a gorgeous natural look.
Follow us get more idea about hairstyles!
Instagram: https://bit.ly/3zmRxLP
@googoohair_support
Discount Codes:
£5 OFF Makeup Revolution - http://rwrd.io/g6d9ofd?c
15% OFF Zeesea Cosmetics with Code CLAREWALCH121 -
https://zeeseacosmetics.com/?ref=CWALC...
10 % off at Glossier - https://re.glossier.com/5e520670
20% off at Look Fantastic with code: LFTFCLAREW
£5 Off at benefitcosmetics.com with code: Clare Walch
https://benefitcosmetics.mention-me.co...
Here to share my passion for Makeup, Beauty, Shopping & Lifestyle♀️
Welcome to my channel. The fact that you are here and reading this shows that we share an interest and so I hope that by subscribing to my channel you will enjoy the makeup and beauty tutorials and reviews that I upload regularly.
I upload 3 times a week on Monday, Wednesday & Friday at 18:00 GMT with varied content.
If you enjoy what you see then please like and subscribe, as they'll be plenty more where that came from!
Thank you
Clare x
Instagram: @clare.walch
Music Credits:
All music supplied by Epidemic Sounds.
#googoohairextensionsreviews #tapeinsonshorthair #hairextensionhsreviews #howtofittapeinextensions #tapeinhairextensions #tapeinhairextensionsreview #fittingmyowntapeinhairextensions
Hi and welcome back to my Channel or welcome if you are new, if you are new and you like makeup beauty, hair or hauls, then please consider subscribing. So today I'm going to be doing another tutorial, showing you how I fit my hair extensions, I'm going to be doing taping extensions today with Goo Goo hair. So this is Google hair. They always come presented in these absolutely stunning. Almost looking like hat boxes really really nice. I have worked with Google hair before a couple of times. I'Ve done tapings with them before, and I've also done some clip-ins as well. I have to say that I really love this company uh. I wouldn't have worked with them three times. If I didn't, I think their hair is incredible. Quality really easy to fit and yeah just the company as a whole as well. The customer service absolutely spot on really really lovely company. So when you open it up, you get all of your goodies inside you get a crocodile clip which is really really handy. Obviously, for fitting your extensions. I'Ve got a few of those now which I'm quite grateful for and then we obviously have our taping extensions in here as well. I got 200 grams because my hair is quite thick and I find that I need about 200 grams. You normally find that you need between 150 to 200 grams, depending on the thickness of your hair. You also get some spare tapes as well, which is really handy. You know if you lose one and you need to refit it or anything like that, and there's also a little instruction manual in here as well. So oops I've got some tape stuck to it. So that's that one just there, so they do all different colors they've got a really really good color range. Actually I chose, I can't remember the name of the color I'll pop it here um, but mine's, a mixture of three different colors, which is platinum. I believe there's like an ash blonde in there and a slightly darker one as well. So this is the color that I chose. As you can see, it's got like a Balayage, so we've got like darker, it's at the roux and then going down to just the complete blonde which, if I hold it up to my own hair, is going to be pretty much a perfect match. For me. I have had to tone them um, which I do with any extensions. I find that I just need to tone them a little bit, so I have already done that uh yeah, because my hair is quite Ashy and I just find that sometimes they're not quite ashy enough for me, but obviously with it being human hair. That'S very very easy to do right. So, as I mentioned, these are human hair. These are 100 human Remy extensions and, as I say, very, very good quality as well, so we're going to go ahead and start fitting them. So before I do my hair extensions, I have to make sure that my hair is properly prepped for them. So I have washed my hair last night. I washed it using only shampoo, I didn't put conditioner on it. So that's why it looks a bit dry on the ends at the moment, but I just find that if you use conditioner on them, it can cause the tapes to slip when you first fit them. Obviously, afterwards is absolutely fine as long as you don't put it on the bonds but yeah I just find just using shampoo and as I used a toe owner as well, then that's absolutely absolutely fine. I didn't use any products on my hair either. For the same reason, so all I did was wash it with shampoo and dried it and just left it be. You don't need much for fitting the extensions which is nice. All you need is some sectioning grips and a hair brush pretty much and then obviously your extensions. So the first thing I'm going to do is section my hair and to do that, I'm just going to go from ear to ear and then take it round to the back. Obviously you can use a comb if you want to um yeah. I just I just don't what I do normally. I just can't find it laughs so right, I'm gon na clip up this top section out the way I do have thick hair um. But if you have particularly thick hair, then you can do this in two parts. I'M just doing it in the one right, so that's my top part out the way I'm just going to brush through the Loose Hair like that. So I've got about that much down which is from there down and then I'm going to work from the bottom. So I'm going to start from the nape of my neck and work my way up to where I've got that now parting. Just there I'll try and flip myself around and show you a couple of bits of me fitting them at the back. So I need to go from the nape, so I'm going to take the bottom section down here like so so I've got about this much hair and then again, I'm going to twist this and just click that out the way like that, so that I can just Concentrate on this bottom section here, so I'm just going to put two pieces here so starting off with the first one. So this is two pieces or two extensions. I should say here so the tapes are just here and then we just need to peel those off. So it leaves looking like that and then I'm just going to take a section, A very, very small section, just like that of hair and take my first tape like this and just place. It underneath like that and then just get rid of any loose bits of hair. It is easier to do this with a comb. If you have one I will say that, but I can't find mine as I say so right, so you want it. So it's quite close, but not too close. If you know what I mean it doesn't need you don't want it right up to your scalp. You want a tiny like a couple of mil if that of distance and then you're going to take your next tape and then on top of that one, it's quite hard to do it at the back, because, obviously you can't see you want to kind of sandwich. The hair in there like that and then give it a really good firm squeeze like that. So that's in there nice and firm and uh yeah there we go so I'm going to do the same on this side. Now there we go so there's my first row. So obviously it's just two extensions, but there's my first one just there. So the next thing I'm going to do is let down the second row that I need to do so, taking down the hair that I've clipped up like that and then going just above like that, and then I need to do the next row. So on this one, I'm going to put three so you want to do it like a brick weave. So obviously I've got two here. So there's going to be one in the middle of those two and then there's going to be one on the two sides. Just here as well foreign, okay, so like that, so as I said, I'm going to put another tube here exactly the same as I have done with the other three and then I'm going to work. My way up in a kind of triangle shape until I get to about here, which is obviously where I have parted it just there. So I'm just going to continue to do that and then I'll come back and show you when I've got that back section in right. Okay, so that's the back now finished! I could probably fit a couple more in if I wanted to, but for now I'm just going to leave it as it is. I'Ve got that many left out of two packs, so I used just under 100 grams just on the back of my head and then I've got two 50 gram packs to use on each side now as well. Okay, so moving on to the sides now I'm gon na pretty much do the same as what I did on the back with the brick weave effect. So I'm going to start off from I've got quite a lot of short bits. They'Re, like broken hairs around the front which I'm trying to grow out, so I'm going to start off from my ear or just above my ear just here and then clip that bit up. I can't stress enough if you've got a like um, a rat tail comb or something like that, then please do use that. Don'T use your fingernails like I am so I'm going to clip this bit up out of the way. So you can see I've got a nice line. Just then, I'm going to work with I'm just going to prepare one piece or well two pieces to make one and I'm gon na start off by taking this section, get that out of the way and I'm going to go just behind my ear, because I want It to be comfortable and place this piece there, underneath I've got loads of little hairs, sticking out wow I've got my fingers stuck there and then again remove any excess hair. It'S kind of stuck just above and click that out of the way, take my top piece and just sandwich that on there and again a good squish ow, I thought I broke my nail there, foreign just like that and that's in again nice and secure with these. I forgot to mention before you can use heat on them, so if you've got some straighteners or whatever or you know, you can get the actual heat clamp things and you can clamp them with heat I prefer not to because when it comes to removal they're a Lot harder to remove and for me it's that's the only reason I don't and I find that they last fine without the heat on them. But obviously you know you can do that if you want to so again, I am just going to work my way up from there to about here on both sides and I'll come back and show you when I've got it all done. Okay, so it's all finished. I'Ve got it all in and I managed to get every single piece of that hair in there. So I've got 200 grams in now, 50 on each side and 100 at the back and yeah I've just kind of [ __ ] my Fringe as well um but yeah. I think it's really nice really nice, I'm never disappointed with Goo Goo hair. I'M really not! I think it's beautiful beautiful, hair and really easy to apply as well. So I'll give you a quick look at the front and the back of my hair. So this is how my hair is looking from the front and back as you can see it Blends in really really nicely. I'M glad I toned it because the color just matches absolutely perfectly so happy with it, but yeah. I think it looks really nice. So, as always the products used in today's video, I will link in the description box below for you, along with any discount codes as well other than that. I hope you enjoyed watching and if you did please give me a thumbs up and I'd really appreciate it. I mean the absolute world to me if you did enjoy watching this video, and you would like to see more content from me in the future and you would like to subscribe to my channel until then thanks for watching bye for me, Isn't it baby

Comments
Sarah James: Excellent tutorial Clare! Looks beautiful too xxx
baby hulk: It definitely ale helps build a solid relationships between buyers and consumers when your products are consistently made of good quality. Great review Clare
Wil Average: Great review as always. The extensions look really good on you.
Annie Bray: they look really pretty very well explained too x
Insta Gal: I just ordered some tape ins to try, I’ll be using this to guide me
Nicola_cooking: You did a great job loving the end result nice review
Alessandro Mario: The hair is beautiful and blends with your natural hair well
Tasha Hind: Gorgeous clare!! Really suits you ❤❤
Alli & Bella 🐾: Evening Clare x Wow they look lovely on u and u explained it all fabulously, thank u Clare. As always with me Clare...u know this by now, lol, I have questions for u sweetness..... How long do they last roughly? Can u reuse the hair once u have removed them? Last question Clare....How do u get them out? Love Alli and Bella XXX