How To Cut Your Hair: Step By Step To Blend Extensions Into Thin Fine Hair Diy
- Posted on 11 September, 2022
- Tape-In Hair Extensions
- By Anonymous
**I am a professional hairdresser these tips in this video are geared for doing them on yourself** DIY haircut on extensions (you can also do this if you do not have extensions) + a quick braid tutorial at the end. Subscribe! I'm here for you every single week!
✖️TIMESTAMPS:
0:43 sectioning
1:53 cutting length
2:58 face framing layers side 1
5:09 face framing layers side 2
5:56 side layers
8:03 back layers
11:23 braid
✖️PRODUCTS USED:
tape in extensions: https://amzn.to/3clYGXG
razor comb: https://amzn.to/3qqB7QO
razor: https://amzn.to/3d7pdIu
shears + thinning shears: https://amzn.to/3RYSkN3
boar bristle brush: https://amzn.to/3d8SceP
pink clips:https://amzn.to/3wkpCNX
powder play: https://amzn.to/3db7Ypz
xmondo bdsm: https://amzn.to/3L3dDuk
✖️RELATED VIDEOS:
coloring extensions to match: https://www.youtube.com/watch?v=tawGmK...
installing extensions: https://www.youtube.com/watch?v=tawGmK...
✖️TIK TOK: https://www.tiktok.com/@brittneealexus...
✖️WEBSITE: https://www.brittneealexus.com
✖️IG: https://www.instagram.com/brittneealex...
✖️INQUIRIES: [email protected]
**product links above are affiliate links through Amazon. I earn a small commission each time a purchase is made. thank you for using these, it helps support my channel and allows for me to create more content**
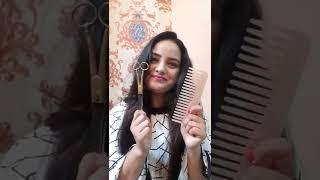
Welcome back to my bathroom today in our redneck salon, we're doing a haircut on these amazon extensions subscribe, i'm here for you every single week on sundays, hang on! Let'S put a disclaimer in, although i'm a licensed hair stylist, i'm in my bathroom. So these techniques are geared for people also in their bathroom. The tool i'm gon na be using today is a razor comb. All this is is a comb on one side and then a little wide tooth comb, not so wide tooth comb at a curvature with a razor inside. So it's really good to comb flip. It use the razor. If you don't have one of these, you can use an actual pair of shears or scissors, or you can use just a regular, cheap razor they're about five-ish dollars, i'll link it all below. So you'll want to go through and part your hair to the way you're going to wear it majority of the time. So, if you know you're always going to have a side part, you need to cut it with that side. Part since i'm really unsure i'm going to be using a middle part, no matter, if you do a side part here there or anywhere the part in the back or sectioning, is going to be straight down the middle. So what i'm going to go through and do is clean up these ends because they are they're a little straggly. The easiest way for me to do this on myself is taking this brush more bristle bore bristle brush behind my ears, really tight, ponytail right behind the ear, mirror the other side going to take this straight down and at the very very end here, i'm going to Put a rubber band match this on the other side brush through it rubber band, i'm going to stand with my shoulders back feet flat on the floor, not on your toes, not in the back then and vertical, and i'm gon na take these ponytails and i'm going To pull them down to where i want to cut my length now, this is going to vary depending on what your hair looks like. You can also do this if you don't have extensions pull these down to where i want the length to be cut and since i'm just cutting the tip snipping the tip it's going to be pretty low all the way down here now, when you're doing this, this Is against my body? This is not way out here, it's easier for you to see, but you need to just be feeling this feel for balance are these even then you can use a body part as reference or a piece of clothing. This is going to line in with the top of my skirt make sure it does boom boom perfect. You can cut above this or you can cut below this. Doesn'T matter so i'm going to cut below and i'm just going to go straight across with my scissors or shears and don't look at these. These are. These are for mannequins, so they're pieces of junk holding this really tight, taut, whatever cutting straight across. Then you have the ends here. Holding this really tight, cutting right below taking out my ponytails, then we hope these are even looks good enough. So now we can unleash the beast here. Well, it's kind of hard to see because i got this thing pattern on my shirt. Look in my mirror and see make sure they're even perfect, good enough. Now i need to carve into this disconnect here's my real hair. Here'S a drop off of weight. Let'S take a subsection right before our ear starts, begins whatever comb, this back, clip it away. You don't want to accidentally carve into this my ear surgery by the way check it out they're. Looking good i'm going to take my real hair and tuck it behind my ears. Usually when i wear hair extensions, i don't mind if i cut my actual real hair, but today i'm trying not to do that, because i am trying to grow out my real hair. So i'm going to be mindful of not cutting my real hair so tucked this in now, i'm going to take this big subsection and it's pretty big. Okay, take a look at that and i'm going to direct it over away from its home. Here is where it lives. It needs to be swung. Oh swung! I don't know you need to pull it over to the opposite side of your face, so i'm going to comb it to make sure there's no tangles, i'm going to take my crab claws hold this here is where my real hair is: here's a disconnect. What we need to do is blend these together, diagonal finger position and i'm going to start it this way until my real hair decides to drop off, because that is my guide right here. That tells me okay, that's where i need to start cutting to make sure that these blend nicely i'm going to take my razor and i'm going to go in at an angle. If i go in horizontal, i will make a horizontal movement, and that is a stair step, not cute gliding. This there was my guide i've over directed and i'm going to be taking my razor at a 45 again we're not we're here and i'm gliding it down. As i move my fingers down all the way to the bottom - and it looks like a lot, but it's kind of a necessary movement to make sure all this blends together. When we release this, we can see here's my real hair, here's my fake hair down down down to eventually it drops off so you've got a nice shape for my hair, because this is how my hair cut is it's kind of like a mullet. You'Ll have to kind of cater it or tweak it to. However, your actual haircut is same thing on the other side. Right where my ear starts. Is my section clip this back, so i don't make any mistakes real hair, putting it behind my ears combing this straight down this time. What works best for me is to go in this way with my hands and then i'm going to start carving it, because it's opposite for me: you grab it. However, it feels best diagonal waiting for my length to drop off there. It is now i'm going to start carving again. It'S hugging my face not out here hugging my face and i'm directing it towards the opposite side. I probably should do that one more time now you can check for balance. This one is just a little bit shorter. So i'm just going to take it and er that off we're going to pin back our length about the middle of the brow on both sides. I'M going to go around my head and it's not going to be completely straight - depends on where your extensions are pin. This up tuck, all this behind your ear, put it in a pony. This is my length. This is the do not cut zone what's left over is what i can create layers with we're going to think of our head as a big pizza pie in the middle. Here is where the pizza pies start, dividing not right here, which is the highest point of the head or the apex right in the center. If you look down like this the center here, this is a circle. Centered we're going to start dividing this into pizza slices little triangles. This is triangle number one and triangle number two. This is my bang area. I don't need to cut that, so i'm just going to pin that up again here's the center of our pizza we're going to go in and make a triangle triangle. I know it doesn't look completely like a triangle, but you have to kind of use your imagination triangle and i'm going to actually cut that in half, still a pretty big section, finding a position that works best for you taking your crab claws, pinchers straight in, like This moving this down until you find your length as your guide and ignore my witchy fingers, i'm like double jointed. I can do all these weird things with my fingers, ignore that here it goes it's dropping off on me. That'S my guide! We'Re going to come in with our razor and we're kissing it or gliding it we're not going down. My fingers are moving down, we're just gliding it. Then you have a chunk of hair. What this does is shaves off and makes a nice mountain or slow. You never want to cut you want it to be a nice 45 degree angle, a curvature. Another pizza slice bam crab claws in kind of going at a diagonal here, waiting for my length to drop off my real hair there she goes now. I have the green light to cut gliding gliding gliding gliding gliding, all the way down here you have that. Then we have a layer for the back, i'm going to go ahead and just split this down the middle. This back part when i cut the back i'm over directing it towards the front. The reason for this is anytime you over direct something or move it out of its home. It lives here, i'm taking it all the way and re-homing it. It makes this piece longer. You want your layers to flow and not all be the same length they'll be shorter in the front and they'll flow kind of to a? U in the back. If that makes sense, and also for your sake, it's easier to over direct it than to try to cut with a two-way mirror like looking here and looking in the back, let's just do this same technique crab claws waiting for that length to drop off here. It is it's about to drop cutting this and i cut the tail off that, but it doesn't matter again because the length is pinned up in the back, we're going to go through and we're going to mimic the other side. Pizza slice crab claws waiting for my length to drop off there. It goes going in gliding, it not gliding it and helping it navigate down, so it can be stacked out of 45. Another pizza slice length is dropping off. Here we go cut the tail off that one didn't mean to it. Just happened: it'll be fine pizza sliced from the back, so i'm over directing it waiting for the length to drop off there. She goes 45. now in our head, if you think of it, if it had a cross in our center, it would have four corners one two, three four: we don't grow hair forward, so you can ignore the front two, but the back two is where weight builds Up so i always like to grab these just kind of freehandedly, not really a method, and i'm going in with my thinning or texturizing shears. These have a straight blade and a teeth blade and i'm just going to about mid shaft, where i know my real hair. Isn'T clamping down once and it just removes every other hair removes weight mimic the other side move it down. If you part this down the middle move, these to the front, you can see like a tail of my real hair. Now, depending on your previous cut, it may be more obvious, but here's my real hair, i'm going to take it away from my head teeth on top, so it doesn't make that line and i'm going to cut cut cut all the way down. This is going to feather this end out and help it blend into my real hair. Could do it a few more times this works really good in blending your real hair to the fake hair. You can even do it on the sides here, however, these are thinning. Shears, which means they are going to thin out your hair. In my case, i already have really thin fine hair and my end goal is to grow my hair out and i'm not touching my real hair. So i'm going to kind of skip that normally when i know that i'm going to commit and wear these for several months i'll go to town on my real hair. But i'm thinking i'm just going to wear these for a month and then i'm going to go back to doing my hair reset just wearing my natural hair and braids, and really work on rebuilding my real hair. So this is a temporary thing for me. So i'm not going to start getting arts and craftsy on my real hair, so i'll go through just on the top for blending's sake, but other than that. That'S going to be it i'm just going to let everything flow, let's put a style in this thing, i'm probably going to keep the middle part for today, just because it's straightened and i'm going to clean it up and a good hairstyle to kind of hide. The extensions if you're wearing it straight, are these two braids in the front big chunk here and i'm going to leave out my natural hair, this bottom and this bang tuck this behind my ear and slick this back. So i don't get confused. It'S a pretty thick chunk and you can see i've got several wefts in here. I'M gon na sliver off the top three sections number one is going over the middle over here under the middle. Now i'm gon na take a piece of hair and add it to this one towards my face under pull it tight, the one towards the back add a little piece of hair under so they're switching places all the time this one closest to my face hair under It'S going to create a braid on top under and i apologize i'm not like the best braider. So my explanation is probably not great little piece of hair here, i'm starting to get into a hair extension, but i'm still continuing the same movement. Taking a piece of hair and under what this is going to do is mimic a cornrow where it's stuck on your scalp, so it's not a free flowing braid. It'S stuck okay. This hair extension is going to get wonky on me, so i'm going to cut it in half under. Don'T worry, we'll be able to hide that then we'll just take this last piece and go under then it goes into a regular braid. I'M going to start getting into layers, so i'm just going to stop it right about right about there clear pony from the dollar tree. We need to pull it out, so it looks better and it hides this weft powder plate, texturizing powder, personal favorite. This gives it a malleable texture and it stays it does make your hair feel dirty. So that's the only downside pop that in there and start pulling these out and when you're pulling them out, you're kind of rubbing them spreading that product and making the hair look. Thicker and fuller and i'm going to add a little bit more product since we've spread the hair. Now we have more hair to work with and keep pulling it out, and i like this to look pretty messy. I, like the texture change, where it's really messy and then sleek brad mondo's, x-mondo bdsm. This is define bomb just a little bit on my hands and i'm going to kind of get these flyaways down and then tap my braids with it. I like this hairstyle because it hides my real hair and i don't have to kind of worry about it and it's just simple easy: is it trendy, probably not, but anyway, thanks again for joining me here in my bathroom, i can't wait to see you next time. I don't know, i don't even know why i'm trying to act like i know what we're doing. I have not a clue what we're doing, but i do know we're meeting here in this bathroom 1pm eastern time on sunday. So i will see you next time for something cool, something cool, something cool. You

Comments
Melissa Harrison: I absolutely love your top. I, also, loved this video about blending the hair. Thank you for this tutorial.
Barbara Todd: OMG! This video is amazing! I always wanted to cut the front of my hair but knew I could never do it with shears and not have it look choppy. I immediately ordered the razor comb. Thank you, thank you, thank you!
Tara L: I can't even tell you how long I've been waitin for this one!!! I love this thank you for making this one!!! I hate the very obvious length difference when wearing them!! Love how easy you make your videos so we can follow!!! Gurl..... I love ya for all that you share with us educate us and show us!!!
Bee Bees: You are amazing at teaching with no fuss involved. Love it! You always put a big smile on my face. Thank you so much for sharing. Love from Scotland ❤️
Courtney Trusty: What’s your advice for trying to let your natural hair grow out? I’ve been wearing hair extensions for 8 years and my hair seems like it never wants to grow do you have any advice? Thank you!! Btw your videos are amazing I’m going to try a couple of your techniques ❤️
Aestheticslifeandstyle: I JUST LOVE YOU!!! I'M TEARING UP BEING THANKFUL HOW YOU ARE ONE WONDERFULLY-BEAUTIFULLY CREATED HUMAN BEING, THAT LEGIT FEELS LIKE A FRIEND, ONLY WATCHING YOUR VIDEOS!!! LOVE YOUR CONFIDENCE, PLAYFULNESS, AND COLORFUL PERSONALITY!! THANK YOU FOR BEING YOU!! ✌❤
Simple Nail Designs: Great tutorial! I hadn’t heard of a razor comb, looks great.
Malgorzata Matukiewicz: I hardly do my hair at home , I"ve tried but it wasn't a great success apart from toning but I love to watch your chanel , you're so hilarious and you have a great energy despite of knowledge of course . Hugs from UK ❤️
starsunmoon: In my darkest hours last year YOU helped me threw I'm a loyal sub ever since ! Your anazing girl ..
Kelli Nicole: I love this! I have the same razor comb. Can I do this on my real hair like a hair cut or is this only for extensions?
Kandice Simmons: That was fun!! Have a great day
Anthony A: Once again awesome video. Great job on the ear surgery!
Kate Eadie: Awesome video! And your ears look fabulous!
Royal Python: Can I ask something? I want to bleach my hair because I want platinum/grey hair, my hair is already blonde because I had blue hair which faded(just have a few blue green spots). I plan to use 20 vol and bleach then silver toner. Is 20 vol okay? would it melt my hair or was I supposed to do 30? I would be super grateful if you answered <3
Becky Elrod: Love your videos. Informative and your sound effects crack me up!
Nasus Mondragon: I´m so glad i found ur channel , ur great , ur just U !
jockaist: Definitely the best! ❤️
Chase Bennett: can you please do a slick straight low ponytail tutorial with a ton of hairspray?
#cute 💐 challenger 100: You ears look look great. I want one of those combs.
Racheal Church: I love you for this.
Aura: Oooo she is *_✨️BLENDED✨️_*
sari taylor: Hi hun when u said u had teeth on top can u explain cos you sort of had scissors on side
bonnie cawley: LOVE watching you and Im 73
Dalena Mullins:
Amelia Edmunds: First comment yay!! You’re the best