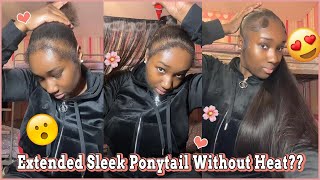
How To: Traditional Sew In| Such A Natural Transformation| Curls Queen
- Posted on 10 September, 2022
- Tape-In Hair Extensions
- By Anonymous
▬▬▬▬▬▬▬▬▬▬▬▬▬▬▬▬▬▬▬▬▬▬▬
Use Code YTDP to save $$$ OFF
I am wearing 18 inches weave bundles in Kinky Straight texture from CURLSQUEEN .
Shop the same #kinkystraigh #weavebundles#extensions #leaveout #sewin for #naturalhair
https://www.curlsqueen.shop/f57cD876
√ Luxurious Upgrade 150 Grams/5.3 ounces per bundle
√ Easy styling & Hold curls very well
√ Longevity: at least 1 year with proper care and maintenance
√ Hair can be colored and bleached
√ Double wefted hair extensions
√ Tangle free and minimal shedding with proper care
Connect with Curlsqueen :
Instagram: https://www.instagram.com/curlsqueenof...
Tiktok: https://www.tiktok.com/@curlsqueen.com...
▬▬▬▬▬▬▬▬▬▬▬▬▬▬▬▬▬▬▬▬▬▬▬
FAQS:
Location: Bay Area, California
Keep Up With Me:
INSTAGRAM = @Dopeaxxpana (Personal) - https://www.instagram.com/dopeaxxpana/...
INSTAGRAM = @BraydedUp (Hair Page) - https://www.instagram.com/braydedup/
Facebook = Dopeaxxpana - Bre C. - https://www.facebook.com/Dopeaxxpana/
Snapchat = @Bigbrowneyeguh
FOR BUSINESS OR COLLABS:
Music: Music by Goosetaf - Bumblebee - https://thmatc.co/?l=5574E131
What you mean you don't know panda she's dope, what you mean, what you mean, what you mean, what you mean, what is poppy youtube welcome back to my channel, it's your girl, dub ass panda and today, i'm going to show you guys how to create a beautiful Traditional natural sew-in, using kinky straight bundles from curls queen. So before we hop into the video i am going to do a quick, unboxing or unbagging, i should say so inside your bag. You will get a pamphlet that will pretty much give you all the information you need to know about the hair, also, how you guys can contact them. They also left a couple gifts, so they will give you a detangling brush, which i thought was really really cute and in addition to that, you will get a satin bonnet. Obviously, the star of the show is the kinky straight bundles and they gave me two bundles, which i was really nervous about, but guys look how thick and full these bundles are. They are in 18 inches and they are made to mimic a natural hair texture. So today we're not going to be flat ironing these bundles we're going to be just styling it in its natural texture, which i'm really really excited for. So i'm just showing you guys the sections that i left out for leave out. Really. I only made this a versatile sew-in, because i was kind of nervous about only having two bundles, so we're gon na see how far these bundles actually get us and if we really needed to do that. But i am showing you guys the sections that i am leaving out so for my braid down, i did do a traditional beehive y'all. I cannot stop doing the beehive. I know that there are other methods that have proven to be flatter, but i feel like if you braid the base of your client's weave super flat. You won't have a problem with it lifting or anything, and i don't know i just really can't shake the beehive. So i'm going to go in and i'm going to oil her scalp prior to starting my sew-in. This is just going to help to lock in all that moisture and just to prevent her from having a dry and itchy scalp. So i am going to be doubling my tracks for this first weft and i'm going to pull the needle through both of the wefts and that's how i'm going to start off. My sewing install i'm going to take this needle and i'm going to put it around. My client's braid underneath it and i'm going to pull that all the way through when i thread my needles, i do tie a knot at the end so as soon as i feel it that not reach the weft it'll stop and that's how you guys know that You are done pulling your string so just to secure this area, since this is where i'm starting her cell went off. I am going to go around in this area a couple times and then i'll proceed to go along the braid. So when i put the needle underneath i'm going to take the thread and wrap it around, the needle and pull is just going to make like a single loop type thing there. I like doing this better than the double, because i feel like when my client goes to take it out. It is a little bit easier to take it out. So as i'm going to be sewing across this braid, i'm going to hold the track where i want it to lay that's just going to help create a nice and flat foundation, and you guys can see i'm kind of taking this underneath the braid. The reason why i'm doing that is because, if my client were to pour her someone up with her leave out on the back, it would look a lot more seamless than if i were to sew this just on top of the braid. You want to make sure that when your client flips it up she's seeing hair and not a track or the braid, so i'm actually not going to be cutting these bundles, at least not for this first bundle um. So i am going to show you guys how i flip the track over, because i am um sewing this track in like doubled. But when i go to flip it over, i'm actually going to leave one weft behind just so that when you flip your track over, it's not super bulky, so you guys will see um as i get to the end here, i'm gon na let go of one Of the tracks - and i'm only gon na begin sewing the other one, and this is the track that i'm going to flip over. So i'm going to take it flipping it over right. There i'm going to sew down in that area a couple times just to make sure that it's nice and flat and then i'm going to keep moving along once i reach the other track, i'm going to pick it up just like that, and then i'm going to Continue sewing and that'll help make sure that where you are flipping, the track does not remain bulky. This is why, when i start my track off, i like to start off with the side that is closed and not the side that is open, because sometimes when you reach the end of the track, it will be a little bit uneven and it's not going to Matter as much, if that closed side is not there, obviously i always try to prevent cutting my clients bundles, because it does prevent a lot of the shedding and also it allows more versatility when they go to reuse the bundles. Sometimes it's frustrating for stylists when clients bring us bundles that are literally cut into 17 different pieces, or sometimes you want to do like a ponytail type style and it's annoying to be trying to wrap so many different pieces. So i do try my best to preserve my clients, bundles when i can, but sometimes like for the weft. That'S at the top. I will have to cut it. Sometimes you just got to do what you got to do, but i always try to have my clients best interest for the future in mind, especially since we spend a lot of money on our bundles. So i am doubling the track in the back so that i can get maximum length for this install, and this install is doesn't mean as much in particular, because my client has two 18 inch bundles. But let's just say that she had a 20 and an 18.. You want the 20 to be predominantly at the bottom to get the most length. So that's why i like to double the track, just to make sure that i can fit in as many bundles as possible, and also that we are really maximizing the length at the bottom of my client's install. So once my string runs out, i'm just going to cut the needle off and i'm going to tie a knot, i'm going to go at least two to three times. You want to do it at least two times, because, obviously, if you did it one time, it would just come out right. So we i'm gon na do it three times and then i'm just gon na cut the excess off and i will start a new needle and just continue to do it again. So i'm still working on that first bundle which at this point guys i was really impressed. I'M like okay, these bundles are really thick and they're, really going a long way, which is amazing, um, so yeah we're just going to keep rocking with these. When sewing the bundles in you kind of just want to follow the shape of the sew-in, so in this case i'm really just going side to side on this side, i'm already flipping tracks at the front of my client's head and i'm going to wrap it around On the other side, you guys will notice that i'm taking the bundle all the way up, because she is getting a side part, and so it's pretty much going to travel all the way up to the other side of her head and i'm just going to follow That pattern going around it's almost like sewing in like a u-shape do so so this is where we are with just one bundle of hair, which is super impressive. I finished over half of my clients install and i really did not need to leave the leave out around the perimeter in the back, but that's okay, y'all we're just gon na keep rocking with it, and so i'm going to go ahead and sew in that last Bundle now i did cut this bundle up a little bit as i was doing this install, so you guys can see that i'm starting with it and just kind of closing it off here. I just wanted to show you guys how i close it off for this last piece, i'm making sure that i'm going on top of that last anchor braid and for this whole top bundle. I pretty much did the same thing i did in the back, except for the track was not doubled, so i'm only sewing in a single weft. When i get to the end, i'm gon na take the needle and i'm gon na go through the weft. At least two times, and then i'm gon na cut that off and just pretty much yes tie it off and cut it, and my client sew in is closed off, and this looks nice and flat. I love the way that this lash track is really covering that braid, so that when we take her leave out out, you guys will not see any braid and it will be a seamless, seamless transition from my clients, natural hair, to the install. So once you get to the styling, this is the super easy part i'm going to start by taking out all of her leave out sections and i'm going to blow dry her hair again for a second time, because i want wanted to kind of melt into the Bundles, my client's hair is a slightly different color and her hair is just a little bit more coarse than the than this kinky texture, but it still blends really really good. So i want you guys to watch how even just comment it out. You guys can see the blend is pretty decent, but i am going to go through with my silver bird and i'm going to kind of just blow dry it out a little bit, so we can get a little bit more of a matching texture. So, just off of blow dry. I was already really super impressed with the way that this looks so i'm going to turn her around here. Just so, you guys can see how natural this install looks. Like i said, her hair is a slightly different color, but i definitely think that this could be pulled off. So i love love love this texture of bundles. If you are a natural girl and you're someone who doesn't want to flat iron a leave out, then i think that this hair would be amazing and perfect for you, but we're definitely going to take it one step further with our styling, because this is cute. But it's not a complete finished look um, so i'm gon na go in with the wand and i'm gon na wand curl her bundles, like i said, i'm not gon na straighten her hair prior i'm actually going to wand curl it in its natural texture. So yeah. Let'S get started with that anytime, i am doing a section that is close to her leave out, i'm making sure that i grab her leave out along with the weave, hair and curling it together. Um. I don't want these curls to be super tight or anything. I want it to mimic like a natural type wave texture, so we're not doing these super tight um. But, yes, i'm excited for you guys to see how this turned out. Occasionally as we're going through. You guys will see me spray a finishing spray. That'S just to get a nice hold on these curls because her hair is not straight in and it's really natural. We want to just make sure that we are holding those curls for as long as possible. So once i want curled her whole head, i did my favorite absolute favorite part. I comb them out and you always want to make sure you do this with a wide tooth comb, so i am combing them out. When i want curled, i did do the curls in opposite directions, just so that they're not too uniform, so i'm just going to go ahead and comb these out as much as possible. Now, during this process, i noticed that my client's hair texture was just a lot more coarse than the actual bundles. So what i had to actually do was go in with the hot comb and just run it through her leave out just a little bit um just to get it to max match this texture. This is a kinky texture guys, but it mimics like a blow dry hair and it is super super super soft. So if your hair is super coarse, you might just need to run a flat iron through now. Some people might like it like this, but i felt like i could really see a difference between her hair and the bundles, so i didn't want to take it a step further. So first i did go ahead and do just a little bit of face framing on this side, because her natural hair, there was a little bit short and then i'm just going to take the hot comb and i'm not really trying to get her hair silky straight. I'M just trying to soften it up a little bit just so that when i run one i can't talk. Sorry when i run the wand through for this a second time we get just a little bit better blend. Do so alright guys. So here we are at the finished, look absolutely love the way that this turned out. If you guys are feeling this look in the comment section down below, let me know what you guys think. Let me know if you guys are feeling it. I love how natural this looks and how it can just really mimic just a natural hairstyle and it is low maintenance, low heat for my natural girls um. This company curls queen offers texture, clip-ins, texture, bundles, texture tape, ins. So if you guys are interested in any of the below make sure you guys check my description, section um and you guys will see a link to everything in this video as always guys. Thank you so much for tuning in and i will catch you guys in my next video big panda, tutorials lives, reviews yeah all that big panda, not the little one, hey what you mean big box braids on your top yeah. Add it up gang fin. It hit a milli, yeah, add it up, pin a pen up in, can you post a vid? I'Ve been really booked and busy, but i got you, sis, big subs box, braids and a tug dropping gyms. Tell your friends yeah! Let'S run it up, big likes drop! A comment or we finna fight cause. Why wouldn't you like comment and subscribe to my videos, like that's weird
Comments
CurlsQueenofficial: Thank you so much for sharing our hair !!Love this look so much .
Mrs. FancyFitz: I love the kinky textured hair! So pretty
Shelbee Marie: I agree. The beehive is the best foundation
Zlexus Nelson: I love it the bundles the before and after curls and the finished looked
Abigail Findley: The curls are so pretty
Venita Williams: Looks just like her natural hair. Very pretty.
Spectrum beauty : Great work. Such a talent.
Ms Val: Looks pretty
Yukia Durand: Love it!
SlayedBy Liz: Beautiful ❤
Eloise Richmond: LOVE IT.
brown_ skin_lover_queen: Omg girl u killed this also that girl looked so so beautiful as well
Brownbeauty27: Yes old intro I get on my daughter's nerves singing it out of nowhere lol.
Sandra DeJesus: GORGEOUS
Lauren p: Love itttt!!!
Donnie Lindon: Beautiful person stay safe yall.
Erica Black: Very pretty
Richelle Reeves: I have the same blow dryer and my comb always come off, how do you keep your comb on
Shemyiah Jones: First and I like the look
Libby freelove: Look at the baby bump!!
Neyde Aparecida Manoel: ❤️❤️❤️❤️❤️
JEANNE JOYCE: Hi Pana how are you baby and Dre when are you going live again thanks for sharing hope to see/talk with you soon ❤️❤️❤️
Abigail Findley: Purr it’s the Outro for mee big Pana not the lil one
Abigail Findley: Okkk!! Not u bring back your old Intro!! Wym you don’t know Pana She’s Dope!
Indescribably Stasii: The end song is tough. I love it
Brownbeauty27:
Yolanda Smith:
Nicole Ryan: Mommy Pana is so cute.
Abigail Findley: I see u watching married at first sight on your tablet
Duje Banovic: Ho to take off
Katrina W.: Early
Katrina W.: Maybe first ? Lol