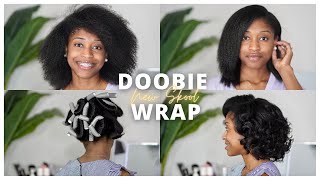
Middle Part Quickweave With Leave Out
- Posted on 08 September, 2022
- Tape-In Hair Extensions
- By Anonymous
Thanks for watching
*i do not own copyrights to this music*
Hey y'all so today i'm working with curl queens again and i am doing a quick wii. U today, so we are doing a middle part, quick weave. This is my client jayla yeah. I do have hair when i say all the time. So it was nothing but advice and laughter the whole appointment, but i hit her up and i was like girl. I have to do a quick, weave and she'll be down for pretty much any style, so i love doing her hair y'all. I really really love doing her hair, so anyways, i'm going to try to be very consistent with my videos. Um. I'M not gon na make any promises, but i'm gon na try, because i really want to put out more content for you guys, um. I finally built up my subscribers to where i wanted to be so. I'M gon na put out more content. I have a lot of content to put out and this challenges me to actually record and not just do little clips for six talk, so i'm excited and we're gon na see we're gon na see about that consistent. Hopefully i do, but anyway back to the video. So we're doing a middle part. Quick leave right here, i'm just pretty much parting out her leave out, so i'm going to braid it down and then i'm going to braid her edges. I left her edges out because i just thought it would give it a more natural look any do you so i'm braiding everything down and then i'm going to come back when i'm doing her protective cap more my so once i'm done, i'm braiding her hair. I'M going to do her cap, so i just braided her hair straight to the back some to the side. Nothing fancy! I just need the quick weave to be flat, so do the braids kind of like small, medium, try not to do large braids. So i'm going in with my protective shield and a relaxer brush. Also with the cap, the cap can be black pink, green, yellow blue. It don't matter. The hair is gon na, be on top of the cap. You'Re gon na have your protective shield. On top of it and glue, so it's gon na turn black. If you ask me so i don't really care what color my cap is. If you don't have a black cap, it doesn't matter, but preferably get a black cap, but it doesn't matter but anyways. So i'm going to add my protective shield and i'm going to generously add it all over, like you want to make sure you have a good amount, so the glue won't bleed through onto your client's hair. Okay, also, these are the bundles. These are the same bundles. I used in my last video, i'm just using two bundles today, so i'm cutting off the excess cap. She just came from under dryer. She was on the dryer for like five minutes. You want to make sure you thoroughly dry your protective shield, the extra black line that you see is just glue. I always go in with just glue around the perimeter just to make sure the cap stays so right. Now, i'm just cutting the cap off okay. So now i'm going to measure the tracks to my client head and you want to make sure when you measure the tracks that you pretty much have like a stretch on the width, because this helps the application of the tracks lay flatter. So you want to give it a good stretch, even when you um glue it on you want to make sure it has a good stretch that way it allows the tracks to lay down really really flat. So now that all of her tracks have been applied yeah. I use the full two bundles and her hair was thick like curl. Queens bundles are super super thick and i love that so we decided we were going to straighten the bundles today, so i'm just blowing out the curls and i'm just putting some heat to it. Just to make it straight a little bit before i start applying the heat from the flat iron on the hair, so i did go in with some heat protectant and i'm going to show you all what brand that i use. But i went in with just a little bit that way: it could give the hair a little shine and yeah it turned out so freaking cute, the hair was so full. It was extremely full, so so, okay, now that we have her edges straight we're going to work on her middle part. So, in order to get my middle part super crispy, i have to put some holding spray on the end of my comb and then i spray the part with the holding spray. And then i parted again, because i am just horrible at parting down the middle, and that should be the easiest part honestly, but i have a hard time just getting it on straight. So i notice, when i add, holding spray. It kind of helps me and y'all are going to see like if y'all don't already try that mythic try it and that is going to make your part extremely crispy. So so, okay, so we were pretty much done here, but we wanted to do blunt ends. So i cut the ends and i went in and just did some finishing touches. I added a fishtail braid and i did go in and clean up that braid, because y'all know how i had those flyaways just super neat when it comes to my clients here, y'all. So i had to cut the flyaways away. They had to go so i'm straightening up her blunt cut in the back for when she turns around and it came out so bummed his hair was so full, i'm hot calming that levi making sure everything relaxed everything was definitely unpleasant. The hair was giving it was giving. This is my real hair periods like it was so so cute, but yes, this is it y'all? Tell me what y'all think in the comments tell me what y'all want to see from me on my channel y'all. I'M excited, i hope y'all are because i have a lot more content coming. But yes, this is the finished. Look. It was so bomb. I love this hair if you order this hair from curl queens use called tyra for money off thanks for watching y'all. Like comment and subscribe,
Comments
IamKushiro2: love it! very nice !! very neat!!
Tinika Byrd: You did a wonderful job!!!