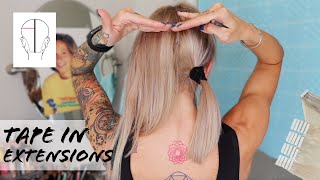
Detailed Tutorial: Tape In Hair Extensions Installation With Dreamcatchers Head Educator Dorothy
- Posted on 21 October, 2020
- Tape-In Hair Extensions
- By Anonymous
DreamCatchers Head Educator Dorthy explains in detail how to do a Tape In Hair Extensions installation on dense hair. Like and comment if you enjoy our in-depth content
Visit our website for more:
For Stylists: https://bit.ly/3hCG1Dn
For Clients: https://bit.ly/3c3Yw2l
Check out our other videos for more tutorials, lessons, and tips on hair extensions.
Hey everyone dorothy reitzman, here with dreamcatchers today i have my beautiful model kenzie and we're going to be doing a full head application of tape in extensions. What i'm doing right now is mackenzie has really dense hair and she has some structure into her hair. So what i'm doing is i'm carving out to remove that density, to allow the tape ends to blend more properly and also removing the structured lines making them more vertical and shattered, so it seamlessly blends throughout her extensions. So now i've completed the carving part of prepping. Her hair to install her extensions, i did smooth it down because, when you're installing extensions, you want it to be as smooth and clean as possible. You want it to be clean, especially when you're installing the tape and extensions, because technically the tape ins are a type of adhesive. If you have any oils or excess product on the hair, it may not allow your tape, ins to adhere properly and or they'll fall out quicker than they would if it was a clean slate to start with, so she has clean straight hair. Now we've smoothed it out, but i've also carved through. So you can see how much just density she's got extremely dense hair. So i release that density because i am going to be adding multiple packs of extensions to her hair. But i've also shattered her lines because she had very structured lines like you saw earlier today. So what you see here is it's definitely more compact. It'S shattered all the way through definitely on the outline, and i remove that weight all the way through every part of her hair. So now i'm going to go ahead and get ready to install her first pack, all right. So now, what i'm doing right through here with mckenzie is i'm just sectioning off from the top of the crown to behind the ear on both of my front sections. The reason i do this is because i'm not going to get to these areas until at least my third or fourth row. So instead of trying to tackle everything and clip it up all in one and having like 15 clips in the hair on the top. With a weird bun, i'm just sectioning them off, taking them out of the way, and it mentally organizes myself that i need to approach those at a different standpoint when i'm starting here in the back, i'm going to be starting in the nape section working my way Up so again, it's going to be about my third, possibly fourth row before i even start to transition to those sides. Once i get to that area, i will then start to section off the front sections as i'm going forward. So i'm working in three quadrants around the head so right now i'm going to be starting with a horizontal section in the nape. You only want to leave enough hair underneath to where, when she pulls her hair up you're not going to see it depending on the density and texture of your client, it's going to vary on exactly how much you leave, but a good rule of thumb is about A half of an inch to an inch you can always leave out around any part of your hairline anywhere around the head to help cover those extensions, so they're not noticeable when your clients wearing them on the daily all right so with mckenzie's hair. I'M just about to put in her first row of her tape ins. So just a couple of things you want to take into consideration tape. Ins are a little bit less forgiving than something like an eye tip eye tips. You can easily open them up, remove them and do what you need to do. Tape ins are a little bit less forgiving, because they're sticking together and it's a little bit more difficult to remove them. So you want to be more precise, with your application as you're going, because you can't just take them off and redo them very quickly. They'Re a lot quicker to do than some other extensions, because more of the maintenance is where you're going to get that time-consuming application. With your tape-ins, when you're originally putting them in it's going to go very quickly, especially if you've prepped them how they're supposed to be prepped, so what i've done with mckenzie again, you guys saw that she was nice and smooth i've just clipped her hair up and I'Ve taken my velcro flyaway strips and i've pasted through to make sure her flyaways are out of the way because you don't want any crosshairs cross. Hairs are going to be very annoying for your client, because it's just one single hair, that's getting pulled rather than like a whole group of hair and that one single hair is going to hurt and be more irritating than anything else. So, as i get my first section going through here, we're working on the horizontal when you're working with tape, ins they're a little bit more of a weft, so you're getting a horizontal distribution of weight versus, maybe like an eye tip. That is a vertical distribution of weight, so this is going to build your weight, a lot quicker than what an eye tip. Would you don't have as much variation within your dimension with mckenzie? I am going to be working with four different colors and i will show you guys how to create that dimension as you're going up through the head so right now you want to make sure when you're, starting through here, you leave sections off of the hairline here. So when i pull up mckenzie's hair you'll notice, i have enough hair underneath so if she pulls her hair up you're not going to see it also away from the side. Hairline so remember when i said a half of an inch to an inch around any hairline in this nape section, i'm working with three different hairlines. So let me re-show you i'm working with this bottom nape hairline through here, but i'm also working within your side. Hairlines along the neck, so any hairline just take into consideration. It'S literally any hairline around the head, so half of an inch to an inch on the underneath and then also one to two fingers, which is a half of an inch to an inch away from your sides as well. So right now i'm going to go ahead and install my first tape in using your tail comb for nice, clean, precise sections is going to make your end result very easy, very quick and very fast to do so. I'M going to take my first slice when you're taking your slice for your tape, ins, those of us who are colorists, it's easy to refer to like a slice for a highlight. You want it very thin to where you can see through it if it gets too thick, it's not going to allow your tapens to adhere close enough to each other, so the longevity might not be there. There'S too much space in between. So if you're, not a colorist, if you're just an extensionist or a hair cutter getting into or styler getting into extensions, you want it to be very, very thin to where you can see through it. So if you put your hand, your phone text message, tick tock, something like that, underneath it you're going to be able to see it's just going to be a small variation in front of it. So you're just taking a very, very thin section. If you're using your dream, catcher tail comb, it's a great reference on how much hair needs to go into it. Otherwise, it's about an inch that you can put into your subsection of your tape in, but i'm taking my dream, catcher styling comb and i'm just going to place it right through here and i can see. I need to dwindle down either side to make sure. I'M not overpowering my tape in so i'm going to take it away for sure from my outside here, because i want to make sure i have enough hair to cover over top and i'm going to take it away from the center piece a little bit as well. So now double check. I'Ve got the size of my section, the exact same size as my comb. Again, it's about an inch i'm holding my hair, nice and tight. You want to have that tension. You always want to work with clean, consistent tension throughout any application, whether it's extensions or hair in general, it's always going to make each application you're doing the most precise clean that you can get so now, i'm going to grab my tape in. I have taken the tape off of the extension when you receive your extensions they're, going to have a little blue or white tab onto it. You want to take this off and prep them before you. Do your install it's going to make it a lot quicker as you're going, rather than having to take it and untap it, as you go, be sure, when you're using your tape, ins you're trying not to touch it with your fingers a whole lot on top of The tape your fingers have oils and things like that on top of it, especially if you use any product speaking with that product, you want to have very little to no product on your clients, hair in general, especially oils and hairsprays reason. Being oils and hairsprays is actually what helps remove the extensions the hairspray has alcohol and oil obviously has that oil residue and it's going to break down your adhesive so very little to no product. When you have your client coming in and you're installing, or even using extensions in general, with your tape ins, so not touching your tape right through here, you want to grab just below and you also want to grab on the corner. Try not to grab in the centers of your tape as when you go to install it you're going to be trying to like do all these weird motions. It'S not going to work very well so go ahead and just grab the corner section of your tape in holding that firm tension, as i lift it up. You'Re going to see there's a section right through here, i'm not placing my tape directly. On top of that section, or else it's going to be too tight onto the client's scalp and it's going to irritate their scalp, it's not going to have any type of movement. So when you take it, you want to put it at the bottom of your section. So not at the parting just right at the bottom of your parting. So that way you have enough give once you lay the hair down to where it's going, to give and actually have some movement. So i'm just going to lift it up, so you guys can see and i'm going to pull it straight down right through here once you have it in the area that you want. It go ahead and take your tail comb and you can just press on top of it. This is just because it's a metal tail comb, no oils or anything like that, and now i can set my hands free to do whatever i need to do. But i do want to take a little second to show you guys each side, i've left a small tab open that has no hair to it. The reason it for this is i'm going to take my second tape in i'm going to sandwich it directly. On top completely flush, so what's going to happen, is this open tape on either side it's going to stick to the open tape on the top of the sandwich that i'm putting onto it technically right through here you have hair, so the hair? Yes, even though it's very thin, but it is still doing a diffusion of your two tape sticking together. So it is going to stick in between where those little hairs are thin enough to allow it to attach. But these corner tabs are going to allow it to have the longevity of the six to ten weeks that your client is going to wear it out. So now, as i grab my next one, let me spin her back just a smidge so again, holding below and you're going to get exactly flush with your tape in right through here again. Try not to press through it really quickly, because if you need to remove or just for any reason it's not fully adhered just yet. But i think it's just about perfect. So i'm going to go ahead. Take my fingers and i'm just going to press it together by taking your fingers and pressing it together. Your fingers do have a little bit of body heat. That'S the only amount of heat that you need when you're installing your extensions with dream catchers, you don't need to flat iron it or do anything like that for the tapes to adhere to each other just pressing it together your body heat, and you can slightly mold It to go with the client's head once i've done that you'll notice. I'Ve got that little bit of give right through here i can take it pull the hair straight up, pull the hair straight down a very clean, precise section. Now, what i'm going to do is apply her second tape in through here. One thing you always want to remember when you're applying your tape and extensions is you need to leave a little bit of space in between each one, a good rule of thumb, a minimum side pinky? So if you take your pinky turn it to the side, that's the minimum amount of space that you want to add in between your tapes so that they don't mesh together. If you have other areas on the head or less hair that you're applying you can space it up. However much you need to, but full head extension all the way through minimum side pinky to create that space. I'M going to go ahead, i'm going to take this one right through here side pinky. So what i'm going to do is i'm going to automatically take that little bit out again, i'm going to take my slice, even though i sliced all the way through. I'M then going to resize my section: take it through here you want to make sure your section is nice and thin. You don't want that over direction. Coming from underneath, you don't want your section too thick, so that you can allow that adhering to happen with your extensions. I got my size. She looks good right through here. So now hold my tension, nice and clean. I'M going to take my tape, i'm going to hold it here, i'm going to press down smooth it out. You see my open space going through flush right there. She looks good. I like it, i'm going to press it through and now we're good. So i'm going to go ahead and continue up through the head with each row all right. I'Ve just completed my second row, but i wanted to point something out on this row. You always want to brick lay your tape ins, because, if you don't you'll have gaps of hair in between that have no extensions to it. So whenever you're working with tape in extensions, you always want a brick clay. So what i've done is my first two tape. Ins underneath on row number one are: let me show you right through here. So tape number one tape number two so now on my next section, i needed to brick lay it, but if i was to do just two tape ins, it wouldn't have been enough. So what what gym catches has is we have a double mesh netting tape on top of our tape and extensions, and what that means is you can cut it and the hair is not going to shed out because it's a double mesh netting, not a single mesh Netting which a lot of other extension companies out there have so ours is double mesh. So what i've done is i've applied a full extension right through here i cut an extension in half and i applied just a baby half one in the middle to help compensate for that middle section that i was lacking prior to and then i applied my second One through here again, i took a side pinky space in between each one to allow that diffusion through also within your sections with mckenzie. She has again a lot of hair, so i'm going to be applying lots of bundles to her hair. Approximately seven seven and a half i'll have to see how many i can fit through her head, but she's trying to get that long density. And so i want to mirror and match the density that she naturally has so with that being said, you always need to leave space in between each row, depending on how much hair you're adding to the head is going to depend on how much hair you leave In between good rule of thumb is at least one finger space in between now, if you're doing more of just an average head, which is about four to five bundles, two finger spaces in between is just enough, but with mckenzie she's got lots of hair we're trying To make a dramatic end result, so i'm just leaving one single finger in between right through here, so her tape ends aren't going to combine together. I'M going to continue doing this up through the head. All tape ends are always placed on the horizontal, so each row as i go up, i'm going to place them horizontally once i get to the sides i'll start to demonstrate, for you guys exactly what i'm doing in the front and what might be different than what I did in the back i'm about 60 of the way through mackenzie's application, so i just want to point out a couple of things, especially because i'm on the sides now so i've already installed her first row of her tape in through here the same thing that I'M doing in the back i'm staying horizontal along the sides, a couple of pointers that you want to take into consideration when working with the front. This is where people are definitely going to notice when they pull their hair back. So you want to leave one to two finger space away from that front hairline. It really depends on the client's texture. If they've got a coarser texture, you can get closer to that front hairline, because their hairs are a little bit fatter and they're going to be able to cover that extension. If they've got the finer hair, the hairs are a little bit skinnier and aren't dense enough or thick enough to actually fully cover. So the finer, the hair, the further away from that hairline you want to go the coarser, the texture. You can scoop closer too she's got that medium to coarse texture, so i'm able to get a little bit closer towards her face, always good good rule of thumb. One to two fingers away from her their front hairline to stay away from also remember when you're working with different hairlines, not everybody one, not every one person is the exact same, so sometimes their front hairlines come really far forward, and sometimes they recede really far back. So, even on section, maybe number one you can get closer to that front hairline, but section number two you might have to scoot it back just depending on how their hairline is falling. So with mckenzie. I want to make sure i'm nice and bright around the face, but also as i'm installing right in this transition part of the head. It'S called the mastoid process. It'S the area from the side to the back, that's happening. You have that bone right through here you'll notice that she's a little bit weaker in this area. So i want to make sure that i definitely put a tape and extension right through here, which is laying it over her last extensions through here. So i really need to put it right in the middle smacked up of that right at her mastoid process. So with that being said, i can't put one full sandwich right here in the front, or else i'm not going to have enough room to hit that center part right there. So right in this front area, i have cut my extension in half again really utilizing that double mesh netting that dreamcatchers offers. So i'm going to be placing a cut sandwich right here and then another sandwich right through here. So let me go ahead and spin. Her really quickly and get my application going taking a horizontal section now, since i have that little baby sandwich, i can't utilize my comb as a good reference. So this is really something that you want to be very cautious of and very aware of the size sectioning that you're installing, because you still want to leave a little bit of space on either side so that you can still allow that adherent. Adhesion of the tapens to go together, so i'm just going to tape it i'm not going to completely adhere it. I'M just going to place it over the top just to gauge my section. So i'm going to give it back really quickly, because i want to slim it down just a little bit again making sure that any one of those cross hairs are out of the way some stylists might say, use a little bit of hairspray to help tie down Or lay down those stray frizzy hairs. The reason you don't want to do this with especially the tape bins. Hairspray has alcohol to it. Alcohol is actually one of the number one ingredients to break down the adhesive to pull the extensions out. So if you hairspray the hair and then put the tapes on top of it, you're literally sandwiching hairspray in between your two tape, ins, you're not going to have a great end result in the end, so i've gauged it. I like it! So i'm going to place it down, pulling it straight down with that tension pressing it. There grabbing my next tape and i'm just going to press it directly on top putting it through there. I got my little baby, it's one technically one tape in, but i cut it in half, so i actually get a full sandwich. This is going to give her that nice brightness kind of that money piece right around the front. So now i'm going to go over leaving that space in between and knowing exactly where. I want to target that next tape right here. Sandwiched get those baby hairs out of the way, lift it up, put it at the bottom, pull down that little piece fell out of my way, so i'm just going to hold it out of my way. Taking my tape, making it nice and flush right through here once i know that sandwich is good, i'm just going to go ahead and get rid of that hair again, making sure it's nice and precise. Now, as you see right in that mastered process, i've now filled out that density towards the bottom, so she's not lacking in this area. So i'm just going to keep continuing around the head doing the exact same thing, so i've just finished mackenzie's full installation of her tape in extensions. I'Ve already established a little bit of length, but i'm going to take it up just a little bit further. So i'm going to take these front pieces, get them out of the way i'm going to approach those separately. So when i'm approaching the back, it was just a little bit longer. But i still feel like it's a little bit too long for her lifestyle when you're trying to decide and speaking with your client during the consultation on the length and type of extensions, that you're doing you want to be sure that it's going to fit their lifestyle. Their jobs and they're really going to feel comfortable in what they're wearing so with mckenzie. I know she wants it to be just about mid back. So when i'm cutting my extensions, i like to use a feather razor. It'S always going to give me a quicker, faster end result for what i'm trying to achieve extensions are technically little bundles or chunks of hair. So if you cut them in properly, it's very easy to make them look fake, there's not one right or wrong way to cut extensions, it's how you can make it look the most natural with whatever tool you're using. So i prefer to use a razor. So when i'm doing my razor cut with the extensions i'm going to hold the hair nice and tight and i'm going to be cutting above my fingers, you want to cut where there's the most tension. I'M going to take my razor put it at a slight angle and i'm just going to stroke the hair until i get the desired length that me and my client talked about and, like i said me and mackenzie like it just about that mid-back. So i'm taking off just a couple inches. We installed dreamcatcher's 20 inch tape in here. I am about seven and a half bundles on mckenzie. I think i had two sandwiches left over so just going in cutting above my fingers. The back in the nape area is always more dense. The back hairline drops through here she has about two to three rows more in the back than what she does on the sides. So back here is always going to be more dense. So it's going to take a little bit more time for you to get your end result when working in the back than it is going to be on the sides. I like to get a little bit nitpicky. So i'm just going to get these little guys. I'M just holding, as i see little areas that i don't like, i'm just grabbing them and i'm cutting them when working with hair extensions. It'S a very, very visual cut. If you don't like it it's out of place, you can slightly trim it. The one thing you want to remember is: obviously you can't put it back well, you can, but it's going to cost a little bit more. So you just want to be very cautious. Take a step away, look at it! If you see it then go in and refine what you're doing, i'm going to go ahead and spin mackenzie around and i'm going to work with a little bit of face framing one more step perfect. So when working with the face framing, you always want to start it where her natural hair stops. So here's her natural here's, the extension i need to create movement on the interior to make those two match together. You always want to be very seamless, very blended, so i'm working on the edge very vertical you don't want to use a lot of a lot of pressure and going horizontal or else you're going to remove the weight you just put in so i'm going to hold It here light pressure, i'm just going to stroke down and feather that face framing in this piece. Right here is laying a little bit heavy. So i'm going to choose that one and feather down i'll always do this, maybe two three times until i get that feathery effect and it blends together. I'M now going to do the same thing on this side. This is her heavier side, so i'm going to be doing a little bit more on this side than i did on her other side. This is her soft light side, heavy side, because she has that side part. So i'm going to take this one. Natural hair stops and i start feather feather feather stroke stroke. Do it till you like it all right, so i'm going to have you take a three quarters to where your shoulders facing me right, one more little there we go so now, since i took off the back and i took off the front, there might still be A corner in the middle here so right at this corner transition part. You always want to double check that to see if there's a corner, so you take from center back and front area and combine the two. So, as you see, there's just a little bit of a corner, sometimes if you're taking off more lengths, it might be more dramatic. So just be cautious of that. So with this i'm just going to take a slight transition and i'm going to walk myself backwards. Rounding off this corner, oh that one wasn't good or wasn't too bad at all. Just got a little guy left right there, so i'm gon na. Do it one more time taking off that piece, and now i'm gon na, have you do a three quarter? Turn all the way to the other, shoulder and right there. Let me go ahead and do it to this side, see my corners a little bit different on this side. Again, it's a visual cut. Take this see if my corner still there. I see that one little guy take him off. Okay, go ahead and face the mirror for me, mackenzie all right so with mackenzie. We know her. Hair is very short up here and now her length is down here. So i want to create that movement on the interior to ensure it looks very natural and blended. So one way we always like that rounded v kind of shape. So if you grab the hair - and i pull it together and i'm going to do this row by row going down the head, i'm going to take it here and i'm going to slide on the side slide on the side and then i'll dip in the middle. When you're going through the middle, you are using your first two to three teeth. When you're on the edge you can use the whole blade. One of the main reasons you want to do it in the middle. You can also do a little bit of a skipping motion through here slightly fraying that cuticle of the extension, because these are 100 human hair, so they do have full cuticle intact. The hair is gorgeous mackenzie for being blonde. She actually has some pretty good hair, but you will still notice that her hair is a little bit more frizzy than the extensions would be. The extensions are russian scandinavian, so it's a european blend and that cuticle is nice and smooth. So we like that. But again you want it to look natural, so sometimes you're going to have to fray the extensions just a little bit so the texture matches with her natural. So taking this next section again, i'm going to start right about in the middle i'm going to feather once or twice feather once or twice and then i'll go in very light touches through the middle once or twice once or twice through the middle. You can take it very very lightly, going just about horizontal, exactly the same as the extension don't tilt your razor one way or another, or else you could dig too much going directly flush. You can rub down slightly fraying those beautiful smooth extensions kind of hurt. Your heart a little bit, but it blends really nicely with their natural hair. All right, i'm gon na go down about one more section, get those guys out of the way taking my v. You can see that natural blend coming through, because i use those four different colors on her corner edge middle again. You can use anything you want when cutting the extensions. Just know why you're using it. So why would i use a feather razor? Why would i use a scissor? Neither one of them is right or wrong. Whatever you can do to create your look, if you're using a scissor you're going to want to use more of a slicing method, going down the cuticle same thing with my razor, i'm always going down the cuticle, i'm never going up the cuticle. So i think that looks good, so i'm going to take her hair down, i'm going to look at it. Sometimes we can get real scissor, happy razor, happy and just keep cutting you don't want to take away everything you just did so sometimes you need to take a step away and let the hair live going through there. So for me, i think i'm pretty much done what i'm going to do is i'm going to give her a couple of different styles and then, if i need to, i can nitpick on a couple more pieces. You

Comments
Jessica Williams: I looove how clear, precise, direct and thorough you are!!! By FAR the best tutorial I’ve seen!!! Thank you!
kylee hinds: I feel like this video gives more important info than the actual training course through dream catchers. And the lady in that video tells you to use hairspray and the thought of “but it’s alcohol based” went through my head
Sigrid van Osch: Seeing this makes me wanna do a course. It looks so fun to make it look so beautiful and blended. She knows what she is talking about. I'm gonna get mine installed this Thursday and I'm so excited!
Jennifer Hermanson: You are very good at explaining this process. I have been doing these for a few years and it took me a long time and several videos to learn everything you just covered. Great job sister!
LifesGood: You're a great teacher. Straight, clear and to the point, thanks.
Janine Marshall: This was absolutely awesome. Brilliant educational video. Thank you.
Cindy Whitehead: I thoroughly enjoyed watching your video method of installing hair extensions. Your client looks beautiful
Savanna Bennett: This video was amazing and super helpful! You did a wonderful job :) Please tell me what brand your glasses are, they're beautiful!
QueenV W.: Thank you!!! I just got a client who asked me to so her tape in . Great Great tutorial video.
Diana van akkeren: Learning so much from this, awesome
HBL Hair Extensions: Omg I’m so glad I came across this video ‼️ you explained everything down to the nitty gritty …clear in detail better than the 3 certifications I have taken new subscriber
Nichele Loh: U r an awesome teacher my dear, thank u so much! Beautiful job!
Kricket Mckay: When u finish a row, and go up to the next row, how far up do u go? Like 1/2 inch or an inch above the previous row?
frostybaby13: This hairdresser looks just like Buffy, I wanna get my hair done by the slayer!!
lilSanq: Thank you for this information i am cosmetology student and will be enrolling very soon..
Elizabeth.: Hello ! PLease answer one of my concerns !! I love your work but i was wondering if is it completely necessary to thin out / shatter the hair before tape ins?? I have a long bob and my hair is pretty dense but i wouldn 't wanna mess up the haircut and the ends
Reiki Lady: Wow.... excellent presentation!
Weronika Laskowska: You are amazing ❤️
stephany macias: Thanks for the vid! Super helpful and I’m sorry, I’ve noticed the word is precise. Wish you well
Landa g: Great detailed tutorial! Thanks
Tezeta Nishan: Omg your so Goooooooooood clean job..
Melissa R: Is there a video about DreamCatchers tape-ins with fine/thin hair?
Dawn Burwell: are there special tips for shampooing and conditioning ?
Lea Seberg Fladstad: How long can tape extensions be on hair, can it be used again several times on hair, will it hold on the hair without falling off, does it feels like our own hair when we wear it, would the attachment still be invisible on short and thin hair and can it make hair worn?
Westin Britt: I suggest look into no sulfates fast hair growth shampoo.
Papaya S: i just want to know what razor you are using
Dav Mar: Im about to start appropriating
Mig 2020: She didn’t show how to do the top part !
Catherine Franceska: Hi i am franceska from mauritius thank you for this technique
Janice Garrett: What's your YouTube I would love to follow you! Not only dreamcatcher
Josephine Santiago: Do anybody know how much hair is needed it for a full head
nancy martinez: how much are these
Ty Ziemann: “Percise”? You mean “Precise”? Haha
ann skaggs: What is brick laying?
Rosas Melchor: Why are the tape in extensions from dream catchers make my scalp itchy?? I paid over 1000$ and its breaking already how is it supposed to last over a year when it’s only been a month that I had them in! I wasted money on these extensions now I have to pay again to have them remove and it hasn’t even been over a month
Philly McCoy: No damage when you remove them
unavailable unfortunately Padilla espinoza: Where you from girl wish do my hair
Lisa Heidelberg: I personally feel that these videos should be kept private for those of us who PAID $300 for them to get certified. The point is there will be ALOT of ppl who will feel they can buy the extensions at Sally's for a cheaper price & get upset with US when they don't last as long or break the hair because, in all truth, the quality is NOT going to hold up NOR can WE guarantee the longevity of quality or wear with cheaper ones. But mainly ppl won't want to spend money on good quality when they can get cheaper as well as letting an uncertified & unlicensed stylist (or licensed) install them without proper instruction. I just think it lowers the integrity of the brand when your instruction videos aren't EXCLUSIVE to your licensed stylist who have paid for the certification. JMO! No disrespect intended!
Josee Balboa: To look much gum flapping
Zen Iwuji: You talk too much