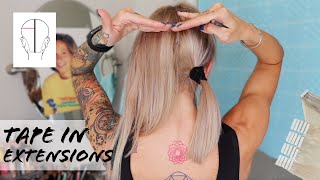
Tape In Extensions + Custom Color [My Best Tips For Custom Coloring And Installing Tape In
- Posted on 20 May, 2021
- Tape-In Hair Extensions
- By Anonymous
Learn my best tips for installing and custom coloring tape in extensions as I show you how I achieved this gorgeous green to yellow colormelt.
Extensions used @donnabellahair
Colors #60, #1B/60 , and #1B
Custom Colored with @Kenra Professional Creatives
Blue & Yellow
Color tools used @Framar You can shop for them here: https://framar.com/?rfsn=5729303.eb090...
Learn how I did her color application here: https://youtu.be/mP_xRYS2QUk
For more education visit http://mirellamanelli.com
Instagram: https://www.instagram.com/mirellamanel...
Facebook: https://www.facebook.com/MirellaManell...
TIKTOK: https://www.tiktok.com/@mirellamanelli...?
Pinterest: https://www.pinterest.com/mirellamanel...
HairB&B IG https://instagram.com/hairbnb_podcast
Hey it's marilyn monelli and welcome back to my youtube channel today. I'M so excited because i'm going to be coloring and installing some 18 inch hair extensions using all dona bella hair, but before we get started, make sure you hit that subscribe button and give this video a like and make sure to turn on all notifications. So you don't miss a tutorial now, let's go ahead and get started so first things. First, i did prepare my model's hair color prior to her installation. So this was really important. I do have a full youtube tutorial on the application on my channel. So if you want to check that out - but here is a quick before and after so once her color was done, i went ahead and placed the order for the hair extensions. My model's preferred install method was tapen, so we also wanted to add in length and fullness. So we decided 18 inch was the way to go so here i'm color matching her on those ends and i felt that 1b matched her perfectly. So we can add in that depth and the other two options were 1b 60 and then 60. So we can create that green to yellow color mount. So here is another green option that donabella offers but didn't quite match her. So we just felt that this color combo of 1b, 60 and 60 was going to be the best option for us to go ahead and custom color it. So it can match perfectly and seamlessly. So what you're seeing here is the custom colorization process. So i have the 18 inch extension here in 60 and i'm actually color blending in this direct dye from kenra color. Now, i'm also using funked up film to layer, one extension on top of the other. Now the whole reason i do that is so that way. I can see exactly where this blend starts and ends and there's no guessing game with that. So quick tip when working with direct dies is start with your lightest, color first and then work your way up to your darkest color. So that's why i'm applying the yellow? First onto the ends, and then one thing that i didn't quite film here or show you is that you're going to want to color both sides of the extension. So that's super important and then you're also going to want to make sure you really work through the product and pushing that color into the hair. Extension you're also going to want to process this for about 20 minutes. But if you left it on longer, it's not a big deal, because this is direct die. There'S really no processing time with this also make sure to use cool water and then just do a light. Shampoo, if you're doing a color blend like i'm doing here and the whole reason for that is so that way you can avoid any color bleeding that your client might experience when they wash their hair for the first time. So that's just a little added tip for myself is i normally don't shampoo out direct dies, but for hair extensions? I will do a slight shampoo and condition to prepare them and then you're going to 100 dry them and get ready for your install. So first things. First, i'm gon na go ahead and section out eudera's hair, but i do want to just point out here where you can see that green blend right in the front and then for the back side. We'Re gon na add in some depth because she has a lot of that black natural hair color poking through and then we're going to simulate her ombre color that she has going on with the baby lights. So i sectioned her off into a tea parting. So right down the center because that's where she naturally parts her hair and then right at the apex or a little behind the apex down behind the ears where i part it so for this first section, i'm gon na work from the bottom right on up. So this is really important. You don't want to install extensions any other way you want to work from the bottom up. This is just going to keep your sections nice and clean throughout and then also you're going to want to have enough depth going on there on that bottom section, so kind of a general rule of thumb is to come in about two fingers width on the sides And then also about two to maybe three fingers with from the bottom up. This is just to ensure that these tapes are not visible when you get ready to install them. So here you're seeing me install my very first row, so i decided to go in with the 1b color and sandwich those two colors together, and it's just to create again that depth that we want underneath. This is just going to give me that pop of color, now you probably cannotice she does have a little bit of green on those tips, but she is growing that out and it's not a super concern for her and she'd prefer that her color look a lot More darker, underneath so that way that green and yellow really stands out now for this first row, i'm just gon na go in with two sandwich: tape ends of 1b and again you want to make sure you have enough room according to your client's density on the Sides of the hair - this is going to give you that cushion so you deer's hair is fine, but it has a lot of density and the way i'm going in with this install here is placing the first sandwich on the very surface of the hair and pushing That tape in all the way and pressing it up against her head to make sure that i'm getting enough hair to stick to it. And then you just lift up that hair extension and you can visually see what that tape actually picked up and then you're just going to take your quick pick and then loosen up any hairs kind of free them so that we have a nice clean section. What'S really great about this technique of applying it, this way is that the tape is going to pick up the perfect amount of hair according to the client's density. What you'll notice on some of your clients is that they have more density in different parts of their head than others. So that's why this technique really works well, for this particular model. I decided to go in with some very close back to back sections here to create lots of depth. Her haircut is super blunt plus. We want to match her density with these extensions as much as possible to add that length and then also that fullness that she's desiring so the whole idea of putting in these sections about a quarter inch apart, is again to create that depth and fullness with this. One beat application so for the first three rows here they are sitting right next to each other and it gave me that depth that you'll see when we're completely done so a really quick tip when you're installing tape ins. That helps me a ton is that when you get ready to install the very first tape is to match it up horizontally to your section and then bring it down. The width of the tape you're then going to apply it and make sure you're pressing down firmly onto the scalp to really make that hair stick. The next step is to take the extension and lift it completely up. So that way, you can see what hairs are stuck to the tape and which ones need to be separated and fall out. That'S where you're going to take your quick pick and separate those hairs and then you're going to take the other part of the tape in or your sandwich and take the tape off and then line it up right underneath and then make sure to press down on The sides, and also in the center - and this is going to make sure that you have a nice marriage between these two tapes. So one thing to note is that you are using medical grade tape, which is going to give you that lasting long hold from donna bella hair, as well as the polyurethane template which is going to give you that minimal shedding, which is fantastic. So i'm already at my fourth row again, i have those quarter inch sub sections. We want to create lots of rows here to match her density and to create that length, because she has that blunt haircut, so i'm using these velcro hair grippers to isolate those baby hairs because, as i was working up, i started to notice. We had a lot of baby hairs kind of getting in the way, so these hair grippers are amazing tool to have in your arsenal. So here's where i started to transition, because now i'm incorporating a little bit more green into her hair. So this is where i'm going to take that 1b60, that i colored with the darker hair, color of green and then right, underneath this particular section, i'm still adding in that 1b. So this is what's going to give me that transition, so it doesn't go drastically from 1b into an ombre. I want there to be again that transition, so here on this row, i added four of those and then for the next row right on top i'm just going to sandwich the 1b60 18 inch donabella hair extension right on top of each other. Once i have this row complete now, i'm going to incorporate the sides, so the sides is where we're going to add in those ombre colors going on. So one thing to note: is you want to have enough room right on top of that ear? So it can be really uncomfortable if you apply the tapes too close to the ear section, especially if they wear glasses. Like my model - and you also want to make sure you're working far enough back again, keep in mind that all of this hair that you're installing should be placed in the interior and that way you can avoid the tape being visible. So for this very first sandwich here, i'm actually putting in my ombre shade and then layering in just a darker green hair, color right underneath so i can create that depth for the green and for the back portion. I'M then going to take my straight green hair. Again, this was used with the 60 color from donna bella hair and i just colored it from roots to ends with the darker green hair, color from kenra color, and then i'm sandwiching right, underneath the ombre 1b60 right underneath so again, you're starting to see that transition. All over again right on this very last section that i'm applying in the back - and the reason is, is because that's really how her hair color appears to the naked eye. So i wanted to mimic that as much as possible for this next section right here. On the side, i'm going to go ahead and apply it again, really close to that section below so there's only a quarter, inch subsections going on and i'm sandwiching my two green to yellow ombre colors that i custom colored for her right here on the side, so That we have a nice pop of this color going on, because this is really the statement piece that really brings all of her hair color together. I'M then going to finish off with one more tape right here on the side. Again, it's for that statement piece and i did go up a little higher than i normally do, but the reason why we decided to go up this high, it's something that i communicated to my model and we know that she parts her hair down the center. Every single time, so this tape was going to remain hidden now here comes the really tricky part. Is blending in this blunt haircut into these beautiful hair extensions that we just installed, so i decided to go in with some texturizing shears on her actual natural hair. So again, this is something you want to communicate to your client before you start cutting into their hair, but i decided to go in with this method, because again, her haircut is really really blunt. Her end goal is to eventually have long, layered, hair, so texturizing the ends and adding in a little bit of layers, wasn't really a big deal for my model. Once i got her natural line of demarcation broken up, i then went in and started blending in with a razor those layers from where her hair starts and then into those layers, just creating lots of movement. So again we want to create as much blend as possible. So go ahead and take your time during this section. I know it seems a little scary at times, but just take your time work section by section until you get the best blend possible, then finally styling. So this is so important. You want to educate your client on how to style their hair at home, how to take care of it. This is the perfect opportunity for you to remind them all the steps they need to do in order to care for their hair, extensions and here's. The final result of my hair transformation using 18 inch tape and extensions from donna, bella, hair extensions. So, just to give you a little recap, i went in with three different colors of 60 and 1b60 and 1b hair extensions, and i went in and colored those beforehand with kenra color direct die with a combination of blue yellows, whites and true black and then, after Those were done processing we made sure to wash those and dry those 100 dry before doing the install now for you, dura's install specifically, we went in with quarter inch subsections throughout her entire hair, since she had a lot of density, but really fine hair as well. Just to give her a really great blend and then we fine-tuned her by giving her a really gorgeous haircut, incorporating lots of different layers just to make sure we got a nice blend from that blunt haircut that she had going on and as you can see, we Got lots of gorgeous fullness and it looks beautiful on her and she's really happy with the final results. So i really hoped you enjoyed this hair tutorial and if you did, please give this video a thumbs up and make sure to subscribe, and i will see you next time, oh yeah, and make sure to check out my other hair tutorials on this channel.
Comments
Muhammad Haseeb: This is amazing . You're a pro.
Tracy: This is amazing I love green hair and purple as well. Where is the color tutorial for this. I’m don’t see it.
Graciela Cascante Sandoval: Do you need to change the tape in after dye the extensions ?
Mirella Manelli: Here is the color application to this look: https://youtu.be/mP_xRYS2QUk