How To Apply Tape-In Extensions Tutorial | Thicken It Studios Truly Seamless Hair Extensions
- Posted on 02 January, 2021
- Tape-In Hair Extensions
- By Anonymous
https://ThickenIt.com | ☎️ 855-352-4247 (HAIR)
How to apply Tape-In hair extensions, our professional tutorial! 100% human Remy hair. Completely invisible and able to do many styles. Here is a full professional tutorial on how to apply our tape-in hair extensions!
➢You will love this tutorial on how to apply our tape-in hair extension system it is so natural and easy to apply.
➢It is very versatile and can be integrated with your own natural hair to create many different styles.
➢It is 100% Remy human hair that is unlike any on the market today.
➢In less than 10 minutes you could have the most put-together hairstyle even if you are having a bad hair day you will always look polished check out our photos below you will be blown away this tape-in hair extension is the most beautiful and natural you have ever seen.
➢We specialize in 100% Remy human hair clip-in ponytail extensions, ultra seamless clip-in hair extensions, hair toppers, single-sided tape hair extensions, double-sided tape hair extensions, lace frontals, wiglets, men's hairpieces, chemo hair toppers, and hair powder for complete gray coverage. CONTACT US online today for all your hair extension needs!
https://ThickenIt.com | ☎️ 855-352-4247 (HAIR)
➢https://twitter.com/thickenit
➢https://fb.com/thickenitstudiosinc
➢https://www.instagram.com/thickenitstu...
➢https://www.linkedin.com/company/thick...
Thicken It Studios Inc.
7551 Wiles Rd STE 105A Coral Springs, FL 33067
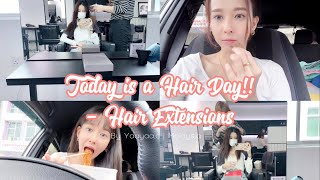
Hi, my name is tj hutchinson, i'm from sarasota florida and today, i'm here to demonstrate for you the thicken, it double-sided tape system. So before we get started, i just want to talk to you a little bit how we prep the hair before we get started with the taping system. As you can see, i've got her sectioned out from ear to ear and then i've made sure to section her hair. Excuse me broke slightly down, so we want to start about maybe two two inches off the hairline up, and we also want to make sure that we're working about two fingers off of the hairline. So when we start so, i've sectioned her out to start my uh application so that when we lift this hair up, it's completely covered she's got full mobility of the hair as i've prepped brooke's hair. Today we're using two types of hair from the double-sided tape system. We'Ve got 6a 22, which is an ash, and then we have 27 the double-sided tape extensions. They come about three inches long, so what i tend to do is i like to cut them in half, because i'm going to be blending the two colors, so i've cut them in half so that i'm going to do i'm going to actually sandwich two different colors On to create the color that we're going to be applying to brooke's hair today, okay, so if you're all ready, let's begin we're going to start with the first piece: we're going to use the 27613 underneath about a quarter section, a quarter inch section of hair. So when we apply the first piece, it's very simple: we keep it about an eighth of an inch off of the scalp and that's also so we have full mobility and then also you want to make sure that you have the right positioning before you press down And actually apply the extension to her hair all right, so we we've got a perfect spot for this extension. So, as you can see, it's very very easy to apply it's very quick. We should be able to do the whole head in about 30 minutes. So as we're going through there's the first one, we want to take the tape backing off and because i'm going to be sandwich, sandwiching two different colors to her today. What i also like to do is take some hair and bring that through to each corner, to help give it a little bit more stability and then one small piece through the front here then we're going to grab our 6822 and we sandwich that direct. On top. All right, then, we're going to do the same thing right beside it. We removed the tape, make sure the tape is clear of any hair and make sure we leave about a quarter inch of hair away all right. We have it where we like it and then we just press press it in you want to make sure that you have enough hair underneath so that you, the tape, is covered and you don't feel any tackiness as you're pressing the hair down all right, then we're Going to do a 6, 8, 22 and repeat chin down slightly here, we go, and then we put a small strand of hair through the middle and that just really helps to secure the two extensions together so that we don't have any slippage. It'S fairly common to layer, two different colors of hair to actually create and add dimension to the hair. With thickened hair studios, we have 15 different shades of hair, starting from one as platinum to all the way i want from being dark black to platinum, but then we have also some mixed shades in between and also some vibrant reds. So it is very common to use two different shades of hair to create dimension in the hair, which is what we're doing today for brooke. So, as you can see, we haven't secured the top of the tapes. Yet so i took a section down, and this is what we're going to use to secure the top of the tapes, and this creates a seamless. You know almost invisible connection here, as you can see, as the hair is pulled up, you can't even see you know where the tapes begin or where the tape's in so those are the first two starting at the nape. Now we're going to move up in a brick layer pattern and going up each side, we recommend doing a brick layer pattern so that you have a slight overlap from the hair as it falls after each one. You put in there's a slight overlap to the previous one so that you have a nice seamless connection to the hair as it goes around the head, so that you don't have leave any gap gapes. You know in in the uh in the hair at all when it's being applied so okay here, as we can see here's the edge of this one here so then we want to go up and over, let's get a little bit more here so and then we Also want to you know, be sure that we're staying two fingers away from the edge of the hairline there, an eighth, an inch off the scalp, and then we press that into place just like. So there we go the most common mistake that somebody might make when they're applying. These is not to use enough hair when they're securing it to the actual tape, because you want to make sure that there's there's no tackiness there's no, you can't feel any tackiness. On top of the tape once you've applied it, so you want to make sure that you get plenty of hair onto top of the tape so that you get a secure bond. So if you don't get enough hair on, then you i'm going to use this as an example, you can still see the side of the tape underneath. So if you find that that that happens, then you want to make sure to go back through and drop down a little bit more hair so that when you're covering the tape that you make sure that really press that hair into the tape. So you get a total adhesion there and then what does it adhere? You can see that it it allows to come up. The hair, that's not needed, will come up and there you can see that we've got a a total adhesion of that extension. Once that hair is secured in place, she can treat it just like her own hair. That'S that becomes part of her hair. Okay, we're going to go to our next section. This process takes from beginning to end about 30 to 40 minutes, depending on how much hair you're applying um and then there's always at the end. You know there's sometimes a haircut involved. So if there's a haircut involved in the end and you're doing some styling on the extensions, you could have the whole thing done in about an hour, you could have them applied, cut styled in an hour's time. This here is remy hair. It'S some of the finest virgin quality hair that money can buy and so as she's wearing this hair. This, like i said before this becomes her own hair, so this hair isn't going to get matted up when she sleeps at night. You know it's not, there's not! Gon na she's not gon na wake up and have rats nests in her hair. So this the thicken it brand is one of the top of the line, hair taping systems that you can get. So it's very highly recommend if you're gon na start with this to you know, go with something. You know a high quality product so that you have the best results possible. So, as you can see on this particular weft, i didn't pull down enough hair just to kind of give you an idea what it needs to look like, so you just want to go ahead and just go up and grab a little bit more hair above that Weft, so that you can correctly cover the entire tape perfect there we go, so you can kind of see the brick layer pattern that we're accomplishing here, see how that's beginning to fall now. This is important to make sure that you get your little pieces here in between the sandwich and that really helps to keep it intact and in place for the duration that the hair is in there. He goes, you can see i'm trying to just use the hair. That'S just above and try and keep the hair from the sides away, so we just want to try and work from the hair, that's directly above the tape in and you can see i'm pulling them apart, pulling pulling on the on the tape end just to really Secure the hair inside perfect, as you can see as we bring that up it, creates a seamless. We can't see any of those tapes, okay, so for the middle section here i'm going to go ahead and use a full full weft across the just below the occipital. Here is where we're going to create this piece and that's going to fill in the middle after we've done our brick layering up the sides and now we're going to go ahead and fill in the middle part here. So so you can just gently position. It so make sure that you have the corners exactly where you want them and then, when you, when you feel like you've, got the extension in the exact position that you want, then that's when you can go in and apply pressure to adhere the extension to her Hair, if you feel like that, you haven't got it in the right position. You haven't yet pressed down so hard, so you'll be able to actually lift the extension away from the hair and reposition and move it around. So it's up to you as the individual stylist to figure out how high up you'd like to go with her hair. If you're adding more length, you could probably you know finish from there. If you want more thickness, then you can go further up the up. The head up to the occipital - you don't really want to go over the occipital unless it's to you know, fill in a little bit on the sides which we're going to do for brook here. Okay, so now now we're getting ready to work on the sides um. We want to make sure that we're not applying the extension past um two fingers from the hairline, so you always want to use. You can use your fingers as a guide. You know to make sure that you're not going to overextend the extension, so that i mean we don't want to see the extension when we pull the hair back okay. So what i've done is i went ahead and sectioned her down in front of her ear. So, whatever we're going to put on the sides here, we want to make sure to apply behind this line. So we're going to go up a bit here. So there we go. We have our three strands, so there we go perfect all right. So there's we are. That'S how it looks as we filled in the sides here, so we can see that beautiful, seamless, her hair, it became part of her hair as it's applied. You know the the thing with doubling these tapes. Like i'm doing here i mean this could actually be done. Just by using one tape, but because i'm doubling them up, you know i'm adding being able to add some dimension to her hair, but i'm also adding more fullness to it when we double these tapes up like this, so it's really good. If somebody has really fine hair - and you just really want to add a lot of thickness to their hair - hence the name thicken it when you double these tapes up like i'm doing here, it really helps to give you that added volume and that added thickness that A lot of people that are really fine, thin hair are looking for and there we go with that side there all right. So this is our double-sided tape, extensions application. Okay, what do you think brooke? I love it and it's beautiful. Oh, my goodness! Look it's so light. It feels soft and silky and beautiful. It looks so much fun. Oh my gosh! Oh it's exciting! I don't even feel like there's anything in my head. Oh that's awesome! You like the length. Yes, the length is awesome, beautiful, beautiful, so so, to give you guys a little recap today, um as we started this process, we started in the back at the nape, i'm using two different uh colors of extensions to create dimension in the hair. I also cut the extensions in half so that i could really do a nice brick layer as we went up and around the sides, so make sure that you work on your brick layer patterns going up for those of you that aren't hair stylists that are just Trying this out for the first time and then also we filled in the back by using a full three inch weft across the occipital. And then we went ahead and finished it off with the wefts on the on the front sides, making sure that we stayed two fingers off of the hairline, which you can see. Why, when i pull brook's hair back, you don't see any tapes any any of the wefts. You do not see them. So if you follow those simple instructions, this is easy. It'S fun to do. You'Ll have a good time doing it and your clients will love you to death there. We go. Thank you, okay, so just to give you guys a little hint or a little tip in the end. You know how i always like to cut these um. As you can see, we finished brook's hair, it's a little uneven, but the only way i cut these extensions is with a fraser. I have a feather razor here. You want to make sure to have a brand new blade, have a brand new blade on it. You want it extra sharp and what we're going to do is we're just going to go in and just kind of feather out the ends just to kind of even it up depending on. If you know what type of shape she likes, if she likes an oval shape or if she likes it straight across, you discuss that with her in advance. As you can see, i just hold it with my fingers and just go right through. You can also put layers into these. If you wanted to add layers, you can go into it, just very gently. You know you can go piece by piece to really create some layering in these extensions and i'm just giving you a quick overview of how this is done and that way we can just even up the ends, as you can see, i'm just using the back of My finger being very careful there we go as you can see, just by using a little razor on the ends. We can get it so it looks really natural. What you don't want to do is just cut them with a straight shear and cut them straight off, because then it just it just leaves them very. You know flat, and this way that the ends have a little bit more texture and a little bit more movement through them.


Comments
LD THE OBSERVANT: I recommend using 1 sided taping for the sandwich method, simply to keep down others being tangled in the loose tape
Brandy Pullis: Great Video! Thanks for sharing <3
Chelsie Buehler: What I’m the hell is this guy doing to her hair?!? I’ve never seen anyone apply tape in extensions like that. Between the huge sections he is sandwhiching, the two sides of tape on each piece of the extension, or the horrendous haircut at the end, this girl is gonna have a head of thick pieces of hair glued together that’s uneven and not even blended into her natural hair.
Queen Victorian: Great video and Instructor
Washing Feet: I use tape ins myself.. they can be expensive but i get them from va-lu..com so it’s high quality and actually not a ton of money.
Nicole Newman: Wow this looks horrible
Hello: Recap for the mullet look…
Nelly Tata: This is not good
Hello: Sloppy joe