The Easiest Way To Apply Tape Hair Extensions | West Label
- Posted on 05 October, 2021
- Tape-In Hair Extensions
- By Anonymous
Hey y’all! I wanted to share a video on how I apply my tape extensions. This is definitely the easiest method! These last me about 8 weeks before I have to take out and move them up. These extensions are from WEST LABEL and are truly amazing! The are Russian Remy hair extensions and the softest I have ever worn! I have tried so many brands too. These extensions are ethically sourced which is amazing! If you take care of them properly they could last you 2 years! Just reapply new tapes to them! Always be sure your hair is clean before applying! I like to do a prewash in apple cider vinegar before I apply to really strip the oils out of my natural hair to get the best hold. These have all been trial and error processes for me and this is what I have found to be the best way, personally!
22” tape extensions
Color 613
150 grams (3 packs)
WEST LABEL
https://www.westlabelhair.com/
https://instagram.com/west.label?utm_m...
Thank y’all so much for watching and I hope you find my technique easy enough!
Follow me on Instagram https://instagram.com/_everythingsarah...
My new boutique https://www.shopthenolita.com/
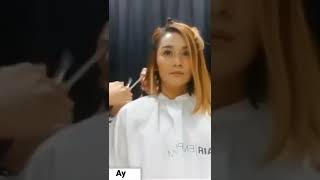
Hey y'all welcome back to my channel. Today'S video is just going to be like a demonstration on how i apply my tape, extensions and these are from west label, and they are absolutely amazing. Amazing quality they're super thick all the way down to the ends. I didn't even use all of them. I bought three packs and i had probably like half a pack left when i was finished um, but they blended super nice uh. They matched my hair, absolutely perfect, um. So um i put the color that i got down below because i really don't remember what the color was called but um. I absolutely love them. Love them. Love love, and i'm also going to do a maybe like a one month, update video just to see how they feel after a month um how they stay. When i wash my hair and all that so um. If you want to see how i put mine in and it's a super easy technique, so if you want to uh see that just keep watching okay, so here is the packaging that it came in and um it is so pretty. I love how they packaged it. It'S so gorgeous um, so anyways here is the hair in here um packaged like this okay. So they come like this and you just take the tape off the back and you sandwich your hair in between. So i have um a darker root, so i really wanted to root these just so that they don't um like stand out so much if you were able to like ever see a piece which i don't put them up super high, so you won't really ever be Able to see it, but i still wanted to root them, just in case like not very far, but just a little bit with, like maybe a dark blonde um or something like that. And if you see like this part right here is like kind of plasticky. So, like the hair isn't exposed right there like where you could dot. So i was trying to like brainstorm how i could make that, like the same like darker blonde color um. So i was thinking that i would just try um, maybe like a sharpie in like a a taupey type of color and just see if that would work on the um on the um kind of plastic part just so that it would blend in because i'll probably Root it to about right here - and i just wanted it to blend in with that - so i'm going to try that i'm going to do that and probably put a little bit of purple shampoo on these before i put them in because they are a little more Yellow than my hair um, because i use because i do use purple shampoo so i'll - do that and um dry them and everything or actually i'm just going to let them dry naturally, because i don't want to mess them up and i don't want to mess the Sticky stuff up, but i'm just going to do that and then i'm gon na come back and put them in okay. So i'm gon na start out by saying i'm so sorry that this video is so long. But i wanted all of it to be on here. So that you can go back to any sections that you want to look at again or if you're not sure about a section i wanted it to be here. So i will speed up a lot of the um process. That'S just kind of like over and over and over. You know the same thing but um like here on this first section. I only put two pieces on this section, and that is just so that i can pull my hair up in a ponytail and you won't be able to see it from the sides or the bottom um. So how i do this is i take the plasti. The paper part off of the tape. I lay it on top of my hair and be sure that you have a nice straight line. Your part is nice and straight, and you want to put it just below your part like you want to be able to um. You want it to like move freely when, like you, pull your hair up um, you don't want any like weird, like bumps in your hair when you pull your hair up or if you like, want to pull it up in a high ponytail or a bun, or Anything so you want to leave just enough room that you can pull the hair like straight up, so i just lay it down on the top section and then what i'm going to do is i'm going to grab underneath and squeeze it make sure the hair is Stuck onto the tape really really well, and then i will just take the like the bottom of the extension and i'll just kind of pull it up and let my natural hair fall whatever isn't stuck to the tape, it will fall and then um, i squeeze it On really good, you can see that's what i'm doing right now and i just let my hair fall. You see and then i see what's stuck on the tape, you can see that's what i'm doing right there. So then i flip it over and i get my other piece and i just sandwich sandwich it on to the bottom and then i just squeeze it really really tight and make sure it's. You know it's really sticking together. Then i do that with the other one and that's pretty much the entire process of the whole head, but i'm gon na speed, some of it up and then i'll slow it down. Whenever there's, you know certain sections that i may want to say something about, because there's sections closer to the front, where i kind of do it at an angle, mainly for the reasons of like being able to pull your hair up um so i'll i'll. Get to that part here soon, but um see i'm doing the same thing on this side. I'M just adding the piece onto the bottom and if you don't have a friend or someone that can do this, for you, you just kind of have to feel because it's really hard, i mean even with the mirror. You know one in front of you, one behind you, it's really hard to get to where you can like really see back there, so you really just kind of have to feel it's it's easier just to feel for it. So now, moving on to the next section and um, i just go up just a little bit, maybe like midway between my ears and um. I'M gon na put three pieces right here and i'm gon na. Do it exactly like. I did that first section, okay, so on this next section, i'm going right above my ears and um. If you can see the way, i'm parting, my hair, i'm going at a slight angle - and this is so that i can pull my hair up. On top of my head kind of like about the height that i have it right there and it's gon na lay the right way on my head without any like hair lumps or or um the extension, the tapes like showing. So that's why i kind of go at an angle, so it's just a little bit higher in the front than it is in the back and that's basically what i'm doing so. I'M gon na go through and um. I forget how many pieces i put right here. Um, but i leave i leave about like a finger tip in between each like tape. Um, that's just kind of like how i measure it myself because they don't have to be like right on top of each other, so um i give them just a little bit of space in between and it you know it also goes um. Your extensions go. A lot further that way um they don't have to you know be right on top of each other, so you can see right here, i'm just taking it right along the um part. Exactly like, i did on those first two sections, i'm just kind of going at a little bit of an angle when i get around to the front, so so, okay, so with this next section, i'm going just a little bit above that one and i'm doing it At that same angle, i start higher in the front and i just kind of go down as i get to the back, and i let my fingers meet right in the middle and that's just kind of an easy way of how i make my part. Hmm. Oh, hmm, oh hmm! Oh these! Last few sections, i'm just going to go um just on the sides. I'M not going to put anything on the back on these last few sections because you don't want to be too high on the back, because you can. You can see those pieces um. So i just flip my hair over and i make a line there and i'm gon na put some um just closer to the front of my face just to like frame my face because you don't want. You know everything to be really long and then you don't really have like long hair around the front of your face, especially like me. I have such naturally short hair, so um. I want to have plenty around my face to blend with everything else and um. I'M doing the same thing here, i'm just keeping it on the sides and when i'm finished with everything um, i always go through, and i just kind of um trim it out with my scissors and you know just to kind of blend everything together, because these extensions Are really long and my hair is like naturally, really short so um, if you're kind of like that or if you have layers in your hair or anything like that, it makes it look a lot more natural. If you just kind of cut some layers into your extensions - and it's really not that hard, just you know, go slow, you don't want to over cut, because you can't take that back so um, just kind of slowly make some layers into your extensions and um. I show that here in a minute kind of how i do that, okay, right at the front of my hair, like where your bangs are um or where they would be. If you had bangs like up here at the very front, i always cut some in half because they just blend better up top rather than having there's just more movement to them when you just like cut them in half and sandwich those together, rather than having like The bigger strips um - they just move more naturally and they're easier to hide when you do it like that. So that's what i'm doing for these very top parts that are like right in the front and um and that's pretty much what i do for the front - and this is i'm pretty sure a few of my last pieces and i'll be finished. Okay. So now it's time to trim um all i do with this. Is i just kind of point my scissors down and so that there's no blunt cuts is just kind of um like fades down, and i do that all the way around um, the back everything, because my hair, my natural hair in the back, is so short um. I want the longer extensions to blend with that. So, like i'll cut, my extensions just like i'll make like a layer right under my natural hair, so that it just kind of all looks natural and that's what i'm doing right now. Okay, so you can see that that was really easy. Um i just styled it. I just threw some curls in it and then i just brushed my curls out um, and that was it. I mean they're really easy to style. You wake up every morning and you have beautiful mermaid hair. That'S what i love so much about tape. Extensions is um, they're, so easy that is it and i'm going to put westlabel's info down below try them out. Their extensions are amazing and um, and these are the 22 inch extensions and they're they look well. I have a high waisted skirt on too so um. They look even longer, but i'm five feet. So they look super long on me. Um, oh, and also, if you like my outfit, i don't know if you can see my skirt. My skirt is so cute, but i just opened up a boutique and i have a york pa location right now and i'm working on getting my online store up and going. But this is one of the outfits that i have um this top and it's really cute. Like a western type, um skirt - and it's got like the little like off - i don't know - i don't know what i'm trying to say like off track type of button. I thought that was super cute um, but anyways uh. I don't have my website up and going right now it is in the works um. I don't know when i'm going to be posting this video. So by the time i post the video, it might be um, maybe up to where you can shop. But if you are in the um york location, then you can come in and shop in my store, um but anyways. I guess that is everything. I'M gon na put all the west labels info down below i'll put their instagram down below go check out their instagram. They have wefts, they have clip-ins tape-ins, all that, so i'm obsessed with these and i'll be back in about a month to let you know um how they hold up. So thanks for watching i'll see you on the next video bye,
Comments
T S: Love this! The best tips on how to do this
West Label: Amazing tips!! Love the results so much
totorowtt: You did such a great job in the back without any help! It came out beautiful. I’ve been too scared to try tapes but just might have to give it a shot!
E Maldonado: That's very neat Sarah. My Sister was a hair stylist so I've always loved watching anything involving hair
clipinqueen: Hi, you did a great job! Can you tell me if you did colour the band of the extensions with the taupe marker/sharpie? I wanted to do this as well, but difficult to find that colour of sharpie. Let me know what you used. Thanks so much.
Nina Zadushlivy: Eepppp I just ordered the west label extensions a few days ago too! Been doing my own tapes for the last 4 years but have yet to find the brand I want to commit to, fingers crossed its this one! Your hair looks dope
American Patriot Girl: People pay thousands of dollars for extension services. Wow. You did an amazing job! Looks beautiful
jean wilson: Excellent clear video...best I've seen
Lacie M: Waiting for your month update video :)
Anita Serrano: Suggestion: research fast hair growth fortified shampoo.
Vanessa Angrisani: Here’s a tip, check out no sulfates fast hair growth shampoo.
Ashley Pellerin: You don’t do the sew ins anymore? A year ago I seen you did the Zala wefts sew ins ones, did you like them? Trying to decide for myself what hair to get! Please respond!!