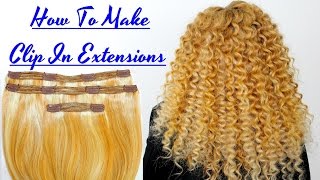
How To Make Clip In Hair Extensions Using Raw Hair
- Posted on 03 March, 2021
- Tape-In Hair Extensions
- By Anonymous
Hey all! If you want to learn how to make clip in extensions from bundles using any hair: raw hair or Virgin hair, watch this! This video is long overdue! I recently got my hair dyed and was not able to get my normal sewin straight away so I made a new set of DIY clip in extensions and filmed it! I love wearing clip in extensions in between sewins as it gives my hair a break! These are raw curly hair clip in extensions that I made from a bundle using the sewing method!
I prefer this method over the hot glue gun method because Raw hair is not that cheap and I need to get the maximum use out of it!
As you can see here I only had 1 bundle of 22in and I was short a row or two! To avoid this problem, I recommend getting two bundles and making sure it is a great color match:)
Clip in extensions are not only used to add length but are a great tool to add pops of color and make your hair fuller!
I hope you guys enjoy my How to Make & Install curly clip in hair extensions! If you have any questions, feel free to leave them down below:)
SUBSCRIBE: https://www.youtube.com/channel/UCEAmA...
Hair Used: 22in Vividae Curly
https://www.vividaehaircollection.com/...
Curly To Straight Routine: https://www.youtube.com/watch?v=wAzRCa...
DIY Microlinks: https://www.youtube.com/watch?v=-3V3Kn...
DIY Tape-In Hair Extensions: https://www.youtube.com/watch?v=aLcgqB...
DIY Sew In: https://www.youtube.com/watch?v=g20Kpn...
Hi everyone and welcome back to my channel, so my name is gwen. If you guys are new here and in today's video i'm going to be doing a hair tutorial, i'm going to show you guys how i make clipping hair extensions. So i'm going to be taking my short hair and making it this long today, i'm gon na be using one bundle. This is one bundle of 22 inch viva day, hair collection, hair, and i did dye it brown, you guys probably can't tell - or you probably can. My hair is a bit of a cooler brown because i just got it dyed from blonde and this hair is a bit of a warmer brown, so it does bother me a hint, but so let's just go ahead and jump right into it. Again. I am going to only be using one bundle um, that's because i just don't have any extra hair, but if i do end up getting here in the future, i probably will squeeze um, maybe another row in it. If i can the longer you go the thicker, i think it's important to have it, but that's really good about these bundles because they are pretty thick okay. So starting off, when i go to measure my hair, it's all still one uh one bundle. I fold it in half and i take the side, that's open and i start there. I do double layer mine, so i take this hair and i just measure it from one side to the other side and i take off about an inch. This point right here is the point where i'm going to cut so many times. I'Ve done it and i've done it hairline to hairline, and it just was too long. So we're gon na cut this and the way i cut it. I just snip it from down and up and i'm gon na just set this aside. I'M sorry man, i didn't mean that don't mind the hair. So now comes the fun part. What you'll need is a set of wig clips and i used the large wig clips because i found that the smaller ones aren't really good. They will just end up popping back out, so the large ones work best. You'Ll need a black thread or brown thread. Whatever color your hair is you'll need a needle when you're using the needle. You want to trap to make sure that it fits all the way through this one does so that's a good thing. So i'm going to thread my needle and i'm pulling it. That'S that's more than enough for one and now i'm going to line up the tracks evenly and i'm going to take one of my clips. So there's two sides there's a side with the clips going down and then there's a side with this black piece. I always do the clips facing me and the black piece facing the track. So that's very important. You don't want to go ahead and sew it on, and then you find out that this part is facing you and you can't clip it on your hair. I also sew them with it being closed. Now i just go in and i line it up with the end, so it's almost flush. I do maybe a centimeter over now i take my needle and i put my needle into the first hole and i push it through both tracks like so so push it through and then i pull it out and i pull it till about. Maybe four inches is left just so i can have something to tie once i'm done now. I take my needle and i'm gon na cross over the weft, and now i'm gon na push it through the second hole. That'S adjacent to that one! I'M going to push it on through and pull and we're going to do the same thing we're going to cross over and push it through the next hole and we're gon na just pull that on through okay, so we're gon na cross it over again. Now we're on to the fourth hole and i'm gon na push it on through. If you have a hard time pushing it through, what you can do is take it out and try to push it again and with the last one i'm going to cross over and i'm going to push it through and pull it through from the other side. Now we're going to work our way back when we're working our way back. This one has a little bit of hair. So that's fine that sucks, but it's fine so don't mind that okay on our way back we're going to cross it over, but now we're going to go back down the line and we're gon na push it through and pull it cross it over push it through The hole and pull it make sure you move some of these hairs out of the way. Okay, so we're not gon na cross over on the last hole. What we're gon na do is we're just gon na put it in the next hole, but we're gon na come out from behind, so i'm taking it and i'm pushing it through where i believe the hole will be, but there it is see how i push that Through and instead of crossing over, you have you just put it right through the bag, so you pull this guys, i'm so sorry about my little ashy hands and you just push this on through bam. Now you have two coming out of the same side. So now you have this one, the original one, and now you have the second one, and what i do is i just tie them together and i tie them maybe three separate times and the way i i'm tying, it is just doing the like you're tying a Shoe so you cross over put it through the hole and then you pull it again cross over put it through the hole and you pull it and i'm going to do one more time for extra security. And then you pull and now i just cut a little piece of thread. I don't cut too far down so that it can get maybe close to the knot. So i do maybe a centimeter up. Then i just snip away. So now we have one. And now it's time to do the other side. So since i just did this part, i'm not gon na bore you guys to death, so i'm gon na speed through uh this part, but i am gon na show you guys the other one do okay guys. So it's the next day i finished the eclipse last night. I did not have as much hair as i thought i did so. I was only able to get one three clip left and instead of getting another three clip left, i only ended up getting two hey guys, so quick disclaimer as i'm editing this. I realized that i forgot to mention how many rows i do and i personally like to do two three clip wefts and three two clip wefts, but i went ahead and listed some examples that you guys can follow and then i also listed a way to measure Your head in case you didn't know which rows went where so i'm going to show you guys uh what i have here. So i have three q-clip wefts. These two clip wefts are really uh short. These are my two clipboards. I have another two clipboard, that's rather long, and then i have my three clip left and these are um all i had in this bundle again. I do have a bundle coming today, but i'm thinking about possibly using that for my sewing. It did not look that much off yesterday, but this morning it looked a lot darker um. It does look off, even though it's they're both in the brown family, one is a more reddish brown and then my hair is a more ash brown. So i'm gon na put my two uh clip wefts in the far back, so i normally take my hair. I twist it i take my clip, that's open! I push it on that. Little section, clamp it that kind of gives it a little bit of an anchor. Instead of just pushing it down on your hair because it could just keep coming down so to stop that again, i take my hair, i kind of twist it, and then i clamp it. Okay. Now i'm going to take my q-clip left since i did not have enough hair. I just have to finesse this. So what i'm thinking of is putting one two clip left on this side at an angle and then just bringing it back and then i'm going to do the same for the other side. So i'm just going to put this on this side at an angle. The angle is so that the track can fall toward the face. If i just put it down a lot of my short hair will be exposed, so the angle is to kind of get rid of that a little bit so that it falls toward my face. Okay, my last track. I am going to part a u really close to the top or, as close as i can and i'm going to, i have a dent in my head, so i have to get on the side of that dent and then another angle. That is basically that now for blending, because blending is the most important thing now would be the time that i would go in and cut layers in it, but because i am getting another bundle and i may possibly add a layer. I do not want to cut it. I also am thinking of, although it may cause a little bit of damage to the hair extension going in and bleaching it more. So that's going to be probably done at another time, so i kind of just wanted to show you guys how i make the clips and how i install them as far as wearing them out. I am just not satisfied with it just yet because of the color. I would suggest if you are going to make your own clips to get two bundles of hair. This looks like a ton of hair, but when it's straightened once it's trimmed, it's not going to be this much so i i definitely need a little bit more. I'M going to show you the way that i would wear this out as it is okay, so the way that i would wear this hair out, because i did not go and cut it and layer it also a nice trick. If you see these little pieces that are sticking out and that bothers you, like it's doing to me right now, because i did not have that extra layer uh what you can do, you can take a bobby pin or for the sake of this video, i'm just Going to use a clip, take a bobby, pin and twist it and then just put a clip through it. If you have a bobby pin, it'll be black, so it won't be that noticeable. That'S a perfect way to get rid of those little annoying pieces that could peek through to the bottom. Okay. Now what i would do, if i had this hairstyle, maybe do a cute little braid leave out this little part here. So it just looks a little bit natural. Then i would go in and make this a little bit bigger like this and keep making it bigger. Then i would take this, take a little black pin and i would just pin this and i would do the other side as well right where that clip was i'm going to take the clip out now i have my two braids and i put them together like This like this or i'm gon na, clip it and then take out the other hair. So that's what i'll end up doing okay. So this is probably how i'll end up wearing my hair out until i either a get um another bundle or b until i uh get my sewing, install okay guys. So that's pretty much it for this video. I hope you guys enjoyed or found it. At least a little bit helpful, if you guys are new here, you can subscribe, because that would make me a very happy lady, and i will see you guys in my next video bye
Comments
Jess Landry: So helpful!
Jodie-Ann Semenov: your videos teach me so much! thnks :)
Jodie-Ann Semenov: you make it look so easy
Jessica H: That is a lot of hair for it to be 1 bundle