Diy - Dyeing And Installing Tape-In Hair Extensions
- Posted on 09 July, 2021
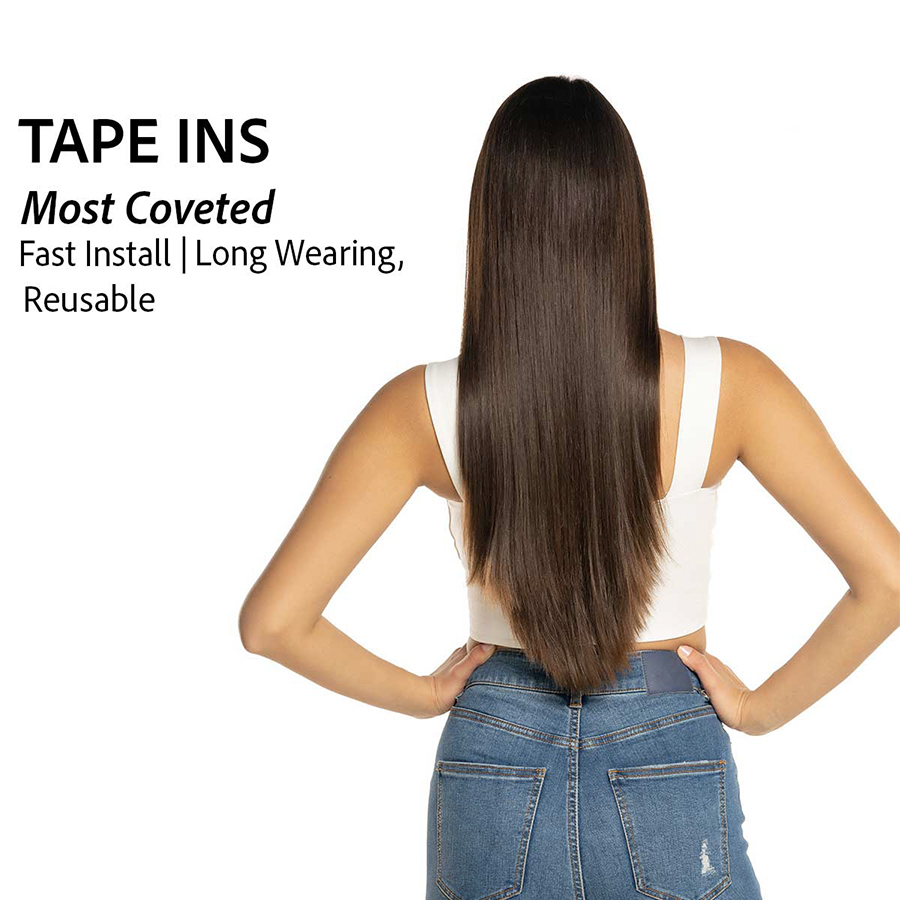
- Tape-In Hair Extensions
- By Anonymous
Welcome back youtube fam! this video took a little longer than expected but finally I am bringing you an updated DIY tutorial on how to install tape in hair extensions! if I missed a detail don't hesitate to comment and ask away any questions you may have and I'll be happy to answer I hope you enjoy this week's video thank you so much for your support ❤ let's keep growing together!
-xoxo
HAIR EXTENSIONS FROM AMAZON
https://www.amazon.com/dp/B07CBQ2DL6/r...
Everything else you can find at your local Sally's, or Walmart or any hair store you have near by
SOCIAL MEDIAS
TIKTOK- Jaquelineehernandezz
IG- Jaquelineehernandezz
SC- jackie_2204
MUSIC
Epidemic sound
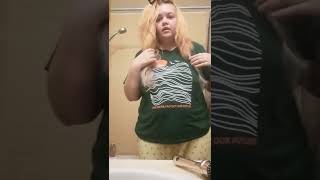
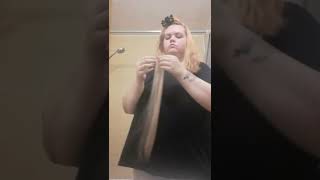
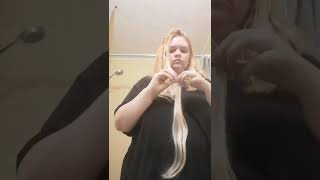
Hi guys welcome back to my channel. My name is jacqueline. If you're new welcome, i hope you guys decide to stay. If you do make sure you click on the subscribe button right below also don't forget to click the little bell button on the side. That way, you guys can be notified every time i upload a new video. The last time i filmed a video like this was about a year ago. So it's been quite a minute, but i am bringing you guys an updated video on how to clip in hair extensions. I am doing them on my best friend's hair, just because you know she's had really short hair on the first original video. She does have really really short hair. Her hair did grow. Obviously, so her hair is longer. She also did want to do color. She showed me a tick tock video and she kind of got the idea from there. So it's basically, she just has like blue on this area of her hair and then it kind of goes like around two of those back and then it just kind of comes forward. We are not in any type of way professionals or know how to do this. Like professionally or we don't have any type of license or anything um, this is just kind of like stuff that we experiment with at home. So whatever you guys are going to see is us experimenting. We'Ve never done this before a lot of the stuff. We just got at the sally store, so if you guys have a sally, it's near nearby, that's where you guys will find most of the products except the hair extensions. I will be linking them down below and just depends what color you want to get. What matches your hair the best um? Those are the extensions that you would get honestly. The extensions that we're using right now are the same extensions that we used a year ago, so yeah they've been lasting her a pretty long time. I am going to be either doing a talk through throughout the video explaining what we're doing just because it's a really long video and i can't really give like the full details right now or i'll - just be um. Putting the descriptions on the screen for you guys that way, you guys know what we're doing along the way we're just gon na go ahead and get started, and i really hope you guys enjoyed today's video and let's get started for this step. The supplies that you will be needing are going to be a mixing bowl, an application, brush, hair dye or bleach and gloves you're gon na start off by mixing your hair dye. So, basically we're going to be dyeing the extensions we will be using the revlon number. 12, blue black hair dye, so we will be prepping the extensions first so, like i said you guys, don't have to do the exact same colors. These are just the ones that she picked and you can go ahead and pick any color of your choice. We are using a paper bag on the bottom because we do not want to get the black on the table um. So if you guys are familiar with blacks, you guys will know that it stains really easily. So we do not want to get any type of stain on the table, so make sure you guys are working in a surface that is going to be easy to clean up. We are working with four packs in total of the hair extension. We have two 20 inch extensions, one 16 inch pack and then one 12 inch pack make sure that you do leave out the extensions that you want to bleach because you do not want to apply any dark colors on them. Okay, so for this step you will be needing a 1 8 measuring cup four scoops of bleach, eight scoops of the 30 volume. So for every scoop of bleach that you use, you will be doing two scoops of the volume. The reason that we are using this bleach is because it will cancel out any orange that you have in your hair for every scoop of bleach that you used. You want to make sure that you do two scoops of the volume okay so now time to bleach. The extensions we will only be bleaching some of the 20 inch extensions, not all of them. We will only be bleaching what we need for the section that we will be bleaching on her head, so make sure that you only bleach what you need, as you guys can see right here. She is massaging the bleach all over the hair extensions. We only bleached the extensions once we did not want to damage them. We did leave both the black hair dye extensions and the bleached extensions in for about 45 minutes. Until we wash them off hey the color that we will be coloring. The extension is going to be the manic panic in the shade. After midnight, we used a total of three of these cans. We used about one and a half for the hair extensions and one and a half for her head. She only wanted to bleach the bottom and front portion of her head. So that's why i'm sectioning it this way. Make sure that you do not get any black on the section that you will be bleaching. That'S why i'm being very, very careful trying not to get any black on the section that i will be bleaching now time to bleach her hair. We will be using once again the 1 8 measuring cup, three scoops of the bleach and six scoops of the 30 volume. So, as you guys can see here, she does have red on her hair. That is why this bleach was very convenient for us just because we did want to cancel out that red, and that is what this bleach does. So make sure that if you do have red in your hair, you do use the bleach that is going to be cancelling all of that out. So you want to make sure that you do leave the roots for last and just focus on the bottom ends of the hair, because the hair on your roots is virgin hair. The bleach will grab on faster on them, so you do not need to leave them for the same amount of time that you're leaving the ends. Please make sure that you are checking the hair in between every hair is different, so for her hair one hour looks really really good and aggressively to really good, so make sure that you are checking your hair. That way, you do not burn it off so applying the glue to the hair. Extensions is probably the easiest step for this, so this is the glue that she's going to be using. All you have to do is peel it up and apply it to the hair extensions she does have them in pairs already because, like i said, we are using the extensions that she's been using for over a year now, as you guys can see here, she just Detaches them and applies the glue. So when i did my first video on this tutorial, i went into a little bit more step on how to apply the hair extensions. So all i do is just remove the glue for every extension that you apply like i said you want to make sure that you do one on the top and one of the bottom, leaving a little bit of hair in between them. That way, when you squeeze the hair together, you are leaving the hair of support in between you want to make sure that you do start from bottom. To top i go over the glue with the hair straightener that way it melts a little bit, and i just squeeze it together for more support. I did a total of six sections starting from bottom to top. The first section on the bottom has three sets of extensions. The second section of her hair has three sets of extensions. The third section of her hair has three sets of extensions. The first section of her hair has five sets of extensions. The fifth section of her hair has four sets of extensions, and the last section of her hair has six sets of extensions. Everybody'S head is different, so you will not be applying the same sets of extensions as i am just make sure that as you're working your way up, you are filling up every little section of the hair. That way, you do not have any patches and the head looks nice and full. I do not apply any extensions on the rest of the hair because you do not want to apply any extensions on the very top, or else they will be visible. Also, we did not need to use all of the extensions because her hair did grow, so it was easier to just cover it up. The first time that i applied them, her hair was shorter, so we did need to use more of the extensions to cover up that short hair. For this tutorial, we only used the long extensions. We did not use any of the short extensions. I just quickly straightened her hair, so we can show you guys. The final result was excited. Tell me anyways guys, so that was it for today's video. I really hope you guys enjoyed it and found it helpful for you guys. I really love the outcome of her hair. Like i said it was something that we were experimenting on, but it came out so nice. I really like how her hair came out um at least the first time i was doing this i feel like we did a pretty good job. If you guys want to go ahead and try it go ahead and try it. If you don't, then don't go ahead and try it, but we are not responsible for any hair damaging hair. I would really recommend those extensions, they're, very good, with color and grabbing color. They didn't get damaged that much. We were basically dying and coloring hair extensions along with real hair and also clipping in the extensions as well. So here you guys that was it for today's tutorial i'll see you guys on my next video bye, guys
Comments
Daisy Davis: Does the dye & wash make the tape less sticky?