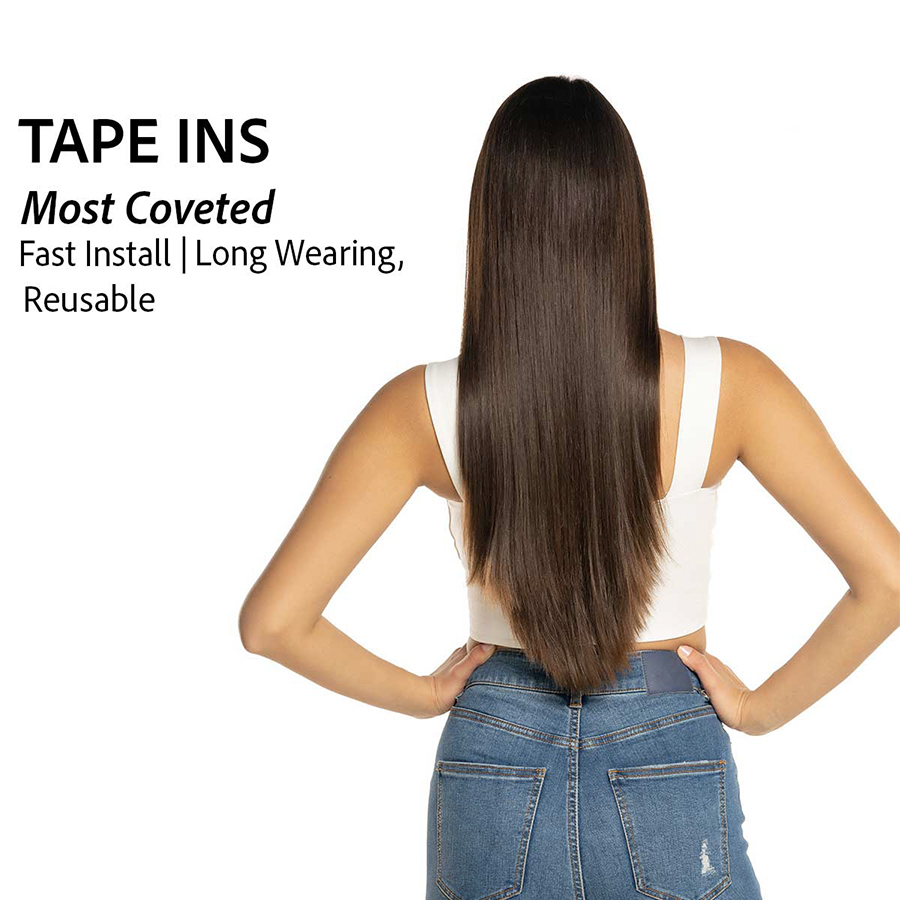
Extensive Seamless1 Tape Extensions Application & Removal
- Posted on 03 August, 2015
- Tape-In Hair Extensions
- By Anonymous
Extensive training on how to apply Seamless1 tape hair extensions and the removal process.
Hello, yes, now we want to prepare for our simplest one installation, the seamless one tray, so you can easily become the hair apply without the help of an apprentice. If you don't have the option. Okay, so obviously, where to place. The extension is the key factor. So after you've consulted with your client, if they have layered hair, they want to add some thickness. They would add some volume or if they want to add length and thickness. So you would have consulted with your clients. So I'm going to show you a couple of different method, so if we are doing concave - and we just want to add some length around the front of the hair, this is where I would place the one packet. So if we do in the hair with one packet, I start with the first piece - and we put it around here so Stacy gon na pass me one and then I will show you we can place the first one around here. So this is, if we doing concave our first piece here and then we'll put one right in this position and one in this position and on a slight angle down. If we do in call cage and want the head to flow down. And then our last section will be around here and then we do one here and one behind it. So we have one two three four five pieces all pointing down. Obviously, if the client have a bob, then she would have a lot more length around the front. However, now I wanted to show you how we apply the side hair extend on the hair. So obviously, if we're doing the hair with one packet, which that would put one piece sort of around two fingers from the next line, one two and then we'll do the second. This is the highest regard normally like around here and then we're gon na. Do one two three four: so that's six sandwiches two pieces together and we're going to do two and two on every side. If we're doing it with two packets or three packets or more then we'll do the first three pieces. Then we'll do four pieces and I will do six pieces around there and we could do three and three on each side. Obviously we can add more and we can always come back and fill up around these areas here. If your client have really short hair, we can always add more higher to the fringe, or you can consult with them which side they part the hair. If they do it right or left, then you can add more on one side than the other. So we want to get started. What I want to show you now is how to apply one packet and do a full head of hair with one packet, which is 20 pieces that make 10 sandwiches really important when you're doing hair extension to be nice and relaxed, because there's nothing really is permanent. You'Re not putting anything that gon na be like tattoo or you causing any damage whatsoever. So the important fact is that you can section really nice and clean sections accessions: zero damage, type, hair extension, cord zero damage. As long as you section the hair correctly. So I'm going to show you there are few different ways, most people, they start trying to find the perfect section, and I keep trying and trying and trying to get the perfect section. It'S not the way how I like to work. I like to work with a metal comb. I love to work with two type of clips. One is a crocodile clips. The second one is a small fine clips and I'm going to show you the role for each clip. So what I'm going to do? I'M going to take a general section, as you can see, I'm not making too much fuss about the line. I put the hair away with my crocodile clips, so it's secured away and now I can make my smaller perfect section and because I'm dealing with a lot less hair, I can use the smaller clips as you can see, and then I can start my work. Nice and clean, so there are three different types of clients: three different type of hair and what makes them three different top is easy, medium and hard. What makes it easy medium and hard it's amantha for new, hair, breakage or flyaway that the clients have on. They would sew a model today, our lovely model she's on the medium side, so she doesn't have a lot of new growth or lots of her new hair. But she does have a few, so we're going to work with that. So obviously I do need to prepare the hair with clarifying shampoo, clean hair dry and we don't put conditioner on the roads. We want to keep the roots without any conditioner. If you need to blow dryer iron, try to stay away from the roots, so either need to iron the roots and then because one that had to be for it, as you can see, if we're doing one packet, we want to work about two fingers away from The neckline two fingers from the side, two fingers over the ears, two fingers from the front, the fringe and the halo area Arno goes on. We do not put any extensions in those areas, so it's simple, two fingers two fingers on the side over the ears. The front fringe and the hanger we don't put extensions in 90 % of the cases. However, if you client have a bar board, you can't have really short hair or they want that long. Victoria'S, Secret models look or Charlie's Angel look. Then we will go much further in, but we must tell them in advance that they cannot put the hair up in ponytails without seeing that day. So something got to give. If you cannot have really short hairs, you want to go long. Then we can go up higher, we can go much higher on the fringe, but that means they can't put the hair up or they meant to please their hair a little bit to cover the tape. But in this case this is our first line. We'Re going to put the hair: this is the second line and then we're going to do the front. So the area where you put the extension becomes simple: if you do like a imaginary, imagine a circle or the run that way. So this is the area where we will put our tape to give the hair nice and warm so which they see here today. We could we only making her hair pick up with the extension and we're adding a little bit of lighter ombre for her hair and on lighter color. So that's what we're doing today, so we want to get started. This is how we want to grab the hair when we feel the tape I'm going to show you one when I feel it personally. So we grab the tape and then would feel the cover, as you can see as note on your fingers should touch the tape at all, because you don't have put oil on the day. This is ideally how I would like to. This is how I would love to hold the tape not too far, because you have no control, but also not too close, because you have no room to maneuver. Also I'll invite you for both of your hands to work together. As you can see, we can rotate the day, I'm working nice and calm. There'S no tension, no pressure. The phone ring I'll, put the tape back on the table and you're gon na answer the phone. So there's no rush when you're doing the extension and also one more thing. I love you to practice eventually, if you can try to do it my way and with time you can develop your own technique in your own style, I can do a forehead of extension. I can put the full package in the hair in less than seven minutes, so in order to be able to achieve this time, you must be able to follow exactly how I'm, showing you and you'll be able to develop your own style later. So, as you can see, we want to practice before you started when your client, I would like you to practice how to rotate the tape in your head and also we want to always hold the calm in our hands so because you're gon na see later how We can use the calm at the same time as we doing the extension that we get full use of our both of our hands and our fingers. So it's really important to understand the relationship between your hands and fingers and how they're gon na help each other, because we're gon na work your hands, gon na work as a team and to help you do a proper application. So you can hold the tape like this or you can hold it like this with your hands or you can move it aside and hold it like this. So this way your fingers are out of the way of, like I said before, we have a unique method of application, so I'm gon na hold the tape we're gon na expose our models hair. So it's really important that we have that super clean section. So, as you can see, I'm using this finger to hold the hair, not this thumb, because if I hold my thumbnail, I've got no use of my hand. So, basically, when I hold the hair with this finger, the small finger, then I've got four years off my head. You see how my hands. I can still help me, but if I do it like that, then I cannot use my fingers become really difficult. So this is really important, so I'm gon na go through the key points with you, so I'm holding the hair very gently like that. We'Ve got that really super clean section my hand here, as you can see my finger, I will release it a little bit. So I can rest my finger on upon my clients head so as you can see, precision and control, so I stopped by the nail to the line of the top and I stopped moving slowly about two to three males from this car. Now I let go with my top hand, and I make very gentle contact as if you touch in your eyeball, really, as you can see very little contact and I elevate, as you can see how the tank picked up whatever the amount of hair needed before I Use my column I'll screw this hand with my fingers and, as you can see, I'm massaging the head make sure I grab hold. I live now. My carb is so important. The angle of my car needs to come from over the ears like that sort of angle. This is the bottom of the tank. We don't work, then at the top. We don't work there, because here I'm not efficient, but here I'm working in the dark. This is where we start from the beginning of the day, and you want to do with one single movement. We want to move the hair and, as you can see, my fingers are working. This is a key point here that your fingers by working close to the table, if you hold it up here, a lot of the head and start falling back down and cause problems. As you can see, I'm holding very gently, I'm not pulling you see, you don't have pull your clients car, so I'm not pulling, but my fingers are nice and firm over the tape. So, as you can see, I remove whatever hair is not connected and when you look on lips tape, you see all the perfect amount of tape on it. If you feel you need some more hair on one side, you can put it down and then pick up a little bit more and then scoop them again and clean up that section again. But you feel you have to replay this video at that point, to keep watching to get it right once you get that right. The rest is really easy, always go in a straight line, so you see I'm not pulling and you can bubble the tape a little bit. So you can see if there's any hair that shouldn't be there. So I've got that clean employment and, as you can see, we want to make the ombre effect for our model here. So what we're doing we're, putting the blonder color on top and we're putting the darker color, underneath I'm going to show you why! So, as you can see, the comb is in my hand. Again I hold the tape like that or I can hold it like this and, as you can see, I rest my hand on our models head, so I'm not shaking or moving so stable. You see how I position it really nicely under the top one and very slowly I lower the top one down and then before I move, as you can see, I'm very still and very stable, not moving at all. Now, with my finger, I'm gon na press in the middle of a can pointing right down in the middle move, my hand away, and now I'm gon na check it. Looking good, I grab my clients head, as you can see, I'm putting my fingers around her head and then I'm gon na massage firmly into the scalp, like I think, someone giving you a deep tissue, massage, really nice and firm, we're gon na press it in. So no shampoo or conditioner gon na go so now time to check if we did a good job, as you can see, the tank moves up and down, there's no pressure on the scalp and also all the tape align nicely. So this is how you check if you did a good job down. This is one piece down done. Is that literally about then not even 20 seconds to do one sandwich so to do the whole head, but it doesn't take long at all now, when we start with the back, we can either do three pieces or we do two pieces. That'S you know our heads are different. You got big head small head big head. As you can see here we did the darker color underneath so when applying gon na lift her hair you're, not gon na see the tape. You see how it's all blend nicely with her hair. So when the client caught her hair up, we put the darker color underneath to achieve the hombre, a beautiful, ombre or balayage effect. You see when we put the hair down, you can see it's lighter on top and then darker underneath now, I'm gon na show you what would have happen if we put the darker one on top look at that different effect altogether. So at the beginning, the bottom row and over the ears we're gon na put the darker piece under as we get higher on top, then we're gon na flip them around and we're gon na put the blonde one under and the dark one on top. So when the blind, where her head down, you can see the hair beautifully cover, so you don't see the blonde balayage one or hombre the reason we don't like the two-tone Valley, our hombre is that because you could not get the right, dark, colors and blonde colors And you don't you get that line in between with this method, you get a beautiful ombre in values and it look completely natural and so right now what we're gon na do I'm going to do one piece on each side and then we're going to move to The next section so again we're gon na implement the same technique. What we did before, as you can see, we want to have the hair holding with the clips you've got to let the technology do the job for you, you don't want to be struggling and holding it and all so. What you want to do you wan na? Let the clips do all the job for you. If you have one or two hair, you need to lift them up gently. That'S what we do like a child really can hold that one piece of paper expert that straight line, as you can see here. If we put this one here, we risking of going too close to the neck to the line and the hairline. So the client, when she put her head off, you might see today, so what we were gon na do here, I'm gon na show you how you can overlap. So this is how we overlap. We lift this one see I'm gon na. Let the place go gently underneath so you see with again with that barrel. Now we lower lower with experience and time you can almost brush the glue against the hair with that having it stick on the actual hair. As you can see, very gently, I'm gon na put the tape facing down, apply little bit of pressure, very gentle as if you're touching your eyeball live, and I scoop the hair again, I'm repeating myself here. So you really get it. You see very gently: I'm massaging the hair between my fingers. I'M gon na live with that pulling hard, I'm not pulling hard, I'm very relaxed. I'M gon na bring the car from this side over the ears and I'm gon na remove that hair. As you can see, if I need to massage it again, I would or if I need to press down to pick up a little bit more hair. Generally speaking, if your clients hair is really fine, I would really invite you to stay away from the roots and if your clients, hair, is like you've got Asian hair, Indian, hair, Brazilian or she's got keratin treatment or really healthy hair, you might need to press a Little bit harder, but if the hair is fine, you press very gentle in the first time to pick up the hip. As you can see, I'm resting on my clients head putting it in the right position and I'm gon na lower and with experience you'll be able to gain a lot more time. As you can see for me now bringing that down. It'S almost about half an hour because I'm done so many of these. So now my fingers in the middle. The reason I only put my finger, that's if I need to do any adjustment, I still care. If I'm not happy with it, then I need to remove it. I'M gon na show you bit later on how we remove it, but for now we're gon na hold the clients head and moustache again, and this is the second one done as you can see it very easy and very simple to do it really nice and relaxed. There'S no other service in the industry, you could ruin have fun with it and in short period of time, as you can see here, we've exposed the roots holding my hand on the stop like he knows my fingers until I'm parallel with the line. Now a makes more contact and ID. When you lift this, you should not see any changes for the scarf. The scarf should be intact, so I'm gon na massage that hair between my fingers and I'm gon na scoop, whatever hair that is not connected again, if I feel that today doesn't have enough hair on it, I'll press a little bit more with that touching this stuff. So I'm happy with that and then now we're gon na put the darker color and you can see how I'm rotating playing around you will get to that. Normally, thank you about three or four pieces to become really comfortable. As you can see a position of nicely and then I lower and then I'll make contact again so now we have done the first roll of the hair and look how beautiful that looks, started to blend really nicely and cover. We'Ve got that beautiful ombre happening and then now we're gon na do a second section. So, as you can see, we can go about two fingers over that that line, and normally, if I'm doing, clients really challenging client. I'Ve never done her hair before and I think she got big hair Bob are hard to blend with extension, if someone have bob hair, you're gon na be mindful that you might need two to three packets. Maybe more! You tell your client that to do your hair today, we might need two to three packets, maybe more three to four packets, maybe more so you're gon na work out how many, how many your client want, rather than how many she need. So if we're doing the hair generally, I would go. This is the highest. I would go normally so that's section the hair. Again we take a very broad and general section, as you can see, I'm not making too much fuss with the crocodile clips. I put the hair away now it's time to make my perfect section and it's always important that the section are nice and straight. So we work in on four centimeters day, so you want the section. So I'm worrying, where I'm putting the tape. Now, I'm not gon na worry about what I'm sectioning there it's gon na come later, as you can see now we want to put the darker one on top, so define the same technique what we learnt earlier, so we start finding out through the scar lower. I'M happy with the make contact without letting go of the hair, because if I let go of that hair, I'm gon na waste five ten seconds to come back and find it again. So this is a key moment where you keep holding on to this hair. You elevate to the hair between your fingers, massage it and then with the comb coming from this angle in the middle, I'm gon na remove the hair that it doesn't need to be there, as you can see, holding without pulling no hair coming down and now we're Putting a lighter color, as you can see, we if you feel that the tape kind of anchoring upward and you could not get it into the right position, which is probably because you haven't cleaned that section properly or sometimes what you can do have a look at My hands, you can practice this as well. I hold the tape like this and my fingers here look at how bring the tail to get down just by rubbing my fingers together. The tape would face down, so I can get it in the right position. So you see, I'm putting my hand on the clients head and all I'm doing is rotating my hand a little back by rubbing my fingers together, you see how I'm putting the tape in the right spot. All this special technique will help you achieve an amazing, fast and great result. As you can see now I can lower, pin it in the middle and then now I'm gon na massage it together. It'S very very easy to do very simple, but you must be able to follow all these great step that I'm helping you in with the darker color on top it's creating that nice ombre, underneath without the tape being visible or shall we so right now what we Want to do want to put another one right next to it. So, if we're building the hair, if we're building the hair and and wanna make it fuller, we can go right next to it or you can have a little centimeter gap in between, but I'm gon na go right next to it make a gentle contact. If you feel that your clients, you need to remove them, if you feel you're doing something wrong, please remove it and start fresh again. I see some people, they've got the fringe stuck in the tape and that's when you cause damage to your clients head. You have responsibility to make the head look: nice and natural and zero damage to your client if, for whatever reason after I'm not happy with this, how it's sitting look how easy! I want you to visualize the concept of a DVD cabinet as you open the cabinet down, so the cabinet there is tapas cabinets, one. The open side way, one that opened down, so my thumb's gon na become the N cup. I'M gon na put them right under this day and I'm gon na flip it down without hurting and then pull it right down. You see our model didn't feel a thing and it's really many more contact with the tape. As you can see, we build the hair in the break formation, so you've got to be able to monitor where you put in them. So now I'm gon na continue all the way to the front of all again, I'm going about two fingers over the ears and I'm gon na clear two fingers from the front. So this is the zone where I can put them in. As I get to the front, I can go on the slide small angle. You want to let the clips do the work for you and let the technology do the work for you. So as we get to the sprung holding putting it down making on that new phenom and I'm not causing the stop, if your client get discomfort - or it's really important - to keep an eye on what's happening with your client stop, if there's like red spot, some people Have a dry scarred or they have dandruff, but they don't realize that they have it that they could bring it on or make the stuff a little bit of irritation. It'S important to point out to your client that she does have a little bit of red spot. A little bit of dandruff happening in winter or whatever. So, if your clients carp get a little bit irritated you, you advise them to lower it down a little bit, so you remove it and you pull it down a little bit all that Mina. They need to come back more often to retail, but it means that this car doesn't get any irritations. This is the type floss between really four to ten weeks is depend on your client, how much they want to leave them in. So, as you can see, we've added a lot of fullness, a lot of thickness into the hair and we've. Given our lovely model, a lot of color variation in here, as you can see the different colors. Let'S do the second side, as you can see, you want to continue that same line of work. We'Ve done it. If you doing your client and your client have really thick hair and you're, not sure whether the one packet or do packet going to be enough. I hardly recommend for you that you do the bottom, you do the top, you do the front and whatever you have leftovers, you can come back and feel the back, so you can feel it and then you can make it look good. So if you're not sure or Occident how many you need, but most of my clients, I've been doing the hair for many many years and I know exactly how many packets they need or what they need to put in. So we don't exactly if you have really long nails if you're a female or male, and you have wronged their audience. This is how we can hold one side and massage it that way, hold one side and then max under the other way. This way you makes a really good combat. I mean ideally to have everything next to you on the trolley mark line they like to bus that takes to me because they, like us all part of the part of the action and then they're doing something. But it's up to you whether it's really easy to have an apprentice helping you or you want to put all the tape on the trolley and that's also easy. So, as you can see, we doing another one here exactly what applying the same technique. So, if what everyone at the front, if you client love to fill the gap around the front, so as you can see we're doing the dark one on top, but what I'd like to do in here is: I would like to do the blonde one on top, Because then, when the client for her hair up, then we could, you could see it blend with her hair and you could go closer or further from the front. I mean it's more become like a personal, but some client. They don't mind if you put a bit closer, so you can fill up some gaps around the front and they don't mind that and they don't care really much about putting the hair up, because there ma be happy to sacrifice putting their hair up. So, as you can see, we put the lighter one on top of create completely different, look and feel look at this, how the color beautifully blending, and now we want to go for the fringe. You see how we did the bottom layer there. So now the top layer - this is the last layer I'm putting up here, as you can see, I'm going on the slide, this angle down or some going when we're doing concave or going angles down. Now I'm going with the angles and reversing angles and the reason I'm doing that is, I don't know if you can answer that. I'M going on the slight angle because I like to clear the halo at the back, so this halo here I don't want to get my extension right into it. I wanted to clear a little bit along the hair to come forward. I'M going to share this with. You now have seen head rested when they put the tape like let's visualize. This is a day, but I've seen here dresses. They put him like this, and this is really bad practice, because unless I'm doing the client - and I know she's absolute princess - spend an hour to brush her hair and hour to paint her nails an hour to blow-dry her hair she's, very gentle. Then I would agree to put them like this, but I'm going to show you the different when you put them astray on this slight angle. Look at how much pressure you can apply and you see it's really strong. It'S not gon na damage your clients head when you put them on an angle like this, the whole weight of the extension this hand, you're gon na hold the whole weight of it and look at this. It can ease me there because there's no support. So you really want to put them on an angle, and you want to pierce your client to brush their hair, nice and gentle. So now we're going with the darker one, as you can see, we're creating our clients had enjoyed her hair for the last two months and now it's time to resurface the hair again and then to restate or to use a new one, 99 % of our client. They choose not to retake the hair because it costs $ 150 per packet to retake the hair 189 for a new hair. So a lot of the time they choose not to use the same hair. It'S still feel nice and beautiful. But time is money and your time also very valuable, so the client - always they have the hair done in summer now, which winter they want to go darker. They want to change the color if they cut the hair. You cannot put the same hair back again in the clients hair. So often they just want to use a new hair because it's either they want more longer. They want different color or they dishonor sit down in the chair for an hour to realize. Well, it's only $ 39 different between using a new hair or using the same old hair retyping can be annoying. I'M going to show you how you can do it efficiently and enjoy and love doing it. So, as you can see, we have little bit of the regrowth happening in here. So it's important to use a tail comb with the metal on the air. We'Ve got the s-1 type remover, and this is alcohol-based it normally. People would use on wounds and stuff, so it doesn't damage your hair or the clients, hair or the stuff. So we wan na we wan na poke the tape a little bit to create a small gap, so we can get that first solution into that gap. When you spray, you want to keep the nozzle very close to the action waist brain. If you don't have spray. The hair or the bottom of the tape you want to spray right in, we don't want to use it like we spray and purse you, so you go right and direct as you can see, I've got right in and now I'm gon na use that tail comb To separate just a a little bit as you can see now with my fingers, I can open it up and then spray a little bit more and you want to let the spray through the work for you. So, as you can see now, opening up the tape remove the top one and then we want to spray a little bit more and then we wan na remove, as you can see, it's nice and easy to remove them if we throw-in them away. I highly recommend you stick them together and then you throw them on the floor this way they don't get stuck on the bottom of your shoes and you're not leaving mess all over your thumb off now, one by one. We need to spray a little bit more and we need to remove the excess of the glue. You don't want to remove the whole head to come back and find them to clean them up. You want to remove them as you go along straight away. If you find your client have a little bit of slight excess residue, you can do like a deep conditioner in between your shampoo just to remove them and brush them a little bit. And then you can do your clarifying shampoo afterwards. So, as you can see very simple and very easy and damage free for your clients,
Comments
rosa lina: but this girl doesnt need extensions..