Tape-In Extensions And Blend
- Posted on 02 June, 2017
- Tape-In Hair Extensions
- By Anonymous
HIGHLIGHTS:
00:08 intro and EXTENSION EXPLANATION
00:48 COLOR MATCH to the EXTENSIONS
01:14 preparing the hair for EXTENSIONS
01:47 EXTENSION tips and tricks
02:53 the first EXTENSION
04:56 EXTENSION ROW one complete
05:00 EXTENSION ROW two
05:23 side of the head EXTENSIONS
05:53 helpful EXTENSION tips
06:14 top of the head HAIR EXTENSIONS
06:37 top of the head HAIR EXTENSION TIPS
07:14 FILLING the HAIR EXTENSIONS as needed
07:35 SLIDE CUTS for shaping the EXTENSION
11:28 TEXTURING
12:02 final HAIR EXTENSION reveal
12:07 leave a comment, like & subscribe @nvennhairbeauty
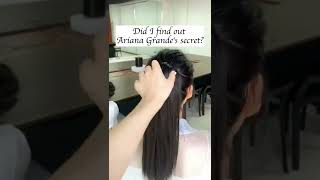
join veronica as she shares a SNEAK PEEK at the new HAIR EXTENSIONS nvenn will be offering and how we BLEND them perfectly with your hair.
Hey guys so today, what we're going to do is we're going to be Amy's extensions, going to do tape and check it out and show your hair, so we're just testing out these brand new extensions that are european virgin, remy hair, so super super nice, maybe they'll, Be awkward pretty soon check out that perfect color mannish, but what we are going to do with the hair it just took down is we are going to do a retouch too, so the roots are completely done and evolved brand new fresh. Are you excited, I'm so excited right through our just getting ready to do her color? What we're going to do is a 7gc and a Beverly Hills whenever you're doing a red, though what 10 always happens, is that the heat from the spell this is the color? A little bit so it's always a little bit warmer than it should be. So what I'm going to do is mix 2/3 of 7gc and then one-third of seven natural colors all done now. I actually switched up the formula a little bit. It'S 3/4 7gc and 1/4 natural 7, and that's just because I want it to have a good, vibrant punch, all right here, coming all washed out now we can see so we're just going to blow dryer hair we're going to prep it we're going to use the Replenish oil so really just moisturizers our hair to sit really soft and shiny, protect, keep protected and then our new product or volumizer to give a ton of bodies you all right. So we're getting started with the taping extensions now you're here, it's all blow-dried and style. Okay, we're going to just start up the bottom here and what you want to do is you want to leave? We got two different. What you want to do, you want to leave a v-sit inch to inch 1/2 perimeter. All the way around the edges and the reason being is that she wants to still be able to tire her out, and so with that perimeter you're going to be able to cover the extensions and on seat up, okay, we're going to start here on the bottom. I like to put everything in a V pattern, because I find that it just gives it a very natural look and slow to the hair without a not just putting it lucky straight in either. We have a good amount of hair underneath there be that smooth air surface. Okay, we also want to make sure that it's completely even so we're going to measure it to the back of her head. You can see that thanks we're going to put two in on the very bottom here, so we're going to have one here and one there we're going to do a very thin section here. So the sectioning is very important too, though, because you don't want too little hair, because then it's actually going to pull the hair and right out. But you need a thin enough section that the two sandwiches of the tapings can actually touch and stick together without sliding out okay. So we have that we're going to place this underneath so make sure you get to see it as close to the root as possible. Just like that, we're going to take another sandwich here and we're going to just close it over top, okay, we're going to press it shut, and then we have our first sandwich in there. So if we love - because we got it so nice and close to the root, a she's going to get a really good long wear out of it and then see it's not pulling the hair at all, because it's not Q tight that I use to the side. So we're going to do we're going to stick with the déplacement, but what we're going to do is now we're going to leave about an inch and a half section in between you, okay. So this is just a good placement so that you have a variety of extensions, very evenly placed all around the head. You want to make sure that it's very even on left to right, because up where her hair is who's going to be sitting. So we have this piece in here. Basically, what we're going to do now is we're going to just work along your heart line. So what we're going to do is we're going to literally put this next one right next to it and all the way out. We have to make sure it's here by the ears that I don't have enough again. We need at least an inch to an inch and a half so that she could pull her hair back and then we're also going to stop an interested inch and a half from the front hairline as well so right in here. This is where it kind of gets debatable, because you can see that it's getting pretty close now to the front of her hair. If we were to put another piece in right there once we pull it back, you'll probably be able to see it. So what we'll do is that we leave this for the end we might put some half pieces are here just to fill them in a little bit more second row Alexander. I don't need to hear how does it feel being pretty amazing for every head of hair? It'S always going to be a little bit different, depending on their shape. So what I'm going to do in here, as we start to get to the top, I'm actually going to do like a smaller section in in here, probably a four and then we'll do our last one at the top of their row number three: we have our Top question putting down so what we did is also to be with the v-shape, but we're making sure not to go over the highest point of her head. Because, what's going to happen, is extension? Is there when the wind blows and which moved you can see it Peaks to the top you're just each other? You go back on the side here on this top layer, I'm actually going to start from the outside in because I want to make sure we have enough in the front here to fill in the sign. So we'll start an inch and a quarter from surprise and we're going to work our way over and then I'll start on the other side, it was not very precise, you bro, so now what we're going to do is we just have a last log few pieces To put in I'm actually just going to look around and see where you could be filled in more, I can see some of the threat needs to be filled in as well some of these gaps in here. So I'm going to kind of pick and choose where I want to put these pieces into how to build Evelyn all right, so my hair is all in now. So it's done! Okay! So now I'm going to do the blend, the karapet, which is actually the most important thing, because you want your extensions to look like a real head hair. So often you know what, if you have people that just do send children go and cut hair? Sometimes that's a issue, though, because I mean how you want to cut. It is exactly how you want a haircut, you strip it. So it's very, very important, okay. So what we're going to do? What we're going to do with her hair is we're going to blend this top layer with her language. So what I like to use is a bit of slide tonight. You and you can see, however, top layer here is heavier. So what we're going to do is we're going to do a rate and that up just with some texture, you, okay and in the front here, we're again breaking up her natural hair that she has and we're going to do some slide, cutting you. So what they're? Here, what I'm doing is I'm going through every single layer of expansion and I'm texturizing her natural hair because of the haircut that she had. It was very blocky Peggy and we wanted to flow really smoothly. So there's like a seamless blend from our hair to the extension, so I'm just going to take the texture shears here and we're just about a lightly texturized the edge there you go. If you like, what you see leave a comment. Subscribe subscribe, we'll be down next time.
Comments
Lien H: I'm loving your hair! Thanks for the inspiration
LALA: AS A HAIR STYLIST OF OVER 30 YEARS I LOVE THIS PLACEMENT !!!! THANK YOU !!
J. R.: pretty! and good problem solving tips, that was a BLUNT haircut she had.
Zhanna Muchnik: I thought you not suppose to color and put products in when doing tape ins. Wonder if it lasted after a wash
Matti Barker: I love it
Carol Grimm: She needs more tape ins to thin
Erica Garza: ❤
Sierra Rodriquez: That guy was hovering. I HATE when I’m doing hair & anyone hovers!! Unless I’m teaching someone.
thatdamnstarship: Tsk tsk. Shame on you. As a hair dresser you shouldn't be advertising those extensions as virgin. Once they're dyed or bleached it is no longer virgin. Shame on you seriously not cool and it makes you less credible imo.