Long Razor Shag Haircut For Women - Tutorial With Erika Hawkins
- Posted on 12 April, 2021
- Hair Knowledge
- By Anonymous
In this video Erika Hawkins does a long razor shag haircut for women and shows how to add lots of layers while maintaining maximum length on thick, wavy hair. With short, face framing curtain bangs, this look really brings a modern look to the classic cut that is so popular today.
Social Links:
https://www.facebook.com/JataiFeather
https://www.instagram.com/jataifeather...
https://www.youtube.com/user/JataiFeat...
https://www.pinterest.com/jataifeather...
https://twitter.com/JataiFeather
Jatai Academy Education:
http://www.jatai.net/jataiacademy/
Shop Jatai Products:
Educator:
@ErikaHawkins_
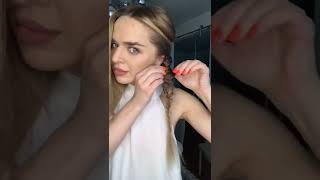
Hi, i'm erica hawkins, i'm a hair stylist in los angeles and i'm here with my model lorita today we're gon na change. Larita'S, look up we're gon na give her a real rocking shag. Add some bangs some nice shorter layers on top and we're going to keep most of this length and kind of blend really nicely into some like long hair, i'm so excited to show you guys, i'm going to start in the front, get her bang set in and Also put in some side bits along the face, i'm going to section out about a one inch section along the front hairline so from the top all the way down into the side. So i've got my one in section from the top of the head down to the ear, so i'm just manipulating the hair a little bit and i see that that wants to fall to the side. So i'm going to put that over to the side. For now i'll do the same thing. On the opposite side, i see that larita's hair has a good bit of wave, even in this front, bang section. So i'm going to leave a little bit of room for her hair to wave and we're going to cut this first section closer, like along the middle of the bridge of her nose. I'M going to hold this section with some tension and i'm going to use the flat of my blade with a pretty wide stroke and just melt some of that hair away, create a real pc effect right in the center. Then i'm going to take the rest of the hair on this side, i'm going to elevate up slightly and pull it straight out from the head and just continue my line across we'll do the same thing. On the opposite side. Take my center section for a guide. Bring all the hair that wants to live on the forehead up, elevating slightly and i'm cutting horizontally and just letting the natural wave do its thing so cool already next to work these side pieces in i'm going to comb these forward and elevate up. I'Ve got a little bit of a visual guide. I know where these bangs are gon na end, and i want these to sit along the side of her face. So i'm just kind of remembering where that sits. Looking at that length, i'm going to elevate up and i'm going to cut short to long nice, big strokes, come from behind and just make that push forward ever so slightly we'll do the same on the opposite side. So now that we've got the beginning of our bang section, set i'm going to take one more section about an inch deep on either side and repeat the process and i'm going from about an inch behind the bang section. But i'm making sure to take the sides. Only to in front of the ear i'm going to elevate slightly again, i've got my guide from underneath i'll. Let that slip out and just concentrate on cutting a horizontal line. We'Re going to elevate these side bits, i'm actually going to take these pieces quite short, so they live in this area where the bang meets the side, not a lot of density in this part of the head so still cutting short to long, and that just fills In that little area right there, so i'm elevating my section. I'Ve got my guide underneath cut horizontally. So now that we've got our bangs and a little bit of our side, bits started we're going to go into layering. So how i'm going to be taking these layering layering sections? Is i'm going to be working from the top taking a section almost vertically, a slight slight diagonal? And it's going to be parallel to our bang sections, we're going to continue working down the back of the head, taking parallel sections and now i'm working where the bangs start to meet the layers we're going to create. So i'm elevating up slightly, i'm letting the bang sections just slip out of my fingertips and i'm cutting short to long starting to slide my fingers down to preserve a little bit of length as i move along, but i'm not afraid to take these first layers shorter. Because that's going to give us a lot of movement around the face - and i know she's got a lot of length as we move back further on her head and you can see those layers already start to move her natural wave around. So we'll take our next section about one inch thick and that's all going to come forward and same thing. I'M elevating a little bit higher as i move back the head, letting that first section slip out of my fingertips and now i'm using a little bit of a bigger stroke, still working short to long. So i'm really letting my fingers start to slide. As i work. My way down - and this is going to help preserve some length and as i'm working down through the ends, i'm sliding past my guide because with a shag like this, it's more of just a visual guide with the razor. But it's fun to kind of. Allow yourself to be free. So as long as you know, where that guide is, you can slide past and keep moving in order to preserve the length, so i'm elevating higher, i'm letting my previous sections slip out of my fingers and i pull the rest of the section towards me as i'm Moving behind the ear, this is where i really want to be aware and really start maintaining length still taking almost vertical sections. As i work through my shape comb this forward elevating up, i can feel my guide slipping out of my fingertips, so i know i'm i'm going past it, which is what i want next section as i'm moving through the head and the further. We come back. We'Re working with a lot more hair so feel free to break these sections. You'Ll see me rearranging my grip a few times, so i'm only only holding the amount of hair that i'm able to comfortably in my fingertips, so i can maintain a lot of good tension. Pulling that forward, i feel my guide leave. My fingertips. She'S got a few short layers in the back already, so it's almost like i'm marrying those layers in with our new layers and connecting them to the length as well ready last section down. The back is going to be just down the center of the back of the head. I can feel she's got a lot of density in this area, so i'm actually going to go within my section first and just lightly. Carve a bit of weight out really lighten up the section elevate this up and just concentrate on going short too long. You can already see that shape starting to take place and now we're going to repeat these steps on the opposite side. So now i'm going to move to layering on top of the head. I'Ve got a nice thick section from the crown of the head to the front of hairline, where we've already put the bangs in i'm over directing this section slightly forward and i'm going to be creating a line that goes short to long. So i'm looking to see where my bang section drops out from my guide sliding past that just slightly and then i'm going to create a line that goes short to long. Those are going to be some really fun layers. Now i'm going to take parallel sections working down the top of the head on either side, and i want the layers to get slightly longer as they move down the head. So i'm going to be pulling my section towards this first section in the middle as i work down the head, just fine tuning those layers a little bit and we'll just take one more section. Just past the round of the head at the parietal ridge. We'Re going to comb all of this up, i'm going to let the hair i've already cut slip out of my fingertips, so i'm only cutting the hair in this last section, and now i'm really just blending to what we've already cut on the sides. You can see that movement starting to happen now, i'm going to do the same thing on the other side of the head, so she's looking great so far. Our last step is just to connect the layers on the top of the head that we just cut into the back to connect the layers on top to the shape and length on the bottom, i'm taking a section down the center back of the head, i'm starting With the length which is the end of the layer that i cut on top of the head previously, and it's going to continue all the way down to the center back at the nape of the neck, i'm going to put her head down to assist me in Getting in elevating the hair - and you can see because we laid her previously she's almost connected, so it's just a little bit of hair that we're gon na work with just to neaten up the shape. So i see my previous layer drop out and it's just working short too long, cleaning up that little tiny bit for these sections. I'M going to pivot off this point in the back, because i'm working around the head, and so it's almost going to turn into little pie sections and i'm taking rather large sections, because i know we've already cut this by pulling it to the front and really now We'Re just doing our fine tuning to perfect the look, take one more pie, slice and now we're meeting up to the side. So because i like the length that we have my goal, isn't to make the ends much shorter, but to really create a smooth transition from layer to the blank at the very perimeter of the shape and we'll do the same thing. On the opposite side, all right and now we've got this really cool rock in shag, shape, ready to get dry all right and now, we've completed our shag shape, started with the really strong bang section and then started to bring the layers in from the top. All the way to the bottom, bringing everything forward connecting and just sliding past our guide to maintain all this nice length, then we added the layer on top short to long and connected that to the back as well. So you can see all these layers coming together. Really seamlessly connecting from the front to the back and really giving her lots of volume and fullness all right, i'm erica, i hope you've enjoyed this shag haircut. You


Comments
Heidi: You shaved 20 yrs off that lady, what a difference! Beautiful work :)
Live Life: Great hair before and after!
Zola Chuluunbaatar: Looks amazing and so much younger!
Licensed and insured: I need this haircut. But I would have to have curtain bangs because I’m older than your lovely model .
Kayla Noelle: Love it!
Zolie Wolie: Wow.... Amazing!
Anna Golden: Thank you so much ☺️
Anna Golden: Fantastic!
Raven Vargas: Gorgeous
Dilcia Moya: ❤️