Drop Skin Fade With Beard Barber Haircut Tutorial
- Posted on 12 December, 2021
- Hair Knowledge
- By Anonymous
https://www.ezbladeshavingproducts.com...
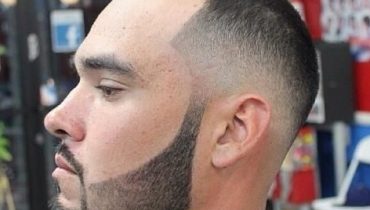
In this barber tutorial Jay does a step by step drop fade haircut and beard line up. He starts off but creating a skin line for the first fade guide line. Next he creates the second guide line the half. Then he fades from the biggest clip to the smallest. Next he works on the beard lining it up then lining it up with a straight razor and shave gel.
Hey, what's going on guys jay here from easy blade, shaving products - we are back with another haircut tutorial, so today we're going to do a skin fade kind of dropped in the back, and the first thing we're doing here is just grabbing our outliner and just basically Skinning out the hair as much as we can making sure it's nice and clean we're, giving it a little drop in the back, that's kind of what he wanted. You want it to be a little lower in the back um and we're just gon na make sure that we have this thing nice and clean nice and skinned out. Then we're gon na go ahead and grab a shaver and we're basically gon na just shave uh. You know making sure it gives it that pop. So when you use the shaver, the foil shaver, it really gives the haircut a pop. So right here we're just again cleaning that up and just making sure you know all the hair is off. We got a nice clean canvas now and we're gon na hit it with the foil shaver. Now this particular foil shaver, i'm about to use, is the babyliss foil shaver, really really strong. Really sturdy. I'Ve been really feeling these baby this product, sir, as you guys know me if any of you guys have been following me from a long time ago. I was always there and this guy but um. Now i'm into this like baby-less um and wall thing, and what i'm doing here is just basically flicking my wrists uh with the with the shaver cleaning them up nicely, i'm only using like one part of the shaver at the bottom part. You can use two, but i'm only using like one part of the shaver. What i'm doing here is grab my five star just making my my second guideline, just cleaning them making sure it's nice and clean. Now, when you're fading here guys, it's all about uh, creating lines and taking them out, if you look at fitting hair that way like looking at it like you're, just creating a line and taking it out you'll do a lot better at fading um! Don'T look at it like an overall project, just look at it like steps. So when you look at fading hair, like steps it'll work out a lot better for you guys, you know, um have a map have like a road map, and you know you put a boat in the water. You have nowhere to go and you're basically going to go to the middle of nowhere. So a lot of you guys that are learning how to fade hair um. You always got to have a map and have a direction that you're going. I know. Sometimes it can be confusing when you're just starting out but um. If you got a map, you'll know where you're going now. What i did here was grab the number two guard just to flatten out my canvas. It'S not really taking off uh too much hair, but i always like to go over the steps same thing with you guys out there you know, go over the steps, even if you don't have to just to see if they work just to see what they're gon Na do for you, you know um and then we're gon na drop down to our one and a half and we're gon na blend into that two: okay and again, first time watching my videos, then what you're doing basically is fading into that previous guard. So if you guys want to see a video on how to use clipper guards just go to our channel and type in clipper guards explained, i basically break down how clipper guards are used um period and that's that could be the most confusing part for a lot Of new guys out, there is how uh, clipper guards are used, um that can be really confusing all right. So what i did was here, like i said one and a half fading into that two and we're flicking our wrist wrist is very important. I say it every video, but it's true flicking wrist is uh very important. What i did was drop down to our one, and then i grabbed my brush. Now the brush is going to get all those micro hairs out of there. Of course, i'm just going to make the fade look overall, just cleaner, basically, so practice guys make sure that you're practicing using that machine, even when you're not cutting hair, grab your machine and just practice flicking your wrists and practice messing with the lever um. This is basically going to help you become a better barber. You want to be as comfortable as you can with the machine with your clippers with your guards. You don't want to wait until you have an actual customer in a chair to try to get comfortable with what you're doing you know um. You want to look like you know what you're doing, even if you don't you know, so you want to be comfortable with that. Clipper, anything that you do in life and you know you want to get comfortable with it um. So what i did here is drop down to our half and i'm basically blending into that one. If we open that half up all the way it becomes a one. So again guys you want to be comfortable with everything that you do and that's just how it is in life period um. I want to say i started boxing about four years ago learning how to box and before i started boxing uh, i thought i knew what i was doing. You know, i thought i thought i knew how to i wasn't a big fighter, but you know i thought i knew how to like, throw my hands a little bit right. But then, when you get into the boxing technique, you realize it's totally different than what you're thinking in real life so anyway guys. This is what i'm doing right here is. I took off the guard and we're basically down to our uh zero, which is our machine. All the way closed and we're fading into that previous guard. We'Re taking out that last guideline so again guys back to my boxing story right. So that's what i'm saying i'm comparing that to you being comfortable with the clippers right, because you can go cut hair in your house or your garage when you go to the barber shop, it's totally different! It'S like getting in the ring right when you get in the ring, it's totally different. You got people watching and you got an opponent in your chair. It'S totally different guys, so you want to get comfortable as you can and practice sparring, basically knowing how to use your clippers and all that type of stuff. Before you even start, you know going into a barber shop and stuff like that so grab my outliner, basically shaping up the forehead, shaping up the sides and then basically creating a box guys and all depending on the customer, depending on the way their their head is Shaped you want to make sure that you're um, you know going up the way the head is shaped, so everybody will be different, so you can't shape up everything the same um and what we're doing right now is outlining the beard a little bit. So i'm gon na get the bottom part. I'M sorry, the side part basically create that shape, guys you're an artist create any shape that you want. Don'T let anybody tell you different, you can get advice from guys like us on youtube or other barbers on youtube, but in reality you're the creator, that's your canvas. You figure it out but again learn how to use those tools making sure the machine is make sure your machine is lined up, make sure it's not uh hurting anybody. These particular new baby lists. I said in my last video they're, very good guys. I haven't even have to had to adjust them, they're really really good, really really sharp. So i highly recommend these clippers and speed detail guys, like i said this haircut probably was a 35 minute haircut, but within the video it's about 10 minutes. So you want to be detailed. You want to take your time, especially if you're a new guy. Now i don't get too much detail on a beard until i use the straight razor, as you guys see me just kind of line it up with it with the with the outliner. I don't get too detailed, some barbers. Do i love to get detail with the straight razor? Of course that's just me. I want to line up under that mustache. Get that hair okay hit the top go lightly, make sure it's not uh hurting your client and we're gon na do is grab some easy blade. Shave gel and we're gon na go ahead and apply that. So this way the blade can glide this shave gel is translucent. You can see exactly what you're doing and you want to just basically stretch the skin angle, your blade out of 30 and just go over your work, guys pull that skin make sure the customer is comfortable every once in a while. Look at the customer's eyes. Guys. Look at his eyes see if he squints like you, could tell if you're hurting them. If they just look at the facial expression, you can see when you're hurting somebody. So if you are apply less pressure, you know it all depends on the customer. Some people's skin would be a lot smoother to use the straight razor on like this particular client. I don't have any problems, but then some people they'll be a little a little rough. You might have to apply more shave gel okay, so it all depends and, like i said, stretch that skin. If you stretch that skin and angle, that blade correctly, you shouldn't have any problems at all guys and again make sure you're using some type of lather. This is our shave gel. This is like, i said, pre-shave all your base really going to allow that blade to go glide guys, and this is what we have so after we shape them up. We have a nice clean, fade nice, clean beard and a happy customer guys again jay here from easy blade, shaving products. If you guys got any questions, comments comment below. Let us know what you want to see next uh we'll talk to you guys soon again. Jay here from easyblade shavingproducts.com talk to you soon,


Comments
Supreme Trimmer: That's a clean fadeKiller work
MA: That is great , what trimmer are you using?
awoke one: What trimmer are you using for his beard?
julio obando: Dope video bro!
IrishUwould: Do barbers hate when clients chew gum? I would
Eloise Daniels: Bright ❤❤❤❤❤
Nerdbama Rich: Fantastic haircut...