Reverse Balayage Technique | Low Maintenance Hair Color | Kenra Color
- Posted on 13 October, 2020
- Hair Knowledge
- By Anonymous
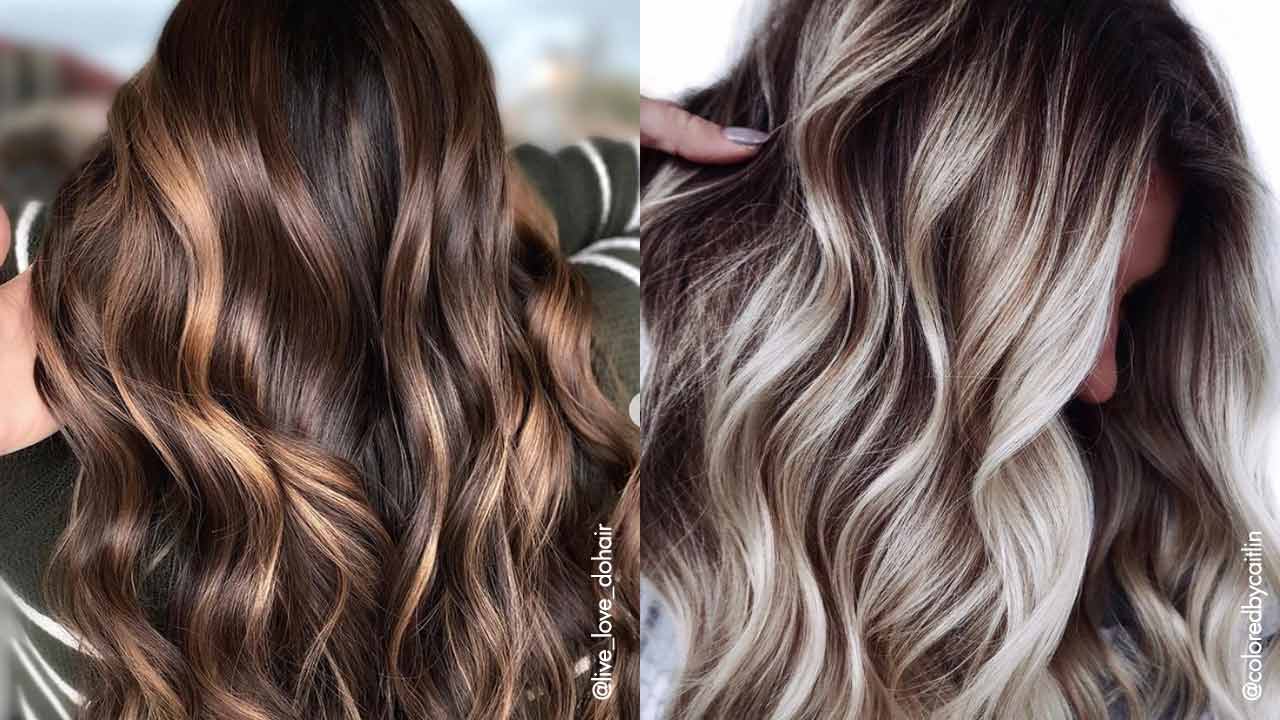
Learn how to transition a light blonde client into a dimensional low maintenance hair color using the reverse balayage technique.
00:00 Introduction
00:11 Consultation
00:41 Kenra Color formula breakdown
01:36 Sectioning
02:43 Color application
06:18 Toning + Kenra Color formula
07:02 Final result
If you enjoyed this video, make sure to give it a thumbs up and tell us in the comments below what you'd like to learn next!
SUBSCRIBE NOW: http://bit.ly/KenraProfessionalSubscri...
VISIT OUR WEBSITE: https://www.kenraprofessional.com
WANT TO WATCH MORE?
Balayage made simple: https://youtu.be/Rzm1jqw5KTo
Air touch balayage: https://youtu.be/lMDb3gGbRMU
101 balayage: https://youtu.be/rgs3jX91tC0
About Kenra Professional
We are a purely professional brand dedicated to understanding and serving today’s stylists. Our passion is developing best-in-class innovations, delivering superior and reliable results. Kenra Professional strives to elevate the stylists’ artistry and craft.
CONNECT with US
FACEBOOK: https://www.facebook.com/KenraProfessi...
INSTAGRAM: https://www.instagram.com/kenraprofess...
TIKTOK: https://www.tiktok.com/@kenraprofessio...
TWITTER: https://twitter.com/Kenra_Haircare
Reverse Balayage Technique | Low Maintenance Hair Color | Kenra Color
#balayage #reversebalayage #fallhair
Hey everyone, i'm kelly educator with kendra professional and today i'm going to be showing you how to transition a light blonde client into a dimensional low-maintenance color, using a reverse balayage technique. As you can see, this mannequin has a lot of previous highlights and a natural level. 6 regrowth my goal is to diffuse the regrowth into these previous highlights to create a lower maintenance color. I would also like to add some additional dimension throughout the mid lengths and ends that are solid blonde. To do so, i'm going to be doing a shadow root and low lighting technique called reverse. Balayage. Reverse balayage is a great way to transition clients from a summer blonde to a dimensional fall color for the shadow root formulation. I'M going to be using one ounce of six natural ultra ash and two ounces of nine volume. Activator six nua is one of my all-time favorite shadow rooting shades because it is the coolest natural color available in the kenner color portfolio. This series is perfect to use for maintaining a true cool result on a darker level, client, starting from post application, to fade out for my low light formula. I'M going to be using half of an ounce of eight gold, brown, beige and half of an ounce of seven brown beige with two ounces of nine volume activator. I have incorporated 8gb into my formulation because the gold brown base will be perfect to slightly fill the level 10 blonde that i am depositing on adding 7b to this formulation will give a beautiful beige finish. The brown beige series and the gold brown beige series are some of my favorites for low lighting blondes to prepare for this technique. I'M going to get my mannequin sectioned and ready for the color application to keep things simple, clean and time friendly. I am using four large quadrants off of my client's natural part, i'm going to create a line from the highest point of the head to directly behind the ear. I'M going to repeat this same section on the opposite side of the head. In the back of the head, i'm going to split this large subsection into two equal subsections from the highest point of the head down to the name. I have chosen to use demi-permanent color for this application, because my client likes to change her hair with the seasons and deli permanent is super gentle on her previous lightened hair. If my client had gray to cover or wanted a longer lasting color, i could definitely use permanent color for this application to begin this transformation. I'M first going to start with my shadow root. I have applied a foil with two small metal duckbill clips on the front. Two subsections, so when i start taking my subsections from my back two quadrants up and over during my shadow root application, the color does not bleed onto the front two quadrants starting in the top of the back right quadrant. I'M going to begin applying my six nua taking about a quarter of an inch diagonal partings, as i start to apply the shadow root as i'm applying this, i want to just barely drag it past that line of demarcation to blur out any lines from the previous Highlights it's important to make sure you're saturating the top and the bottom of each subsection. It'S also really important to not have too much product on your brush to make sure this application is super clean to make sure there are no harsh lines in the shadow room. I'M going to take a wide tooth comb and drag this color down slightly. Now, i'm going to repeat this same process on the other three quadrants and now for the low lights, i'm once again, starting in the back right quadrant. But before i get started, i'm going to give a generous mist of the porosity equalizing spray. This will help even out the porosity of the hair, as well as assure an even absorption of color. I really want to make sure i'm focusing this on the mid lengths and ends where the hair tends to be more porous for my low lights. I'M going to be using back to back thin diagonal slices pro tip when low lighting on a bright blonde use thin slices instead of weaves weaves are used to diffuse color throughout the hair, and when this is done on blondes, it can actually make the hair look. Darker than desired slices are a great option because they are older pops of color and will actually help make the blonde look brighter by giving the eye something to compare the color to. I want these slices to be thin enough that i can see my glove through the hair. Now i'm taking my low light formulation and i'm going to saturate from just below the shadow root down and then once i have a little bit of product left on my brush, i'm going to diffuse the line between my shadow root and my low light for a Seamless blend now i'm going to apply one more thin slice directly, underneath that foil still wanting to be able to see my glove through that subsection. Now i'm going to do this same foil pattern on the other three quadrants. Now that all the color has been applied, i'm going to process this for 25 minutes, i'm going to reach for my porosity equalizing spray to prep the hair for my toner, really making sure again that i focus this on those mid lengths and ends. This is going to help give an even distribution of my toner. To finish the surface, i'm going to tone the previous lightened hair. Today i will be using one ounce of beige, rapid toner and two ounces of nine volume activator. This is going to give the perfect beige result that will complement my shadow root and low light for my toner application, i'm focusing on the roots to mid shafts first and then i'll apply the color to the ends last because they are more porous and will accept The color a lot quicker, i'm going to let the toner process for a full five minutes and i'll be back with the result and here's the final result of my reverse balayage service. I love how i was able to take super blonde hair and transition it to a low maintenance, dimensional style thanks. So much for joining me today, as i created this look be sure to try this reverse balayage technique on your clients.


Comments
Bridgette Moreno: Love this! What’s the reason for placing two slices back to back? Does it give it a more bold look? If someone is worried about looking stripy would you weave these pieces or keep them slices?
Cynthia Tapia: Absolutely beautiful! Thanks for sharing this technique I learned a lot
A Acts: Absolutely love this technique. This is exactly what I was looking for for the same hair situation described.
Lori M.: Just amazing education! Kenra, you have stepped it up I have been trying out the Demi’s and Rapid toner. Love them! It’s great to see an American Based company Impress after many years of Super Pricey European brands, I’m liking my “ options” now. Thanks for such a straightforward explanation, with stunning results.
Kristy Vang: This is so helpful! I wish you would have shown how to do the front pieces as well, since it is the part everyone sees first.
Tracy Hultay Hicks: beautiful. and such an easy method.. will be trying this on my clients for sure. thanks!
LYD VINCE CRUZ: Beautifully done.Great job.Thanks for sharing your knowledge.I appreciate it very much.Your channel po when I mostly needed it.❤❤❤
Luna Linda: I’m not a hair stylist.. but I enjoyed watching this video! You did such a great job explaining everything I had to see the end product and it is amazing!
Thomas Dazoxa: Great tutorial, but I would not recommend permanent colour on the roots, as it is difficult to remove and will make highlighting difficult as it grows out. It's going to give you a lot more work as well as cause a lot of unnecessary damage since you have to bleach through permanent colour when they come in for another appointment. Permanent colour is great for on the mids and ends, but not on the roots. I would always use demi on the roots. Using permanent colour on a wig or manakin is fine, but not on a real person with hair that actually grows. Yes I know she used demi, but she also said permanent on the roots is okay, but it really isn't.
Maria DePietro: Stunning & amazing tutorial thank you ❤️❤️
Johanna Albright: Thank you! Appreciate your help! Great tutorial!
Dani Barce: Beautiful!! Just a question, doing the root like that would affect in any way if the client wants more highlights later and doesn't want to do a root retouch after this process? Would there be an orange band in the hair when bleaching again? Thank you so much
TMTLM13: I like your video! Thank you for doing a great job teaching this service!
Jenna Ross: Such a great tutorial!
Ten Lamps: Choosing a toner is always the hard part for me.
Maria Flores: Beautiful! Thank you
Rebecca Johnston: Would this technique work for clients wanting to go lighter from dark but keeping the dark root ? Looks a lovely colour and it’s exactly what she likes
Isabel Lopez: HOLA!! PRECIOSO EL RESULTADO DEL COLOR,,, GRACIAS
Starmane: Love it
Haley Sperbeck: Very nice
kimmie: Could you do a reverse balayage with just toner?
Tam Nguyen: Love it
Mika Anderson: Can I ask why you just didn’t grab just a thicker slice and saturate it really well instead of doing 2 back to back? That seems like it’s just working harder not smarter. Thanks!
Mel Fab: This is great! But I would never use permanent color through those ends, no matter what! :)
Dolsie Mercado: That came out very nice.
Ashley Hiles: Back in the day we used to call that a retouch in low light so confuse it’s just a fancy word for retouch and low light
Ashitny: can't wait for the opportunity to try this, unfortunately more often than not you hear "I want to go lighter" rather than "i want to go darker" :(
HeyItsLey: Can you use this same technique on level 10+ silver/white hair? I currently have white hair, and have for like a year now, but the damage is really building up and I don't want to bleach my roots anymore. I wanted to do a super contrasted look with a reverse balayage, but with black. But I'm not sure how I'd manage that considering I'd have to fill the hair first before I can get it to black ;_;
Sara Richardson: Great video! However, please, please change the music in future videos from this techno, perhaps use some peaceful instrumental guitar, literally made me want to turn off the sound for most of the video :)
Kay Marie: Whoa I know its styled and wavy but that hair looks much thicker now
Cynthia L: I love this process.. I use these products. But I do not like ash. A d would love one color up this looks dark. Maybe my tablet. Ideas. Xxooo
ElleGabri: Anyone else notice that the mannequin seems traumatized? Now I don’t know what’s better a faceless mannequin or one that looks like something really bad happened to it? I thought it would cheer up more after it got that beautiful #reversebalayage but it still looked traumatized. Guess that’s a life lesson, great hair doesn’t always fix everything but for people it really helps!
Shanta Shetty: V nice thanks some thing new
Sophia Marie: Video was so dark