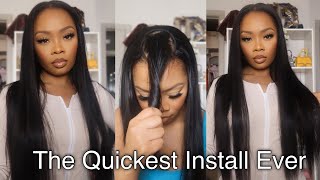
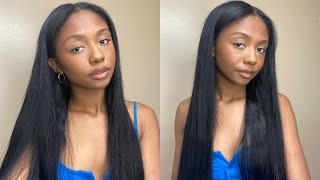
Wig Review: Thin Part Wig™️ Negative & Positive Reviews + Innovative Weaves Install Tips
- Posted on 20 April, 2021
- Hair Knowledge
- By Anonymous
In this video you will see both negative and positive reviews of the patent approved Thin-Part Wig. From their mistakes you will learn what not to do when installing. To properly install this wig you must follow our patent pending install method. This method is easy, only takes 5-10 minutes and will allow you to wear your own real scalp with no leave-out. The Thin-Part Wig should not be installed like a traditional u part wig.
Not only can this wig be installed with no leave out while wearing your own real scalp, it can also be worn with a thin leave out, a headband wig, half wig, half up/ half down, bangs and more. In this video you will see multiple styles featuring the Thin Part Wig. Visit the website or IG account below for more videos and details.
Website: InnovativeWeavesAndWigs.com
Instagram: https://www.instagram.com/innovativewe...
Featured Models
@sewwiggedout
@marykbella
@anouschkaangel
@contrise_yanfaye
@_crownedwithcurlss
Some models featured in our videos have received free products, discounted products, commissions and/or other financial rewards.
Copyright Disclaimer Under Section 107 of the Copyright Act 1976, allowance is made for "fair use" for purposes such as criticism, comment, news reporting, teaching, scholarship, and research. Fair use is a use permitted by copyright statute that might otherwise be infringing.
In this video, you will see both negative reviews of the patent-approved thin part wig, as well as positive experiences of the thin part wig from their mistakes. You will learn what not to do. As you can see. The hair on the left is not installed correctly, whereas the hair on the right looks fantastic, so we're going to show you exactly what to do now in case you are unaware. The thin part wig is a patent-approved wig that allows you to wear your own real scalp with no leave out, so you can have amazing gorgeous curls that appear to be growing right from your scalp, but you must follow our simple patent-pending installation technique. If you do not follow our easy installation technique, then the patent-approved thin part wig will not install properly so we're going to go over exactly what those simple steps are, so that you know what to do and what not to do when installing the thin part wig. You will see negative reviews and exactly what they did wrong and why their hair did not look like this, and you will also see positive experiences. So let's go ahead and get started okay. So this is a negative review, but it is one of our favorite clips to send to customers, because it shows them exactly what not to do so. First things: first, let's mention that she has an older version of the product where the top of the unit was a little bit bulkier because of the wig clips. However, even with that, it will still look 100 natural, but she installed it like a u-part wig. Instead of following our easy install method and listen, we know how tempting it is to just throw that wig up there like it's, a regular old, u-part wig, but no man, that's not how this wig works. It will not look natural. You have to follow our easy patent pending install method, and then you also have to prepare your curls in advance before installing you don't want to install it with the curls, as they are right out of the box. You have to co-wash and brush to really get your curls to pop and look natural. We will go over all this in the video, so you can make sure that your thin part wig does not look like this. This hair is the same version of the thin part wig. The first person has, which again is the older version of the wig and, as you can see, it looks natural. It appears to be growing right from her scalp, and this is because she followed our install method, so you must follow our technique and now we're going to show you the newer version. Okay. So this is the newer version of the wig as of august 2020, where the top is already flat, and you don't have to flatten it first first, she installs it just like the first person did as a u-part wig. So this is the result you will have. If you do that, but again, this is not how it's intended to look. It should look like the hair on the right. Instead, so we're going to show you why you need to follow our technique and not install it. The way you would install a u-part wig now on the left, you can see how unnatural the curls look. So you have to prep the hair in advance to make the curls look natural and to make sure the top of the wig lays down properly. You have to co-wash the hair and then use a denman style brush to bring out the true texture of your curls, make sure you follow this process and that you don't just wear the hair straight out of the box now. Another issue is that she did not properly prepare her hair. If you look at her hair, we can see that she does not have an anchor area at the top. So when she clips the wig on the wig has nothing to attach to, but both straight roots, and if it's attaching to flat roots, then the wig clips are going to slide away from your part revealing your own roots. However, the point of this wig is that none of your own roots should show. This is why her own roots are showing because she is attaching it to straight flat roots, because she did not create an anchor. So, as you can see here, you can see all of her own roots. You must clip the wig directly next to your part, so none of your own roots show. So let's show you how to do that. You start by taking a section of your own hair. This is normally what people will use to create an anchor braid. However, this does not work with an anchor braid so make sure that you do not add a cornrow right here. Instead, you over direct this section of hair and tease right at the root. This teased area is your anchor. This is what you clip the wig to this prevents the whey clips from sliding and revealing your own roots. Again, you don't want your own roots to show. So when you create this anchor and then clip these gorgeous curls onto this anchor area, none of your own roots will show, because the wick clips will not slide away from your part. The next step that you need to make sure to do is to tease the roots of the wig. The previous person did not tease her roots at all, and this is a vital step in the process, because teased roots will give you that natural root appearance so that it will appear to be your own natural roots, growing from your scalp, so make sure to tease The roots make sure to co-wash and brush those curls and make sure to create the anchor so that you too will have curls that appear to be growing right from your own scalp. Now, let's watch another first time user, who initially did not install it correctly, but she contacted us and asked for help within a few messages. We were able to assist her. This is an amazing product, but i didn't know how to take care of it at first. So it did not look okay. After watching the detailed video of how to improperly install it and prep the hair. I found out that i was doing a lot of things wrong. Like number one never tried to put hair on wet and my parts, they were always crooked. They weren't they had to be straight for this to work, and i would always put it too far away from our roots, like your roots, can't show that's the whole part of this is to make it look like your natural root. After watching the video uh, you know at night, i would wash the hair and conditioner, and then i would cake on this bad boy right here, use maybe like a quarter of the bottle, really section the hair and use a denman brush to really get those curls Defined and i'd, let it dry overnight so in the morning, if you really want soft curls, you just take each strand and just run your fingers along it and it like fluffens it up, and this is key. This is what you use to tease those roots right. There, because that's what it really gives you more of a natural root, look that is the key to making this bad boy. Look like your hair and it's absolutely amazing. Nobody can tell it's not so because she reached out for help. We were able to assist her. So, as you can see here, her part is not straight: it's very important that your part is straight, it cannot be crooked, and also the hair on the wig is wet. You can kind of see the water droplets here and the wet texture here. So this told us that the hair is wet. The teasing will not work if the hair is wet. Now this picture is the wig installed after we communicated with her to straighten her part and to also make sure that the hair is dry, and this is the result, it's absolutely beautiful and it appears to be growing right from her scalp. So if you want the results that these beautiful women have, who are able to wear their own real scalp with no leave out, then you must use our patent-pending method with the patent-approved thin part wig. And then you too will be able to wear your own real scalp with no leave out now. Of course, this can be worn with a thin leave-out as well. So if you're wearing straight textures and if you're wearing curly textures, you can choose to wear it with a thin leave out now, let's go over the technique for the thin leave out. So the technique is almost the same. Except now you are going to have a thin leave out, though you can also choose to make your leave out as big as you want, but the bottom line is that you are still going to create an anchor. You simply take the section up under your leave out and create an anchor by teasing your roots. This is important because you want the wig to be right up against your leave out. You still want the wig to cover the roots that you are clipping it to. So make sure that you create the anchor line up the wig right up against your leave out, and then you can begin to blend your leave out. Your leave out can be very thin as in 90, less than a traditional u-part wig, so that it's much easier to blend. Now when wearing a leave-out, you can wet the hair. The hair can be wet when you are installing it, because you do not need to tease the roots of the wig, given that you have a thin leave out. Look how thin her leave out is by the way, but because your hair is covering up the top of the wig, you don't have to tease the roots of the wig, so she was able to wet the hair, allowed it to air dry, and you can see Just how natural it appears with the thin leave-out, she then created two twists for an even cuter style. Now, let's get a view of how this looks with straight textures with straight textures, we still recommend that you create an anchor the same way. It will be much more comfortable and allow the wig to stay in position so make sure you tease the roots to create an anchor first and then your leave out can be 90 percent less leave out than a traditional u-part wig. This is a yaki course texture. We recommend leaving texture at the roots of your leave out, rather than making your roots silky straight. This allows you to wear less leave out because there is texture at your roots which blends with the roots of the wig. If the roots of your leave out are silky straight, then you will need to leave out slightly more hair. So in order to have the thinnest leave out possible, leave a little bit of texture at your own hair roots. Now one of the awesome things about having a thin leave-out is that when you wear a wig with color like this one, the leave out will look so much more natural. Look. How natural her leave out blends in with our honey blonde color, because your leave out is so thin at the top. It allows the color from the wig to peek through closer to the top of the wig, and it just looks very, very natural. It really doesn't get any more natural than this okay. So now, let's take a quick look at how to wear this wig as a half wig or headband wig. It'S very easy to do simply prep your hair, the same way that she has clip it on and then add a headband. It'S really as simple as that. So, as you can see, you can wear this wig in a variety of ways, including no leave out a thin leave out, half wig or headband wig, as well as half up half down. Let'S watch this half up, half down style right, quick! She attaches the wig to the back of her hair, pulls hair from the top of the wig into her bun to make the top bun bigger, wraps it around, and that's it half up, half down style. So, as you can see, the patent-approved thin part wig can be worn in a variety of very cute styles, from no leave-out to thin leave-out just make sure to follow our install method. However, if you don't follow our technique, then you will end up with the results on the left instead of the results on the right. This is why our very easy, install method is quite important. If you follow it, you too will have curls that appear to be growing right from your scalp for more videos subscribe to this channel, follow us on instagram at innovativeweaves and wigs or visit innovativeweavesandwigs.com for more details. Thanks for watching you

Comments
Innovative Weaves: NOTE: This method does not work with lace wigs cut down the middle, v part or i part wigs. As you will see from videos on knock off imitation “thin part” wigs, the results are not positive and resembles crochet, invisible part or worse. This patent pending method was developed for the Patent Approved Thin Part™️ Wig. Pls do not contact us for assistance on how you can make the imitation wigs work with this method. LEGAL NOTICE: Any video or content installing a wig exposing the real scalp in this manner are subject to legal action including being removed from social media platforms when the patent application on our wig install method is approved. Any company selling knock offs of our Patent Approved Thin Part™️ Wig is subject to legal action within 6 yrs from the date of infringement.
Nia C: The petty- professionalism we love to see I have the Jada and EVERYONE thinks it’s my hair !
Simone Brown: THIS is how you do an instructional video!!! Kudos
Angela D: I love how y’all explained this. The technique is really simple. It takes me maybe 5 minutes. But there have been times I’m in a rush so I just wear it as a headband wig. I love all my wigs from you guysCant wait to see what you come up with next ...no pressure haha...I’m very happy with the thin part...I just enjoy being wowed and thinking “now why didn’t I think of that” haha
sade watkins: Everytime I look at a video from this company I think of how Geniusly this wig is constructed. (I know that’s not a word but still) I also feel the price matches what is being sold. Please don’t be discouraged by people being frustrated by the price point because when I look at the expected longevity (which is most important), innovation and easy styling the price is more than equitable. This is a wig that I know my mom & mom in law can use without the disappointment of feeling like it ages them if that makes sense. I would suggest a payment option in the future though because it is hard to make such a large payment at once for most people (even me lol) But again this is a very equitable buy and shout out to y’all for patenting your design. It’s the Black excellence for me. Will definitely be purchasing in the near future
Drkay: I’ve been buying from this company since 2014 with the 10 minute sewin wig. Switch to the thin part wig 2 yrs ago and love it even more. My initial attraction was the breathability of the cap. It’s not mentioned in this video but it’s a huge plus for me. Regular wigs make me hot. Their units ware fully breathable. No cap or net or anything. Of course the no leave out is major but the cap is a godsend for me.
Antanisha Cato: After seeing this on fb and coming here to see this awesome tutorial, I am so convinced I want one of these wigs!
D A C: Wow! Major respect to IW for making a video like this! You guys are the real deal.
Kay: This is a genius invention
diamond morris: Love it Just need that wait time to come down
Lore Mertens: Beautiful! Still waiting for silkier textures to come out:-/
Elizabeth Burgest: I have this wig and it has been worth it to me, i really like the parting and it does look unlockable. It has helped me with my frustrating hair issues lol It is super thick too honestly if they offered 150 density i would choose that instead. The quality is good i feel like it looks better after like 10 wears than it did when i first wore it. I am going to keep wearing it then try to the kym unit.
Aaro Mattila: Blown away by what people come up with. Very cool idea
Administrative Account: I respect this video. Good job!
J. Bailey Beauty: Lol! Love this!
It's ya girl Angel Vonndrina: I wish i could get this today!!!! Cant wait until it's available to ship asap Amazing wig Wanted to but two but the shipping is too long
Say Brittaney: This video is awesome
Inanna: This video was very helpful. Im definitely considering purchasing however I'm interested in the differences in density with your products. I noticed a lot of people don't put the density that they got so I would love a video perhaps that shows the difference between a 180% vs 250% using different textures! It would also be nice if a more extensive breakdown could be offered regarding the benefits of picking a different grade.... Thanks so much. I'm always on the hunt to support black owned businesses!!! Thanks again
napeakor: Hello! What are the measurements of the large cap please? I looked at the size chart on your site, but only see the measurements of small and medium. I'm looking to order ASAP and just wanted to verify so I can purchase the right size. Thank you kindly! I'm so excited to place my order.
alexis howard: I’m looking for a Candice and Kayla comparison. They look very similar.
LaVawn Barnes👑❤: I went on the website and saw the wigs,which are already over $300, but you end up paying so much more. I can't see paying that much for hair...
Crystal Wilson: I thought this video was going to be about how to properly showcase a positive review, because the girl on the left is dressed down, and without makeup, and the girl on the right is dressed nicely, and with makeup!
Nervgirl1: What does the sew in process look like?
alexandra king: The install videos sent were very helpful. Knowing me I’d probably end up like the first person without it. Never been good with my hair or wigs but the videos helped a lot
Jaesha: Still waiting for a video of the Candace wig. My concern is some of these wigs are straighter at the roots so I can’t spend that much money without seeing what it looks like on someone. I need a wig thats the same curl pattern from root as it is on the tip.
Vixen Bow: Very nice unit and instructions, but not down for teasing my own hair. Seem damaging process over time will be the next complaints. Not to the company, but about breakage of their hair in that area. I will stay tuned!
girlonfire723: Can you create a part, separate the teased hair and add an anchor braid under under the teased hair? Or can this be sewed down around the perimeter.
KED 2010: Also, what is the style at 13:21? Thanks again!
Herman Flores: Is there a wholesale program available?
kennedy adams: Love, love, love mine!
Nya G: I bought the yaki true roots closure a while ago and I'm a little disappointed no demo was given for wearing straighter wigs/ closures without any leave-out. If I rely on this video, it only shows that you can only have a no leave-out with curlier textured wigs/ closures. I can't tease the roots of my yaki closure to make it blend, due to the texture.
A. B.: Do I need to also wash the straight wig first?
Ms. Around The Way Girl: When will it come in longer lengths, like 22 or 24 inch?
Jasmine Scott: Very professional. I’m looking to get a brown color. I’m having trouble finding videos. Do you have any available?
Isis Howard: Beautiful
Alexis Williams: Excellent! Which wig is 13:00 and also the main one shown on msrykbella?
Trinity Mitchell: Can you swim in this?
Kelley Neptune: Forgot hair pin method for straight textures
Elias Turunen: Big hair don’t care
Samira J.: can I custom order the jada wig in 14/16 inches?
Aniyah Scott: Which is the honey blonde wig? I can’t find it on the site.
Jessica McDaniels: Do you accept AfterPay or Klarna ?
soggyfroggy: So is this thin part wig secure, i.e. will it blow off in the wind? Also can it be sewn on and still look natural?
TechNOIRlogy: My issue is the hair tangled and shedded very badly during first co wash.
Amanii X: The wig should come co washed to wear straight-out-of-the-box.
History High with Lisa Marrie: Which wig is featured? I'm looking for a 4b texture but the length shown in the video. Would that be the Jennifer?
Lil_ ayss: Wish they had after pay
Kemi Obuotor: Can we get one for locs please
KED 2010: Hi! What wig is at 12:57? Thanks!
Gaelyn Watson: Can I straighten the curly wig?
altovise14: So this is a U part wig with clips
Hanne Goossens: Subscribed
Al Stew: Imma get my coins together and buy 2!!!!!
A Shade of Ebony: Please I need to see before and after washing on your website on all wigs. I want to purchase two of them but can't decide
taffypat12: This company is starting to look shady to me. No one is replying my emails and my other comments on sew wigged out's channel get deleted. Buyer beware! I paid nearly $700 and absolutely no communication from the company
C. Williams: I am definetly interested in buying a thin part wig, however, would you guys ever do/allow payment in installments like quadpay, klarna, etc?
Emma Peeters: Is the honey blonde available in silky instead of yaki?
Tonia Large: Is this black own?