Very Detailed & Natural Frontal Wig Install For Beginners From Start To Finish | Klaiyi Hair
- Posted on 28 May, 2021
- Hair Knowledge
- By Anonymous
Use Special Code Get Extra 12% OFF: KlaiyiYTB
●▬▬▬▬▬▬▬▬▬♛ KlaiyiHair ♛ ▬▬▬▬▬▬▬▬▬●
I'm wearing 26"HD 13*4 Lace Frontal Body Wig:➤https://bit.ly/3bkpfsp
https://www.klaiyihair.com/ ➤Hot Sale Wigs: https://bit.ly/3mgV3m9
Must-Have 13*4 Lace Frontal Transparent Wigs:➤https://bit.ly/3o9y0L2
Sezzle Klaiyi Hair Now. Less than 15 Bucks 1 week!
New Trendy Lace Part Wigs:➤ https://bit.ly/39yCncz
Affordable New Fashion Headband Wigs:➤ https://bit.ly/3mnnkaL
Big Sale!!! Affordable Youth Series Hair:➤ https://bit.ly/3fEh9Om
Klaiyi Hair Official Website:➤ https://bit.ly/3wkl88y
Aliexpress Klaiyi Hair Store:➤ https://bit.ly/3sOzPOT
Amazon Klaiyi HairStore:➤ https://amzn.to/3jeMnug
YouTube "Klaiyi Hair":➤http://bit.ly/2zpjQhu
Instagram "@Klaiyihair_no1": https://www.instagram.com/klaiyihair_n...
Facebook "@NO1KLAIYIHAIR": https://www.facebook.com/NO1KLAIYIHAIR...
Contact for Wholesale: +86 18864600633 Email: [email protected]
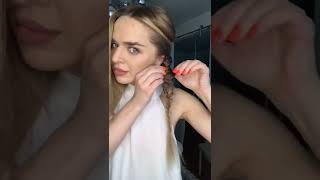
So what is up africana fam? It'S your girl, younger for kind of back at it again with another video today i'll, be showing you guys how to do a full install from start to finish how to style your wigs curl, your wigs, install your wig. Do the ball cap method, everything i'm showing every little nitty-gritty detail and also showing you guys, tips and tricks and things that you should avoid while doing the install there were definitely a lot of mistakes that i've made in this video that i want you guys to Learn from so i went ahead and posted this just to be a little bit more transparent about my work and also too that not everything is perfect. So without further ado, if you want to see how i achieve this look then keep on watching all right. So the first thing we're going to go ahead and start doing is styling. This hair is sponsored by clay hair. I have their 13 by 4, hd lace, frontal wig and the density is 180 and i got it in 26 inches so yeah. That was a whole mouthful, but we got in tune so the first thing i'm going to go ahead and do is just start. You know parting, my hair into a side part. I kind of wanted to go for like this sexy voluminous curl vibe. I feel like whenever i do curls. I always do a middle part, so i wanted to switch it up and go ahead and do a side part. So i transferred my wig from my head onto my mannequin head and i placed it on my mannequin head just so i could get like you know the back section of where i cut um, some of the hair horizontally just to cover up the tracks, and i Used my cara care wax, stick just to tame the flyaways and to just get the hair nice and laid, and right now, i'm using my hot comb, i'm using my hot comb on this hottest setting and i'm just going to go ahead and just press out that Hair, you guys want to press out everything and i did bleach the knots. One thing that i would definitely say is that if you notice that you're not just a little bit black and you plan on tinting your lace with a lace tint - which i did please make sure that you dye your knots like a nice brown almost going to Like a golden type of color, i definitely noticed that my knots were still black after the first thing that i bleached it. But i didn't go ahead and bleach it a second time and that kind of messed me up a little bit, because you know my knots ended up being black still when i tinted it, but that's beside the point i'm going to go ahead and just blow out The waves from the hair, the hair, was a little bit wavy, so i just want to kind of comb out those waves. Just so i could have the hair pretty straight, but still puffy enough, where it could hold a curl. So i'm just using my wig brush and i'm using my blow dryer on the hottest setting and i'm just going to go ahead and blow dry that hair and it doesn't have to be bone straight like i've said before it does not have to be bone straight. But you just want to make sure that most of the waves are out and now on to the curling when it comes to curling, you want to make sure that you have beautiful layers so right now, i'm cutting some inches off of this wig, i'm not going To lie um, you don't have to cut off inches, but i wanted to go for like an extreme layered. Look so inches had to be cut so right. Now, i'm just going to go ahead and do my base cut to see where i want it to be. You know cut at in general before i start going in with layers, so i'm kind of just taking off some inches and cutting straight across and i'm using these shears and i'm kind of cutting up in an upwards motion. But still in a straight line as well. And i'm going to go ahead and do that all around the hair until the hair is nice and even and to the length that i want it to be at so now that i have my base cut now we're going to go into layering so right now. What i like to do is i like to start where um you know my fringe bangs are going to be. I like to start at that area. First, just so, i could get a general idea of where i want my layers to start at and then i just follow suit all around the hair. So right now, i'm just taking a piece of the bang that i you know gon na. Do my bangs at i'm, taking my razor comb and i'm just razoring off the hair just to give myself some nice beautiful layers and right now, what i'm doing is. I'M just going in a diagonal motion, so every time i gather hair, i kind of cut where i last cut out from the original part. So again, when you're cutting the hair, you want to make sure that you're using your first cut as your guideline and then just cut diagonal when you go around the hair, so you're almost cutting it in a v. Hopefully this is making sense. I'M not rambling too much but yeah. You just want to make sure that you cut where you last cut out when you're going into your new section and just cut in a diagonal motion going downwards and again just layers just give your hair a fuller. Look. Your curls are going to be more voluminous and i just feel like it's necessary when you want like big bouncy curls like you just have to do layers so now i'm going to go ahead and go on the other side and then start my layers and again, I'M just going to go in a diagonal downward motion and then i'm going to gather some hair and then you know cut where i last cut at so again, i'm just using where i last cut out as my guideline to cut further around the hair. As you guys can see, i'm going to go to the longest part of where i last cut at and then start cutting diagonally down with the new section and now what i like to do. Is i like to clean up a little bit i like to take my hair in big chunky, vertical sections, and i like to go in with my shears and just you know, get rid of any of the dead ends. This is really just like the clean up process of it because i, like my ends very full, so we'll recur my hair, my hair just looks lively and not dead, now i'll be using my garnier fructis um anti-frizz serum and i'm just going to go ahead and Just run that throughout my entire hair make sure that the hair is nice and moisturized and protected before we go into the styling. Now i like to work in sections and what i'm going to do is start in the back. I'M going to pin up the rest of the hair, so we can start curling and the sections are usually about small to medium. I'M not going to go track by try curling the hair. That'S that's a little crazy, but i took about probably a good two or three tracks for each section, just so that you know it's nice and full. I get full voluminous curls, but still the entire hair is still being curled. Hopefully that makes sense, but i'm just pinning the hair, as you guys can see, i was struggling pinning the hair, but we move we move now, i'm going into my babyliss curling iron. This is the titanium curling iron and the inch is one and one half inch and what i like to do is i like to curl my curls away from my face. So, as you guys can see right here, i'm going to go ahead and curl my hair away from my face, and i like to put the curl in my hand and let that cool off my hand do not drop your curls immediately. Please and i'll drop your curls immediately. You want to make sure that after you finish curling you let go of it. You have it in your palm. Let it cool for about 10 to 15 seconds, and then you release because again, like the curl is still hot. When you like, you know initially take it off the iron, so once you just drop it like you know, gravity defies itself you guys what what's up must come down. So all the heat is not gon na be retained and your curl is just gon na drop. So again, once you finish curling, let that sit in your palm for about 10 to 15 seconds. You know cool it off, maybe a little bit too hot, but just cool it off bounce it around and then release and i'm just repeating the same exact process around the hair. Again just curling away from the face, letting that curl sit in my hand. Let it cool off bounce it around, because it gets a little too hot and then just release now, usually when it comes to curling, especially when it comes to the frontal i like to leave the frontal for last so um, i'm curling the frontal. Now in sections and what i'm doing is again just curling away from the face, and overall these are like the finished results. You guys we're now going to go into the ball cap method. So now my braids is already done. I already got my meek mills in they're, a little old, but don't judge y'all, don't judge. Now what i like to use for the ball cap method is my fave, which is the both hold liquid glow in it. It is from the hair diagram. This stuff is the truth y'all. So what i like to do is you want to make sure that your edges are nice and you know slicked back so you're able to do your ball cap method and i like to go in sections use my edge comb and just you know, brush my hair Back hold my hair in place and then use my blow dryer on medium heat, just to mold it in place, and when i tell you guys this works, it works because my hair is pretty coarse and i haven't gotten a perm in a minute. So yeah just know that you know this stuff definitely do work when it comes to slicking your edges and it's not going anywhere either and again. You just want to make sure that all your hair is just you know, tucked away just so that your hair doesn't get caught up when you're doing your gluing method, because again glue is not made for your hair. It'S made for your skin, so you want to make sure that everything is nice and tucked away, so your edges are protected and this is why i have edges still, but now on to the ball cap method. I am getting a ball cap and it is recommended for you to get a ball cap, that's closest to your skin tone, but unfortunately i did not have that on me. So i'm using this one that i have and i'm gon na use makeup to tint it to the color of my skin. But before i go ahead and do that i like to cut out my ear um tabs or ear holes. I don't know what to call it, but yeah i like to cut out the ear section just so that the wig cap is nice and flush to my skin, and you know we're getting everywhere when we're gluing it or gelling it down. So ken just make sure that you're cutting out the ear sections and don't mind if you see the wig cap kind of shredding a little bit that just usually happens as long as it's not you know, shredding towards the front. You should be fine, but now i'm taking my uma beauty foundation in the color t2n and i'm using my foundation brush and i'm just you know, using my foundation brush and just tinting the wig cap to the color of my skin, and i like to outline exactly Where my hairline is at so when i'm gelling it down, i already have an outline and you want to make sure that your wig cap is about your shade or shade darker, never lighter, especially when working with hd lace, which i am working with. You want to make sure that your wig cap or your ball cap is always your skin. Color are darker. Now to gel down the wig cap. I like to use the boldhole liquid gold again and i'm just going to go ahead and put that around the perimeter of my hairline and i'm using my hand just to smooth it out. You want to make sure that it's nice and smoothed out like how you would with glue just so that it dries properly, and you know it's nice and flat as well too and again. I just like to do this in sections just because it's easier for me. Now, where i really like to focus at is the air area that was weird, that was a weird tongue twister, but the ear area is where i really like to work at and make sure that there's gel over there too. Just because that area is more prone to lift up, i like to put a little bit. You know just a little bit more tlc on that area and make sure it's nice and dry before i cut it off, and this will just help you, you know, have a flawless and foolproof wig cap or ball cap method, and after i'm done with this process, I usually like to air dry or blow dry on medium heat, just for about a couple of minutes and stuff, and you will feel once it's finally dry once it feels very hard and it's not wet around that area um. But now what i'm doing is i'm cutting my wig cap in slits and in sections i like to do this more so because i feel like when you just cut all at once: one size, 10 shift, and then you know your wig cap starts lifting. I feel like this process is a lot more easier, more foolproof, especially if you are a beginner. So i like to cut you know in sections and i like to cut upwards in the middle, and then i like to use my eyebrow razor and i'm just cutting off the excess wig cap. And i like to lift up gently just enough for me to see where my gel um you know ends at i like to cut right along where the gel is just so that it's nice and seamless, and i'm just going to do this all around the perimeter. Now i like to take my shears and cut off any of the excess cap that i have lingering around that i don't want, and this is how i do my wig cap method. Now i don't know if you guys know this, but you do see a little white cast around the perimeter of my wig cap. So i like to go back in with my foundation brush and using just the remainder on the brush. Just to you know, conceal that and make it look flush to my skin tone as possible, and this is how i do my wig cap method. Now you can sew the back if you want to, but i didn't do that and it's perfectly fine. It won't lift up, but now onto the install i like to go in with my 91 alcohol and just an old t-shirt or you can use dry, wash cloth and put some alcohol on there. And i like to go over the perimeter of my hairline as well as where my ear tabs are twice just so i get rid of any dirt or oils. That'S on my forehead just so that we can have a seamless install now, i'm just going to go ahead and put on my wig. Like i did say earlier, i did tint my lace and i tinted my lace with the amazo bay uh smeared lace tint in the color mocha, and i did three layers of this, and this is the color that i got and in between each layer. I make sure i let it dry in between for about 15 to 20 minutes before i apply the next layer and i did cut off my ear taps off camera. There wasn't really much to cut off it's just literally lace, because i have a big old head, but what i did just now is: i just cut some slits right where, like my temple area is at and i like to flip the wig upwards, you want to Make sure that the wig is positioned exactly where you want it to be glued at before you go ahead and flip it up and prep your hair for the install, but now for skin guard. I'M using my erica j hold me down skin guard and i'm doing that around the perimeter of my head twice and i'm matching it with the hold me down adhesive, and this is the watermelon scented one and i'm using two layers of glue. Now, if you're, looking for an extreme and long hold three to four layers, would be your ideal amount of layers that you want to do. But since i'm taking this wig off like right after i'm done with this video, i'm only doing two. Just for the sake of you know time, and i don't want it to be just you know stuck on my head forever, so yeah, i'm gon na go and just go around right around the perimeter and like right where the wig cap stops at now. I'M going to go ahead and take my rat tail comb and use the metal tip. As you know, my spatula for this glue and i'm just smoothing it down on my skin and you guys for a flawless install. You want to make sure that the width of the glue and i'm not saying like the amount of glue, but the width of the glue, is big enough. That'S why i like to put it right directly on my wig cap, so i have more room to put some on my skin as well and again you just want to make sure that you're taking your time while doing this and as you guys can see, i, Like to place some of that glue, a lot of glue on the wig cap and then a bit on my skin, because the wig cap is kind of serving as a replacement for the skin, because wig caps do not produce oils. So, that's why it's good to do the wig cap method and um yeah. You guys! You just want to make sure you have a nice width so that the hair could stick on to the glue and it won't lift. Now you want to make sure that your first layer dries completely clear before you apply your second layer so right now i'm going to go ahead and apply my second layer, i'm going to do the same exact thing that i did for the first layer and again You want to make sure that this second layer or your last layer dries completely clear before you go ahead and apply your lace onto the glue now. One thing i want to talk about before we go into the next segment is um wig size, so this wig size was a 23.5, which is my circumference, but i personally feel like it didn't fit my head. It was a bit just a little bit small and i had to put on an elastic band just so that you know the lace won't go anywhere, but i feel like in the long run. I ended up suffocating my head. You guys um, so i feel like at a certain point you kind of see like an indent in my head, because the wig was a little bit too tight. So for my beginners, please make sure that you're getting a wig that fits your head to the tee. You guys it doesn't have to be snug. I would rather go for something that's a bit bigger than me, then, for having a small wig. You guys like that, really do make or break your look all right. So now that the glue is now dry we're going to go ahead and place our wig, i like to place my wig in front of the glue not right on the glue but right in front of the glue. You want to make sure when you're placing it where you're placing your hair, you don't see any type of glue peeking through the lace at all. You want to make sure that the hair is over the glue and the reason why i do this is because i rather go in and fix you know any loose lace or any lace. That'S flapping around then for me to clean up glue, because cleaning up glue is a headache you do not want to do that so again, for my beginners make sure you placing your wig or your lace right in front of the glue, and i like to use My hands just to kind of press it down, even though people say: oh no, your hands are oily clean, your hands before you go ahead and do this i feel like it gives it a nice snug feel and overall it just feels tight when you do this. Um, but yes, so now on to my first section, i like to work in the middle section and use my eyebrow razor just to cut off the lace, you want to make sure that you're cutting it in a jagged motion. You don't want to cut it straight across and yes, but okay, so now, let's get into details real quick, you guys. I don't know if you noticed, but one thing i definitely didn't notice is that this lace tint, is my color, but the reason why it probably appears to be a little bit darker is because the nuts turned back to black when i used the lace tint. So you want to make sure that your knots are nice and bleached before you go ahead and apply any lace to, and if you notice that your lace tint turns the knots a little bit darker go back in and bleach your knots again. Because again, you do not want to deal with this, because everything about this install was perfect, except for that and then the wig being a little bit smaller than my head. So those are just like my mistakes that i've made when doing this and um yeah. I hope you guys learned. Listen, i've been doing. You know, lace for some time now and every single time i get a different wig. It'S always a different result, and that's just sometimes you're gon na have to deal with that. You know whether you're professional or not, but right now what i'm doing i'm just cutting around my hairline, i'm as close to the hairline as possible, and now i like to go ahead and detail, and this is really where the trust the process comes into play because At first, when i was looking at this, i'm like yo, this wig is looking kind of crazy. I'M not gon na lie but trust the process. You guys trust trust, trust the process. I was really about to give up myself like okay, no i'm not filming this anymore, like i, don't know what to do. It'S not coming out how i wanted to, but trust the process and keep on watching. You guys are going to see that indeed trust the process, but right now i'm going in with my rat tail comb and i'm just detailing i'm going in section by section. So i like to work on the middle section first and again just using two layers. While i'm doing my detailing with my rat tail comb and letting it dry completely before i place the lace onto the glue and i'm just doing this all around the head, so i'm not going to speak too much. You guys are going to watch and learn and now i'm doing the same thing on the side, just lifting up the lace, placing the glue where the lace is supposed to be at doing two layers and then putting the lace into the glue once it's completely dry And i like to use the teeth of the comb just to kind of press down the lace in to the glue, and now i'm just using my hot comb on the hottest setting and i'm just pressing down the hair. Just to see how i'm gon na get it formed and stuff, as you guys, can see internally, i'm panicking because i'm just like yo what's going on over here, but again trust the process, but i'm just pressing down the hairs because it looked a little bit too Bulky and now i just noticed that, like the hairline was looking a little too dense. So i like to do. Is i like to use the teeth of the comb and just press down onto the lace, while i'm plucking, so that the lace won't lift up? While i'm plucking and i'm just going to go ahead and pluck around the hairline just so it could be a little bit less dense because it was just too dense for me and now you want to make sure that you just comb out your hair just to Get rid of all the hair that you plucked out and, as you guys can see, it's looking a little bit better, but now what i'm gon na go ahead and do is just you know, start you know playing around with the part making the part. Looking a little bit more crisp and also ended up um plucking a little bit of the part as well too, but now onto the baby hairs i like to cut out my baby hairs, i'm doing two baby ears on each side and again i'm just going to Go ahead and just press out that hair, i was pressing on my hair a lot in this video and now i'm just going to go ahead and take out the baby hairs on the other side and for your baby hairs. You want to make sure that you're, using your hot comb and just pressing on your baby hairs just to train them downwards um. This is very important just so that your baby hairs don't be sticking up. You do not want that. That'S not a cute look. I guess i mean teach his own. Everybody has their own definition of cute, but yeah. I want to make sure that you press down those baby hairs, but now onto the melting process, i like to use my spritz from fantasia i like to use that around my hairline to kind of melt that hairline and i'm going to go ahead and just kind Of dry it off, let it air dry and now i'm putting up my hair. So i can use my elastic band just to uh. You know melt the lace a little bit more and i like to leave this on for about 15 to 20 minutes. So, as you guys can see, i got a little occupied within those 15 minutes and did my eyebrows off camera. But now i'm taking it off and, as you guys can see, it's a lot more melted into my skin. And now i went ahead and do my makeup and i'm going in with my concealer just to um define my part. I feel like this also makes it break your look as well too so go ahead and do that for my lovely beginners. If you're trying to go for a very defined part, and now i'm using my carry care wax, stick and again, i'm going to go ahead and press this bad boy out, just because the elastic band left a little bit of an indentation. You want to make sure you get rid of that. So just know you're going to be using a hot comb. A lot and a hot comb really makes you break your look as well too, but again, i'm just using the caracara wax stick around my hairline, not on the baby hairs just around the hairline, i'm going to go ahead and press that out. So it gives it a nice sleek and flawless. Look now, i'm using my eyebrow razor and i'm gon na go ahead and cut my baby hairs about an inch, long um. I rather you cut your baby hairs a little bit longer and then you know cut in between. If you feel like it's a little bit too long, then for you to cut it short, because you can't stick back on hair and for my tendrils aka, my ear baby hairs. The guideline i like to use is like to cover right below where my earlobe hangs at that's like my guideline. When it comes to cutting the earlobes, i'm not cutting the earlobes. Oh, my gosh just keep what i just said: cutting my tendrils all right now on to the baby hairs, i'm doing the arrogant method of baby hairs. So i'm taking my bed head flat iron. I believe it's in 3 4 of an inch and i'm just curling inwards. You want to make sure you get real curly with this. You guys get real curly with this one, i'm just going to go ahead and curl it around and i feel like this is so beginner friendly. Just because you don't have to use no mousse or anything, and then you know your lace start lifting and stuff. This is very easy and your weight, your lace, will not lift. So now i went in with my s got to be spritz. My spurs my gossip spray and now i'm going in with my baby hair comb and i'm going to go ahead and just you know play around with the baby, hair and just kind of form the baby hair, and this is super easy. I don't know why. We didn't learn this like a long time ago. This is definitely a game changer i'm going to go ahead and do that all around my hair and you guys these are the finished results. I hope you guys learned a lot from this video. Like comment subscribe to. My channel, if you have not, please go ahead and do so and i'll catch you guys in the next video now watch me film myself and look good later. You

Comments
Young Africana: Hey Africana Fam ‼️ Leave A Like On This Video And Comment Some If Youre Feeling This Look
K D: For those who missed it. The tint is called "slay yo Bae smeared tint in mocha " took me a sec to hear it. Just bought some it's on sale right now
Sydney B: This hair turned out SO beautiful
Bre lindz: So down to earth, I love it . Your makeup and hair turned out beautiful
Fatmata Conteh: Nah I love how she doesn’t hold back on the lowkey tips/ reminders! WRKKKK
Dajanay White: The whole time I was watching I'm like "her skiiinnnnnnnnnn!!!!!!" Beautiful!!! And the hair looks bomb too lol
NurseTammiMonique M: You did a amazing job the hair is beautiful, You did a perfect bold cap method. Love it thanks for the tutorial.
As Told by Victoria: Literally this is one of the BEST wig tutorials on YouTube I've watched, thank you!!!!!
Kwene Denise: Beautiful install Your hair and make up came out flawless! I’m definitely trying the tips you shared.
Jasmyn Destine: Loveeeeee this install! Definitely trying your tips and tricks for my next install
Posh Ivy: Sis, you always understand the assignment! A+++
Tara Fleming: Lord you have come such a long wayyy gooo girl ✨✨✨
Melanie Santana-Sanchez: You make me feel like i can do this thank you!!!!
deexma: This look is gorgeous and you look beautiful! Thanks for the detailed tutorial I learnt some tips. ❤
Patricia Andall: One day are you able to do a hair tutorial how to reinstall used wigs please and thank youu
Fairies of Kay: So bomb and so well explained ✨ yasssss Queen
Nana Marfo: This was beautiful as usual!!! Do you do installs on other people? If so, I would love to utilize that service for my bday in August !!!
Sammy Da Goat: Showing You Love And Support From Virginia I'm Obsessed With This Loving The Whole Look
Evette Jackson Collection: Very Pretty! I struggle every day to get my wig installs to look this good. I am about to try this so wish me luck. lol
allondria smith: Can you please make a video cutting off the ear tabs and securing the bag of the wig and wig cap? Also great video I learned a lot! I will be trying this next month for my birthday I’m doing my own hair! Lol pray for me
Shareka Ray: Thank you so much. So detailed. Can't wait to try it. Does it matter if foundation to color the wig cap is liquid or powder? I have spent so much money with beauticians and mad each and everytime because they didn't know what they were doing.
Tamara Marsico: Yesss beautiful Slay glad you made this video. ❤right on time ⏲️.
Jahnell Rich: I don’t even wear wigs. I might one day. But your videos are nice and therapeutic for me so. And I’m learning how the wig install process go though.
Mandy Bruce: The best video yet! Thank you from a beginner!
Mᴇʟᴀɴɪɴ Mᴏɴʀᴏᴇ: As you do every time...slay'd to thee gawdz hunny ♀
Shelby_NS: We need an eye makeup tutorial
Léa M: Hey, I have a question. Do you let the hair glue air dry, or do you use a hairdryer? What is the best way to let the glue dry? Much love, from Amsterdam
Mrs. Moore: You are absolutely Gorgeous Sis! #cholcolate! Great job!
K D: Thak you Vivi bby your shit is always popping. Doing it for the dark-skinned girls
Foreign Queen: You never disappoint
Ayana: so informative! you've changed my wig install game.
supermzbee: This was so good
JONCIA JOHNSON: You slay sis!
ROXAAN ROXAAN: Thank you for these beginners friendly videostheyre really helpful
Talonda King: Girl you slayed this
Dayana: This is beautiful
Valerie Dews-Farrar: Classy and Stunning! Some of the women making videos use profanity. I even saw one girl who said she just had a baby vaping on her video. My teenage daughter turned it off. You are a fabulous example of Black Beauty! Stay blessed and keep your high standards. We need them!
Brittany: Kilt this look
hennieex3: Soooo perfect
Phoenix Rising: I gotta say I'm not even disability y this girl you did a phenomenal job hair and make was on point.. Like what colors did you use as your eye shadow base? because it was blended in rhe most lovely of colors So, living for this look and I'm definitely a fan for this and thanks for sharing chika. You are beyond B.E.A-utiful
Mommy & Me "Natural Beauties": Now why this video doesn't have more than 3.7K likes...I have no idea, bc this young lady took her time and explained e-ver-y-thing. She did an EXCELLENT job.
Michelle Bryce: New to wig installs.... so wish I watched this before I installed my new wig for the first time on my own this morning.... literally going to take it off and re do it now loool
Monievia Williams: Omg this is soooooo pretty you did that
LuxurCr3 Tv: Forget the wig can we talk about that beat face
Danerra Grahn: Thank you! That was helpful
Chelsea J: Heya, this install was lovely ! What curlers did you use please? thanks xx
Leandrea Williams: Your ebony skin just glows so beautiful without makeup.. you are beautiful and blessed!!!!
Jocelyn F: the best application i've seen, you're beautiful; hair or no hair.
Danna Atkins: Very detailed and a fantastic job done!!
R. Wright: You are stunning!!!
simplybri: You are beautiful sis ❤️ this came out
Penelope: Ummm your skin is unreal ❤ You literally look like a doll sooo beautiful sis HAY WHAT'S ON UR EYE LIDS??
BVR WIGS: You take my breath away.
Pearl Patrick: Love you so much ❤️ all the way from Botswana
Jazzmen Rain: I can watch it a hundred times and still fck it up. Lol, But flawless job well done gurrrrrrrrl!
AnewowHeadwrap: You are so beautiful. ♥️
Lanor Ryder: GREAT baby hair slaying method!!!!
Tijuana Skky: Slay always ❣️❣️❣️
Chan Deborah: You are very pretty. Thank you! and I love your eye brows too!
Olomiyesan Omowunmi Martha: You did it so well honey
Nichelle Loh: U did a darn good job ! Very pretty !
New Beginnings With Eve: You did that Girrrlll! Beautiful
New Beginnings With Eve: You did that Girrrlll! Beautiful
J B: Your hands are blessed!
AaliyahV: The way you explained this imma try it out because I’m terrible at installing wigs but you you’d be a great teacher
Jamilla Harris: You definitely SNAPPED! I will be using this tutorial
Fatmata Conteh: this looks so bomb!
Collins Lily: Your video is great! ! ! Have you worn Asteriahair's wigs?
Jericee Mitchell: Where do you get the band to tie down your lace?
Cheridan Kennon: It’s the Nails for me!!☺️
Koconut Kirby: Very arrogant tae ❤️❤️❤️ gorgeous
G3na D: You look amazing as always
Aleshia Trench Coat Treasurz: Yesss ❤️❤️❤️
queen Purifoy !: Beautiful ❤️❤️❤️❤️
Simita: Amazing!!!!
Victoria Caine: I ordered mine from your link in 16" and it came with two short pieces in the front like weird bangs. I think they thought thats what people want for baby hairs. I would have loved to get the same wig that you got. I'll have to send this one back unfortunately.
Kiera Kouture: Your skin is soo beautiful!
Zavia Walker: The nail change, I didn’t even realize
Nashara Cockrell: She is beautiful wow! :)
Pauline Zanga: What about using water instead of 91% alcohol? Btw great video ❤️
Fit Pitt: Baby girl, you are gorgeous! Awesome video!
ladyj40: Beautiful but way to much work for me whew❤
e Enny: What lace tint do you use? Not sure if you mentioned it
Holly Golightly: Dope! thx
Jackie Burns: How long does this stay on the head before you need to reinstall?
Kersha Beaver: Nice work as always
Cherry Love: I love your skin complexion melanin queen fr
QueenCoCoaMocha: I thumbs up on the thumbnail...sis, I'm inspired
Belissa Adames: STIFF WHERE?!?! She killed it ‼️‼️
Trinity Fayth: any alternative to the bold hold liquid gold? its sold out everywhere
its_ zaniya: so pretty
Colorme Stylish: Beautiful
its clarice: Wow amazing i am learning here
ASTERIA HAIR: Yasss!
Taylor McDaniel: Can you do this makeup look too please!
DiorDaDon🪐:
Nashaa Lovee: Sooo Gorgeous
Dorothy Whitfield: Beautiful
Yomi: I love you too much at this point lol
Noreen Leak: I ordered this hair after watching your video and I just received it today and my wig looks nothing like what you unboxed. It’s not HD, they tracks are spaced far apart, and the lace is not HD like they gave you. I’m kissed because I really wanted to tag you and slay this look