Melted 613 Wig Install | Amazon Best 613 Hair | Blonde Wig | Hallie Symone
- Posted on 14 September, 2021
- Hair Knowledge
- By Anonymous
Melted 613 Wig Install | Amazing best 613 hair | Blonde wig | Hallie Symone
Thank you guys so much for watching! I really hope you enjoy this type of content because I have more tutorials coming soon. T-Part Wigs are limited lace which means you have to style it differently from a 13x4 Lace Frontal. Please be mindful of that when purchasing a T part Lace Wig.
Don't forget to SUBSCRIBE❤️ NEW VIDEOS TWICE A WEEK ❤️
https://www.youtube.com/channel/UCsIBc...
Here's more of my videos
MY MIAMI BIRTHDAY TRIP VLOG: https://www.youtube.com/watch?v=Hzb_JC...
MELTED 613 T-PART WIG: https://www.youtube.com/watch?v=ItLMRX...
PURSE SHOPPING HAUL: https://www.youtube.com/watch?v=8KIgmL...
HOW TO CUT OFF FULL LACE WIG: https://www.youtube.com/watch?v=IhGe_A...
Items that I used in the video:
LACE GLUE:
https://www.amazon.com/Bold-Hold-Extre...
WIG:
https://www.amazon.com/LUMIERE-T-part-...
FOUNDATION:
https://www.sephora.com/product/lumino...
GOT2B SPRAY:
https://www.amazon.com/göt2b-Glued-Bla...
Email: [email protected]
Follow Me On Social Media:
Instagram: @Halliesymone
Twitter: @HallieSymone_
Snapchat: @Halliesymone
Tiktok: @Halliesymone
#613hairreview #613wiginstall #affordablewigs
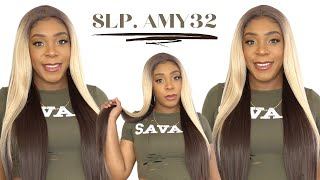
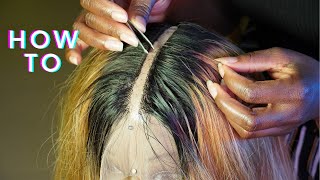
What'S up guys welcome to my channel, as you can already tell by the caption of the video i'm about to give you guys a tutorial on how i achieved this look. This is like the second day that i had this here, but just stay tuned guys. Please excuse my voice, i'm a little hoarse, but my voice is way better. This right here is the package that the wig came in. It also came with a wig cap and a white paper. I'M not gon na lie, i'm not exactly sure what was on the paper. I didn't read it so please forgive me so far. The wig feels and look nice i'm about to continue to play with it just to see what i'm about to work with this right. Here is a tea party wig, which means it's only a middle part. So far, it seems like the wig is true to length, but i really won't be able to tell until after i wash blow dry and flat iron it so we'll see. I just wanted to show you guys what the wig looked like on my mannequin stand. I know y'all probably can't tell but y'all the knots on this wig was so freaking big, like it was so noticeable, and i tried my best to blend it. I don't know i'ma just let y'all continue to see right here, i'm about to tone the yellow out of the hair. So i'm about to take some hot water, with my shimmer lights, shampoo, to get the process done and, as you can see, this process is basically like the watercolor method, except for you're, not using hair dye you're using shimmer light shampoo. I always use a little bit of shimmer lights at first and then i'll dup the hair and probably add some more on down the line. If i feel like the hair needs more toning i'ma, let you guys sit and watch the process and then i'll come back whenever it's done, since i'm done toning it. The next steps is to blow dry it and then apply it. This hair is really pretty all the length of this wig is supposed to be 30 inches, but honestly, it's given pretty much 28 inches. I don't think this right here is true to length now that i'm really looking at it foreign, so you so there is some shedding. As you can see, i don't know if it was because of something that i did or if the hair is like. Really, it's not bad, though the hair feels pretty good like it's a really good wig. I went ahead and pinned the hair up, and then i went in with my hot comb to slick the hair down really good. Just look it down straight back and of course, as you can see, i made my part as well now, i'm about to do my ball cap method, i'm about to cut out my ears on each side, i'm about to take my anastasia or anastasia beverly hills foundation. However, you pronounce it i'm about to just apply it to my ball cap, i put a little bit on my hand, and then i use a foundation brush to blend it out. I'M gon na be using this got to be spray to glue down my ball cap. I'Ma spray, this by following the shape of my hairline got to be spray, is so easy to use to me. So that's why i just stick to this method. After i get done applying the freeze spray, i'm a blow dryer, i'm gon na be using my scissors to cut the cap. Also, my ball cap method. Don'T never be perfect, but i make it work. These scissors are so dull. They were making me so mad. I know you guys can't see it because i don't cut it already, but y'all. I have a widow's peak and i don't like that foreign do i'm about to clean up around my hairline using this alcohol, and this rack it's very important for you to do this step, because if you don't your lace might not lay so just make sure you Clean up around your edges before you put the glue on i'm about to put some more foundation on the lace and then i'm gon na clean it up again yay. So now it's time to apply the glue. I don't know why this my favorite pore apple y'all. I love doing this, i'm just applying a little bit of glue to the ball cap because i want the ball cap to lay really really flat. My now i'm about to put the wig on, because i need to see how this thing gon na lay okay, look at it, it's beautiful already. I don't know if you guys can see what i was talking about when i was saying that the knots are noticeable by the way i had already went ahead and put makeup on the lace. I really need to get me some lace tint, because i feel like the foundation wasn't really showing up on the lace, and i put a lot y'all right here. I'M just trying to imagine how my wig is gon na lay yeah. Today is my birthday and i'm just so blessed and so thankful to see another year, make sure you guys wish me happy birthday in the comments below i'm gon na use. This bold hold glue and this popsicle stick to lay my wig. I always apply the glue in sections i'll start with the middle section first and then work the sides. I'M gon na do three layers of glue, because i need this wig to last me all weekend. Foreign foreign, so i feel like applying the lace is very self-explanatory. So i'ma, just let you guys watch i'm about to tie this down with my elastic band and then i'm gon na let this sit for maybe 10 minutes by the way. My mama was right here talking to me, so i'm about to make her help me now that the lace is melted, i'm about to cut the extra lace off using my scissors and my razor foreign right here. I'M about to cut out the ear part on both sides and when doing this y'all, please make sure to make this comfortable, because if not, then around your ear will hurt, meaning make sure you cut as much as you need to off to make it comfortable. For you that part right, there was a process, but i'm finally done so. I forgot to tell you guys that i did not plug this wig. Like i said this wig is a t-part wig, which means limited lace. I know on the sides. It'S like one or two inches of lace, so you can't really make a part or anything, so i just decided not to do any plucking but to leave the wig, as is i'm about to spray. This got to be spray all over my hairline and then put back on my elastic band, so i can melt the lace some more now that the lace is good and melted, i'm about to play around with the hair to see how i want the hair to Lay we are finally about to complete the last step, which is straightening the hair. Of course, i'm going to be using my flat irons to straighten it, but i'm gon na use my hot comb on the top part with my part at. I always try my best to flatten that area as much as possible or to my liking. You know so right here, i'm still visualizing how i want it to lay, but i think i got it guys. I'M gon na put this oil on the hair before i flat iron it it just makes the hair so silky and smooth. It also helps with the flyaways. Oh bye, do foreign do my so foreign, my to my my so do so y'all. I'M finally done - and this right here is exactly how i want it to lay and don't mind me y'all, my mom. In the background. Hyping me up, i really hope you guys enjoyed this tutorial. Please feel free to comment below any questions that you guys have about this tutorial and i promise to comment back. Don'T forget to like this video and subscribe to my channel bye.