How To: Dark Roots On Honey Blonde Wig + Install | Yolissa Hair
- Posted on 23 November, 2020
- Hair Knowledge
- By Anonymous
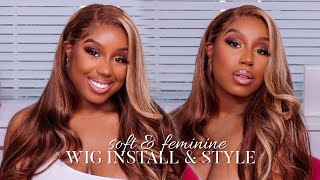
Get ready to glo up! ✨ In this video I show you how to add dark brown roots and install this honey blonde lacefront wig from Yolissa Hair. Thank you for watching!
Hair Details:
Direct Link • https://m.yolissahair.com/body-wave-27...
#27
18 Inches
You’ll Need:
Adore Dye - Dark Brown
Ghost Bond Glue
Got 2 Be Freeze Spray
Keep Up With Me ♡
IG: https://www.instagram.com/_jojomonroe/...
Tik Tok: https://vm.tiktok.com/ZMJbHJWWR/
BUSINESS INQUIRES
About Me ♡
age: 23
height: 5’9
location: virginia beach & raleigh
sign: cancer
2L law student
#yolissahair
Keywords
honey blonde, honey blonde hair, how to add brown roots on blonde hair, how to add brown roots on 613 blonde hair, blonde wig install, blonde, blonde wig, blonde hair with dark roots tutorial, blonde hair dark roots, dark brown roots for blonde hair, dark roots on blonde hair, dark roots on blonde wig, ash blonde, blonde hair, honey blonde wig, how to color dark roots on blonde weave, yolissa hair, honey blonde hair on woc, how to install a lace frontal | ash blonde wig pt.2, honey blondes, ash blonde wig
Hey y'all welcome to my channel in today's video i'm going to show you how i got these dark brown roots on this honey blonde wig from yolissa hair. So first we're starting with adore dye in the color dark brown. So i'm just dipping a toothbrush into the die so that i can be precise when applying it onto the lace front. You want to be very gentle and not press down too hard so that you're not getting dye on the lace and you're just going to drag the toothbrush through the hair and the toothbrush will help to create an ombre effect so that it's not patchy or too Uniform on the hairline, it's very simple and i'm just going to keep dragging the die through the front of the hairline and you can take it down as low as you want. There'S no specific requirement. I didn't want, like all of my hair, to be super dark. I just wanted the roots to be dark, so i didn't take mine that far back, but you can take yours back. However far you would like now, as i continue to drag the toothbrush through the hairline, i'm going to start parting off sections just so i can make sure i get every piece of the frontal so that when i part the hair, the roots are dark there as Well and down um bye after i finish applying the dye, i let it sit for 15 to 20 minutes and then rinsed it out and the rinsing is not a complicated process at all. You can rinse it just like you do regular hair. The black is not going to stain the rest of the hair. However, if you are concerned, you can wash it upside down just to make sure the dye runs straight into the sink or the tub wherever you're washing it. However, you'll be fine either way. So now i'm installing the frontal. I cut it into three sections because to me, that's the easiest way to install it and right now, i'm just putting some got to be glue on my edges since i'm not wearing a bald cap. I want to make sure my hair is out of the way when i'm putting the glue on. So i'm not going to do much talking in this part, because i'm just going to be showing it to you on camera, but i'll be applying the lace front. With bold hole, bold hold glue and then i'm going to go on top of it with got to be glue and tie it down with my elastic band right here. I'M cutting out my ear tabs and the easiest way for me to do it is to pull out some hair and make a side burn. So i have something to hold on to when i'm gluing it down and an easier, more accurate way for me to measure. My hairline now i'm applying the glue and the most important thing is to make sure that it dries clear before you start laying the lace down so that you give it a chance to be clear and when you're going to lay the lace down. It'S not crusty and creating a white cast under the lace. Please ignore my facial expressions in this video. I have terrible allergies, so, if it looks like i can't breathe, i can't jesus so cutting off the lace. It might be easier for you to use a razor. However, i couldn't find mine, so i'm just using scissors and you just want to make sure that you don't cut it in a perfect straight line to make it look more like a natural hairline um. So thank um um, so uh do uh. So uh it's jesus. It'S it's it's jesus, so it's jesus! So


Comments
Yolissa Hair: Beyonce vibes!!!! So pretty!!! Thank you so much for choosing Yolissa Hair!
Géraldine: love love the final look. the blonde hair really suits you!
Destiny R.: This is soooo bomb I love it!
Wini Bihai: What density did you get?
Yolissa Hair: Hair link to the same hair: https://www.yolissahair.com/body-wave-27-and-ombre-lace-front-wigs-for-black-women-150-200-density.html