How To Slay Dark Brown Roots On A 613 Blonde Wig|| Aliexpress Hair, Install And Review
- Posted on 02 August, 2021
- Hair Knowledge
- By Anonymous
Heyyyy Loves !!
If you are new to my channel WELCOME ✨
Feel free to like, share and Subscribe to my channel ✅
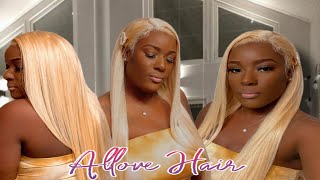
In this video I’m installing this bomb wig from
Allove Official store on AliExpress.
This wig took a while to get delivered to me, none the less the seller was real nice and communicated with me about everything. I paid CA $94.13 for this wig and then I dyed the roots with Bigen Dark brown semi permanent hair colour. There is minimal shedding but the wig is good for special occasions.
Wig info
613 T-part lace wig
150 density%
16 inches
C$ 69.50 59% Off | 30inch 613 Blonde Lace Front Wig Human Hair Wigs For Women Transparent Lace Frontal Wig Blonde Bone Straight Human Hair Wig
https://a.aliexpress.com/_mO08ECF
#tpartlacewig #lacewiginstall
#howtoslaylacewig
Hi guys welcome back to my channel so today i'll be installing a 613 blonde lace front t-part, wig 16. Inches that i got from all love here. To be honest, the shipping time was really it took a while to get here, which i was super mad at that, because this is a non-sponsored video. However, the seller was really good in terms of communicating with me. Their hair was packaged nicely. As you see, i got my wig caps and, as i said, it is a tea party here, so they did give me a poster explaining to me what that is i'll, definitely put the information in the bio below just so. You guys understand better what that means. As a tea party wig so yeah, this is a blonde wig and this is my first time doing blonde. So i wanted to be comfortable with it. So, as you can see here, i'm just showing you the hair and i'm putting it on my mannequin hair. So because it was my first time doing blonde wig, i wanted it to be something more natural. I wanted to be comfortable with it. So, as you can see here, i'm using a begin dark brown dye to dye the roots. I wanted it to have a nice ombre, look, you know like starting out with a natural look from the roots and then going out to the blonde. So all i did here, i just parted my hair in you know each section and i just took my toothbrush and i dyed it. The dye is already a water-based dye. However, i added water to it, which was not so much a good idea. However, i'll show you guys the result of that. Well, this is how the hair turned out, which i was absolutely loving. I love how the dark brown blended in with a blonde. I loved it. So i then went in with my tresemme conditioner and my tresemme shampoo and i washed the wig out, but sadly, to my surprise, i think i did it too quickly because i honestly did not wait for it to dry properly. I literally just washed it out. Like 10 minutes or less than 10 minutes after i finished dyeing it, so, as you can see here, it turned out green green does something turn out green um as far as i was liking it, but then, after that i was like no, i didn't so. I went back in after the hair dried and i just used the dye without any water. I just used a dye and i left it overnight. It turned out so good, like after waking up and washing it out blow drying it flat ironing it. You know plucking it getting it ready. Trust me, i love the finish. Look so yeah if you decide to do your hair like this is something you know the mistake you don't want to make. So now i'm just doing my bald cap method, guys i've learned so many new ways and tips and tricks to get your wigs looking really late. If you guys want me to do a detailed video on, you know, tips and tricks to getting your lace with looking good. Let me know in the comments and i'll give it to. You definitely will so for my ball cap method. I just go in with my blow dryer just to make sure that it's well intact, and you know after i go in with my foundation. Typically, i wait until after it's dry to put my foundation on, but i was just in the mood to do this and i find that this helps better, because what happens is when it dries fully. You don't have to be worrying about adding foundation which is good and how you know a ball cap method is really working like the sides are not lifting or anything right. So then, after that you go in, you put your elastic band on and guys you have to be patient. At this point, i took like an hour to just eat, watch some tv and to just sit with this thing on my head, because i needed my wig to come out looking snatched. So when i take it off it's fully down, it's fully laid like i can just go ahead: cut the excess off and add my wig now so once you are done, cutting off all the excess lace and you have outlined your hairline, you go ahead and you Put the wig on just so that you know you don't see any of the bald caps. So at this point, i'm just listing every little inch that i'm seeing through the wig, because i don't want that to happen. Slowly, cutting it off just so that my wig is fully laid and the weight can even melt better. Once i'm comfortable with my bald cap method, i then take a wipes and i wipe around my hairline. I do not use alcohol because i think that leaves your bald cap up. I then go in with my got to be glue and i add three layers of glue. Then i use my blow dryer to make sure it's tacky. You want to make sure this is tacky so that it holds the wig once you're done, and you put your wig on you're going to then take your got to be spray and you're going to spray different areas of your wig, so that this helps it to Melt, i would say, give it one more spray around the entire hairline, because this not only glues down the wig, but it helps it to melt into your skin. So it looks a lot natural, and so you know it looks more like a hairline than a wig. Also, you want to take your comb and make sure that you, you know you press the lace and the hair into your skin. Basically, as you see, i'm doing you know comb, it back hold the lace down just so that this also helps to melt the wig into your skin. After that, you're gon na go ahead and you're gon na cut off whatever extra flaps you have just so that you can hold the wig down nicer and so that, after it's easier to remove the lace so right here, i was just removing all that excess lace, Because i wanted to do my makeup, but you know you do not have to once: it's fully dried, you go ahead and you know you remove the band and then this is when you go ahead to cut the lace. So i'm cutting this into four sections because i feel like that helps me to you, know: pay more attention to each section and to remove the lace properly so you're, just gon na go ahead and slowly either use your scissors or a razor to give it a More jagged look and yeah remove all that extra lace. So after that i go ahead and i remove two little sections for my baby hairs. I wanted to keep it simple and subtle, so i just wanted two little cute baby hair at the front right there. So i just took some oats and then i used my razor to cut them short. You don't want to have long, baby, hair sticking out trust me and for me to get baby hairs to look really nice and laid. I use my mousse, so i use my tresemme mousse. You can use any mousse you have but yeah. This helps me to swoop it. Another thing i did not do in this video which i should have is basically get a curling iron and curl. My edges probably would have even been easier for me right now, but get a curling iron curl, the edges, that's what tay said. If you don't know who tay is google him, but yeah curl your edges, so it's easier for you. I just take my mousse and add a little to the front. Add it to my edges and then i wrap that back. Then i go in with my makeup, so i wanted to try a new. You know a new type of thing, so i started off with my sitting powder and then i added my foundation base just because i wanted a more matte makeup once i'm done blending that with my brush and my beauty, blender, that is when i go in after With my juvia's place, concealer my favorite concealer with this concealer, you do not need a full cover. You don't need a lot because it gives you full coverage. Trust me, as you can see, i haven't dipped it back in the bottle until, like i reach my forehead, because this gives you a lot of coverage and i love um a really bright under eye so yeah i go in and i started to blend that into My skin, as you can see, you can see the difference it's doing already like you can see how full coverage it is. But if you don't want to be a full coverage girl like me, you can just find um, you can get a darker color or you can get something that is lighter on the skin yeah. So now i'm gon na do my contour, as you can see, to give it that natural snatched look so yeah. These are the places i do for my contour and now i'm just gon na blend that in once, i'm done with my face. I go in with my eyelids now, for you know a nude natural look. I start off with a very light brown and then in the crease of my eye, i go in with like a nude, a lighter natural, looking color. This is what i stick to when i want to. You know: keep it natural, keep it subtle, keep it soft, um, so yeah, and then, after this i'm going to go in with my fenty beauty setting powder because trust me fenty, it's the best setting powder. There is okay, so once i'm done with this, i go ahead and i do my lips for my lips to keep it natural to keep it simple. I aligned my lips with my brown fenty lipstick, and then i use my sephora. You know white looking nude type of lipstick in the center. Now i'm just applying my beautiful lashes, because you know girl can't go nowhere without her lashes and yeah. Once i do that, i apply my natural looking lip gloss, apply some setting spray and your girl is looking good. So, for my highlights, i just wanted a little sparkle, so i just you know added a little on my nose a little on my chin. Just so i can sparkle a little because i was feeling i was feeling pretty. I was looking pretty. I was feeling i was feeling good so once my makeup is done uh, my hair is now fully set and floated fully laid. I don't know about you, but i can barely see where the wig meets my hairline, and that is that's the goal. Okay, that is the goal, so i'm just going in with my contour, because i didn't get to contour that section of my face and once i do that the makeup will even blend in with the wig guys. Are you seeing this wig? Are you seeing this? Ombre? Are you seeing how this blended nicely wow? I'M amazed at my work, i'm glad on how everything came out. I love the look on me for my first time trying blonde i'm not disappointed. I really hope you guys like this video. Please go ahead like share subscribe. So once i do that, i go in with my flat comb guys if you don't have a flat comb and you wear wigs. What are you doing? What are you doing? Sis you can't be walking around looking like the himalayan mountain, so get yourself a flat comb press, it out press your wigs out so that it looks really nice so guys. I'M finally done with my makeup and my hair, and this is the final look. Let me tell you something: i look good asl, i look so good. I love the wig. I love how it fits my head. It fits. This is probably one of my best wigs, because just how the cap fits my head head perfectly, it's amazing. The dye turned out amazing how i did it it's like so good. I do not know if you guys can see it like on the camera, but i can still see like a bit of green tinge and that i'm not 100 liking, but i, like other from that it looks so good. I love how the brown the dark brown blends out into the blonde, and let me tell you something: i never knew how i was gon na feel about blonde hair, but i'm loving this and next time around. I'M gon na try just like a full blonde. Like blonde from the root, oh my gosh, i look so good. Like honestly, i look good man tattros! No, but anyway guys. I really hope you guys enjoyed that video. I hope you learned something from this video. If it's your first time, you know dyeing my hair. Don'T be scared to try, try it and you know if it doesn't work out twice again, because this was an epic fail. The first time around - and i was scared because i was like i missed my wig up, but then i tried it again and i love how it turned out. I don't know about you, but i am loving the look so guys. Please go ahead subscribe to my channel. Definitely leave a like, and you know, leave some comments down below so yeah i'll see you in next week's video bye. You guys be replaced.


Comments
Shayan Jackson: Great come back from the green wig. I'd still be crying rn lol.
Queen Neely: "You dont want to look like the himalayas" a weak
Yashan Thompson: Ooouuuuu it turned out amazing
Shayan Jackson: Wow, this looks great
Queen Neely: We hereeeee
Yashan Thompson: GREEN??
Alecia Bignall: Check innn