How To Cut Bangs On A Synthetic Wig | Wig Styling Tutorial | How To Make A Wig Look Natural
- Posted on 04 March, 2021
- Bangs
- By Anonymous
Today we are going to go over how to cut bangs on a synthetic wig! This synthetic wig transformation is a great way to alter your wig the way you want!
You don’t need to be a hairstylist to achieve this super cute and on-trend look at home. You probably even have everything you need already laying around your home!!
Come hang out with me and add some bangs to your wigs to give them new life!!
THINGS YOU'LL NEED FOR THIS VIDEO
- Scissors
- Clips
- Comb
-Small Scissors
- Hair Brush
- Flat Iron
Link To Chelsey's TikTok Video - https://vm.tiktok.com/ZMe6KKJHs/
Find Some Amazing Nails From The Jemz Co At - https://bit.ly/30aGp5H
~ Jesse M Simons ~
**Follow me on**
IG: @Jesse_M_Simons
Facebook: https://www.facebook.com/Jessemsimons
Email: [email protected]
*These Are A Few Of My Favorite Things (Wigs)*
Lace Grip Cap - https://amzn.to/3snbsqC
Got 2B Glued Spray - https://amzn.to/3cP4IMG
Got 2B Glued Glue - https://amzn.to/3bZ8DHw
Blade Extreme Hold Spiking Glue ( Cheaper Version) - https://bit.ly/3eXa3nP
Amika Silken Up Dry Conditioner - https://amzn.to/3fjlZ3d
Amika Silken Up Dry Conditioner (Travel Size) - https://amzn.to/3ehsl16
Aussie Sleekend Warrior Dry Conditioner - https://amzn.to/3w34nhV
Wig Brush: https://amzn.to/2QQDxcW
Wig Wall - https://amzn.to/2RcM1Lv
*These Are A Few Of My Favorite Things (Makeup)*
Milk Makeup Mini Hydro Grip Setting Spray - https://amzn.to/30HgDGw
Mini Fan Air Conditioning Blower for Eyelash - https://amzn.to/38D3XVu
Eyebrow Scissors - https://amzn.to/3fQgQQs
Kabuki Brush- https://amzn.to/3gdT7di
HiMirror Slide: Smart Makeup Mirror - https://amzn.to/3amBKDc
Cosmetic Makeup and Jewelry Storage - https://amzn.to/3aqon4Z
HiMirror Mini Premium X 64GB - https://amzn.to/3dCEYEP
*Other Videos You May Like*
How To Highlight A Synthetic Wig - https://bit.ly/3ekXYqj
How To Wash A Synthetic Wig - https://bit.ly/3dE7k1r
How To Pluck A Wig - https://bit.ly/3ncwqrs
How To Make A Hard Front Wig Look Natural - https://bit.ly/3sI5iBw
Wig Basics 101 - https://bit.ly/3sFqEQf
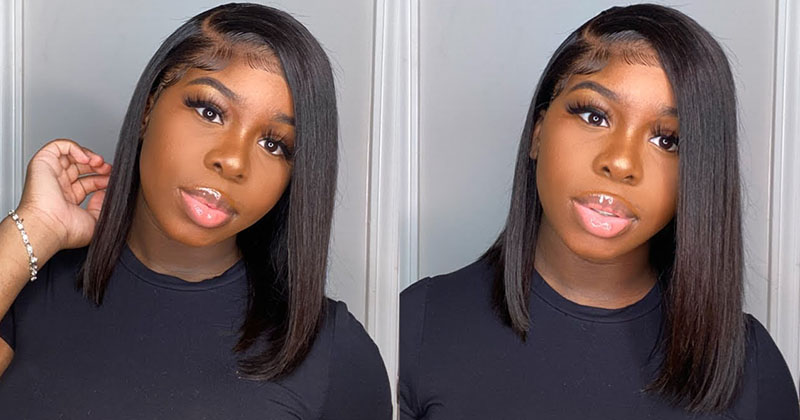
Hi guys today, i'm going to be showing you how to cut these shag style bangs into your fixed part, wigs hi guys. Today, i wanted to come on and i wanted to show you how you can put in these shag style bangs into a fixed part wig. So i know we all have wigs at home that have these middle parts in them, and maybe you don't wear them as much or maybe you just kind of wish. They had a bang on them and they don't make them in that style. And you want to add a bang, and i know adding things like that can be kind of scary, anytime, you're taking scissors to a wig can be scary and with a fixed part, it can be a little bit more intimidating because you kind of have to manipulate The part before you're able to really get a bang like this in it, so i wanted to really show you step by step how you can cut a bang exactly like i have cut into this wig. This is the burgundy, katherine wig, and she originally was just a middle part um. I can show you guys a picture right here what she looked like before, so i had seen chelsea, who is one of the people that i buy wigs from cut some a little bit thinner and a little bit longer shag style bangs into her um og, katherine Wig - and i was like i have to try this so i went ahead and did it. I did them a little bit shorter. I went a little bit thicker, but i wanted to show you guys kind of how i did it um. You can check her video out. I believe she posted one on tik tok, where she uses a blow dryer to do it. I'M going to be using a couple, different tools to do mine, but you can absolutely use whatever you feel most comfortable with that's totally fine, but we're going to go ahead and get into this um. First off, i'm going to show you guys exactly what you're going to need for this. So obviously you're going to want to have some really nice sharp scissors, so you can either use hair cutting shears. Those would be ideal. I also like to use my singer. Um fabric shears because they are very sharp and i like the way that they're shaped and they make it a lot easier for me to kind of like cut straight and stuff. Like that. I don't know it's just a personal preference, but you can use any type of hair cutting shears. You want just make sure that they're, nice and sharp that's going to make a huge difference in cutting and your precision and all of that, if you don't have sharp scissors, it's going to be harder to cut these wigs, especially if you're cutting into a synthetic wig. The fibers can be a little bit harder to cut through, so i always recommend make sure your scissors are sharp. The other thing you're going to want to have is some clips so that you can kind of pull back the hair that you aren't working with and you can keep everything separate um. I love these like alligator clips. Something like this is fine. Any kind of clip you have at home, where you can use to pull back. The hair is totally cool, so whatever you already have, you don't have to like go make a special trip just to get these, but you can get these on. Amazon they're really cheap and i use them all the time when i'm styling and doing all sorts of stuff to my wig. So it's not a bad investment um. Something else you're going to want to have is a comb, something like this. It can be bigger. Obviously, this is just kind of like a little travel size, one that i already had again. I was trying to do this without really having to go out and buy anything that i didn't already have in my house and that's kind of what i want to do for you guys as well, so that you can just kind of do this with what you Already have um the other thing that i like to use. These are actually my eyelash, like eyebrow scissors. Actually, what we're going to go in and do is kind of cut in between these hairs here to kind of break up the line. So it's not this jagged straight kind of shelf bang and i tend to like to use a little bit of a smaller scissor to do that, so i'm not taking too much hair at a time, whereas if i was doing it with these sheers, i might tend To take a little bit more chunks of hair than i want to so i would really recommend kind of whatever hair cutting scissors you're going to use and then maybe some smaller ones. If you are using like smaller haircutting shears, you can absolutely use those to do this as well. Again, personal preference. You can kind of tweak this to fit whatever you feel comfortable with whatever you already have, or whatever you are planning on going to get. If you do have to go pick up some of these items, the other thing you're going to want to have is you're going to have a hairbrush and then for my method, i like to use a straining iron. So i'm going to be using this. If i can get it off of here, i'm going to be using this um straightening iron flat iron right here you can use a blow dryer if you want. Instead, you can use a straightening comb if you want. Instead any of those are fine um. I did try it with my straightening comb. If you guys watch my videos, you know i'm really a big advocate for using a straightening comb versus a flat iron on synthetic wigs, because you have a bigger chance of kind of damaging the fiber. But when i was trying to really get manipulate this part into getting rid of this kind of middle part in the front, the straightening comb just wasn't giving me enough heat. So i'm going to be using a straight iron. You want to make sure you're, starting this off on a lower setting, make sure you're doing this on a heat, safe, wig, the wigs that i'm using that are from chelsea in this video are all heat safe. Please please, please make sure you check to that. Is a heat safe wig before you add any heat to it, because if it's not it's gon na melt, so we're gon na go ahead and get into this, and i'm going to show you step by step how to go ahead and cut this. So the first thing you're going to want to do is we're going to want to kind of manipulate this part and turn this front hair that we're going to section off into one solid piece in the front which is going to make our bang. So, as you can see here, she was originally a middle part, and now she doesn't have any parting here in the bang and that's really the goal that you want to get when you're doing this, so we're going to go ahead and section off the hair. Here. First - and you can do this on your head - or you can start this out on a wig head if you want when i go to actually cut this, i'm going to go ahead and put her on, because i really like to see where the bang is going To fall, if you do it on a wig head, especially like the one i have, it doesn't really have like a face or anything. So it's really kind of hard to see where it's gon na fall at, but i'm gon na go ahead and start off by sectioning her on the wig head. Just so i can really show you guys what i'm doing and then we'll transfer over to my head. When i go to cut her um, so we're gon na first go ahead and take our section, you don't need a whole lot of hair, so i'm taking probably i'm gon na go up probably about an inch from where this part starts and then i'm gon na Go ahead and just take this section of hair here - and this is also really going to depend on how thick you want these bangs, so you can obviously go thinner. You can go thicker. I like them a little bit on the thicker side, so i tend to pull a little bit more hair, but you can always pull less so actually, i went ahead and went like more of like a half an inch, because this is a little bit more of A dense wig, so i feel like i don't need as much hair and you're going to want to pull this here and you're going to want to come to right about where your eyebrow would end. So, if you're wearing this on your head, this is also where it kind of helps. If you have the wig on your head, you're, going to kind of want to bring that hair and section off all the way to kind of where your eyebrow ends. So i'm going to go ahead and take that hair right here and that should be pretty good all right, so we got that right there and i'm going to do it on this other side as well. I'M gon na go ahead and pin this hair back that i'm not using just so it's out of my way and i'm not gon na have any issues with it mixing back up while i work on the other side, so this is my one section: i'm gon Na go ahead and get my other section on the other side here and you're just going to line this up. With that other side i use my nail. You can use a rat tail comb if that's easier or whatever you feel comfortable with whatever works, for you is totally fine. I just have like dagger nails, so they are like my permanently attached rat tail comb on my fingers. It'S weird, but it's true all right! So now what we have here is this section of hair. A good rule of thumb is kind of coming to where your that end of your eyebrow is so wherever that's going to fall on. You is where you kind of want to stop with the hair here. So we go ahead and we have this hair here now and the next thing we're going to do is we're going to get rid of this separation that we naturally have here to make it. You know a straight across bang, so this is where your fine iron comes in. You can choose if you want totally up to you um, to spray this to dampen it a little bit that'll kind of help steam it like steam, straighten it versus just dry heat to it. So i do have a spray bottle. I'M gon na show you guys with a spray bottle when i cut these ones. I did them dry, so you can absolutely do these dry. It'S not like a requirement, but i'm going to go ahead and show you guys what it's like to do it with actual like damp hair. So we're just going to spray this a couple times. It just kind of helps with the manipulating of the part as well, and then we're just gon na go ahead and take our straining iron and we're gon na go ahead. And what i like to do with this. To kind of give it a little bit of that volume that it doesn't really have right now is i'm gon na take my straightening iron, i'm going to start in this middle area, because this is obviously where we have to work the most on it, because this Is where that part is, and i'm going to take my straight yarn all the way to the root here and i'm going to kind of curl it like this and then come down, and i'm gon na do that until that part is gone, um you're gon na Go back into once, you cut this to really um, give it a little bit more of that volume. So it's not like a huge deal if you can't get that little curve in it when you're putting it all together and i'm just going to go through the whole side here. This is a wavy wig and it's a little bit easier to really see where this is going to fall. If you can get that whole area kind of straight, so i'm just going to go through the whole hair and just really make sure it has become one solid, bang and that part doesn't start until after the bang anymore and as you can see like i've only Run through this, you know two or three times and it's already pretty much gone. I just want to really make sure i've got it good all right. So that part super easy like it's not like crazy hard and that part is gone now. So we have a solid straight bang section of hair to work with so now. This is where i recommend putting the wig on your head, so you can cut it on the wig head if you want, but, like i said, you're not really gon na be able to see where it's gon na fall on your face and because everyone's face is Different, i would recommend putting it on to do this. I'M gon na go ahead and throw her on my head and then i'll show you how we're gon na go ahead and cut her all right. So you just want to make sure you have the lace where you would normally want her to be so a good way to kind of figure out exactly where it should lay is to hold this hair up and just look and see where that lace is falling. That'S where i would want my hairline to be so. She is good where she's at okay, so i went ahead. I threw her back on and then i just kind of adjusted the little clips because they were falling all over the place. This is also where it gets a little weird, because i feel like cousin it, and i can't see anything but that's good, because that means that we got the part out, which is exactly what we want. It'S all laying here flat, you'll, also be able to tell when you put it on your head, if you need to kind of go back in and really put those two pieces back together, a little bit more with your straightening iron to get rid of that part. This one looks pretty good and, like i said, i do have a pretty decent long section going on here, and that really is because i'm gon na go ahead, and i want this bang to go all the way across and i'm also going to go ahead and Angle, it a little bit so that blends in with the rest of the hairline, so to do the cutting. What we're going to do. Take your finger like a scissor hold the hair out like this and put the hair in between your fingers like this here and then you're going to slide your hand down, and i recommend for these, because we are going to go ahead and kind of give them A little bit curl up afterwards give them a little bit more volume. I would probably want to come to right about to where the tip of my nose is. It really depends on how long you want these to be. I like them to be a little bit more long, but if you want them a little bit shorter, you can obviously go up a little bit more, but i would recommend starting out kind of at the tip of your nose, because you can always cut more hair Off but obviously once you cut the hair off, you cannot put it back so you it's better to start out longer and kind of trim up than to start out really short and then realize you went way too short. So now we're going to go ahead and take our scissors and we're going to cut right underneath, where our hand is here and we're just going to cut straight across and it's okay to kind of go in sections, so a lot of times. What i'll do is i'll start like that, and i've got this one section cut, and then i kind of just take my hand here, because it's a little bit hard to hold all that hair. But now i have a guide and i can just take a little bit of this hair that i already cut, and i can work my way across and use that as a guide to see exactly where i need to go across and also wearing it. On your head is um nice too, because you can kind of really look at it as you're doing it and, like i said you don't have to go across in like one fail, soup don't feel like you have to be like all the way through, because it's Really hard to do that as long as you start out with kind of like a guide, and then you work your way across the hair and also don't freak out too like if it's not 100 perfectly, even like all the hairs aren't perfectly even that's fine. That'S kind of where the shagging kind of comes in, where we're going to um kind of break up the bluntness of it, and it's going to kind of hide those imperfections. So now i still feel like cousin it because you can't see my eyeballs, but if you see um the way i cut this, it kind of gives you like a longer and then it goes in a little bit shorter, and this is gon na really help blend. This in to the rest of the hair, so what i like to do is i just like to take these two end pieces here and because this is a curled wig, you might see once you cut it, that it kind of. Does this little bounce up thing? If you need to just take your um flat iron and kind of strain, it out it'll be a little bit easier for you to really see if it's the same length. So what i'm gon na do is i'm just gon na take these two end pieces here and i'm going to meet them together, just to make sure they're the same length and as long as they're the same length. That means they're pretty much the same length on both sides and then we're just going to take this middle part right here and do the same thing you want to get rid of any like little stray hairs that you may have missed. I'Ve got a couple right here that i kind of missed here all right. So then, once you've done this you're going to either want to take a um. You can take a round brush in your um blow dryer or i'm gon na go ahead and just take my straightening iron and i'm gon na go ahead and just give this a little bit of a curl. I can already tell this is way too long. So i'm gon na go ahead and cut some more of this off, but this is also why i said i like to kind of start at the nose, because then i can kind of really see where i'm at and work my way up. So i'm gon na go ahead and take probably another. I'M gon na come right up to like the um bridge of my nose here, all right. So now we have this situation here. So as you can see, it's like very blunt. It'S you can tell that. Like we've got some different lengths happening here, that's totally fine. I'M gon na go ahead and take her off. So i can really show you guys how to do this, but you can do this on your head as well, but we're gon na go ahead and take our scissors and we're gon na kind of chop into the hair to kind of break it up. So i'm gon na put her back on the wig head because it's gon na be a little bit easier for me to explain if it's not on my head in front of my eyeballs. So now i have her on here and i'm going to go ahead and take my little small scissors. Like i said but like i said, if you are using hair cutting shoes, you don't need necessarily have these small scissors and you're literally going to take your scissors and just kind of cut up and in it doesn't have to be perfect. It'S just kind of you want to go in and kind of chop at it to kind of break up that kind of perfect shelf-like line you have going on, and then you can also kind of see. If you have a little stray hair, that's longer, you can get rid of it then as well, and we're just going in kind of every other. Here use the same philosophy as when i tell you guys like to go in and pluck the hairline of your wig. You don't really want to have a rhyme or reason to it, you're just kind of going in and thinning it up a little bit chopping it up a little bit, breaking it up a little bit and then once you're done with that again, you can take those End pieces and kind of make sure they are the same length and then what i like to do is kind of angle this into the hair. So, as you can tell, we have like the shorter and then it goes longer. So i'm just going to take my scissors and just make sure it's you know kind of angled in that's going to help blend it into the rest of the hair when we go to add the other hair back into the bang. So then the last thing we're going to do is you can either take like, i said, a round brush and a blow dryer or i'm just going to take my straightening iron and we're just going to add a little bit of a curl to the ends. So they're not so straight, you can add a curl in with a flat iron, if you just take it and twist it as you're doing it like this you're going to come down and around, and that will add a little bit of that it'll curl in the Bottom, so it's not like a blunt straight. You can leave it blend straight if you want, like you, don't have to do this part, but i i tend to like the way this looks a little bit better, all right. So last thing we're going to want to do. Is i'm going to pull this hair back down here and here and i'm gon na go ahead and take my scissors one more time you can either use the small ones or you can use these hair cutting shears, and i like to kind of take the hair Um and i like to kind of blend it in by doing the same thing, so i'm going to take where this bang ends and i'm going to go ahead and just kind of very um, not precise per se. But i'm gon na go ahead and just kind of angle in a little bit here, just in this front piece just to kind of blend it together. That'S it so i'm gon na throw her on real quick. So you guys can see what she looks like on with the bang all right. So this is the end result. So, like i said i did cut this one. All these bangs a little bit shorter than i'd done, the other one. You can obviously go longer. You can go shorter totally up to you, but i just wanted to show you guys that you can absolutely add a bang into a synthetic wig. Even if it's a fixed part - and this is how you would do it if you're doing this with a side part. You could do it exactly the same way. You just really want to get rid of that separation between the one side of the part and the other, and then the process would be exactly the same. You can angle this in more. You can do more of a shag, you can do less, you can do a straight across bang if you want um. The options are endless when it comes to this, but i really just wanted to show you guys that it's super easy to do and it doesn't take a whole lot of time and it can seem scary and intimidating, but it is absolutely doable. Even if you are like me and don't have any background in cutting hair at all, you can absolutely add a bang into your wig. I hope you guys, like this video, if you are new to my channel, don't forget to subscribe and make sure you hit that notification bell. So you get notifications on all the videos i do in the future. I do wig videos every wednesday for you guys if you liked this video and you found some value in it. I'D really appreciate a like as well, and thank you guys so much for watching, and i will see you guys on the next video you

Comments
Jesse M Simons: Hey all If there are any questions feel free to reply to this comment! Thanks for watching!
Judy Anne: Thank you for showing us how to get rid of the part in the bangs. Always wondered how to make bangs look right when there is a part
Awentia Wolf: Thank you so much! My wig has bangs and that cool but it's more like a drapes in front of my face hahaha they are soooo long! Shortening them with a lil tips and tricks you just did in the video ❤ and it looks great now, thanks!
gillian lee: That’s a cool Betty Paige look. Looks great! I’m using this tutorial for a lace front that I bought.
Mariama: You did an excellent Job explaining this thank u sm for being realistic
dizzyk54: Very well explained! Thank you!
Pamela Hill: Thank you for this video. I need to see how to do this!❤️
Michelle Casey: Great job and great tips!
Shawnine Sorensen: This was a Awesome lesson Thank you
Pamela Ingold: I love the color of the wig you are wearing in this video. The color is incredible on you, love love ❤️
Diana Ryan: Awesome video! Thank u so much!
Tara Stoddard: Thanks for the tutorial and tips! I’m a big fan of bangs on me and I think I’m going to do this to the one I have coming on Monday.
lora lepore: It was amazing thank you
Anna Nass: My favorite part was 12:57 when you said “schlonger”
Alice cooper: amazing
Christina Mangum: I bought a synthetic wig with bangs but when I’m using my straightener to curl them so they’re not sticking straight down on my forehead, it’s doing this weird little swoop to the side curl. How can I fix this?
Suellen: A little long winded. If you make your point more concisely, clicking on your future tutorials will feel like a must.
Karenamelia Payne: I think the bangs on the wig she is wearing are a little too thick plus a little too long. It looks like she is squinting just to keep the hair out of her eyes
dizzyk54:
bodyworkz: i think that link for tiktok to see Chelsea's is wrong