How To Cut Long Curtain Bangs
In this video I explain a simple way on How To Cut Long Curtain Bangs at home. With a few simple steps you can easily achieve a beautiful Long Curtain Bang.
***** Please Subscribe to my Channel and follow me on Social Media*****
https://www.facebook.com/ASimpleKind.B...
https://www.instagram.com/kristymaccon...
How To Trim Hair Straight Across At Home https://youtu.be/_RLQqLHmrSY
How To Cut Long Layers In Thin Hair https://youtu.be/KRzQQnENDNs
How To Cut Face Framing Layers https://youtu.be/fVBr71YAFWk
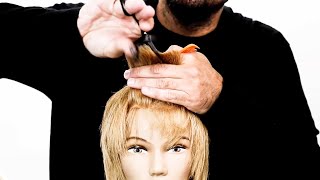
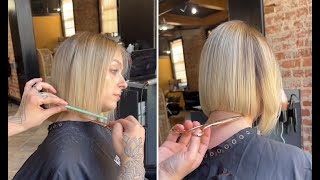
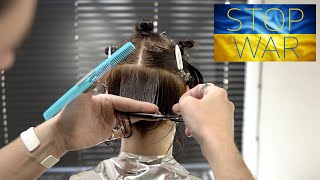
Everybody welcome back to my channel and if you're new, my name is christy and i am a licensed hair stylist and in today's video i'm going to show you how i do a curtain bang. This is the fourth part of a series of videos where i focus on different parts of a haircut. The first video was how to cut your hair straight across. The second video was how to make some long layers that blend in really nicely with the hair. The third video was face framing layers and now this fourth video is a curtain. Bang. Why? I decided to separate the face framing layers, video from the curtain. Bang video is because, if you like the way the face framing looks, you could just stop there, but a curtain bang is very similar. The way you cut it and section the hair on face framing layers, but just shorter. So, if you're able to do that, this is going to be very simple. So if you want to see how i do that just keep on watching okay, so first things first, what are you going to need? I always like just to establish this. So when you do sit down to do this, you have everything that you need in front of you. You want a comb or rat tail comb, so you can section your hair off properly. You need some hair clips. Any kind of clips will work. Um a hair tie, so you could tie back the part that you're not going to be working on at all and, most importantly, scissors that were made for cutting hair and a bottle of water. Maybe so you can wet your hair, the section that you're working on you can do it dry. That'S okay! Also, i'm gon na do it on wet hair, but if not just go and wet the section that you're gon na cut and you'll be fine. So what i'm gon na do is make sure that my hair is divided right in the middle and you could use the your nose to bring it up and see where it is. But you want to make sure it's in the middle, because current bangs were intended to be parted in the middle, not on the side. I mean you could after you cut it, but you won't really have that effect, so you want it in the middle. So when you style it and comb it and just push it forward, it has that curtain effect and important to note that there are a lot of kinds of curtain banks, curtain bangs, could be short and then just have the longer pieces on the side. They could be a little longer around the nose cheekbones around your mouth around your chin. I would say anything underneath the chin would be considered long face framing layers that could be styled like curtain bangs right so just know that i'm gon na do them longer, but you can do this shorter. Let'S just move this out away for now, because we are going to be combing that back so a curtain, bang sectioning could be brought back as far as you want it, depending if you want a stronger bang or not. So if you want a stronger bang, maybe you want to come up to where your hair is like, where the comb would lay flat on your head and where you could see that the hair that it starts to like curve down? If you want that, i don't. I want it to be softer, so i'm not going to go that far back, so i'm basically gon na go back, maybe like two inches and i'm gon na start my triangle there - and this is very similar to what i did in the video where i'm face Framing i'm going to make that triangle come down to the arch of my brow, but also use your eyeball. If you want to use that as a measurement and then just come down to that area and now, let's pull that back and now we're going to do the same exact thing on this side: we're going to make a triangle. So we have like two little triangles right and you want to make sure that they meet in the same spot and keep the sectioning nice and clean. If you, if you look at that - and you say, wait a second, that's too much like, i think, that's too much that's going to be too much hair. Well then, go ahead and section your triangle down further, if you like and take your time on this part, because this is important - this is how much bangs you're gon na have or not. Okay. So once you have this sectioned off, what we're gon na do for now is we're just gon na pull the rest of the hair back and tie it up. So it's not in the way you can do this on dry hair or you can do it on wet hair. Just remember: if you're going to do it on wet hair, you have to leave that room when you're cutting leave a little extra length. So when you do style your hair, it's going to come up a bit. So let's say it's gon na come up, maybe like a half of an inch depending on how you style it. So the first thing that i'm gon na do is i'm going to wet this section. Okay, so now that your hair is wet, you want to establish where the shortest point is going to be and where the longest point is going to be so in the middle. Is where it's going to be shortest and on the sides is where it's going to be longest, and i think the biggest mistake that i have seen is that people say okay. I want my curtain bang to come down to. Let'S say just for an example. My lips and then they cut a straight line and that's perfect, but i don't think they kept in mind once they angle it and give it that angle that the curtain bang is supposed to have where this part is longer than this part. The bang comes up shorter than they might have wanted and then they say wait. I went too short. I would have wanted it to be longer. So that's how come it's so important to establish where you want the shortest length to be so, in my case, i'm thinking that i want the shortest length to be practical for me. So what i want to be able to do with my shortest length is be able to put it behind my ear, because that's what i do and i need to be able to take the hair out of my face. So i'm always going to make sure that this piece i can put behind my ear, so i already know that it could come to the middle of my chin. So, okay, that's where that's going to be now. Where do i want my longest layer to be well, i would like it to come down far enough, so when so, i can actually see an angle when i cut it, because if i don't give myself room to have an angle, i'm just going to have a Line that is almost a straight line and that's basically a regular bang. That is not a curtain. Bang curtain bangs have an angled effect, so what you want to do is first establish your shortest piece, so my shortest piece is going to be around here right. My longest piece should be like way down here, so i can see a nice angle. So what i'm going to do first, is i'm going to cut the longest piece. My longest piece is going to be right here and that's exactly where i'm going to cut it right now and you could go longer than you intended. You could always go shorter in the end. I am going to elevate it a bit and cut where i think i should cut, which is right here and i'm just going to cut a straight line. So now, let's make sure that is nice and straight which it is not so i'm going to go in and straighten it. If you have small hands like i do. Your fingers are not that long and you just have to take a smaller section, so you can cut it so now. What i'm going to do is divide it in the middle again, and now i'm going to establish my shortest length. So i'm going to take a small section from this side of the triangle, i'll put that behind my ear. So now i'm going to take a section from the other side, the other triangle i'm going to put that behind my ear. So when i cut it, i'm going to elevate it like this and i'm going to put my fingers first parallel and then i'm gon na incline them a little bit so that this part closest to the top of my head is a little bit longer. So i'm gon na put angle. My fingers like this to give myself a little bit more room and have this piece a little bit shorter. So when i style it, if i comb it back, it just will just have a softer fall when i comb it out and i style it i'll spread it out a bit. So i can really see it angle, my fingers and i'm going to cut so now. I'Ve established the length of my shortest piece so now comes the easy part. The easy part is just connecting both sides, so that is the length that i established for the shortest part, and this was what i had established for the longest part. So i am going to bring this now completely to the side, and i am going to angle my fingers like this and there i have my guide and what i'm going to do is now connect this and i'm going to start from the bottom and kind of Go from the bottom up until i meet that guide and i'm on an angle. Now, if i look at it, i see that i can still go in a little bit more, so i'm just going to hold it right in front to the center of my face and i'm just going to cut those pieces to make it meet. And again i still have another piece there and there i have a nice angle and i'm happy with that. So now i'm going to do the same to the other side and again, i'm going to over direct my hair angle, my fingers and i'm going to work. My way up from this end length to make it meet my guide. So now, let's measure them and see if they are the same okay. So now, let's measure everything and see how it looks see if the front pieces measure up and the side pieces measure up and they look okay and i'm about ready to style it. But i want to show you something when i let this loose and i bring this forward. I did do some face framing layers, but now you can see that it's disconnected from the rest of my hair. So these are the layered the face framing layers that i had made, and so, as you can see, it almost blends in perfectly, but if i wanted to just make it blend even more, i could just cut a little bit just comb this down and just see That little bit right here, where it's not like, you could see this layer, and then you see this is a little bit longer. I could just very gently: come in and cut just a few tiny pieces of hair, and now i could do the same thing on this side. I'M just going to do the same thing on this side. Now it's all blended in with those layers, so you can already see the way it's gon na fall and blend in to the rest of the hair, which is what i want. So what i'm gon na do is i'm gon na go blow dry, it style. It come back and show you how it looks all right. So i'm back and i have to say i love it. I feel like this is the haircut that i never knew. I always wanted like this really came out nice. I just feel like, since i went in little by little and first i did face framing layers, and then i cut the bangs i just feel like now. It all plays also well together and it just has a nice soft fall. I also like the fact that, and keep that in mind when you're cutting your own hair cut it in a way, that's practical for you like, since i measured what i needed it to do. I measured it in the way that i needed it to be able to go behind my ear. If i wanted it to do so, and i could perfectly put it behind my ear and i'm good, i like the way that it'll fall. If i like make a ponytail and bring them out, i mean that's very, very pretty like just to make a ponytail like that, be able to it's just great. I love it. So i guess now. I know what all the fuss was about with the curtain bangs and i think it's something that'll look good on just about anybody and any face shape. Depending on what length you do it. It'S a real versatile kind of haircut where you could go shorter longer and it'll grow up like gracefully, so yeah. I think this is a really good haircut and i hope you're able to follow along. If you do like always leave me a comment. I love to read how it worked out for you and so yeah. This is the end result, and i am very, very pleasantly pleased this wraps up these four videos and where i focus on different haircuts to achieve one whole haircut and sit so until the next time. Bye.
Comments
kyla Yolo: Thank you so much! I was debating whether to do it or not. I think it will go well with my blonde hair a d hazel eyes. Thanks for the vid! Turned out prefect
Sophie Sylvain: Love all your videos with a beautiful result Big fan from France
Nydia Ortiz: Nice video. Good to see you again.