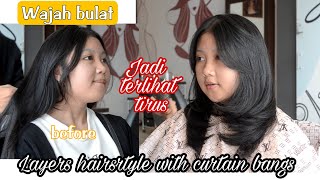
Curtain Bangs Made Easy #Dyicurtainbangs
- Posted on 01 August, 2022
- Bangs
- By Anonymous
CURTAIN BANGS MADE EASY! How to cut Fringe Curtain Bangs
*Disclaimer: This video is for entertainment purposes only. I am just showing how I cut my own hair.. bangs. I recommend suggest to anyone wanting their hair cut to seek a professional licensed hair stylist. I am not a licensed stylist.
#curtainbangs#fringebangs#howtocutcurtainbangs
SUBSCRIBE TO MY CHANNEL
Please share my videos
Playlist of My hair videos
https://youtube.com/playlist?list=PL9G...
_________________
Email for Business Enquiries Only
________________
PRODUCT LINKS:
Blowdryer
https://rstyle.me/+P-R_RfWd0d7arIf7KUz...
Scissors
https://rstyle.me/+Cu2Dqc89jTkx0HYVMG6...
Heat protectant
https://rstyle.me/+NLoDqPx_vNfKCJsI8Nj...
________________
My LTK
Amazon Favs
Poshmark Closet
YouTube Channel
https://www.youtube.com/c/jdeebeauty
____________________
Some of my other hair videos
How I cut my Shag
How I style my Long Shag
How I cut My Bardot Curtain Bangs
Older Video different technique
________________
Thank you for watching my youtube channel. I'm Jdee and I love sharing all things related to beauty, makeup, skincare, fashion, hair and things I love. I hope you find my channel helpful in some way. I appreciate you watching.
_______________
DISCLAIMER
FTC : This video is not sponsored. Some of the above links are affiliate links.
I make a small commission if used. They are free for you to use!
Thank you for your support! Gifted Products marked with a '*' for my honest opinion/review.
Disclaimer: All honest opinions are my own and reflect no one but myself.
___________________
Today, i'm going to share with you an easy way of how i cut my curtain: bangs bardo, bangs fringe bangs, whatever you want to call them, and this is for entertainment purposes only. I don't suggest that you go cut your bangs, i'm just showing you how i kept my bangs, and i suggest that you go and see a professional licensed hairdresser to have them cut your bangs. This is a requested video i showed well. I recently cut them and i showed on instagram how they looked, and i had several people ask me: would i do a video of how i do this, so this is my video how i kept my bangs, and i have many videos on how i cut my Hair, but this is a new one, so let's start right here, so what you need is you're going to need a brush if you want to brush your hair and you're going to need a comb - and this is a rat tail comb which this is what you Need - and you need a pair of scissors - and these are - i got these at sally's - you don't have to buy expensive scissors, but you do need sharp scissors i'll try to come up with the easiest way to do this, because my hair videos are the most watched Videos that i have on youtube, so if i make any money on youtube, it's from my hair videos, so y'all watch this, so i can make money. So the first thing you want to do is get a good straight part right down the center. Is you want a triangle? That'S going to come down like this? How far back you go is entirely up to you, but remember. If you go way back here and make a triangle that starts back here, then you're gon na have like a mushroom head and if that's your gig then go for it. So i'm gon na start about right there and pull it forward. Do that and when you pull it across, you want to see the angle come down like this see it's coming down like a triangle, one side of a triangle and we're going to clip that back we're going to repeat the same, the same ouch, we're going to Repeat the same thing on this side, so take it down come down at an angle, a little bit more. I have too much right there, so it's pretty even on both sides. Then you have to decide how short do you want them to be so how you do that is you're going to create a a small triangle right in the dead front, and you don't need, but a tiny bit of hair. That'S too much hair, so we're gon na take some of that out out of the way - and i got too much here too - it's actually the thinnest amount but see how i'm coming down, see how i'm coming down at an angle. So i still have a triangle right here, just like the bigger triangle back here. I do think it's better. If you wet your hair, so go ahead and wet it and i've got a i say bottles. Well, i used to say bottles, i don't say bottles anymore, because i have too many bottles, i'm gon na, and this only has water in it. So i'm just gon na wet that your hair is wet and you cut it. It will shrink when it's dry. So remember that, don't i have this one little piece right here and this is our guide piece i like to hit it about right at my nose right there, so you want to take it and we're going to pull it straight down. Okay, so i want it to about right here and i'm taking into consideration that it's going to shrink so when you're pulling it don't pull it like tight. Don'T pull down like this like super tight, because when you let go it's gon na shrink, so just hold it loosely, pull it down right here and you're going to cut straight across, don't lift it to cut it. Even though that's what i've shown in previous videos, do it like this, hold it straight down and you're just going to cut straight across the bottom. I have just recently cut them, as i stated so i just barely nipped it and you're going to have a blunt edge, but we're going to fix that before i'm done and then just let go we're going to bring back down the pieces that we had on The side these pieces right here so now we have a a big triangle. So now your guide are these pieces right here in the dead center? So you don't want to go any shorter than that right. There you're just going to start sectioning it off and you're, going to pull it across, don't pull it this way, don't pull it straight down unless you want straight across bangs, you want to pull it and you want your fingers at an angle like this. So when you look at it right there there's the shortest piece right there and you're just going to cut up the sides. Then, when you let it go you you start having that you start creating that angle right there we're going to repeat the same thing right here and i'm seriously. Let me wet this. I want to make sure that well for one thing, when i get done, i'm going to blow dry it now, i'm going to show y'all how it blow dry it and you get to get the best thing going on. We take the next piece right here. There'S my shortest piece in the center right there, my fingers at an angle, i'm pulling it across i'm going to take my scissors and i'm going to match this piece right here. So we're going to cut up, and then i have the angle, we're going to repeat the same thing right here see this piece now matches this piece, so we're just going to match the ends to this piece right here. I need to be able to see my eyes all covered up and we're just going to cut up to that piece right there and we're going to let go and we're going to take this down. I have my brush: let's look at it so now we have the angle that cups around your face, we're going to repeat the same thing on this side, i'm going to wet it. Here'S my my shortest piece is right in there. So we're just going to take a section right here and this time you're going to pull it across this way and we're going to put it at an angle. You see the hairs right there and i'm going to cut these hairs to match that shortest piece right. There repeat, rinse and repeat now: i've cut both sides and it's pretty blunt like it's got some pretty blunt edges, so we're going to comb it like this we're going to pull it forward and we're going to pull it across and i'm going to take my scissors And i'm going to cut up into it, don't cut big chunks, don't cut zigzags, just nip it just barely nipping into that, and that will feather it out and bring it on down, because you need to come on down to this section right here. Just nip the ends and then we'll repeat it on this side and as i'm working, i'm sliding my hand down to catch those pieces and i'm just cutting into it. I got a clip still in there. Okay, we're going to comb it out, we're going to feel of it and see. Does it feel relatively even on both sides? I think it does. This might be a hair longer right here, so we're just gon na snip that right there. That feels pretty. Even this feels pretty easy, so i want to blend it where it'll kind of blend in with the sides, so it doesn't look like well. I have like some kind of weird drop. What you're gon na do is you're gon na just razor down the side. I know it sounds scary, it's not so i'm gon na pull this down like this. I'M going to hold my scissors open like this, i'm not going to do this. We'Re just going to hold my scissors like this and as i move them down my hair, i'm going to move them like that. Just like that. Just like that! Don'T do this! If you do this you're going to cut your hair off, all we're trying to do is razor our hair. So you want to come right here and just barely barely move those scissors - i don't know if y'all can see that, but that nips those ends and then it gives you a blend. So it comes all the way down to right here and then you have some some layers on the side. I'M going to repeat repeat the same thing that i just did barely moving you'll hear it well. I can't it's really quiet in here, so i can actually hear the hair cutting more than i can see it and i have hair right there. I'M not real happy with that. On this side, i need i need to wet that. I still see where there's like a unevenness right here. You see. This is not it's a little bit shorter than this, and i want it to be a little bit more blended. So i'm going to come down just a tiny bit and and look in fact and look what i'm doing now is i'm not grabbing my hair as i'm cutting it? I'M not doing this. You want to hold that hair straight down. Just like you did in the front hold it straight down, because when you release it, you want to know that, where you've cut is where you've cut, do it like this now i've cut all i want to cut so i could go out like this right now, But my idea of the video obviously is to show you how to get that bend and that swoop i did. I did wet them a little bit more because they dried, but you don't, they don't have to be super wet, so you need a blow dryer. This is my t3. You need a round brush. This brush is not clean. So let's don't look at my brush and i don't know what this is. It doesn't matter. You just need a round brush. I need a new round. Brush is what i need. So what you're going to do is you're going to take this section, this top section right here, i'll scrunch down and you want to roll it forward, and you want to do that right there. Now you can use a heat protectant and i always have heat protectant on my hair, because my hair is bleached and i'm going to turn this on. And i don't want this on a high setting and you want it on your lowest setting, especially if your hair is bleached, i'm going to dry it. So i have a little bit of a bend right there and as you're doing this, you can move it a little bit like don't just hold it on there and cook your hair, but i'm going to roll it on there. This is going to be my last hit now you want to sit and hold it, don't let it go and don't pull it out, because you want to sit there like this until this cools - and this is going to take a minute so just sit there, and I can play music if you want me to i'll chatter a little bit. If you go ahead and pull it out, then you're going to lose that bend and when you first pull it out, it's like a big swoop, but it will relax. So don't panic? Don'T panic when you pull it out and you have this big thing going on on top of your head, so we're just letting it cool. If you have a cool setting on your blow dryer, you can hit it with a cool setting to cool it off. I do but we're gon na we're gon na skip that we're just gon na skip that and i'm gon na sit here for a minute just to show you how long that i set like this and let that cool now, i'm gon na pull it out. So when i pull it out, i'm just gon na grab it right here. Okay, we have a good little bend right there. I'M gon na continue to let it cool for a minute and explain why you don't want to do it this way like, if, if i take what i just did, and do it the opposite direction and swoop it back those shortest hairs right, there are going to Stick out and you don't want that you want it to come down like this, so now we can start and i'll. Let me mention i haven't done anything to my hair this morning, like i didn't get up rolling or nothing. I literally took it out of my little bun that i sleep in i've tried this with the curling iron and it does not work, not in my opinion, not as good as it works with a blow dryer. So this is the curtain bank see how it's kind of relaxed from when i first took it to swear. I wore my hair exactly like this in 1976., but back then i took a a a um, a roller. It was a brush roller and i would roll it and i'd stick one of those pink pen pens. No, it's not what it's called. I don't know what it's called a pink thing that you stuck in it and it hold it there, and i literally slept with that thing in my hair and then when i got up in the morning you know back, then i mean we didn't have all this Stuff, if you like a side part, you can just take it after you've done it through the middle. You can pull it over to the side. You'Ll still hang on to that little swoop right there. You can get like a big 80s swoop going on, except back. Then we ratted and sprayed our hair, so you have a swoop on the side. You get a lot of height right there. Do it on this side and get the same swoop. It'S like marilyn monroe. I hope this video was helpful to you in some way. If you're thinking about doing bangs doing curtain bangs, if you have any comments or questions, leave it in the comment box below, i really really appreciate you watching. I hope you enjoyed this video and i'll see you next time. You
Comments
Melissa55: Your hair looks wonderful!!! I just can't handle a blow dryer and brush so I have to use the big velcro rollers and a curling iron and roll it back to get it to do right. I will try to roll it forward and see what it does. I'll let you know! Thank you for showing how to do this. I wish I lived close to you and I would make you a meal if you would cut my bangs! Take care! Love, Melissa
DebbiAnn2: Your bangs look fabulous! I am a licensed Hairstylist and I couldn’t have done better! Thank you for sharing! Your hair always looks spectacular!❤️
Olina Young: I started cutting my own hair during lockdown (several times, with random scissors lol!) and I need a trim so I’m all about trying this! Gorgeous. Thank you beauty
Ibelieveinangels yesido: I love that you're so fearless with your hair! I can hear you saying, "It's just hair. It'll grow." LOL! I like bangs but really can't wear them ~ my natural wave & the slightest humidity makes them into Betty Boop bangs in a heartbeat. Enjoyed this. Happy birth month, isn't it? Blessings! Jackie in upstate NY
Angela Crowder: Hi Jdee, I absolutely enjoyed your video! Thank you so much!! Have a beautiful evening!!!
Kathy Moore: It turned out so pretty
Voula P: Omg all I’m gonna say is I’ve never had bangs in my life and just got them few weeks ago because I kind of cut a little piece and kept cutting and I had to do bangs however today I trimmed them and I cut them little short gonna grow them. You look so pretty
Dawn's Life, over 40: Love your bang videos!! They look great!
priscilla soles: Been waiting for this one! Thank you Jdee❤️
Erinn Brown: Hi Jadee Can't wait till I can cut my hair again. It probably sounds strange but I really miss cutting my hair.. I lost 70 0/0 back when I had the bad bug. It's finely growing back in.. have a great week
Angela Jane Lomax: Yes always good videos, my visits to hairdressers are rare. I have bangs (a finge in Uk lol. Bardot that is gorgeous on you. XxX ❤❤❤⬛
Bridget B: Beautiful!