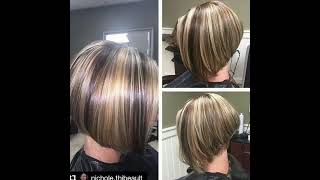
Perfect Short Layered Bob Haircut Tutorial | Best Short Hair Cutting Techniques
- Posted on 11 September, 2021
- Bob Hairstyles
- By Anonymous
Learn How to cut a Short Hair. Sharing great cutting techniques and tips
"I Love Haircut - I Love Hairstylist"
So we're going to start with our four quadrant sections, so we're going to go from the front all the way back down the center of the head to the nape and then we're going to go, uh create separating left and right and then we're going to go From the high point of the head to where the ear connects now, if you're not quite sure where the high point of the head is just lay your comb on the top of the client's head like this, you don't have to do it so dramatically, then, but So that you can find where the top of the head is and right where it balances, this is going to be your high point of your head. So then we're going to take our finger our other hand and place it where we want the comb to finish. So i'm going to start at the high point of the head, i'm going to create a line just behind the ear to where the ear connects to the head on a mannequin. It'S very difficult because their ears are weird, so we're gon na go straight down there and that's gon na connect separate our front from our back okay and we're just going to clip that out of the way. So now i have my four quadrant sections. We'Re going to start with now is about a one inch parting down here at the bottom. So this is where we're going to be working in this area here first, so we're not going to be creating a guideline because we're going to be using the hairline as our guide, so just straight across there and we're going to keep this and clip this right Out of our way as well always remember guys, keep your sections neat and clean and you'll be uh able to know exactly where you left off in a haircut and where you began it. And if you had to step away for a minute there, we go a little higher for you, so you can see a little bit better and always keep a water bottle handy because the when you keep the porosity even with the wetness uh the tension on the Haircut, it's gon na have more even tension. So, okay, this is our first section here. So we're gon na comb, everything straight down, so you're gon na take a section, that's manageable for your hand and i'm going to start in the back center. So i'm combing everything straight down and i don't care how many times you comb your this hair straight down. Your last comb is always going to be underneath and what you're going to do is you're going to place your bottom finger right at that hairline. Okay. So last cone underneath placing my finger right at that hairline, so i have a good grip on this one. It'S not going anywhere. I can. I have complete control over this section. So what we're going to do now is i'm going to lay my hand flat on the scalp on that on the scalp with our client and then i'm going to push that hair up and i'm going to keep my hand on in connection with the with the Client, at all times, until my pinky right down there reaches that hairline see that once my pinky reaches that hairline, i'm then going to bevel my hand and rotate it over and then i'm going to cut straight across and you can see the beveled line. That'S already starting to happen in here. If we go like this, you can see where that beveled edge is already starting. So we're going to take our next section last comb always underneath hand flat on the head pushing up all the hair up until our pinky reaches the hairline and then we're going to rotate our hand over and we're cutting straight across. And then one last section over here coming down underneath pushing up rotating over and cutting straight across so like i said this was one of the first technique-based haircuts ever created by rusk, and i'm going to be using a couple of different blades today. While i am completing this haircut and our last section here, combing down underneath placing my fingers at the hairline, my bottom fingers my index middle fingers of the hairline, pushing up keeping constant contact rotating my hand over and cutting straight across now. This is my first section and it's pretty much how the haircut is going to continue, but you can see already this beveled rounded shape starting to form right in here and how we finish. This will become how you finish your bob is going to be completely up to you, so we're going to drop down the next section now, depending everybody always asks you know how big should the section be. The section should be big enough for your hand to handle and, depending on the thick, the thickness of the hair near this mannequin has a decent amount of hair uh, not too thick, not too thin for a mannequin, and i'm just taking i'm gon na, say one And a half inch sections to drop down for my next one. You know this technique once it's mastered that you know, they've actually dug this one, the three minute bob. You know the some the person who invented this one it was, it could be done in three minutes behind the chair. If i'm not thinking about it um, you know really walking out these steps for you guys. I can complete this haircut fairly quickly and the baseline anyway, not not the uh, not the personalization, the detail of it. Okay, here's our first section grabbing everything in our hand, that's comfortable! That'S a manageable section! My index, my middle finger, is at the hairline i'm pushing everything straight up until my pinky reaches the hairline turning over rotating over and cutting straight across, i'm going to continue on to the left side last comb always underneath just to make sure that everything is flat. My fingers are connected to the scalp to the skin sliding up and rotating over. Now you guys can't i'm trying to stay off of camera, so you guys can see the hair better, because there's nothing worse than watching a haircut video and not being able to see what what the person is doing. But what i, what i want you to be aware of is that when we're cutting underneath, you can't see that like, if i'm looking straight on at that, i can't see that so i either have to make sure that i can i'm going to go down. Crouch down and look underneath or if i'm going to be able to have my client high enough that i can see underneath that section. What i want you to be aware of is don't flip your hand up this way to see the section, because what we're doing here is by having the length travel up higher, okay, we're allowing this to travel up higher as well. So, by doing that, we're we're letting it become a little bit longer which is going to push down on those hairs. If we start flipping it up, we start to lose that roundness a little bit and that little bit of bevel that and that bevel that we're we're trying to create for this haircut. This line so just be aware that when you're, when you're doing it kind of trust, the technique and cut and cut or if you have to you want to look down at it and get underneath that section, you know i also find that, instead of cutting it Straight across i'm actually beveling my scissor just a little bit. So with my 360 i have the 360 swivel. You know on my delta blade here. So it's easier for me to be able to kind of just bevel my scissor a little bit as well, so that it's kind of stick is sticky going in tune with um the angle that i'm cutting don't worry about all this under here you can leave it. You can you can detail that out later, if you'd like, but we're going to keep going with this rounded sections. Okay, we're going to switch over to our right side now combing down underneath my finger. Is there push up and turn over we're almost creating an r shape like the lowercase r on this one? You know how like lowercase r is the straight line with the curve over. So that's what we're doing we're creating our straight line and then we're curving it over to to create that r shape, and then i'm just going to drop down. My last section, i'm just going to get a little bit more water. The lights in here are really kind of drying out the hair a little bit. Okay, there we are, and our last section back center combing, underneath placing our finger at the hairline pushing up till our pinky reaches and beveling over and it's okay. I didn't get that last piece i felt like it was getting a little too close to the inside of my finger and i didn't want another battle wound, so i decided to leave it out and pick it up in the next section, because my sections are neat And i know where i'm going, i'm able to pick up where i left off and because there's no real guide on this haircut as of yet it's basically the hairline. That'S the guide combing this out of the way combing this hair straight down, want to make sure we're combing the hair and that straight down and letting it be where uh fall, you know cutting it where it falls, cutting it where it lives. If we start over directing a little bit too much this way a little too much this way, we start to lose what line we're giving it and we could create some um elevation or shortness, where we're not quite sure we want it. Okay, let's comb this out of the way our last section in the back combing, underneath placing my fingers sliding up turning over okay. So here we are we're creating that beautiful weighted, rounded line in the haircut, and it just only took me a couple of sections to do that last section. On the right hand, side you know, had her hair been incredibly long and she wanted a bob. I really, i would have removed um just a bunch of weight to begin with. Actually, when i colored this hair, i removed a bunch a lot of weight length before i went into the cut it's just a little bit easier to handle. So if you have a lot of hair that you're dealing with just make your life a little easier and just cut a lot of that length off to begin with, you know those are my favorite ones. When i get to use my clippers and just clip her off a bunch of length, it's very dramatic so straight down finger at the hairline sliding up keeping constant contact with that hair. With that scalp and cutting straight across now, i said you know the the title of this one was versatility in a classic cutting technique, um class. So what i'm showing you guys is a cutting technique. Yes, i'm showing you a bob. Yes, i'm going to show you how to detail it, but you can use this technique all over the head wherever you want a weighted, rounded beveled line um. This is the technique that you can use and i have a couple of mannequins that i've already finished um and i'm gon na i'll share with you when we're done here and we'll flip over for the last one and there we are straight across so there we Have it this is the beginning of a beautiful bob, and you can see that beautiful roundness to the haircut. You can see the graduation that we built in here by pushing up we're, making the top hair the bottom here travel a little. The top hairs are traveling a little further than the bottom here and we're getting that beautiful, beautiful graduation. Okay. So i'm going to switch out from my straight blade and i'm going to start using one of my texture, blades i'm going to use. Let'S do the gamma blade, the grammar blade is going to be the 32 tooth, um thinning shear, and you can use whatever tool you like, depending on the look that you're going for. But what i want to do is i want to just soften this. A little bit and blend this line just a little bit just this little bit of roundness in here. So what i'm going to going to do is i'm going to cut it the exact texturize it the exact same way that i just cut it using the same. Pushing and rolling technique so again it's the it's the it's the push up and the roll over using our pinky as a guide. Now, when we use um, but if i push up and roll over, i still use my pinky as my guide, i'm going to have nothing to cut because it's the same technique that i just used. So what i'm going to do, depending on how much texture i want to take out, i'm going to either drop out my pinky or both my pinky and my ring finger and that will allow the most hair to bevel over and i'll, be creating um texture up. This way so the more fingers i take out, the more hair that's going to be left for me to texturize i'll, show you what i mean so we'll comb that i'll just do it i'll show you in two sections now i, if, depending on the thickness of The hair, if her hair was super fine, i would be able to do it all in one section, but her hair is pretty okay um, it's average texture, hair um. So i'm going to start in my back center combing this out of my way. This out of the way, combing everything straight down: okay, a little bit more water help me keep everything out of the way. So, like i said, here's our section, my finger is at the hairline. If i push up to the pinky and rotate over there's nothing in there for me to to texturize, because i have already cut it off, so what i want to do is um use. This uh take my pinky out over my ring finger out. Let me see: do this one ring finger, turn it over and then we're going to texturize really breaking up some of that weight line, but still keeping that beautiful bevel in there oops same exact way. Dropping my pinky out pushing up turning over and texturizing and the last side here pushing up taking my pinky out and beveling over. So it really is softening out that heavy line of demarcation, but it really is defining a little bit more of that bevel and that graduation in there dropping my pinky out pushing up. So how many of you have you guys seen this technique before um? I hope you're enjoying because i'm telling you this was the coolest haircut that i had ever seen in my life back in the day, and i still honestly, i still use it even if i don't realize i'm using it, i'm using it. I use it for clipper cutting. I use it to really um blend out. When i do undercuts, i have one of those i'll show. You too last cut comb, always underneath grabbing all that hair, laying it flat pushing up beveling over honestly. It really is taking on a gorgeous shape, may be one of my favorite haircuts in the world. Okay, let's take down our last section, guys just going to give it a little bit more water in the back center. Just the exact same way that i originally cut it in my middle finger at the hairline and i'm going to use my ring finger as the guide pushing up turning over and breaking up all that hair. Now you could use um any different blade that you wanted to, like. I said i'm using my 32 tooth um thinning shear. I have my alpha blades, which are the big teeth guys these create a more chunkier type of look i'll. Do the next section with the with that one combing down last section, is underneath push up rotate over now. You can see how much more hair this one takes out and you can see that it's a much a much chunkier kind of texture in there still creating that beautiful beveled shape. I haven't really done anything to the interior of the hair um and that's that's great. For when you're detailing you know um, are we going to layer it? Are we going to do it more a-line? Are we going to um, you know really razor the front? Is there going to be a fringe all kind of personalization details that you would give any client getting a bob, i'm just going to break that up and the last one on this side last one underneath using my ring finger to push up to the hairline flipping Over rotating and really just breaking up that hard edge on that line, and you can see the little bit of the difference between the thinning shear and the alpha blade, which is pretty cool okay. So now we have this beautiful beveled line in here, and we have a couple of decisions to make. Are we going to keep it a true one length bob? Are we going to add some texture to it? Are we going to leave? How are we going to soften this fringe up here? Are we going to go underneath the fringe? Are we going to go right to the fringe, so there's a lot happening, a lot of decisions to be made, and that's all based on your consultation, usually what i like to do because um i like a softer hairline back here. I'Ll usually do a scissor over comb and i'm going to use my betta blades, so the betta blades are actually a combination of the um alpha and the gamma. So it's like they were like right. This scissor here is like, if i took my my big blade and my thinning blade and kind of you know melded them together. This is kind of what we got. This is the hybrid of that one and this one's going to take out the most hair, and this one i really like for detailing around the hairlines, especially when somebody has one of those swirls or whirls and or the hairlines go in different directions. This is great for really detailing that hairline and i always like to do it in a scissor over comb technique to really keep it soft in there for you. So i i like to kind of get this out of my way a little bit and there i can see right in here. Can you guys see right in there right where that bevel starts right at that hairline, so this is kind of where i'm going to start with my like i'm just going to do it, so you can see what i'm talking about i'm going to kind of like Do it right in here and that's where i'm going to bring it to just going in gliding out removing a lot of this bulk a lot of these extra hairs that we want to keep a cleaner line on our bob, and you can see how it's it's Really removing quite a bit of hair but really leaving it super soft. Looking. Yes, you see that see it's removing so much hair, but it's still leaving that softness in there my um, my beta blades, were honestly the last blades that i ever purchased from risk, and i swear. I really don't know how i lived without them for so long. They really do remove a lot of hair. I can sometimes do an entire haircut with just my beta blade um, because it does remove that much hair. So you know they come in for their three or four week touch up and they just need a dusting on their hair and they don't really need a full haircut. But if they don't get any kind of trim, they're going to be back again in two weeks. For their trim and it's all about convenience, okay, just bringing a little bit more balance to that back. Hairline, because i'm trying to keep you guys. So you can see what i'm doing. Okay, just one more little hair. Okay! Maybe then it's just to soften the hairline! Just a pinch more i'll go back in and just do a little scissoring over comb just on that bottom section, just to break it up, just a pinch notice how i'm holding my scissors, i'm not holding my scissors vertical to the section, i'm kind of beveling again, My scissors around to keep in the shape of the haircut, because i do want to keep that nice round shape and there you have it guys. This is how we create the beyond the fringe hairline in the back to create the most beautiful one length beveled bob. Now, what do you guys think it was pretty cool right and it's just a matter of like i said that are pushing up on the head and then beveling your fingers over and trusting that technique. Um once you master this, and you just hear the steps that i'm saying in your hand in your head, because that's how i did it when i first learned how to do it, i just kept taking the steps over and over my head, keep my hand up Against the scalp up against the skin, don't lose contact. Push up to my pinky reaches the hairline bevel over and cut and trust the technique because it will work, the technique is perfected and it works for you every single time. Now. The next couple of things we have to do is decide what we're going to do. Are we going to keep it a true bob and cut these straight across? Are we going to then go in here and layer this? The decision, the the the possibilities are honestly really endless when it comes to a bob, and i think that's why a bob never goes out of style. It'S it's such a classic hairstyle, because you can personalize it and customize it to each individual client and what the fashion is pushing forward. Um for that you know era. So this is really cool a cool technique. So i'm just going to finish it up real, quick and i'm going to. Basically i'm just going to cut these straight across and keep in line with a with a straight bob. I'M just going to wet these i'm going to switch back to my delta blades, which is my straight blade and i'm going to take two sections straight across and i'm just going to going to connect my back with my front ever so slightly ever so slightly beveling. My fingers over just to create keep the in tune with that roundness. That'S happening um, just ever so slightly beveling, my fingers underneath okay, it's one side completed and, let's just finish up the other side, colleen make sure it's make sure you re-wet your hair ever so slightly bubbling. My fingers cutting straight across with my delta blade and the last section of our haircut now you guys i've mentioned before that um this haircut had also could be dubbed the three-minute bob, and now you can see why it could probably be done nothing. I'Ve ever done in three minutes, but you could probably see why it's been dubbed the three minute bob, because it really is a a really kind of quick technique when working behind the chair just checking for balance just going to tighten this one up. Just a pinch. There we go okay, guys there you have it. This is our. You know our beyond the fringe, beautiful weighted one length, bob haircut, i thought it was pretty. I thought it was pretty easy now. Let me show you a couple of other ones. How you can just take this technique and use it on different parts of the head, so i have here this one, so this one kind of was miley cyrus inspired when she was growing out her hair before she got that beautiful shag that she's wearing now. So this one i love, because i use this on the fringe area. I wanted to create that roundness on the fringe area for it for here, so this haircut, i left it a little. I sectioned off i sectioned off just at the top of the ear. Okay and i layered everything underneath the top of the ear by holding everything out this way straight up from the head once that was done. I used that guideline that line here where i sectioned off and that i used as my hairline. So i got that roundness in here right at the top of the ear. I did my my you know my push and roll technique, and i created this and then i layered it a little bit. So i add a little bit more layering and a little bit more texture for the fringe area. I sectioned a deep fringe out and i took it in. I think it was two sections i took it here and i used the eyebrows as my guide for the hairline. So i think i don't want to push everything up to her hairline because well, that's a lot of hair um. So what i used was. I used the the top of her eyebrows as my guideline, you know we're always using different parts of the body when we do a haircut so i'll show you real, quick, there's not going to be anything really for me to cut, but i'll show you anyway. So this was my section. Let me put this down a little bit, so this was my. This is my my fringe section. What i did was i took everything to the center last comb, always underneath i grabbed it. I pushed up until my fingers reached my ring finger reached her um top of her eyebrow and then i beveled over, and i cut straight across by pulling everything to this section here, i'm creating a natural roundness and by pushing up and over i'm i'm forcing the Hair to travel a little further, which is giving me that roundness, i brought the next section down combed it the same way and i used the eyebrows and then i texturized them. So that's how i created this beautiful miley, cyrus inspired fringe for someone who's growing out their pixie cut the next one i did for you guys was a shorter version of that. So on this one i did a shorter version of the haircut that i just did so i cut out. I used um the recession area on a mannequin. They really don't have recession areas. So i used the recession area here and i layered everything at a at a 90 degree angle straight out from the head, and i kept everything nice and short underneath. But then i was left with. I used a four quadrant section again, two down the middle. You know from left and right and then from front to back this section this these sections were grabbed in four sections and i used that line of demo. That line of where i had my layering. So you can see guys. I can go back in here and i can find this haircut. This is where i started. I stopped layering, and this is where i started with my push and roll technique with my beyond the fringe, so my finger is placed right at the line where i stopped. Layering, so right at that section line, i pushed up till my pinky was here and i rotated over and i cut straight across and let me tell you this line was very scary. Looking when i did it because it looked like a mushroom haircut, but once i combed it down and i texturized that line a little bit, it really became quite beautiful. I did the next section here now. I had two sections in the back: oh she's, losing a lot of hair um, two sections in the back. What i did was i worked from the center of each one of those sections again grabbing, pushing and rolling and cutting that off. So you guys can see it's a really cool technique to use around the head. When you want to create a weighted beveled line, does it always have to be a heavy weight line? No, it doesn't have to be heavy. It can be a weighted line without being heavy and then for the last section it was pulled again over to the side. That'S where i, where i placed my finger and rolled over and lots of texturizing later, and we have this really kind of cute haircut here - that i used to be on the fringe technique on and for last, but not least, this one's my favorite um, this one Is an asymmetrical that i kind of took i did so. What i did was, i created a c shaping here, just a nice c shaping so from the recession area around the ear back down to the point of the hairline down in here, and i just use the clipper guard and i clippered all of that off. I created my four quadrant sections, one two. You know straight down the middle and then from front and back - and i took my section here from the high point of the head to where the ear connects just clip, that out of the way for me, combing everything straight down where the hair lives. I pushed up to my hairline a little bit higher to where the buzz was, and then i beveled my hand this way, because i wanted that roundness around here and i wanted that soft fringe to lie on top of there, so that when i combed it down It had that nice soft bevel and it didn't look like um too disconnected it had a little bit more of that blend to it. The next section i took was straight across the next one that i took. My mannequin keeps getting lower and lower the next one that i took, i kind of started, pushing rolling and then bringing my elbow up so that i'm getting this long elongation down in here. So i'm still holding combing the hair last one underneath pushing up rolling over it and then i'm kind of lifting like pointing my fingers towards the ground in the direction that i want the hair to fall. So by doing that, i'm creating a little bit more longness. Here and then i continued this all the way around bringing my elbow up, pointing my fingers down towards the ground, and here we have our beautiful asymmetrical, with an undercut one length. Bob
Comments
ABD ABD: Thank you so much, easy, beautiful and creative.
Maria Lascaibar: Great technique. Thank you for sharing. Can you let me know the name of the thinning shears. ❤️❤️❤️
biglouis: Beautiful technique,what is your name in Instagram?thank you for sharing.