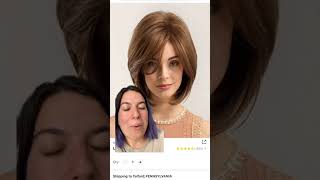
Long Bob Haircut Raul Roa Estilista Hair Pro
- Posted on 22 July, 2022
- Bob Hairstyles
- By Anonymous
Long Bob Haircut is a very fun cut that requires several tips to successfully obtain the result expected by our clients and in this video I give you the guide and I show you how to do it correctly.
Hi, i'm raul roa esti lista. Today we are going to see another technique on how to do the long bob cut. How you can appreciate my client has lots of hair and that's why she's sectioning this way to have better control. Let'S start at the back sectioning, a wick of vertically which we're going to project at 90 degrees and the cutting incline is going to be at 45 degrees. We will cut straight. We will section the next week to cut also vertically and parallel to the previous one, which will be our guide weight and we are going to take it to the same cut of point. We will also cut straight. We continue sectioning wicks parallel to the previous one. Taking them to the same cut of point while maintaining the same angle, cutting incline, that is at 45 degrees. We continue sectioning, wicks and taking them to the next cutoff point. It'S very important that these selected wigs are thin to be able to see our guide wig. Very well and to be able to maintain the tail angle and obviously cut where we should cut. How are we sectioning our wicks cut vertically and we are taking them to the central point, keeping the tilt at 45 degrees? What i am going to get is in the back central part. It will be shorter and longer on the sides, because it will carry the wick further away, and that makes it much longer or that is longer on the sides, because that is what we are looking for. Also, the cutting inclination at 45 degrees will allow me the hair naturally shrinks inward. I don't have to be forcing it, but the same inclination will allow me for the hair to shrink inwards. We return to our central guide wick to be able to start working on the opposite side, and we do exactly the same. That is in the first section that we already cut. We section vertical wicks and we will take them to the center keeping the same. Cutting incline at 45 degrees and cut straight with the big difference. When i'm cutting the right side, i must be standing on the left side and when i'm cutting on the left side, i must be standing on the right side. That forces me to keep the sides longer it's what i call the mirror effect, which is the same when you are standing in front of a mirror. You raise your right hand and it will obviously reflect in the mirror. We must do it exactly the same. Yes, i can move to section the wick. I can move a little to make it perfect, but i must regain my cutting position, which will be in the center if i'm cutting the wick in the center or a little more to the left. If i'm cutting the right side or a little more to the right, if i'm cutting the left side, it's very very important that we do not lose the cutting position, because this is where we fell in this kind of cut. We carry out the rectification, taking highlights from each side bringing them to the center, and they have to give me exactly the same. If there is one that's longer than the other, we'll have to return to correct where it was longest and cut off the excess to fit me fully balance both sides, we will continue with one of the sections middle back where we will take our first wig to Cut diagonally and parallel to the dividing line. We comb the wick very well from the growth area and we take it to the cut point, maintaining a 45 degree tilt. We will cut straight, it's very important that you do not try to cut the section at once. While you can cut your fingers, you are cutting little by little, but keeping the straight line in the inclination that we give to the wick try to take the wig to cut very, very thin. This will allow me that each week is getting longer and longer and then the hair shrinks in a natural way. You will also have better hair loss. You are not going to see any jumps when taking very tight sections. You can see the jumps of one stroke and the other. We will cut the entire section in the same way and the same point - and this is the result of this section now we continue with the opposite section. We are going to perform the sectioning of the wicks diagonally in parallel to the division of the section, the same diagonally we are going to cut, but keeping the premise that my body is on the opposite side from where i'm cutting. I can move my body when i'm sectioning the wick to be cut. I have to regain my cutting position, which will be the opposite side where i'm cutting and as a figure shows us. I continue. Sectioning wigs to cut another secret is to keep your foot on your feet in the center. That allows me to move calmly commonly not lose the cutoff point. This is the third cut i make of this guy. The previous two were with two techniques very similar, but different, because it's important to try different techniques to see the different results to adjust your technique. Every time you cut even more so which this type of cut that is so complex, because you have to take many positions into account, cutting position, wick inclination, the way you're cutting the section of the wick and the projection of it. This is a bit expensive due to the needed to remove the thin wick, and then we have a client like the one we have right now who has a lot of hair because it will be more delayed, i'm going to have to repeatedly pull out thin highlights, But it's necessary if you want a good result. Besides that, if they get thin, you can go with peace of mind, handling the cut diagonally, because every time you pull out a wick, you are going to start to see the diagonal growing and growing, and each time it will be longer the more opposite. The cutting position to the wig that you are cutting, it will be longer, so you want a super extreme length on the sides. You have to stand more opposite. Where are you cutting from to carry a longer length from the sides to the cutoff point? Likewise, we take two weeks we take them to the center and rectify that we have the same length. Now we go to the one of the sides where we select the wick parallel to the division and we take her to the back continuing to cut diagonally. I lose my court position to go to the section with the wick to be cut, but we immediately go back at it here. I have not recovered my position of cut because they will be watching my back. That makes it more difficult, but you must be in the correct position to the opposite side or in the position you have chosen as a cutting position. There you must return and then you must cut diagonally and straight. We continue to select the thin wicks and combing them very well, taking them to the same cut of point already in this part, you tend to turn the diagonal that we are working on cutting in a vertical the same section that we are taking on the sides. The wick that we are sectioning on the sides, it's also beginning to become more vertical sectioning as our cutting line they already become vertical, because that's what i'm looking for it's along on the sides. As we can appreciate now, we will continue with the next side repeating the same procedure, sectioning strands vertically and taking them to our cutting point diagonally that in the end, it will end returning i'll cut line vertically and cut straight as advice focus on what you are Doing talk very little because a good result depends on that. If we get distracted, we can lose our cutting position and we can work not a diagonal but a horizontal. And if we lose the length of the section, we will have to return to the section that we cut previously to rectify it and give it the same length that we just achieved with the section that we have shorter. We will do the checking, bringing the highlights and bringing them to the center to measure that we have been equal in length. We can already see the structure and the movement that the hair naturally has, as advised, when there is a lot of hair, it's ideal to dry, brush and structure and thus be able to handle the texture to remove volume and weight from the hair. Because this type of cut requires yes or yes to give texture. I have a video on my youtube channel where we can see how to perform the technique correctly, texture to remove volume that what the scissors do is enter parallel to the direction of the hair and create small spaces to give it the shape. We already achieved to the structure. It is now recommended to use thin and scissors to achieve this effect. Now we are going to work on the upper portion where we will select weights parallel to the division of the triangle, which are we going to take and cut. We will use a guide, the structure that we dried and cut previously, for this is also very important, thin sections to be able to see exactly where and where i should cut. Every wick we have is to cut the start of the cut. There will always be a millimeter longer that allows the hair to shrink in a natural way, because the first wigs are going to be shorter and the last ones will be longer. Given an inward movement or shrink inward all cut all structure. You must also adapt the wick to cut the size of your hand, if your hand is small. Well, we are going to take the strands that fit between your fingers to make the cut, don't try to cover a very thick strand, because you can change the direction of the cut very important that what fits in your hand, is what you are going to cut. Keeping the inclination diagonally - let's remember that, already in the last weeks, the inclination tends to be almost vertical. This type of cut usually fits all faces types except the long face rest all types of faces. They will adapt very well to this type of cut, and it will also be very important that there is a neck if there is no neck. It is very difficult achieve the effect because it will be brushing on the shoulders and i'm not going to be able to give it a shape from short, too long, because we don't have a neck. That'S why? When the client comes to us with the instagram photo of a girl with a very long neck, like 15 centimeters, we can see those amazing falls and if your client does not have those characteristics or similar, we obviously we have to adapt the cut to her muscular Bone shape to adapt it. That is, why is very important to tell our clients, because obviously they don't know this, and then they want to look the same as the girl in the photo, but suddenly the hair does not apply because it's too thick on wavy hair. This type of cut is also very nice, then save the client that she's not going to be exactly the same because of the differences, but we can adjust it and that we are going to achieve a similar effect on wavy frizzy hair. We would have, after making the structure, making some light layers to distribute better the volume and that we will not be with a triangular finish. We are going to distribute the frizzy better, just have the right model to make the cut i'll. Do it and record it? Obviously, as you can see, i move a section, the wick, but i immediately go and regain my cutting position not to lose neither the inclination nor the form how i am going to cut the hair and, of course, sectioning, is vital to be able to work. Organizing step by step, we cannot do this type of cut without sectioning or a section, that's asymmetric or unbalanced, because that's how the code will be now we are going to section a wick on the opposite side and we will do the same again continuing with our Cut diagonally keeping the lengths of the sides. That is why it's very important that you always stand when cutting to the opposite side, where i am cutting from and that forces me that the length of the sides i stayed long, we usually cut the hair when it's wet wet. We make the structure and when it's dry, we give it the texture that is, to remove weight also with practice with a lot of study and lots of perseverance, you will also be able to do it very fast and perfect, and every day you will do better. Take all the time necessary to make a good cut. Sometimes we get a bit confused when we talk about grades. The degrees are present in the inclination in the projection and it's very important that we take them into account. That'S why i have a video on the channel where i spoke clearly on this topic. We finish and rectify the lengths we brush and shape the structure and then start working on the texture. For this we take logs. We comb them to the contrary and enter the parallel scissors. As i tell you, i have a video on the channel where i explained it, i clearly do it a little slower, so we understand the concept well, but it's very important to do so. I was talking about the thinning scissors. It does not help us to do this type of process because it creates internal spaces or internal layers, which can give two results, one that remains with a lot of volume, or that is opposite that it remains in the hair. Completely empty and that's a risk: let's let the thinning scissors for very short hair. You

Comments
Guadalupe Castillo Góngora: Muy precioso
Djulita Sulai: Thank you Mr. Raul. God bless Mr. Raul. ♀
jorge enrique moreno muñoz: GRACIAS RAUL
maissa MAISSA: Tooop
aline sophia: superbe carré plongeant
Milagros Emilio: new hair Bob cut short