Step-By-Step Diy Beginner Friendly Versatile Box Braids | Braidless Illusion Crochet | Dorsanee Hair
- Posted on 02 November, 2022
- Bob Hairstyles
- By Anonymous
Bonjour lovelies!
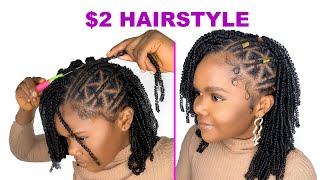
Today's video shows from start to finish how I achieved this knotless, illusion, individual crochet goddess box braid hairstyle in 30 minutes! It is the versatile braid pattern with no rubber band! This style is very much beginner and DIY friendly. I hope that my beauty babes learnt something from this video.
If you enjoyed this video, don't forget to:
#Like!
#Subscribe!
#Comment!
#Share!
Goddess Box Braids Crochet Hair 12 Inch Short Pre-looped Crochet Box Braids Curly Ends Bohemian Hippie Braids Synthetic Braiding Hair Extension (7packs, 1B/30/27) https://a.co/d/3uuPVHc
Check out my previous videos @KrissTayne
Thanks for your continued support
Promotions, Sponsorships and Inquiries: [email protected]
Follow my business page @millionhairyqr_
#workvlog #canadavlogs #jamaicatocanada #jamaicanincanada #protectivestyles #naturalhairstyles #naturalhair #haircare #crochet #crochethair #crochethairstyle
#internationalstudentsincanada #firsttimemom #labouranddelivery #genderreveal #3rdtrimester #firsttrimester #secondtrimester #babymomma #baby #freepromotion #promotion #collaboration #hairreview #boxbraids #knotlessbraids #kalysshair #unicehair #alipearlhair #rpgshow #xtrendhair #humanhairwig #humanhair #braids #braidstyles #nadulahair #hairstylist #wigreview #hairreview #aliexpress #amazon #wigsale #wigs #hair #freewig #freehair #freeproducts #aliexpresshair #amazonhair #makeup #beauty #lifestyle #products #saskatchewan #canada #KrissTayne
Foreign lovelies welcome or welcome back to my channel. Today'S video is sponsored by darsani here, and this is their 12-inch goddess box, braid in the color 1B 30-27. So if you are feeling this look, guys, don't forget to drop your comments like the video. Let me know in the comment section that you are present. Thank you guys. Also, if you are new, don't forget to subscribe to the channel and everybody. Please turn your post notification Bell on. So today's video I'll be showing you how I achieved this look or specification to this hair will be in the description box down below, so don't forget to check it out and get yours before it is finished. Thank you so guys my hair has been stretched from some jumbo plaits, so I just went ahead and sectioned my hair like this, then I am going to do the front first by putting some plaits that will connect to each other. You will see that later on. So make sure that you get it as small as you can, if you have natural hair and get you some edge control to really just tame the edges so that it gets that fresh. Look so right here, I'm doing my plaid or, as some people call it box braid that will connect to the other piece or section of hair right behind uh. For this part, I would definitely recommend that you plot it or you can twist the end all the way out, instead of leaving it uh halfway like I did, and then after twisting it or plaiting it all the way to the end, you go ahead and connect. It like I did in the video so guys you will do that for the entire front until it is completed and then I'll show you how I went ahead and do the back portion guys. I really don't think that there's a particular way to do the joining of the hair. You just want to be sure that it's not too tight on the root so that your crochet needle can go through it. But you also want to be sure that you plot it as tight as you can just so that it can lay flat, especially if you have natural hair now to connect the plaits uh. You know that for the first one you as I said you would want to do that, one all the way to the end, but for the second one you want well what I did. I did like about three plots and then I started to add the first flat. You will see it later on like right here I did about three plus and then I added the first one and then I went all the way out with that plait and then I did three plots again for the second one like right here and then I Connected it, so you just do that until you are completed with a section of the hair and then for the end, I like to twist my ends, because I don't like to have to pull it all out. It takes time so for the back portion. I simply just instead of going all the way down like in a straight line, I just curve it across just so that the crochet cannot leave spaces in the back of my head. So I just do it all the way up to the top and guys it doesn't have to be perfect because it will be covered just try to get it as flat as you can and guys. I was so excited to try this look so for the installation. You want to get your closed, crochet needle and push it downward just so that the hair can lie flat, and then you are going to open the top or the loop and pull through the entire here. So you're gon na pull through the curly piece as well as the piece that is like the braid, the box braid, and then that is it too late how it's supposed to be laid in place, and you repeat the process for the next side. You are going to put the needle on the opposite side you'll see later on, and you just continue the process until the front is finished. So here it is you guys this is exactly what I was trying to explain and the top of the hair is like a two strand twist, so you can just basically do it in the opposite direction to get it open. Then, after you push through your closed crochet needle, you want to open it put on the hair, close it and pull it through. It'S that simple. Then you are going to fix the hair in place so that it does not unravel. So you want to get it as tight as you can at the root, but you don't want to pull on your hair so, while you're pulling it, you need to like hold the root of your hair because we want to protect our edges. Okay, so, as I said, you just basically continue the same thing until the top portion is finished. It is that simple, like trust me and remember guys, even if it does look a little bit crazy at the beginning, it's gon na work. Okay over here. We trust the process and it always turns out really good. So that is all there is to it. When we get to the back portion or at the top, I'm gon na explain it once more and guys your foundation, braids, don't have to be fresh. Mine were like a few weeks old and the hairstyle still came out good okay. So if you can't do the hairstyle immediately, don't worry so once more, you close your crochet needle and it's going to open. That is fine. Then you put on the hair close. It pull it through when it is through you open the hoop, pull through the entire hair, so the curly piece plus the braided piece. You pull it through the hoop just like that. You get it flat at the root by pulling and holding your hair. So you don't damage your hair in the process and then you lay it in the position that you want it to, and that is it you guys so when we get to the back I'll, explain how it is done again, foreign. So this is literally me trusting the process trying to see how it looks and yeah getting my phone to see. If it is pick friendly, I love it guys for the back. You won't even need a mirror to do it like I'm telling you that this style is really simple. It'S really easy, so you continue the process. You know pull it through closed. It will open - and you just add your hair - to the open piece of the crochet needle pull it through create the hook by opening the opening the loop and pulling through the entire hair. And you just do it with all of the back portion of your head. As I said, you can trust the process. It'S not gon na look as neat at first, but it will be very cute at the end, and that is basically it's you guys so yeah as I was explaining earlier to get it nice and full. You don't want to do the cornrows in a straight line, you do it with the Curve and voila so guys. I just completed the insulation process. This is the finished. Look, it's your style! It'S very light. I used all the bundles that came with the hair, so it's pretty fluffy, but I like it this way it doesn't feel like there's anything on my head um, the colors are just popping. Also it's very versatile. You can wear it to this side, guys, I'm really feeling this hairstyle. I think I'm gon na wear it mostly like this, and it's pretty easy to maintain all you need is still moves and some hairspray for Sheen, and that is it. So all my girls out there, who don't really know how to do box braids. This is definitely for you. It'S very easy guys. It'S very simple anybody literally anybody can do it for you and it's beautiful, I'm gon na show you some ways in which you can style this here. So guys, don't forget to comment down below your favorite. Look like subscribe. Tell a friend guys share the video so that other persons can join. So this is look number three. We already did the center part and we did the side part it's giving school girl number four. Isn'T this some fresh box braids guys the hair is very inexpensive. So I don't know what you'll be waiting for. You need to get this hair so that you can rock this look. Okay, all right! Okay,
Comments
Teshia RDix: Versatile... Loving the colour.
The humble Baptiste family: Hey Krissy. So beautiful as usual. I love it . Fit your face.
Tashna Gentles: I love this!!! The color and styles fit you bad!
La vida Jennings: Girl I have a whole lot of hair on my head but with patience, trusting the process I guess it would turn out as nicely as yours
Naturally Kerry: Present! This hair is beautiful on you
La vida Jennings: Love number three and the one you love most too.
Tori WM: This color!
Kay's Version: Looking good. The hair colors fits your complexion.
MsKoko: Love it. How many bundles did you use?
Hannah-Kay Angus: This looks real good
Tahj Rose-Fagan: Me say, the dimples inna the thumbnail a kill me! This looks so good!!?
La vida Jennings: Bonjour lovely! Je suis ici
Jodi Fabulousss: From when mi been a eye this crochet hair but me just nu like how dem get trashy and fry after a while. How did this hair hold up?