No Leave Out Flip Over Method Quick Weave | Jasmine Defined
- Posted on 12 November, 2022
- Bob Hairstyles
- By Anonymous
The speed and convenience of a quick weave without the maintenance of leave out? Yes, please!
*Products Used:
Hair: https://amzn.to/3O3oUfJ
Wig Cap: https://amzn.to/3fTYaBX
Brush: https://amzn.to/3hE2J3T
Hair Glue: https://amzn.to/3WUjEiu
Hair Shield: https://amzn.to/3ElnTeP
Subscribe!: http://goo.gl/W8NrwM
▬▬▬▬▬▬▬▬▬▬▬▬▬▬▬▬▬▬▬▬▬▬▬▬▬▬▬▬▬▬▬
-FAQ-
*Camera (latest model): https://amzn.to/3wmAk3S
*Lens: https://amzn.to/3jZHx7d
*Vlog Camera: https://amzn.to/3sy3mxn
*Vlog Camera Lens: https://amzn.to/2VnE8oJ
*Audio: https://amzn.to/3yEBzwI
*Lighting: https://amzn.to/3jYVP8c
Editing Software: FCPX
▬▬▬▬▬▬▬▬▬▬▬▬▬▬▬▬▬▬▬▬▬▬▬▬▬▬▬▬▬▬▬
Instagram: www.instagram.com/JasSL_
Contact me: [email protected]
▬▬▬▬▬▬▬▬▬▬▬▬▬▬▬▬▬▬▬▬▬▬▬▬▬▬▬▬▬▬▬
*Popular videos*
Crochet Butterfly Locs: https://youtu.be/yZr5p5D8Ob8
No Leave Out Curly Crochet Wig: https://youtu.be/lsLgpvJyhus
Easy Grip Knotless Box Braids: https://youtu.be/ctFmNn0EN2g
Crochet Faux Locs: https://youtu.be/weOsux_qlRI
Styling My TWA: https://youtu.be/NqcCv6rSLLs
Middle Part Bob Sew-in Tutorial: https://youtu.be/0pQ9LADHiXk
Curly Crochet Braids Tutorial: https://youtu.be/e4wp_w_hPV4
Box Braid Tutorial: https://youtu.be/K5eKgN7U2-w
Crochet Marley Twist Tutorial: https://youtu.be/l9BnLRxIq08
▬▬▬▬▬▬▬▬▬▬▬▬▬▬▬▬▬▬▬▬▬▬▬▬▬▬▬▬▬▬▬
*Affiliate Link
▬▬▬▬▬▬▬▬▬▬▬▬▬▬▬▬▬▬▬▬▬▬▬▬▬▬▬▬▬▬▬
#quickweave #protectivestyles #noleaveout
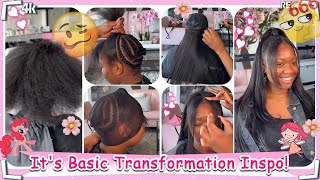
You know who it is everybody, I'm back once again with another hair tutorial today I am bringing you the much awaited tutorial on how I achieve this quick weave with no leave out for this style. I am using Organics Maui curl. This comes with three bundles and they are 18, 20 and 22 inches for the style. You'Ll need a wig cap hair glue and this protective shield, which I will link in the description box below so I'm starting with freshly washed and stretched hair. So you can see, I have my two pigtails all right. So first I'm going to cornrow my hair and I'm going to have the front section in the back section. So I'm taking my bundle and I just cut off a small piece at a time of the track. This is the 18 inch Track by the way, so I'm starting with the shortest hair and this hair is going to be used for the front perimeter of my head. So I'm cutting a small piece of track and I'm cutting off the weft and pulling out this access hair at the top, and this hair is what we're going to use as kind of our fake leave out. So I'm going to take this hair and cornrow it into the front, and here you'll see I've already started. So I have kind of larger cornrows on the sides, with the two strands of hair and then, as we get closer to the middle, the braids are slightly smaller and I'm using three strands to give myself more coverage where my hairline will be most exposed all right. So, first I'm going to show you one of the larger cornrows that I'm doing on the side and I'm going to take two strands of the hair place it on either side of the braid to start and I'm using my mouth to hold the ends of the Hair, so they don't slide out. You know how to cornrow, then this is helpful, if not I'm gon na try to do a no cornrow method at some point, but for now, if you know how to cornrow you're, basically pouring the hair in in reverse - and here I'll, give you a closer look. This is me doing one of the middle braids, so the braids are going to be slightly smaller and I'm going to be using three pieces of hair versus two, and so I'm adding a piece of hair to each strand of hair in the braid foreign and there You are, it doesn't look too good right now, but don't worry because we're going to come back and we're going to fix that all right. Now that the front is completed, I'm gon na do even larger braids in the back and I'm just braiding those front braids into these larger braids in the back does not have to be perfect because you're not going to see any of this at all. Here'S how the back looks and I'm going to take this braid in the back and just tuck it wherever it'll give me the flattest Foundation, and now I'm gon na put on the wig cap, make sure you put on the wig cap that that front hair is Hanging forward and out of the way one thing I didn't do, but I would do the next time around is, if you have like a white eye pencil or something just mark off, exactly where your hairline is, because you don't want to get any of the protective Shield or the glue on that hair in the front because it'll make it crunchy and give you problems later. So you want to just kind of Mark exactly where you want to stop with the glue, and here I'm cutting my ears out. So I can make sure the wig cap is laying flat to my head on each side and now I'm going to apply the protective shield, as you can see, I already have it running too far forward is getting on that hair. In the front my fake leave out, if you will so that was a mistake, but lesson learned this: does this will run down your hair so keep that in mind, and I would really suggest starting more in the middle of your head and brushing out from there To prevent this from happening, so I'm putting layer after layer of this stuff on my hair, because I really want to make sure it's nice and protected a lot of people. I see use two wig caps, which will definitely give you more protection, but I'm just doing one, but you want to keep adding the protective shield and you'll see the holes in the um and the cap start to fill in foreign. Take a blow dryer here. I am fake blow drying my hair because I had to do in the bathroom, but just blow dry it until it's dry and now we're gon na add our bundle so we're taking our longest bundle first and starting at the nape of the neck. I'M going to glue the pieces in this is pretty self-explanatory. You just measure it to the length that you want cut. It apply the hair glue and then stick it to your head. A lot of people blow dry it afterwards or my mom actually used to put a curling iron to it. I don't do any of that. I let it dry a little bit after I had the glue and then I just stick it on there and it it stays foreign you want to make sure you do is put the tracks kind of close together, especially as you reach the top. You want to make sure you don't have any gaps and no tracks exposed, because you don't have any leave out to cover it and, as you continue up you're going to start to get a u-shape. And once you get to about here, I'd say about a couple inches in or when you have about a couple inches of space left, you're gon na start laying the tracks across, and I want to show you guys how to do that and notice. I'M laying these tracks at kind of an angle that'll help with hiding the tracks, also foreign foreign, and once I get to this tiny little section, I'm gon na do a few more tiny tracks facing forward. Thank you, and now that that's done, I'm going to cut away the excess wig cap all the way around the perimeter of my head foreign, and here is how we're looking so far. So the first thing we're going to do is take this section by section. So I'm sectioning off that front hair and you can even include some of the hair from the tracks if you want, for example, if you have gaps between the braids, you may want to pull some hair from the tracks up to the front. Also, then, I'm going to take some scissors and trim just a little bit of hair you're, really just rubbing the blade against the um, the hair, just to give you some kind of like fake baby hair, so I'm chopping just a little bit of hair. At a time back combing it - and you just want to keep doing this until you feel, like you - have a nice natural, looking leave out situation, you're just blurring those lines between the cornrows here's kind of a before and after look and I'm going to continue on To the other side, and finally, I'm going to start to separate some of the curls, so I'm sectioning off the hair again and just separating the curls throughout to give it more of a natural look. We don't want the curls to be too uniform and here's our finished look and that's all I have for you guys today. If you found this video helpful, make sure you give it a thumbs up. If you have any comments or questions, make sure you leave it in the comment section below and of course, if you haven't already make sure you hit that subscribe button and the notification Bell, so you don't miss my next video and until next time you wan na Say it: peace, peace, no peace,


Comments
Ivy Merritt: Your final result looks VERY natural!! Excellent work!!
Ivy Merritt: I'm VERY happy to see that you didn't appear to experience a lot of post-partum shedding!