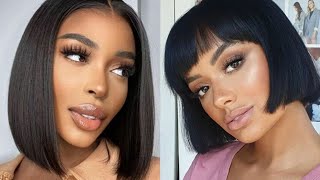
Medium Length Layered Bob Cut & Shaggy Bob Haircut For Women | Great Cutting Techniques With Razor
- Posted on 01 November, 2021
- Bob Hairstyles
- By Anonymous
How to cut a Medium Bob & Shaggy Layered Tutorial. The point of a medium length layered bob is to be practical and easy to maintain.
Sharing great cutting techniques and tips
"I Love Haircut - I Love Hairstylist"
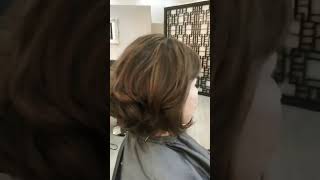
Okay, i'm going to be working with a razor, but you can see my first girl here. She'S got what a lot of people are, calling a shabab right, so you see how it's got the feeling of a shag. Yet it's a bob. It'S very textured very undone on the bottom, so we've got her and then i've also got a little bit more of a mullet shag and you can see her there. She'S got some block color going on all the way around and what we've done is cut. This also with a razor, so i'm going to be doing a couple of looks today for you inspired by that. So here check her out right. Here'S the same technique on textured hair. How cool is that right? So we just see that really open mullet same technique. Two different um hair textures, so going back to her, i'm going to show you the section name for this, so welcome everybody thanks for coming. Here'S where we're going! Here'S where we're starting okay, so we're going with this shaggy sort of bob. It'S cut with the razor and it's a really fun way to get there um quickly. Okay, so here we go. I got ta breathe. Okay, now i've breathed now i've breathed okay, so check it out a lot of times. We do a horseshoe right to section out this, the top from the bottom. What i'm doing is working with a zigzag section, very big zigzag, a bag. Big zigzag is a big zig zag and then what i'm going to do is start underneath. So it's going to be disconnected and we're going to work with a razor like i said, we're going to start in the back work to the back corners back of the ear sides and then we're going to do the top and it's all like. I said it's all disconnected some of it blends. So if you're, a precision, cutter and you're used to everything blending, i'm sorry take a deep breath. It'S gon na be okay. I promise so my two side sections, i'm just gon na section, those out of the way and what you'll notice too is. This makes a very uneven section on the top right. That'S okay! Just let it be that we're going to pretend that this is a nice straight horseshoe and deal with it, just as we would if it was, but it's not so it's going to look a little bit different as we go. So what i've done here is i'm just sectioning out the other side and i'm just going to throw my flip on the floor. I know no one ever does that and then we're going to separate the hair right down the center. So there's my back section. We'Ve got the back of the ear separated we put our zigzag section. You see, we have two points in the back: here's the center back. What i'm going to do now before i do that, let's just put a little bit of a detangler in the hair. That'S going to smooth down the cuticle and make it nicer to work with. This is redken's one united. I use it a lot and then, as far as which razor you use that depends on what your comfort level is. We can go with a straight blade. We can go with a um guard, i knew there was a word for it. We can go with the guard or we can go with um a straight blade. So i'm going to be working with a guard because i don't, i only have one band-aid. So i have to be careful how much i uh bleed. You know what i mean and most of the accidents with razors come when we're combing the hair right, not when we're cutting the hair, it's learning how to palm it and working it together. So what i've done is i've separated at the two back corners of the head? Okay, so see how weird of that is, let it go. It'S all about this being organic and not worrying about it. So we've got our back corner and our back corner. This whole section is going to be cut as a condensed section to the center back. Okay. So just for those of you joining here's, where we're going. Okay, a nice commercial, wearable, shaggy bob, that's very tattered! On the bottom, okay, so what i'm going to do is start right down the center back, i'm going to take a section for my guide and then everything to the back corners is going to come to that. My guide here, as you can see, is right down the center okay and i'm gon na cut my length at about five inches as soon as i stop kicking her around, which would be really great okay. So here we go coming that straight out from the head. My comb is about seven inches, so i'm going to go at about five and the reason i say five is that's the right length for where we're going today, so going right down the section long strokes, because we want a very textured look right. If i were to go in there and do some really tiny little baby, strokes we'd end up with more of a blunt edge right and what we're doing is we're going for a very textured edge. Okay, so that's my first section: you can see how it's sitting there. What i'm going to do now is i'm going to take all the way to that back corner. So here's the back of the ear. Here'S where the head changes from the round part to a very flat part with hardly any hair called the scarier otherwise known as the scary area. I like to combine words. So it's the scarier here we go long strokes over directed right back to the center same thing on this side, i'm going to over direct it right back to the center, so my body position is standing right at that center. Back here we go now. Could we cut this blunt absolutely? Could we point cut it absolutely? Could we cut it some other way? Yes, the idea is the line that we're creating is a vertical line right, so we're doing lots of horizontal little thingy thingy bobs, but we are doing it to create um a vertical line. That'S very broken up like this. So that's the goal now by over directing everything to the center back. What we've done is we've created length on both sides of that right. So now we're going from a closer to the head building a little bit of weight and volume towards the back of the ear. So here we go all right here we go sorry. I was just looking to make sure i didn't miss anything and if i miss your questions, i apologize. I will do everything i can to see your questions um, but they do go by sometimes a little quickly and i got to get some hair done because who wants to watch someone just talking, not me all right. So here's the back corner now right. So i over directed everything to the center back like this. Now i'm going to bring my section out where it lives and i'm going to over direct this section to it. Some people call this overdraft into the previous section. You can call it whatever you want, i'm over directing past. That point see that okay, so we're just pretending that we've got a horseshoe, a nice straight line. But what we have is a zigzag. Why do we have a zigzag? Because we want the overlay, so the section that's on the top to fall over this shape, so we're taking weight away from the underneath and getting it to collapse in. But this is going to spill over and give us our bob vibe. If we cut of a cut a vob wish, you could cut my hair brenda me too um. If you cut a bob first and then try to texturize it, you know what it's like right. You could sit there for an hour and a half trying to get the weight smaller. This is a way to get your shape first and then create your perimeter after so we're just going in over directing it to the back corner now not to the center back, and what that does. Is it's just going to build a little more length and weight towards the back of the ear as we go? So if you think about the mannequin that i showed you in the beginning right that length is going to come up to here all right so that well not here it's going to come up to here. So that is if this is distracting and all that stuff. That'S: okay: try not to look at it! Okay, because that's going to go away now. What we're going to do is go ahead and put in that perimeter. Okay, so here we go starting in the center back back to the center back, i got to stand on the other side, i'm going to go in with long strokes, because we want to keep this really really really soft, so just going in and then what i'm Going to do now is go ahead and keep it a little bit more short, strokes there just right in the center, then what we're going to do is come to the side. Again, we don't have a lot of. Let me excuse me. We still have a lot of density here, and what i'm starting to do is get a little bit longer with my bottom length same thing on this side, go just a little bit longer as we go for me. What'S hard is to keep this very unstructured and loose, you know i want to go in and make it more together, and could you absolutely right, you could go ahead and put that in blunt and have your texture all happening on the inside just depends on what You want to see you know, but, and also i just wanted to breathe hi from germany, hi germany um. Let'S see i like to watch your haircuts, i do a lot of razor cool and i need that's awesome, so you can see how we're getting a little longer towards the back of the ear, see that and we're going to keep it very, very soft. So i'm dropping down this whole section now. What i wanted to point out is this sectioning pattern that we've got here is the same sectioning pattern that i used here, which i'm going to show you, and i also used it here. It'S the same sectioning pattern, meaning it was divided this way the back of the ear was dealt with one way besides something else same top okay, so you get something totally different on these two different hair, textures and two different lengths. Okay, so we're dropping the side down. Here we go hi nesma from france. You guys are so fun thanks for showing up okay. So here we go dropping this down now, there's my last link from behind the ear. I want to keep this very, very soft and longer can always take more off so keeping it very, very soft, it's probably a little too long, but, like i said we can take that off later. What'S nice about working with the shape first and then the perimeter is that you get to um, have some leeway. You know some some options. Let'S see how that's looking excuse me a lot of times. People don't have much hair here right. Most people mannequin heads do sometimes, but that's okay, so what happens is that she has a lot, but i'm pretending like she doesn't and just cutting that bottom um to um to fill it all in. Does that make sense to fill it in hey bombay all right? I'M in napa by the way, napa california - i lived in new york for 25 years now, i'm here it's crazy, but i love it so here you see how this this chunk right here is a little heavy. That'S where we over directed it back to keep the weight right, because this is a scary place where we can take too much weight out, so i'm just going in and taking a little more weight out of there to balance it out. Let'S check this side, see it right here going in just break that up a little bit, you can see. I'Ve dropped my comb, i don't even need it right now. Okay, so that's the bottom super easy um trying to see how long i don't know what time it is or anything, but we're just going to keep going until we're done which, as you can see, this is very quick right. This is a quick haircut, i'm not going to be doing any blow drying today. I just want to show you some stuff that you can go back and use in your own way. Okay, do you over direct on the bottom length sides? Thank you for that question. So on the sides here i didn't over direct back. I just held it straight down and cut my line and you can go longer with your line. You can go horizontal, you can even go up and i'm going to show you a different line when we get to the other haircut. I hope that answers your question. Okay. So now what i'm going to do? Just for clarity? Okay, is i'm going to section. I'M gon na go get another comb which is right down here. Oh there, it is, i'm gon na clip this out of the way. So we can see exactly where we are on the head. Would i do this in the salon, not necessarily um, but i'm doing it today, so you can see what's going on within this zigzag horseshoe now the zigzag is a great section to use and you'll see on the next cut, i'm going to make the zigs much Smaller and more organic, this is big ones, and it's so that we have a little more length spilling down where the points of the layers are because we're going to layer through the top. Now, okay, oh, i see okay, good all right here we go so what i'm going to do is i'm going to ultimately cut this section, this whole top section to the center like this over directed. What i need to do is divide it, because it's really overwhelming. So what i want to do is i want to go. Oh, you know what one more thing before we move on, so what i didn't show you was something that's really great to use underneath, which side is longer yolanda, i'll fix it. Yolanda we've got ta, this side's longer fix it. Please it's it's actually! Okay! If, if you do leave it longer, the idea with this is that it's very you know undone looking, but i get your point and just hang on. I will take care of it. So what we're doing through the inside of the shape is working with vertical sections and i'm just going to take some weight out weaving with the razor and i'm just going to softly razor through the the back side of the section. I did that on my doll head all the way around the bottom, i'm leaving the perimeter alone and the top of the section. So what happens is i've got the top and the bottom turn the razor and weave through like this? What that's going to do is it's going to create space in between the ends of the hair and you're, going to start to see more of that. Okay, here we go i'll. Just do a couple more sections, so you start from behind the section: push forward back forward back forward back and take it out. You can do this with the shears if you're not comfortable or the the hair texture isn't good for the razor. You can do that as well. Okay, let's see, let's see where that uneven side is. Is that even now guys give me give me a comment? That'S even all right, so i'm gon na clip this out of the way now and then and then we'll be able to cut that top section. You'Re welcome, okay and, like i said you may not have heard me, but this this haircut is for someone who's a precision, hair cutter which is beautiful and i love precision, hair cutting some of these ideas are just weirdo right and you can cut much more precise With the razor than what i am, but in this case i want the texture to be very organic, lived in. You know that kind of thing, so i don't want it to be overly thought about or blended okay. So here we go, there's my i'm just getting my sections organized here, i'm creating a center section and then my two sides just to get it out of the way again, so you can see what is going on there we go and now what we're going to Do is we're going to take that center section and we're going to cut from short. Excuse me from the crown to the front. So let's take a look. There'S my center section we're within the zigzag right and we're going to go in and this time i'm going to cut about nine inches. So the underneath part is here: we're not going to connect it to this right. We'Ve got there, i'm going to go even longer than that and work with long strokes up towards the ceiling. Again, this is going to be layers that stick over. Everybody knows what spanx are right: the spanx are going to hold the shape, whatever we drop over, the shape is going to take on the shape, so spanx create a shape, and then what overflows follows that shape so we're creating layers here to overflow over flow over The underneath i'm just going to go in and take a little bit of weight out there. Okay, so that's our guide for the top. Now. What i'm gon na do is take the everything from both sides of that diagonal horseshoe and i'm going to bring it to the center section. So as we work towards the outside of the horseshoe, it's going to be longer right and that's going to give us the shortest layer sitting on the top of the head and the longer layers spilling over the bottom. Remember that this is going to be a bob right now i took my perimeter where i took it. Could you take it shorter and create more of a chin length bob for sure you know, depending on how how you want your layers to sit, you might go a little bit longer. You might go a little bit shorter. This is also a great section to disconnect for a pixie. You know where you're working with creating - maybe some under you know some disconnection short underneath lower on the top, and if you take a zigzag section, you can get a lot more of that dropping dropping in and blending in so taking everything now the whole section. So i've got the whole thing in my hand. I'Ve cut it in sections, but our goal is that we get it all to one guide, keeping it very, very light and soft. Now, when you look at the front, see how dark it is, it's so dense because there's so much hair there duh right, but what i'm going to do is just go through again and just lightly. Now you can weave through, but it's a little more awkward going from up towards the top. So i'm just going to take my blade and just take out some of that hair in between here we go really okay. Here we go, bring it up and that's just gon na lighten up around the front. So, let's drop that down now and look at what we've got so you can see how we've got our layers falling a little bit longer where the points are and a little bit shorter, where the the shape goes in so again, it just gives us an unusual Type of a layer that looks very blended, even though it's not so i'm going to drop these out. Okay, so that's the basic idea is we create the shape we create, create the layers? Then we connect it all into the perimeter and what i'm going to do now - and this is going to make some people very happy - is i'm going to go in with the shears okay, i'm gon na go in with the shears and look here's our point. Here'S our other point in the back, i'm going to go in and just take that length off, so i'm not going any shorter than what i've done, but some of those layers where the v goes in in the back. So here's where our section was these layers right here, are going to fall shorter, okay, so we've got all that variation going on now you might end up taking some of that out once you start to look at the shape, but what this does is it gives Us the variety of what's happening now as we come around the side here, we've got lots of craziness lots of length, i'm going to just pinch and talk some of that length away. Now, when i look at this right, it still looks pretty heavy on the sides. That'S fine, you can take more weight out. You know it's all good. So, let's check out this side come a little closer, so i'm going to just do a little bit of shameless self promotion right now, um, my instagram is ruth, wrote, r-u-t-h-r-o-c-h-e and my website is roofroach.com and i do a lot of education on my website and just Have some weirdo stuff going on in there i anyway, so i just wanted to make sure that you know about that. Hi carol, hi, barbara! Oh thanks! I should cut my hair. You know i took out my extensions and i have like four hairs left so one on each side and two in the back. It'S awesome um, but i've had them for 15 years and i had to just give myself a break. So now, what we're gon na do is create, let's bring her over okay look at the front of her hair. So what we're going to do is create this type of a vibe happening in again in a very condensed way. Okay, so normally, when we take a fringe area, it sits in front of the apex or the high point of the head. What i'm going to do is take this section at the high point of the head, so i'm going to drop the comb on the head. There it is, and i'm going to go from there to the recession area on both sides. So, let's put this out of the way again, i'm being very clear with my parting, so you can spend clipping things so you can see what's going on and there we go this. What i'm about to show you now is something that's great just for face framing. So you're doing a long haircut and you want to create some face framing really quickly. This is a great way to do it. So there's my section from the high point to the recession area going to take a section right down the center. No i'm not! I forgot what i was doing. Did you ever do that? It'S the the client in my head was talking to me and i got distracted. I hate when that happens. So what i'm going to do here is i'm going to take this section and we're going to first look at it. Okay, so look at my over. My elevation is 45 degrees. Okay, i'm going to pinch it together this way as well. Okay, so you can see how it's all brought to the center, keeping it a panel when you look at it from the side. So here we go, i'm going to turn sideways, i'm switching to my shears. You could use a razor um if you wanted to. Actually, i will use a razor because that's what i'm doing is using a razor okay, so on her she's got a ton of hair in this front. Part of the section - that's okay, but know that on most people they don't so what i'm gon na do is work from us, a link that would sit about her chin between the lip and the chin. So that length is about right here. That means i need to pinch lower down, so i'm pinching closer to where the hair is happening, where that, where the length is going to be cut so that hair is condensed. So when i cut my first piece here, it's going to be going short to long as we move towards the recession area right so inside of there, because we over directed everything to the center right pinch, where you're going to start and then work your way up From there you can go into the section a lot. This way you can go barely in and right out to the length if you go into the section more you're going to get more layers around the face. So, let's take a look at what you get so you see how that's shorter in the center getting longer on the sides. So we open that up and you're going to get a nice face frame. There see how you get just section: let's drop the bottom out now. Remember we already connected the bottom, so everything that we just did boom to the center is going to get longer as it drops down on the on the edges, so we're getting a concave line here. We'Re also cutting from short to long. This way right so the length that's at the high point, stays the length that it was and more and more so here we go, take a look now. I'Ve i've also heard you know what, if it's a side part, you can definitely um. Do it on a side? Part too, you know just shift your your section over a little bit so that you're like. If this is your section, you would just shift it to where the part would be same parting's here, but shifted here, making the sense okay. So that's basically it now. Let me show you how you would do it with the shears, so i'm just going to take a quick section here, so you get the idea. Okay, there we go pinch slide right past that point and go in and i'm talking with the shears again. What that does is it creates most of the shortness around the face right in the very front and it pushes away so again, it's great for long hair. You just work out to whatever length you have at the high point and that's going to give you your your face. Framing okay. So let's go back to our that's the idea. Everybody good awesome! Here'S our girl here, blow-dried and finished, and just to let you know, um what i used in her hair was a gel and a it's called hardware 16, and then i used an oil redken's. Is oil for all and mix that together rough, dried it and then hit it with a little bit of an iron here and there she's got a rougher texture of hair. So that is her. That'S the bob, the shaggy bob with the open front that we just cut now. What we're going to do is go into this look here, so this is more of a melody type of a shape because it's shorter on the sides and longer in the back and then we've got you're welcome, jamie yeah, um and we've we're going to work with The mannequin that we were just working with, but you get a totally different, vibe same sectioning pattern. So let's get that mannequin back now remember i talked about how you could do a more um thanks thanks, tracy, a more organic, smaller zigzags. So that's what we're gon na do here. I have no idea what time it is. I forgot to check how long i've been blabbing, so i'm just gon na keep going and then we'll you know we'll go from there. So, as you can see, these are pretty quick techniques so going working my way back from the the coming coming, the hair back here we go so i'm going to start at the recession. Now, what's important to remember is just the same with a horseshoe. We wouldn't go up higher than the parietal, so i'm starting at the parietal and going down up down up down up down just with the tooth, the just with the top tooth of the comb right there and that's going to give us like. I said a very organic, smaller zigzag, so you're going to get less um variation in the length of your layers that fall down. Then she's got a big head. You ever have those clients with big heads and you're like they're you're like when am i gon na get to the side? It happens. Okay! So, just looking for overall balance here, i got a big zigzag right there, so i'm going to make that a little smaller and broken up see now i'm starting to analyze it too much. Don'T do that just section it that's for the clients that move too much, and here we go so same thing, i'm going to section that section out of the way now what's going to happen here is some of this hair is going to not make it into Our section so there's our zigzag, really organic, not perfect, okay and um. Here we go so we're going to do the same thing, we're going to start in the center back, but what i'm going to do is first just section out. My sides, like i said so remember it's the same section so far, right we're going to do the same thing in the back that i just did and we're going to cut to start in that center back. The difference of what we're going to do here now is: we are going to direct everything to the center back, so when you go into when you go into we'll just do it. Okay! So look at that. That is not even don't freak out. That'S the center back, it's supposed to be like that it we want it to be um, very lived in looking and grown out and not perfect. So for some of us that's harder to get our head around um, i was trained by trevor sorby, who was a sassoon based cutter and then started. You know going rogue and doing things with razors and things like that too. There you can see the hangover from my first section, my first haircut here we go so i'm going to go in and i'm going to go a little bit shorter now and what this is going to do. Is it's going to collapse the weight so in the haircut that we're going with you're going to see this start to go flatter, see that so before our weight was down here and we came in now we're going flatter. So what i'm going to do now is over direct everything back to that point. So i'm going to over direct vertical sections, those of you tuning in we're imagining that this is a straight line, but we're zigzagging it because it's going to be disconnected and these layers are going to fall over what we're doing underneath so we're creating our spanx right. First, going down this the vertical line and i'm over directing everything to the center back. This is quick, it's condensed cutting and it's effective and it doesn't um it's not just to save time. It'S to um have fun with it. You know this is a sectioning pattern that you can use in a lot of different ways. This is just one way to do it well. This is the second way so see how that gets shorter and closer to the head right now, we're going to do the same thing on this side, flip that out of the way center back, is our guide over directing everything. Now my elevation is 90 degrees straight out from the head right so that we get a nice vertical section. So, even though i'm razor cutting it, i'm razor cutting it to a vertical line. Here'S my vertical line! So it's long strokes, lots of texture, lots of texture, but we're working out to the plane back here so going in now you can see i've switched my body position just like we would with the shears. Could we cut this with the shears? For sure you know? It'S just going to give us a different edge or a different hem on the dress or the trousers or whatever you want to wear, bringing it all the way back center. Back on the first haircut, we went to the corner and then we brought that out and over directed there to the back corner. Here we open, we didn't, we had a stationary guide and you can see in the back now how much weight we get behind the ears, see that so you have options. This could also be a little bob. That'S more of a chin length bob see where that weight ends up sitting, so we cut that perimeter off after what we're doing right now is our little mule action. So we've got some length and weight there, but watch it's going to go away by what we're going to do through the sides now. So what we're going to do now is we're going to create a shorter side. Okay, we've got the same back that we just did except it's shorter and it's got a little more weight behind the ears. You show us how to fan the side um now, if you could describe what you're talking about a little bit better. That would be great. I don't know what fan the side means all right, so here we go, i'm going to take a vertical section. That looks a little diagonal, that's okay, but because i said vertical, i'm going to make it vertical okay, and this is going to be short compared to the rest of it. The top section is going to spill over this and make our fringe, which is going to drop over some of the short stuff we're going to do here. So i'm going to bring it forward she's so dense that she's. I can go ahead and take some of this weight out vertically, meaning the excuse me horizontally. I'M combing the hair vertically, but the blade is horizontal. So here we go, i'm going to go in pretty short here and start to layer that away, let's check it out from the front: oh malay layer that molay okay. Now i'm going to over direct the next section right to that section, going in and razor cutting the length to the guide, i'm going to continue right back to behind the ear now and i'm thinking this could have probably been a bit a little bit shorter too. But see how that starts to work into the back, and you take out that okay, thanks honey, we'll get back to that. I promise um. If i forget remind me so there we go. If we look from the front you get these shorter bits happening right here and you get your longer bits falling away and you get your little bitty bits flicking out here. Okay, so now what i'm going to do is do the other side. So going back to the quick just this flip out thing right here, i either do it with a brush or i just use the air from the blow dryer and point it down. While i'm holding the ends or you can do it with an iron and really then this is the key mujah taking your fingers like this and blending it out like so. Okay, all right so now we're going to do is do the other side and what i'm going to do is pick a piece from the opposite side, i'm going to bring it to the center, bring it to the center and i'm going to cut it to match The opposite side so right to the center cool, that's going to be our guide now for this section, which is too dry. So i'm going to go back in with my one united and i've also got my samvia razor. If you guys don't know, sami he's one of the most amazing educators in the world samvia, and he has some really cool tools. So here we go straight down vertical line and you can see how textured that line is because of the lengths of the strokes that we took. Okay, now we're going to go ahead and continue back with these sections over directing it to that first section and we're going to go right into the back some of it's not going to reach now you could have done this all first right down the sides first, But what happens is we keep this weight here, but we still get our short bits happening around the face? Okay, so that's the sides in the back now we're going to go into the top same thing here, i'm just going to clip it away for clarity and we're going to go in and layer the top and then we're going to do our front separately. So super simple template a sectioning template a lot of times. We take a horseshoe section right. This is working with a zigzag section instead of a horseshoe section. So when we go in and we create those layers, we get a um. I just went into my hair spaceship. Do you have one of those okay? A hair spaceship is where you go when you're cutting hair on your client and you left the building right you're in your spaceship in your head, you're there and you're still doing hair but you're in you're there in a different kind of way, um and they're. Talking and you don't, you have no idea what you were just talking about. So that's that's. What happened there for a second, but i'm back um and we're gon na go right down the center again vertically. Just get this hair out of the way there and then there so i'll show you that section again we're working with the condensed cutting to create shapes quickly, creating very undone looking stuff. There'S my center section. Yes, it's a big section, we're gon na over direct everything. Above the zigzag to this center section, so here we go this time, i'm going to go shorter. Okay, we were about nine inches on our first haircut. Here'S my um length here now, i'm not going to go up like this and use it as a guide. I'M going to think about: where is it going to hang when it falls, and i want it to sit pretty long, so we're going to go in it's going to be longer than the occipital right, so i'm going in here and i'm going to go straight across. So here's my line that i'm cutting i'm just cutting it in pieces. You know a little bit at a time now. You could use this for this sectioning for a pixie right. You could take all that hair underneath and create a very um short, even a fade. Whatever and wear a below the zigzag and then when you go to drop that zigzag over you'll, get your very blended looking layers so just bringing it all to the center. That'S going to give me more length as we work towards the edge or the parietal ridge, and it's going to be shorter in the center right. So that way we create again short to long layers going in on the opposite side, i'm going to stand on this side of the head, so you can see what i'm doing body position wise. It allows me to cut from the center back to the front as opposed to trying to cut from the front and go back we're always working towards our length, especially if you're working shorter to longer so bringing it all up now again, if this is freaking, you Out, because it's not an even parting, just breathe just breathe, could we do even partings absolutely? Would we get the same result not exactly. We could get something very similar, but it's not going to be the same. Now we drop our top over now check it out check out what happened in the back. We get some bits falling over what we did underneath huh, it's cool right, okay, you know and different strokes for different jokes folks, different jokes for different folks, too. All right, remember that section we put on the top the high point of the head: we're still going to do that just for now and we're going to end up connecting all of this top to what i'm about to do in the front. So we're going to start with our section at the high point to the recession, get this out of the way on both sides. There'S our section. What we're going to do within that section is start to subdivide the hair into smaller sections. So i don't have a watch on, obviously, because i don't know what time it is. Has it been an hour yet somebody? Let me know, okay. So, as we go into this front now we're going to get a little bit of water in there and we're going to go in and take a vertical section right down the center. So i'll show you what that looks like from the top in just a second here: don't cry it's just hair sections, a little higher on the other side standby. This is called a heart attack. Okay, when your parting is not the same and you're freaking out about it, that's a heart attack, i'm not freaking out, but i'm just saying it. You can and that's a hard uh heart attack, okay ready! So let's go back, make our sections vertical section right down the middle vertical section, and that gives us three sections right: one: two: three: now what i'm going to do is start in the center. I'M going back to my razor and here's where we're going to create a much shorter front with this center piece, so i'm going to go in i'm going to work with the tip of the blade and start to take a lot of that weight out. Just like we did on our bob on that first section of the perimeter in the nape. Now that just gets some of the weight out of there. First again, she's got so much hair that we might not have to take this much out on most people and then i'm going to take and get rid of this extra length again. The idea is that it's not perfect, we don't want it all the same length. I'M going to go in and just take a little bit more out of some of that, so we have a little bit of a chunkier vibe. Okay. So that's our first section! Next, i'm going to go in and take this, the the third excuse me the outer section, so we're going to the recession area all the way up to the high point, and what i'm going to do here is i'm going to direct it towards the center and I'M going to work from that short point. Sorry pardon me from that short point and there's my fringe, so we got our short our longer sitting. There next thing same thing on this side. Sorry i keep moving around, but i want you to be able to see bringing it forward, i'm going to go from that center piece, which is right here and work my way out, okay, good! So when we look at that, how that's sitting oops, i kick the camera, we get a vision of where we're going. There guess what i want this shorter there. We go. Okay, now it's just a matter of starting to connect the top sections in okay. So we're going to take sections that are parallel to this diagonal section. Okay, so here we go back, i got ta put her head down a little bit, we're gon na bring it up to where we just were, which is here. So let me take a smaller section, so we can see the guide, which is always a good thing right, see your guide! There'S my guide, i'm going to go in and start to layer that out - and this is where we're going to get more melody right. So the reason oh for crying out loud, let me get another one, it's right over here. Okay, here it is. Ah, i know this is uh a lot of hair and i'm trying not to talk too much, but i got to explain what i'm doing so here. We go see how i've my sides have dropped out that we cut now watch what happens check it out, check it out now we're gon na do the same thing on this side. Diagonal section now i haven't put any texture in the haircut at all. You could do that as you go or you could do it where you need it afterwards, it's entirely up to you so taking the entire section up to my guide and then following the guide. Now you might be wondering why do we layer the whole top and now this it's for me, it's about getting this length sitting right in the back back here. First and then we just bring everything forward which is going to push everything back to the back again and keep our length back there. So the layers are going along with the mullet vibe, where it's shorter around the face and longer in the back. So everything ultimately comes forward to that middle point and i'm just going to take some weight out. Ah the sound of comb on plastic. You know i've been working with mannequins forever and my favorite mannequins are pivot point um. This one is a what is she viola? Yeah they've got the big heads, but some of them have the smaller heads like erica is great she's a little more affordable and you can uh play around with that. But this one has a nice movement to her hair. So i need to stop and look at what i've got. You can see how you get your short stuff from what you did underneath you get this parts in this case it's kind of blending a little bit. But when you look at my girl over here, you can see how she's got her longer bits falling over some of these shorter sides. So it's it's very um. It'S not it's not perfectly. It'S disconnected right, so it doesn't have to be a big difference in length. The idea is that it's very sort of soft and flicky, and that kind of thing got a little extra length right. There see how i angled out there there we go. So when we start to let this dry, you can start to see how we get our little flicky bits. You can see how we've got longer bits falling over. Those can be, you know, tweaked and that kind of thing as we go um if we want to i'm going to go back in with my shears and just take little bits of that away and one more shameless self promotion. I'M going to give you my instagram. It'S at ruth roach, so it's ruth and then roach r-o-c-h-e. I also have a website and i do classes and i have education, i'm also a redken master artist and proudly representing and using redken today, um and yeah. Let me just see for my friend yolanda: you can see how we got more length here. I'M just gon na take that away, but very organically, see the words on the thing are coming up right at the bottom of the screen. So i have to hold her up, so i can see through the words all right there we go. So that is that and what i would do, what i've been doing. A lot is doing a um when the hair is wet putting gel. So i use hardware 16 and oil for all, which is a nice light oil i mix the gel and the oil together, put it in very wet and sculpt it and like wrap these around your finger and sculpt it into a shape and then put them under The dryer or diffuse it or for your clients when they go home, a way of of creating it that way for them at home and then just run your finger suit. Almost like a wet set. You know so right now i don't have any product in her hair, except for the one united and we're just letting it be a shaggy kind of mullet, thingy. Okay. So that is that's that we did our shanky bob right. Oh wait, wait wait! So what we? Just did right here, okay, this one is this on textured hair. Okay! So that's exactly what i did there. The difference is the back visually almost connects, so it's a little bit disconnected, but not much see that how i cut this was with my hands. I didn't use a comb and when i'm working with textured hair, like this, i like to have my guests: come in with their hair with the product that they use, how they wear it every day. Then i cut it, then i i wash it and do the product and set it and use a diffuser and let it dry question uh. Do you ever diffuse on cold air? It works for me. You know what that's a great suggestion. I don't because i'm always feeling like it's going to take too long, but i'm going to try that. Thank you for that. Don'T forget how you do your fan on side like i know how you do this right here. This i'm sorry, i'm feeling dumb. I don't all right so whatever here just for a second here, let's talk about this and i clicked this out of the way i did zigzag sections with my fingers. This is uh cut at the shortness brought all the way forward. This in the back was cut. The same way over directed to the center weight behind the ears and then it was taken away when we brought it all forward here, layers drop over the top and then what i did around the face was. I literally cut like a few shorter curls. A few longer curls and then some longer than that, so it does spill over some of our short, but it kind of visually blends in so that's working with textured hair on all of that stuff. So how i do not heat! I know it's all about me for a second here this section right here. If this was my curling iron, what i do is the iron goes in and i wrap it around like this and just let it get really hot once i'm done take it out and then it falls right. So it's got a little more curl. I use a one and a half inch iron same thing on this side. Now i'm going to stop because i'm totally embarrassing myself, but that's how i do it all right. So i hope that you enjoyed the class we started with our bob right. Star is zigzag section sectioning out the top did the same sectioning on her right and then the same sectioning on the textured look. I just showed you thank you so much for being here.


Comments
Beverly Trader: I love the way she cuts ✂️ hair , she's really good
Delia Jauregui: Thank you!!!! So friendly and lovely!!!!
Jackie Brown: Thank you! So cooool! ❤️
Lucy Santos: 0