Creative Short Layered Haircut Step By Step | Textured Bob Haircut
- Posted on 30 July, 2020
- Bob Hairstyles
- By Anonymous
If you're ready for a short layered haircut, there is no better time than now and for you, we have the best options.
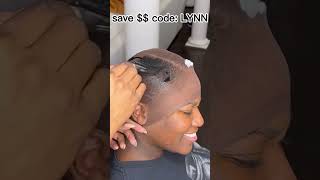
Uh, i've split it separated the front from the back and i didn't go from the high point of the head. I went a little bit further back about the middle of the round, where the crown is because i'm going to take this quite short and keep it pretty flat and square. I didn't want to move it up too high, because then i would have got this really. Lumpy kind of weight line, and that would not be good so down to behind the ear you'll notice. It'S not above the ear. It'S back here and that'll play an important part when we go to connect the front based on the way that we're going to do the disconnection same thing on the opposite side, kind of got that clipped a little bit different, but just straight through, and then i've Just created three panels in the front, so just horizontal section that runs from the part up into the fringe like where the hairline would be it kind of angles in a little bit, and that's just because on these doll heads you know they don't have that recession. Point so i don't want the the fringe to get too heavy and kind of collide into that. So sometimes you have people that have those really strong hairlines. So it's a good way to do that kind of just angle. It forward a bit, so it's skinnier at the front and it gets wider as it goes back and then i've just got two panels in the side, one on each side above the ear and then when we're gon na start in the back is just dead center. Uh vertical section, uh and gon na bring everything straight out from the head straight off the head like this way, so not like a low elevation just straight off so you're going to get different elevation points. So at the top it's going to be like below. You know 90, so more graduation kind of layered through the middle, where the the occipital bone is and then even more layered as it works out through the front. So um yeah that's going to be kind of the run down here. So i'm going to start in this back panel for this haircut, i'm going to have to work super clean. I tend to work that way anyway, but with this you got to be really careful kind of how you do it just because the sections can get in your way, because you're working such a tight space, it's good to just keep it really clean. I'M going to work with the head slightly down. If this was a clamp, i would raise the chair. What i'm looking at is to not be working like too far down to where i can't really see where my elevation is so bringing it straight off like that, then i can kind of compensate for the head being tilted by bringing my elevation up. You have to remember that when the head moves off its base, you know straight off this way, changes to where now it's got to be a little bit more like that. So just keep that in mind as we're working, so i'm going to bring this straight backwards. So i'm keeping that kind of straight off the head shape and i'm keeping my fingers flat to the shape of the head. So that's really important. I don't want to dive my knuckles into the nape because i'm not looking to build like a graduation, so i don't want my finger angle to be like this to where it's heavier on the top. I want everything to stay flat to the head, shape so it'll be longer here, shorter in the middle longer at the bottom and you'll kind of see when we go in and do the refinement and put the perimeter line and why that kind of is important. So, just straight off the head making sure my fingers stay flat to the head, shape kind of clean that up a bit and just work my way down. So what i get is this really kind of uh? You know cascading layer is the way it kind of looks, but it really hugs the shape of the head, because i brought it straight out, so it collapses really square onto itself. So what i'm going to do next is just take a section vertically parallel to the one that i just cut and i'm going to utilize section one as my guide, but i'm not gon na over direct to the middle. So if that makes sense, like section one first, maybe you can come behind and show it is straight off the head, like this straight back section, two straight back as well, utilizing the first one. So if you think about the back of the head like a drawer, i'm just pulling everything straight out. So what that's going to do is allow me to keep the shape fairly flat horizontally and it still gets a little longer because the head curves. But if i were to really crank that over direction back when i get to these corners, it would be way too long. So i don't want that. I want a really head hugging shape, so just straight backwards, so my body position plays a huge role in that. So making sure that i'm standing, you know square to the back of the head shape and not standing directly in the center. So i take a small step to my left every single time, if you guys have any questions, feel free to fire them off. Like i said it's, our was our first day back in the salon. Today, it's cool to be back to work, a little scary with all the precautions that you have to take in order to make sure that everybody's safe, a little weird wearing a face mask as you do hair, but i do got ta say i did enjoy. You know getting to create and cut hair on an actual live person for the first time in a while so section three same thing straight backwards, so i make that slight adjustment in my body so slightly moved out from where i was so. I'M really not even touching section one at this point just section two is my guide, so it's crucial that i work pretty small sectioning here, based on the fact that i'm not over directing to the center, because it's a traveling guide, they have to be smaller and They have to be consistent in size every time kind of check, the way that that looks, nice same thing vertical section side, adjustment from the body position, so they're not huge moves. It'S not like i'm taking a giant step out to my left, but you know as wide as the section is. I just try to move over to where i'm standing in the same spot. In relation to the previous section that i just had anybody say anything nope. No comments, i must be doing good, they get it, they get it all. Two of them are the two people watching. I don't know who it is all right, so now i'm kind of reach that round of the head. So what we'll start to see here is this over direction is going to get a lot stronger now, just because it has to travel further from the division line back to square like that. So if you just look, my comb is closer to the head in this spot than it is in this spot. So even without utilizing a ton of over direction, i can still maintain that length behind the ear that we like a lot of times when we're cutting. Like a bob shape, so everything's straight back keeping my hand vertical, this is much easier on this side than it is on the opposite side. So whenever we go to the other direction in order to maintain consistency, we'll have to utilize things that are at our disposal. Like the head being tilted a little bit more on one side and compensating for that tilt, meredith klein peter uh. I said i'm watching with 25 of my students. Oh nice, are they in school? Are you guys all watching like online together? So really just maintaining? Control is what's super important, so haircutting is just about consistency, doing the same thing over and over again to get the result that you want um whenever you kind of have something that jumps out. That'S different like if you take a section, that's bigger than the one before then you get those inconsistencies in the shape and those are the things that i try to avoid. I don't think that we can all or that any of us can do it perfect, but by being diligent and controlling the things that you can, it allows you to have a much better finished result. So you see on the side, you can really see that i'm not lowering it. It'S coming straight off the back of the head and that's why we're getting that length through the bottom, which will be addressed whenever we connect it to the front. She said the remote uh she's got an ipad pointed at the computer nice from the aveda institute in charlotte nice. Well, thank you guys for watching stay in school, so i'm just going to cross check. So i'm just elevating and bringing everything straight out, i'm not going to cross-check the entire panel um. You know, i think, once you've been doing it quite a while you can kind of get it by just hitting a couple spots, but you know the newer. You are to haircutting the more. I think you should probably cross-check your work, especially working. Something that's like real precision shaped like this. So that's side, one and just kind of give you a visual of length difference. So it's quite short in the middle right. But if i go parallel to that and bring it to the corner, see how much longer this hair is. That'S - and i didn't do anything different over direction wise. It just pulled straight out backwards, but because the head rounds, this hair now had to travel to be longer in order to follow where we wanted it to go. And it's going to be a little long for my taste um. So we're going to come in and refine that at the end, but that would be something we can touch on. So i'm going to work into the other side now i'll probably turn the head. So this is kind of the problem side for most people and the reason for that is because, when we're cutting hair we're finding gravity, it's really easy to hold my hand still like this, because my elbows down and i'm braced against my body or you know - i Don'T have to fight gravity, because my elbow is already down when i flip like this now. My elbow just naturally is going to want to do this. I'M going to want my hand, doesn't want to stay up so in order to make that easier. For me, what i've learned to do is instead of keeping the head in that same position, where it's straight up: it's where, if i'm doing a vertical section in order for me to cut that my elbow's got to be really high. What i'll do is i'll? Take the client or the model and i'll just tilt the head to the side. So now the section is vertical on the head shape, but it's actually diagonal. It'S kind of it's changed a bit so now my elbow can stay in line with my section without me. Having to really crank it like that, so that's a good trick now the the problem is, is that sometimes what we do is when we tilt the head, then we stay here with our arm. Now it's going to change that elevation, so you just have to be mindful of the fact that you know those things are changing. So, whenever the head moves, your elevation has to change in relation to the way that you're standing, but not in relation to the head, shape 90 degrees out from the head is the same, no matter how i move the head around, you know you can move it All different directions straight out from the head straight out from the head, so i'm tilting it to the left a little bit now. That'Ll help me to be able to stay in line with it, but everything else is the same, so straight backwards, fingers vertical um. It'S also, you know a way to kind of get around. Things is being able to have really good dexterity with your scissors, so you'll see like i'm. You know working up this way and a lot of times like we try to do this, but what happens is when i try to do this now. My elbow is jammed into my body, so my natural reaction is to move and when i move then i start to over direct and not everybody's, like that. Some people have really great dexterity in their wrists and they can kind of, like you know, tweak their hands in really interesting ways to make it work, i'm not so lucky. So i have just learned how to control the scissor by working. You know overhanded, like that. Underhanded or whatever it's interesting, because to me this, what i'm doing with my right hand, the scissor, that's the least important part of the haircut like cutting the hair, is the easy part everything else leading up to. It is what causes us to have problems. So if you can control what you're doing with the hand that's holding the hair, then it doesn't really matter how you cut it. You can cut it with a razor. You can chew it off. The result will be the same so so slight adjustment in the body position to make sure that i'm over directing everything straight backwards, joe says killing it pal joe profita, what's up joe hope, you're staying safe, dude scared for all my friends up in that area. If you guys don't follow joe, you should check him out on instagram great hair cutter, joe prep pizza p-r-o-f-i-t-a. I believe good photographer too, so it's a little slower going on this side, just because i have to be a little bit more aware of. What'S going on, i can't really go into autopilot. I find these things really challenging and fun to do, because it kind of forces me to think about how the hair is going to work. You know some haircuts like a long layer or whatever we can just blindly kind of go in because it's all kind of elevated to one spot or whatever. So these little moving target haircuts are fun because i think it challenges your expertise of the technique. You know there's just something really appealing about a really strong shape too, when it's cut well, in my opinion, so like two more once you reach the round of the head, you can kind of condense a bit because it is all coming back to one spot at This point: don't tell state board students, teachers, it's just adulthood, so everything straight back, working vertically, i'm kind of opening my body up a bit more, so you guys can see you know if i kind of get where i would be on a person, i'm a little Closer uh, a student dmd um: do you have a strong side for cutting? Is it the same as uh as readjusting when you change sides uh, the left side is definitely the stronger side. So really all the adjustment comes on the opposite side. Again, it's just about maintaining the exact same amount of control on both sides, so my tension is the same. My elevation is the same. Over direction is the same. Everything is the same, except for the way that i'm cutting it just flipping my hand over, but definitely the left side is easier for me. So hopefully you can see from that side profile that it just collapses the shape. So it's not a big bulbous kind of graduation or anything like that. It'S really just a layer and then you get these longer bits that are sitting behind the ear which again we're not going to leave just because i'm not a fan of that length. So i'll probably go ahead and i'll do it a minute. So what we're going to do now is we're going to work into this side panel. Now this this becomes interesting to me. So what i'm going to do is create sections of disconnection within the haircut. So it's going to go like a line and then a shorter piece and then a line that falls on top and then a shorter piece and then a line that falls on top and i'm going to utilize. These different lengths - and here is my guide for the longer bits. So, technically speaking, this bottom piece is shorter than this. Just barely you can kind of see how much longer it is and then there and there you can see how the how it kind of works out. So what i'm going to do is drop this panel on the side here. Actually, i am going i'm going to cut the line first through the back. Sorry, i'm going to refine this, because i want to utilize the length for my perimeter shape in the front. So all i'm going to do is just create like a stronger outline. Now these doll heads have a tendency to kind of be jumpy, so i'm not going to be like, as probably meticulous with this is, if i would, on a person, it's just harder to kind of maintain that kind of perfectness, but approaching it the same way. So i'm just checking the hairline kind of finding where that middle is so just comb it down nice and neat, i'm not mashing it to the head. I don't want it to be like pushed into the head shape. Um then, i'm going to bring my comb in now. None of this hair is going to reach. So as far as like me, combing from the root all the way down like this hair is not going to get cut anyway. So if you see me not going from the top i'm just kind of starting to the middle, what i'm going to do is just go in and hold it in my comb and just create a nice strong perimeter line now again on a person. This would probably bevel in a little bit more, but because it's a doll head, it's going to just stick straight up so same thing, pulling everything down, so i just wanted to create a strong perimeter shape through there and then same thing on the opposite side. I'M going to work from the outside in so i'm going to work a little smaller panel. Trying to you know, maintain that control by cutting just a little bit just long enough to where it can reach. I don't want my hand to get in there and bump it too much so that'll be the parameter, so this will make this easier to work into the front. So back to that, so i had a plan going into it um, but obviously just based on what i saw with the hair, i decided to make a slight adjustment and that's okay. You can do that. The more kind of knowledge you have of the way that the hair works, then you can adjust on the fly, but i do think it's good to have a general idea of where you're going to go. So what i'm going to do first, is i'm going to take a horizontal section, just that works across from the parting into the front hairline about the width of the comb pretty much all the sections are the same size on this. So what i'm going to do now is connect the front to the back. So there's a couple ways i could do it. I could hold up my fingers. I could hold it in the comb i'm going to do with my fingers, just because i feel the most comfortable with that. What i'm looking for is that back corner that we cut - and this is where it's important, that i took the section so far back behind the ear, because of the way that the hairline jumps. If i would have taken it to there, then i'd have so much more density in that spot. So this way i can kind of control how fat it is behind me here so just parallel to the floor, just a nice square line so just connecting through. So that's section one on the side so now we're gon na do if it was a person. I would tuck this behind here uh, because her ears aren't there i'm going to clip in order to kind of isolate that, because what i don't want is i don't want to cut any of the hair that i just did. So i'm going to clip that off elevate, harrison studio looks great. Thank you. We just put all the polaroids up from the years and years that i've been shooting pictures like that on our doors. So now i'm going to take another horizontal section right above it, and this is where the disconnection is going to come in so try to follow along here. What i'm going to do is i'm going to bring this straight out from the head shape and i'm going to take this piece of hair right behind it just directly behind it and i'm going to cut a shorter panel than what is than the perimeter line. So i'm utilizing the guide from the back, i'm cutting it square through. So you can see it doesn't meet the length at the bottom right. So you've got this and you've got that so there's this kind of panel of shorter length that sits right there. So then we just do the same thing on section three that we did on section one. So we take a horizontal section straight across bring it down just bringing it down to no elevation tilted the head away from me. So that way i could work easier. So i'm not jamming my hand into the neck, just bringing everything straight down and connecting to that back piece again. So that's one two three, so visually i'll wait to show you that so section, four horizontal section so isolate the underneath horizontal section, keeping everything nice and clean you'll notice. Every time i move up, i push the head away and i bring it forward and that's because on this section i'm bringing everything straight out. So it's easier for me to stand here. If i left the head tilted, then i'd have to do that. But same same thing: i'm going to take this piece of hair that sits directly behind the section and that's going to become my guide so there's the short piece right there. So this is cool because it's disconnected from the ones below it, but it is connected to the panel behind it. So there's kind of this like internal disconnection like but an external connection through the perimeter. What this does is it just creates a lot of space in that front piece. Sometimes, when you're cutting a bob, you can get a little bit heavy around the front uh just based upon the way the head's going. I'M gon na just pull this down and do the rest of it. So i'm gon na move that away from me so square to the head, cut everything flat to the floor, no questions so far so visually now. What i can do is take this vertical section and pull it out from the head and what you'll be able to see are those gaps that i've created. So if i pull this out, then you can see the length but the interior are these little pieces. So this is really great on somebody. That'S got like a natural wave to their hair because what you can do is it just allows that space and you can get that kind of airiness through the front as opposed to. If you just cut it all one length, then as it dries, naturally it kind of expands and looks more like graduation, so it might not be for everybody, but it is something that i really enjoy so opposite side same thing: i'm gon na work a little faster Here now so just take the horizontal section across that becomes. This will become my guide for the perimeter length working, really clean, so bringing everything down cutting a square line. I don't really get too hung up on checking if it's necessarily balanced on both sides, because of it being so loose um. You know it's not going to create like a really strong perimeter shape, so i'm not like measuring it. I can kind of eyeball it and make sure that both of them are the same, so opposite side taking that section and connecting it to the shorter bit behind the panel still keeping it flat square to the head section: three meredith. I love that i've been doing here for 10 years and i've never seen that technique to create the gaps, lots of positive feedback on our end nice. Well, i invented it so uh royalties. If you make any money off her just kidding, i didn't i didn't create this. I saw somebody else who is better at me than hair. Do it and then just started doing it a lot? I really do like it. On hair, that's got a natural wave to it. It'S probably my favorite and now that i'm saying that we'll probably air, dry or diffuse this just because i think it looks really nice so one more for the short panel congrats on doing hair for 10 years meredith. That'S a that's a milestone, so just working straight out from the head shape and connecting those disconnected bits. So now i can drop this entire panel move the head away. So it's easier to work, bring everything straight down and just connect to that perimeter line. This also works on like longer links too. If the doll head was longer, you could do this out here and have the disconnection be, you know longer as well on the inside, so it's not like you have to do. You know, like a bob that sits on the jawline, to make this work. You don't even have to do it in the entire, the entirety of the haircut. If you just wanted to do it through the front um, you could kind of create those lengths that you want, as opposed to you, know, using a guide, there's nothing that says it has to be connected. So that's the interior kind of the perimeter shape. So just a nice kind of bobbling sits along the cheekbone around the jaw, so now we're going to work into the top. So i'm going to isolate the bottom just so i don't get lost and just so it's easier to kind of connect. The dots as you're watching so i'm going to lower this because we're going to work through the top panel now so what i'm going to do is i'm going to create three distinct lengths that all fall into the fringe. So if you look at the direction of the hair growth growth, the way that it was implanted into the doll all of this hair wants to fall forward. If i take it and try to move it backwards, then it jumps on me and that's not what i want. So that's another reason why i chose to section it the way that i did so what i'm gon na do. I'Ve got this one big panel now so i'm gon na section it into three separate ones. So i'm going to take a horizontal section across the front for my first one and i'm only going to do one at a time just because it's a lot of hair and i think it would be more kind of confusing. If i were to try to section all three and then pin it, but what you can see is i'm gon na do one two three so relatively the same size sections. So i'm going to work with the head lobe and i'm going to work from behind. So what i want to do is i want to take a section across the back of that panel and i'm going to elevate it up, so i can't hold it all at once right now, so i'm going to bring this up and i'm going to cut it. Quite short, now it's a little scary on these doll heads doing this because they have a tendency to jump, but the cool thing about this technique that we'll see is that by utilizing disconnection we kind of give the hair a little bit of a little bit of Freedom to bounce around a bit. I know that when i was younger in my career, if somebody came in and they wanted fringe and they had a cowlick, i was like well tough. You don't get one um, but over time you learned that. There'S ways to manipulate the way that the hair grows so i'll be able to show you once we get to the second panel. So now, what i'm doing is i'm going to over direct everything back to that first section. So the panel is actually going to get longer as it works forward. So the front of this section will be longer than the back and pretty dramatically longer because of how much over direction i'm putting on the hair. So i'm pulling everything backwards and because it's a stationary guide, i feel comfortable enough being able to control this. I'M going to just grab it all in one and do it for the sake of time and it's a lot easier to condense, cut if you're using a stationary guide. As long as you can control the hair and whatever technique that you're doing. I don't necessarily think that there's a right or wrong way. So what ends up happening now that this falls down, and it's still quite long. I didn't want to take it as short, as i probably could just based on the fact that it's a doll head and you can see it's jumpy uh. Once i get some water on it, you know kind of blow dry it once we're done. Then that'll start to go away a bit, but we all have clients that have jumpy fringe. So you know you can't be afraid to kind of give people the opportunity to try something that they might not normally get just because you're scared of jumping around. So second panel basically going to split this in half and then i'm going to do the same process that i just did in the front through this middle one. So i'm going to take my first section to create my guide now. What i'm going to do is on this one on the first one i went about that long so on the second one. I want to go about that long, so i'm just extending the length as i work up, which means that when i over direct the hair in front of it backwards, it's also going to get longer and what you get. Is this hair? That kind of falls over the top of what we already cut, so it kind of hides some of that jumpiness by creating those differences in length so over directing it backwards. I described it all at once because, like i said i can control the panel. If you guys want to follow me on instagram, you can the aaron johnson, a r o n j, o h and s o n um. You can also follow my education company that i started with my friend beau bollinger called sunday school education, and you can find us on instagram sunday school studio. We'Re going to be launching an online platform for education, soon really excited about the way that it's coming along. The covid situation kind of put a damper on it, just like about everything else, so we're about to get back into creating and it's cool, because it's not just step by steps. We kind of set it like a podcast um, we'll have guests on we'll do, interviews and stuff like that. Some really cool people in the hair industry, but then also a lot of really great knowledge to share. Now, if you don't follow beau on instagram, it's beau bullinger, i'm not sure how to spell it, but you should check him out so last panel. So same thing, i'm going to take a section across. What'S the photo for your sunday school studio, one? What'S the photo yeah, i don't know what that means. I'M sorry! So i'm just elevating up, oh, like in the profile, maybe uh it should be like a red and yellow just says sunday school. So then same thing. Just bringing this back so really over directing that hair backwards elevate said no fringe for you in french. For me, we'll see, i think, we'll get our french or bangs i'd, say bangs. I don't care so then again with that length change what it does. It kind of falls over into that, so just a way to kind of visually, see those three panels: the opposite direction. If i take a section straight through the middle and i lift it up, what you'll see is kind of a longer piece point shorter piece, point, shorter piece point, so shorts are long. Shorts are long shorts along and you can make those adjustments on how short you want these spots to be based upon. You know the desire of the person, that's wearing it uh. You know, what's available to you, so we'll start the blow dry. I wasn't gon na. Let it air dry, because her bangs are jumping we're gon na have to load right so get ready for excitement, so just prepping the hair with like a blow dry serum. Just something! That'S going to help your sparing time a on here and then usually i blow dry without a concentrator, but today i'm going to use one just because of how jumpy that front is. I want the most possible concentration of air and another little tip. If you have somebody, that's got a jumpy fringe. Is you really want to work it when it's wet? So if it dries, then it's already going to start to kind of jump and do that thing. But if you can get it wet, then you have more control over how it's going to lay down actually does look pretty jumpy. So we'll see how this goes. Tam, i'm sorry! If i uh embarrass you um so with the blow drying, i'm just going to work. I'M going to start in the front because that's the problem area and i'm really going to wrap the fringe and really blow dry those spots to try to get them to lay down as much as possible. Now, if this wasn't a doll head like oh, this would be easy. No problem um, but because it is just gon na have to work a little bit more at it. Unfortunately, she doesn't care if it gets too hot, but blow drying like this is really nice. Uh utilizes the roundness of the head to kind of create a bevel, so i don't have to pick it up and do a lot of leafing. Just blow-drying flat for the scalp like that helps to smooth it gets the cuticle to lay down, puts a nice shine on the hair and makes it easier to refine the haircut at the end. If i were to go in and kind of just you know fluff dry it with my hands, then it's going to be a lot harder for me to refine the haircut at the end. We'Re really just concentrating all that heat and airflow straight down the hairstyle. So it helps the cuticle lay down, and i like to move the hair in multiple directions. So, instead of just drawing it straight down and forward, i like to push it backwards as well just break down any build patterns that might be there blow drying. Is such an important part of hair cutting, especially when you're working like a shorter shape, and you have to kind of learn like over time to be able to navigate around the head quickly? Because again, if it starts to grind one spot, then that those growth patterns will you know kind of stick like that, so you know, i think, learning how to blow dry with both hands is really nice like being able to wrap with both hands. So you don't have to work around the head in awkward situations or awkward positions. You can really do the same thing on both sides. So if you can learn to switch, you know, then i'm standing on the opposite side, but in the same position. So i'm making sure that i'm kind of directing the hair the way that i want it to go. I just think it makes you a better hairdresser and it speeds things up for you a bit we're laying down all right. It'S not the worst. So sorry, the blow gun is not the most exciting part guys, but i want to be able to get this exactly how i want meredith asked. So, do you ever go back in and connect the fringe with light face framers uh, or does that just mess up? The whole haircut vibe, no, i like we'll go in and kind of connect things and refine a bit here in just a minute uh. Obviously i don't want like there to be. You know these massive kind of disconnections that are that you can see where they're sitting around the front now part of that, too, is the fact that it's a doll head and their hairline is so strong, so you kind of have to make. I had to make that decision whether i wanted the fringe to be like really wide and come all the way to the edges or if i wanted to have those pieces that were left in there and i would refine them off later, so i don't think either One of them is wrong. It just kind of depends on what you like to do. You know, anytime. You work on a doll head like there's, going to be these slight kind of variations in the way that it reacts as if it was a real person, but i'm pretty happy with the shape. You know this is not like your grandma's bob like this is a really you know, kind of short strong shape with a lot of you know loosens to it. So it's got to go on the right person um for you, beauty, school students watching now's, like the best time in your life that you can just try stuff, because it's like the only time in your career that you're not like 100 responsible for how things go. Like if you you know, if you jack somebody up, you get to raise your hand and be like. Oh it wasn't my fault, i'm learning you know, so you try these things. She goes hey now. She said: hey now, jesus, so i might iron it sometimes sometimes not, and i don't want to spend three hours doing this, so you know for you guys so we're just going to take it kind of as it is but yeah so i mean. Obviously, i think that we could make a decision like to to leave this and kind of these little curtain bangs, even though they're not really blow dried set like that, but lengthwise they work really nice um, but i do want to kind of go ahead and show Like how i would go about creating like a stronger fringe shape on this situation, so it's always a little different on a doll than a person or just is different from person to person. So um you have to kind of learn. You know when to do certain things, but for me what i want to do here is i'm going to lift it with the scissor or with the yeah scissor, and then i'm going to set it in the comb and i'm kind of going to use the comb As a bit of a you know, a guide point for me to be able to cut that nice strong fringe line, you know just right about right below the eyebrow there. I like doing it in the comb on a longer fringe like this, because i just get that little bit of forgiveness, whereas if i held it in my fingers, then it stretches the hair out a bit, and this just keeps it from stretching too much. So i'm just taking a little bit at a time to make sure that i don't jump over into the hairline, because i don't want to you know, cut off hair that sits in the side. You know so on a person you get. This kind of you can do it on the skin like this, and the skin kind of gives a little bit as you're setting it. You know with it being at all, it doesn't want to doesn't want to give as much so the refining process can sometimes be even more tedious. When you're working on a doll head, ashley emmanoy, i don't know how to say that last name um says love the wall. Am i on it uh maybe did i cut your hair? Sorry, if i don't recognize the the full name there. If i cut your hair or if you got it cut out of elevate, there's a good chance that you're on the wall, so just widening it out a bit lol, ibs new york, oh well, then yeah! Probably what did you guys? What was the show which here so same thing on the opposite side, just kind of working out a little bit at a time, uh, hair colored - it oh, was it 2016. It might not be on there, then. Actually, if it was the year they did it because i don't think i had the polaroid camera back then so then i'm just going to lower it down. So i can work on the refinement through the top. So what i'm going to do is just create a little bit more space and i want to kind of blend those different links that we cut into the top. So i'm just going to elevate and you'll be able to see like the shorter and the longer, and while i want them to stay separate because that's how we cut it, i do just like to kind of melt the difference a little bit. So just really deep point cutting and not a time like. I don't want to do it too much, because then you know we'll start to kind of wreck what we did and just work that rounded section forward, but even just a little bit you get it's a really kind of shaggy pc feel to the fringe. So it almost kind of allows it to jump a bit and you get a little bit of height in the front as opposed to just laying really flat working into the sides. So i brought everything down and i cut it. So what i'm going to do is i'm going to cut and refine that line as i lift. So i've got those multiple panels of connection through the bottom that are all touching, but i want them to just diffuse a little bit so by lifting, as i cut that edge, it's almost kind of like scissor over combing, but just on a longer length. So i don't want to do a lot, because i want that really strong shape same thing on the opposite side. So i'm as i'm closing, i'm lifting so and then, as i lift those bottom pieces fall out and then that disconnection that i cut shorter falls out and then the one above it and so on and so forth, and it's just a way to kind of dust. Those ends without going and point cutting, because i don't want to disrupt the kind of overall shape and then the back's pretty set. So i will spray it. It'S just a texture spray, so i'm looking for a really messy textured shape. I like to get my hands in the hair and kind of move it and provoke it around a bit, especially working. You know, with the shows that we do and stuff like that. Like my my my first concern is obviously making sure that the model likes the hair, but then i also like to create something that looks really interesting for images. So it's not just you know a bob, but it's a bob. It'S got this kind of like messy texture to it, so that way, whenever we photograph it like it has a more interesting appeal in the picture. So just these really kind of textured bangs and because of that disconnection, a lot of texture through the front which i feel like is lacking in a lot of bob shapes. When you don't do that. They just kind of have a tendency to lay flat. But you can see just by using my fingers. I can get it to really kind of lift out and i think about that for imaging purposes not so much that she's going to walk around like this, but more so that he just looks good for photography, stuff and yeah. So that's, that's it there's any questions before i go shout out real quick. I appreciate everybody watching did watch thanks to the students for tuning in thanks to elevate and tatum for asking me to do it hope i'll see you guys at one of the shows soon see.

Comments
Vanessa Hawarden: I would give the world for this haircut ... genius xx
PrincessAloeVera: Very interesting and well shown demo but it would have been nice to see it finished for real life and not so much for a commercial photo shoot. I watched the whole thing and really wanted to see the wearable end result so just a bit disappointed, and less confident to try it because I can't know for sure how it looks . Thanks tho.
mdcs55: Is it safe to assume that even before we get to that point, you would ask me how much I want off? That is 1 in, I would measure 90 degrees but tale off 1 inch?
Vanessa Hawarden: I would give the world for this haircut ... genius xx
Carol Weaver: I have gone so far crazy I am trying to do my own hair! THIS is what I want and yet no one does it as i ask and no one will finish up with the wispy messy look which I try hard to explain like this above! Only thing is i need a bit of more HEIGHT on top so think a tiny bit shorter on top? Then i tease it some and comb over. But I keep saying a BOB and I tell them Textured, and Point cut and use all these terms and hair to eyebrow and maybe if you cut it too short when wit it will bounce back and be too short so perhaps best to go a little longer than to eyebrow but to middle of eye or cut it dry?? Mine right now is a little longer than your manikin as I certainly need it done again. Go back and forth on going to salon as always someone NEW and have to explain all over and never know if they will figure out what I mean? I would like them to do at you did and tussle it and make it just bit like an artist would do and mess it up some and get a nice look out of it. Now I give it up, and have figured out by watching mostly how to cut at angle and also now doing it shorter at bottom in middle part of that back group and above and below longer cutting. Point cutting after angle cutting where necessary. BUT doing back of my head is very hard. I cannot see what I am doing! Sometimes people will do my hair and I asked all of above and I end up with shag with hair at lobe of eats. One never knows and sometimes they may actually do the Bob and get it much more like the manikin today and I love it and it grows out in better shape as it falls this way on its own! But the little curve you gave at end is perfect and would wish I could get it to stay like that!? I never wanted to be bossy and never really liked to tell anyone anything but when they ASK me " What did you want done today?" I do tell them what i said above and I just pray i am not bossy? But some can handle it halfway right me not at all and once in a while it comes out just right! Then that person is not working on those days or at that place as I do not see them there. It is at a mall. If I found one hairdresser who could do this and repeat it as they are the same person over and over maybe this would work better? But here I am trying to handle it myself! I give up ending up with some good and some not so good of a haircut. Thank you for tutorial. I think working on someone else it is easier, but not sure on back part of your own hair and for the self, but at least realize I must, and I mean must, section it off better first. I was too lazy before; it still came out alright though as the main part of the look existed. But grown out again somewhat, and so ready again, but have a cold and not feeling up to it yet. would not take this into hairdresser anyway at this point.
maureen rhysjones: Hideous! NONE of my clients have heads of hair like this! WHO DOES? I get so sick of these demos, especially cutting ones. Misleading. Great for doing long hair techniques etc but NOT cuts!
Helen: You do nice haircuts but your explanations are to be desired I'm confused and I'm a hairdresser
kai west: Nice instructions, but needs editing. And music.
wonfunigrl: This guys haircuts NEVER look like the pictures?