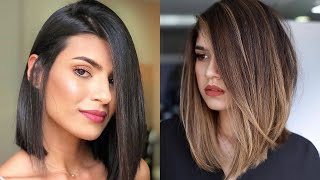
Layered Haircut Tutorial For Really Thick Hairs
- Posted on 03 September, 2019
- Bob Hairstyles
- By Anonymous
The video will show you to "Do your Long Bob Haircut Yourself Tutorial" to easily haircut Long Bob Haircut at home.
Comment like share and subscribe "HAIRCUTS": https://tinyurl.com/yxl63md4
Well, so, no need to extend this any longer. Let'S get start with the step by step here we go alright guys, so this is my model for the day, this is Amy. What we're going to do on her hair she's got really really thick hair. She also has a shaved underneath too, which I'm gon na, show you guys in a second. That is not something I did it's something that she does even on her own. So what I wanted to do is just clean that up, but I also like the fact that she has that, because it does take out a lot of weight from the underneath. I probably wouldn't go up as high as it is, but because it's already there it is what it is so for the sectioning. I create a horseshoe section, all the way around parietal Ridge, back around a little bit lower on the crown and the reason I go. A little bit lower is because I'm going to cut layers underneath this you shape, or this horseshoe shape on the top. I'M gon na cut those layers, and then the rest of the hair is gon na hang over top of it. So we're gon na be creating a disconnection and my goal with that is to make sure that I have that hair that falls over it. So I don't have short layers everywhere so right there. You can see I kind of expose that underneath section that again she doesn't go to a salon to get that done. They just kind of shave it up. So I wouldn't go quite as high up on the occipital bone, but that's just my personal preference and it actually does work pretty well for her hair, I'm using the andis Envy. This is a cordless clipper, I'm using a one guard on it just to go in and again clean it up. I'M not really trying to do anything fancy underneath here. I just want it to look nice, so I take the one guard and then I go through. I go a little bit a half step down. I take it a little tighter around the nape and then I go in with my andis T trimmer. Just to finish it up create some lines in the back, and that is how we do the bottom of the haircut. Now I let down the interior part of the haircut and what I'm gon na be using the tool of my choice, for this cut is the Donald Scott swivel twist razor. The reason I like this tool is because I can use any comb that I want. I'M using the YS Park, 3 3:9 comb to get a nice tight tension and I, like a smaller comb. I also spray all over the head, the Donald Scott preparer, which is a it's a liquid tool glide for the Rays. It also is pure coconut and sunflower. Oil, so it gives a nice slip to the hair, helps keep the hair protected when using it for razor cutting. So the thing I like about the twist is you'll see I'm not carving into the hair. I slide through it. So I pick where I want to cut and I bring everything straight out from the head and I'm working in basically pie-shaped sections all the way around the underneath of the hair, starting at the mid shaft and working my way to the end sliding that razor down. What that's gon na do is remove weight for me, but keep her length if you're afraid of cutting into your guests length. Then what I would do is just drop that length out and then do your slide cutting for me. I keep the length right at the tip of my fingers, so I know exactly where it's at I'm gon na continue. These PI shape sections around the head to the right as well. The only difference is now my fingers are pointing down, and we've talked about this in many videos but as I work to the right hand, side of the head, you never want to comb your guide into the new hair, so I'm always combing the new hair towards The guide line so, on the left hand side I comb the hair towards the middle and then on the right hand, side, I'm still combing the hair towards the middle. So I make a shift in my hand, position which keeps me consistent keeps my sectioning there and my guide line there as well. So just working my way, all the way to the front hairline and then sliding from mid-shaft to the ends, keeping the length but removing the weight. Now this is a pretty simple haircut, because all I'm gon na do is drop down. One half of that you shape and I'm gon na do the same thing sliding. What I wanted to do here was over-direct everything to the very front, create a stationary guide, create layering around the face, but then pushing that weight to the back. So what we did was we created the layers underneath we took out a ton of weight, but now I'm pushing that hair over top of it. So at the back of the u-shape, if you think about it, that's gon na be the longest point. The shortest point is right in the front of the face, so we're creating layers, and then the longest point is falling over top of those layers that we created in the back. Also, what you'll notice about this technique is we're creating a fringe and using the Donald Scott twist has one side of it cuts a hundred percent, which is the side I'm using right now and then what I do is I go through at the very end, and I use the 25 %. You can see it right there, 25 % cutting side which takes out 25 % of the hair to just remove some bulk. So I comb it around the face: 25 % carve it a little bit below the mid-shaft and just work. My way through it and that lightens it up, so it's not so heavy. Now I'm gon na go in with the Mercado conditioning mousse, it's cloud9. I I'm a moose. I really love moose, so I'm always on the search for my favorite moose this one. I love because it's really fluffy and thick feeling, but it doesn't feel heavy on the hair, its conditioning. It helps repair the hair as well so nice, nice, thick moose and then also the root fix. It'S a root lifter moose that I spray right at the base because I'm gon na go in into a round brush blow dry. I wanted to build up some volume, the blow-dryer I'm choosing today. This is the Minerva blow-dryer been given away on the podcast. Quite a bit, so if you guys listen to our podcast live on Wednesday nights, you have a chance to win one of these blow dryers from Minerva. This thing is super powerful, so I go in. I do a power blow-dry and now I'm gon na section off the Mohawk section of the hair and start in with my are go round brush. This is the number 43 brush. So it's not the largest one that we have it's a little bit, it's more like a medium sized. I like using that because it gives me a little more volume. People think that the bigger the round brush the bigger the volume, but it's actually the complete opposite. Thus so I like to use a medium brush when I'm looking for some volume in the hair notice, how, when I'm blow-drying, I work that section back and forth. I also use the nozzle on the blow-dryer to keep the hair nice and smooth, and I allow it to pass over the hair to keep that cuticle down. Shiny hair is when the cuticle is laying down. So that's what you want to be creating you don't want to be shaking the blow-dryer back and forth all over the place. Now I'm gon na speed it up, because I do the same thing all the way around the head, just basically blow-drying and wrapping it back off of her face is my goal with this. Now, as I move into the top portion, I'm gon na take horizontal partings across the top. Let'S call it horizontal cuz, it's right in front of me and I'm gon na section it I'm blow-drying round brushing back off of the face until I get to the midpoint of the head and then I'm gon na round brush everything forward to create extra volume. So you can see we're still doing that they called the truck and trailer method. I guess just working that blow dryer up against the brush, and now I'm blow-drying forward, which is gon na, give me maximum volume right around the front of her head. I didn't need maximum volume in the very back of the head because of the fact that she's got so much thick hair back there, but she likes to wear her hair kind of toss to either side in the front. That'S why we cut it to almost appear like we're gon na cut it for a center parting, but I wanted to keep it more symmetrical because she likes to toss it back and forth on both sides now to finish it up. This is that vibra straight iron. This is the giveaway that we're doing so. If you want to win this iron, it is an inch and a half iron that vibrates as you smooth it. You can curl with it smooth straight and do whatever you want. The vibration separates the hair as it goes through, so it really allows you to not have as many passes over the hair, so it creates less damage. This one has two separate settings, so it's really good. It'S a good consumer based iron. They also have a professional version as well, then we're gon na finish it off with the Brocato maximum will hold hairspray. This is basically one of those sprays that will stop a bird in flight. We used to say it's super firm hold, so I just spray it a little bit just to hold it in place, and you can see all those layers all the movement that we created in this cut. It looks nice and light, but also still thick and full as well. It'S much easier for her to manage check out the bottom. Where that shaved part is it's nice and airy, it's got a nice textured. Look to it so hope you liked it. Let me know in the comments below


Comments
HAIRCUTS: Please comment, how much this detailed tutorial helped you to learn the layered Haircut for really thick hairs?
Fluffy Socks: Her hair doesnt even look as thick as mine and I’m scared to get layers because I feel like they’ll look choppy