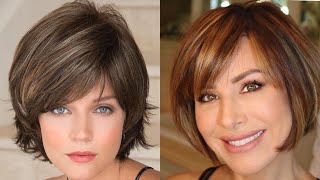
✧ How To Cut The Perfect Long Bob ✧ ("Lob Haircut")
- Posted on 21 August, 2015
- Bob Hairstyles
- By Anonymous
OPEN FOR MORE INFORMATION!
Accompanying Blogpost and headsheet linked here:
http://www.alexsismae.com/2015/08/lob....
__________________________
♥COME HANG OUT WITH ME ♥
♥BLOG PAGE: http://alexsismae.com/
♥YOUTUBE: http://www.youtube.com/user/AlexsisMae...
♥FACEBOOK: http://www.facebook.com/AlexsisMae
♥INSTAGRAM: http://instagram.com/alexsismae
♥PINTEREST: http://pinterest.com/alexsismae/
♥SNAPCHAT: alexsismae
♥E-MAIL: [email protected]
♥SALON APPOINTMENT INQUIERIES: [email protected]
♥✉SEND ME MAIL!✎♥
ALEXSIS SCALETTI
P.O. BOX 15428
NEWPORT BEACH, CA 92659
__________________________
♥ COUPON CODES
-NUME HOT TOOLS
$100 off ANY set + FREE US shipping with code FALLSETS exp 9/30
-ADORE ME LINGERIE
Join Adore Me's monthly VIP Membership and get your first set for $24.95
-TWISTED SILVER JEWELRY
15% OFF CODE: ALEXSIS
-Chromia and Crystal
25% OFF CODE: ALEXSIS
-Luxury For Princess Hair Extensions:
http://luxuryforprincess.com/en/
COUPON CODE: ALEXSIS
__________________________
♥ FAQ:
Camera- Nikon D3200 with a 18-55mm lens
Editing Software- iMovie ’11 & Adobe Photoshop
Some links are affiliate link’s
I use EVO Hair Products http://bit.ly/1DF8zot
My Jewelry Rack Inspiration- http://bit.ly/1MBIXvk
For Sponsorships or Endorsements: https://famebit.com/#/profile/AlexsisM...
__________________________
♥♥♥ All opinions are my own, and all products were purchased by myself unless otherwise noted. I will always share my honest opinion so that you know when I tell you my opinion of products/methods you can trust what I'm sharing. Love you XOXO, Alexsis♥♥♥
Hello and welcome to my first haircutting tutorial ever this is Monica and she's decided that she wants to chop her hair off into a long. Bob she's been obsessed with this haircut for so long and wanted to do something new, so I actually created a hair cutting head sheet for you guys for anybody who wants to get a little bit more technical and half the breakdown. So let's get started first. I'Ve already sectioned her hair from the front to the back, so she has three sections, so you can see. There'S number one and number two for the to break up the front two sections of the head and then three in the back just make sure you're, following the part line from where they part, so that you're going to break up that front section right on where They part now we're going to go in and bring down our partings from the back, so we're going to be starting at the back section in the back, taking horizontal partings with zero elevation. So what I'm going to do is make a nice horizontal partings. We want to be taking smaller sections when we're doing this initial haircut, because we want to make sure that we can see our guide if you're a little bit more Pro with haircuts, then you can take a little bit larger of sections once you have that done. You'Re going to take your first one down and comb it all out. I actually like to turn around the cape for this, because in the back, where that button part is, it can actually make it a little bit frustrating. So I just turn this around. So I have a straight shot on the back: that's not going to get in my way, so I don't cut my cape, then I'm going to just read comb and then position her head down. I always tell my clients to tuck their chin in that way. It'S going to create kind of a little bit of an undercut and then let the layers on top fall down. So now I'm going to section my part, I'm going to bring this down to where I want her link to be, and I'm going to hold it at zero elevation and I'm going to be point cutting this across we're going to keep it nice and squared out In the back, so that is eventually going to get a little bit longer towards the sides. I just kind of checked where my length was by tilting her head back up and then I just placed her head back down with her chin tucked in so I could continue cutting this section. It'S all about checking and making sure where your length is falling and double-checking on the sides to make sure that your lengths are even on both sides and when I'm doing this, like I said it's a zero elevation, I'm keeping this very squared out in the back. So you don't want to be pulling the sides of your hair out to the corners or anything like that. You want to keep it nice and squared out, because once that hair starts to move forwards a little bit, it's going to automatically create it to be longer towards the front. So you're going to continue to see me just kind of point cut this across, and the reason why I like to point cut is because it's going to make it a lot softer and not be so blunt, because this haircut is a little bit more textured without Having a lot of layering done so then, once I finished up finish up that parting and I get all of that cut, I'm just going to wreak ohm and then cross check and verify that I have cut everything in nice and even then, I'm going to drop Down another parting - and I'm going to I like to do this in just one big part or just one big section in the back and then I take my part line across the entire section, because it's just easier for me. I like it because I don't have to like work on two sides. So all I'm going to do is drop down another parting and comb this out and then using my guide from underneath. You want to make sure that you can see your hair from underneath. So using that guide, I'm just going to follow that guide and point cut in this next layer of hair cross check at the end of every part that you pull down and cut. So we can definitely make sure that we are not overdoing it and kind of exaggerating aside, I'm going to continue to kind of just drop the rest of this hair down, taking horizontal partings and cutting all of the rest of her hair. Using the underneath cut line or guide line as a guide, this haircut is actually super simple. It'S just a few minor things to make sure that it looks perfect. So now, once I have this whole set, this whole section done, I'm just going to check it. Make sure that it looks nice and beautiful and then we're going to move on towards the face. So now we're going to be working in sections 1 & 2, I'm going to take a horizontal diagonal forward, part line and I'm going to comb all of this out. Now this is going to be over directed back to the previous section, so I'm going to have her turn her head towards her shoulder and then down a little bit. You guys can see I'm over directing it back to that previous section. How much you guys over direct depends on how much you guys really want to have that kind of a line effects from shorter to longer, so I kind of just pulled it back to that shorter and I balled exactly where I want it to be from the Description of the pictures that she showed me, moreover, direction longer hair in the front, shorter or less / Direction, shorter, hair in the front. So once you have that initial guide cut in I'm going to drop another horizontal diagonal forward parting and I'm going to comb all of this back stand over direct it back and now that under section, which is my guide, I'm going to just copy and mimic and Cut and point cut into this section once again or this parting once again and then just kind of checking it. What I like to do is I like to get a little bit of that initial kind of cut in on those first two partings, and then I just like to show the clients so that they can see where it's falling. So once you kind of show them where it is just continue to pull down all of your partings until this entire section is cut, this haircut is so much fun. I am so stoked that I have it on my head and now I'm being able to this on Monika today, because it's still long, it's still sexy and super fun, and I just think this is such a great haircut for someone who wants to go shorter with Their long hair, but doesn't want to commit to a full short cut. So now, I'm just kind of showing her again where it's going to fall, how it's going to fall and she is so excited, I'm going to repeat the same process to the other side. On that section and then at the end, I'm just going to bring it all forward and cross-check it in the front to make sure that both of these sides are nice and even then we're going to blow-dry and then do dry cutting. What I did is, I just put a little bit of some styling gel in her hair to kind of give it a little bit of texture and then I'm just going to power dry. It the whole entire way, because I want it to be not so smooth and blown out looking, then I'm going to section the front from the back, just like we did when we did the initial haircut and then taking a horizontal part line from across the crown Area, I'm going to take up this top layer right here and I'm going to clip it up. What this is going to do is I'm going to actually be doing a lot of point cutting and into the layers underneath. So what I'm going to do is I'm going to take out a nice sized chunk of a vertical section going from that crown all the way down to the nape area, and I'm going to use my thinning shears pulling this out at kind of, like, I guess, Like a 45, maybe a little bit more than a 45 and I'm going to go in and I'm going to slide cut with my thinning shears and take and remove away out of the hair, then I'm going to just continue to do this by taking sections working Towards the ear I'm going to be making sure I mean we're elevating this guy's, but we're not going to be over directing this, so I'm just slide cutting as you guys can see, probably in the last maybe like two to three inches of her ends. This all depends on how much weight you want to remove or how much you want to keep she's got some nice thick hair. So I want to remove a lot of weight from this underneath part and then once we have gotten done one side of the hair. I just kind of like to look at it and kind of shake it a little bit to see if there's any more weight sitting in a place and I'll go in and just visually kind of take out some of that weight once you do that, I just Move on to the next side and do that all the way towards the ear once again, this is such a great method to remove hair, because it is easy, it's not going to make any lines and, like I said it's underneath so now we're going to move To that top section, I'm going to break it up into three and do basically the same thing. I'M going to elevate this more to a 90-degree elevation and if I have any layers on top that are a little bit long for me, I'm just going to kind of point, cut them off and then I'm going to re comb this and take weight by holding My hair at a vertical position and then just slide cutting some of that weight out, I'm going to do a little bit less in this top layer, because I want those underneath kind of point, cutted and texturized little bits to kind of pop out. I love that this doesn't have layers. I love that it's more of a textured cut, it's so much fun, especially when you go in and style it out, so I'm just going to continue to do this to the whole entire top crown area. After I finish, I'm just going to visually check it and make sure that there's no parts that I need to go in and kind of take out more weights. Then we're going to move to the front. So I'm going to take an entire vertical section from her part line all the way down to like the bottom of her ear. Now you guys are going to see me comb this out and then watch as I drop right on that bottom part right near the ear. I want to make sure that I'm keeping the weight line and I'm not going to make any holes by removing too much weight. So I'm going to leave that out and I'm not going to texturize that part. So what I'm going to do is direct it up again at a ninety degree, elevation and then I'm just kind of going to go in and slide cut out more weight. Just like we did in the back. Just make sure that you guys put down that part where the ear is just a tiny little piece that way we're not going to take out too much weight and it looks kind of hollow in the front. I'M just going to do the same thing. Moving towards her face until I have texturized all of her hair again dropping that underneath section, a small sections that I'm not taking a full out once I have that all of that texture put in there, I'm just going to double check it and do the same Process to the other side, now I'm just kind of visually checking it out and showing her and seeing the softness. So now we're going to go in and put some curls in I'm using my Moroccan oil hairspray. This is the finishing spray to kind of give her a little bit of hold I'm using a 1 in 1/4 inch curling iron, I'm curling this all away from her face by leaving about 2 inches of her ends out for a little bit more of that modern Undone look then: I'm going to go in and mess everything up and break up that texture to give you just that really gorgeous curl and wave. She had me show her how to do it, because she was like every single time that I try to do. My curls, it just doesn't turn out right, so I showed her how to do it in the way that I love to curl the hair to get the perfect wave and there you guys, have it how to cut a perfect long, bob or lob. I love this haircut on her. I love this haircut on me. It is just so fun and fantastic if you guys haven't seen at my blog of me getting my hair cut like this go check it out. If you guys, like this hair cutting video, please give it a like, and then let me know your guys's thoughts if you guys want to see more hunting, hair cutting videos down below in the comments


Comments
howva: i'm not even a hair dresser but i feel like i could do this, THAT is how good this tutorial is! A++++
Heather Orcutt: Thank for this video!! It has been extremely helpful in adding some volume to my hair without traditional layers. I have fine, thin hair that can look flat. if I add layers it takes hair from the length and looks too thin. I always cut my own hair and have used a straight razor in the past to add some texture in the ends. However, I have naturally wavy hair and razored ends look frizzy. I never would even think to use thinning shears on my thin hair! I have used this tutorial to cut my hair 3 times now and I couldn't be happier with my voluminous long Bob! Thanks again for all the details and a great video!!
alexis.r: This tutorial is exactly what I’ve been searching for! Super helpful - you rock!! ❤️
Tyree Hirschi: finally! I stylist with a normal, not annoying-high pitched voice haha I've watched a few of your hair videos and you ARE SO HELPFUL! and not with just color. I love that you give a variety of services. I love that you show all the steps.... & your diagrams I'm telling all my hair stylist friends about your channel. THANK YOU!
Asmita Morrison: Thank you so much for this video! I’ve been looking for a tutorial on this particular haircut. This video is very educational and can follow perfectly.
ChloeMR1991: Thank you for this, my Mum had a go at this on my hair yesterday! We don't have thinning scissors so it's still pretty thick, but while in isolation it's gotta be done!
Chai: This is one of the best videos I've seen. I finally found the perfect haircut video fo how I want my hair cut for next time it grows out. Thank you! Wish I could come to your salon! Great job!
Lindsey Walter: Thanks for the video! I'm a cosmetology student and my sister in law wants this cut but she's naturally curly. She's going to style it like this though. Do you suggest I cut it dry, while straight? Or just wet and watch how much length I take off? Thanks!
Jacqueline Munar: Woohoo I love seeing a left hand stylist on YouTube! I struggled in school because everyone was right I'm glad to see you on here! Awesome video!
JENNA QUAGLIANA: Thanks for the video! You were really informative and helpful step by step! I’ve been looking for a good video and this one definitely is the most helpful :)
Laura S: Great Video! Not only do you help your fellow stylists, current students, or lay person on how to and what to expect when cutting this particular style! You broke it down and explained how and why! Do more please! The lob is a great cut for everyone and spans many age groups and is versatile! Laura co
mama warrior: Do you know how many times I've asked for a long bob and got a very short not angled bob? Thanks for this video!!
Emily Fowler: Thank you so much for this video! I am in hair school and this has helped me out a lot!! You are awesome!!
Ashley Laine: I'm a lefty too!!! I had such a hard time learning in school because no one was left handed... Pa-leeeeeze do more cutting tutorials!!!!! I'm so happy I found you!!!
Starlight Girl: Finally a simple cut that looks fantastic! Love it- great video!
jamie anglin: Great job! It looks good on her! I'm going to try it on my mom! Sometimes I miss doing hair in the salon.
TTiffy87: I forced my mom to do this haircut to me and I LOVE it
The Mighty Miss M: That haircut seriously took YEARS off of what she looked like with the longer hair. Not sure how old she is and she doesn't look *really* old, but the haircut "shaved" off 5-10 years. Amazing what a good haircut can do. Thanks for the tutorial - you really do an amazing job explaining the "how"! Love this look!
Trey Johnson: Thanks for sharing! Natural teacher. Loved the diagram and clear instructions!
Kim Kane: Looks great thanks for easy instructions
Courtney Pack: This was great! Loved this video and hair cut! It also looks great on you
Chloe Anibal: This helped me soooooo much!!! Thank you!!
Pamela Sayre: Nicely done!! Love it!!
Danielle Vockroth: Love this! it looks great (:
Erin Martin: This was SO helpful!!
Lady RoMia: i went to hairdressing college and i was bullied for loving my studies and for having good customer service....i left to do teaching but my heart loves hair. I love how positive, friendly and talented you are. The women who bullied me for 7 weeks all got jobs working locally...imagine how screwed my head was and I am a Mummy.... shame on the bullies but good for me for rising above xx
Cindy Johnson: Love this!! Thank you!
gabriela sosa: perfect! I love it!
Macadamia Nutball: Question: does the front hair section start behind ear , mid or front of… everyone does it different just wondering the standard!!! Thank you
zona999: Beautiful job.
mamalovesmascara: Love it! So cute!
Gina Crisci: Awesome easy video! Hopefully someone will come in today n want his cut lol. Gotta love Saturdays ! Xoxo
suzyqt1980: NAILED ITGreat video❗️Please DO more
Crystal Lanae Smith: Love it!!!!! Thanks for sharing :)
Olivia Legree: omg..great technique clean and easy...I ll do this on my long haired client who wants a little change.
Adrianna F: Can you do this but with a short layered bob? The picture is super helpful
the curling dervish: you don't even know how many capes I've snipped! You're a genius!! ❤❤
Marce River: Love it!!! Did you cut the back in a straight line?
WOKE Mel: I have really long hair, felt impatient and just now divided into two section putting them over my shoulders and just cut. I will go to hair dresser later for trimming and a style but yeah this wasn't a great idea because for some reason some pieces are so short and the others are long although I thought the way I did it would result in a somewhat even style until I could see a hairdresser. thoughts anyone?
Solmary Pérez: Can I curl my hair with a flat iron and get kind of the same look ?
Melinda Daniel: great video! more cutting video please..
HeadHome: Great video more please!
A S: Loved watching it ...will it suit for a thin hair? ...I've got a thin hair and Im kinda confused whether to get this style or not....
Lola Pavon: Great thanks!!
MaritMakeupManicure: looks great! how would you give a thinner hair some texture?
Lauriiz Alonso: Que bonito Saludos desde México!
Sharon La Tour: You did a nice job on her lob! LOL. Looks great!
Nivisha Kohli: Hey! Would you recommend this haircut for thin hair ?
Aneta Katsi: You are absolutely great!!!Keep on!!!
Missy Chrissy: So much love thank you!!!!!
Heather Mattas: Tip for this type video, if your client has dark hair use a colorful cape so viewers can see better!
DoraReviews A: leftys are freaking awesome at everything. my cousin is a left handed hairdresser and an artist! she's the best!
Kitty B: would you still do the texture 'cuts' or take the weight off on finer hair?
Smokahontas: more haircuttinng!<3 thank you! lol
Rebekah Bradley: Super cute!
Cristina Andrea: How did you part the hair from the start? Middle or side part?
jnesia suarez: I love all your work. One day I will go to get my hair done by you . Where is your shop located?
Elena Macián: I want to get this haircut but I'm afraid because I have thick hair and I don't want it to look very thick or "fat" at the bottom. Also I have tons of volume and layers maybe will make it frizz even more.
HeadHome: Wow great tutorial.
Julissa Hernandez: what kind of scissors you used to texture the ends?
Emily Preston: Is she using thinning shears around 8:56?
Laurielane: more videos please
Celia Meraz: I want this haircut but I have really fine hair will it work for me? or is it best on thick hair.
Denise D'Agostino: For the future you might want to consider a lighter cape so that the hair you are cutting does not blend in with the cape and we can see better.
Alondra Torres: Finally a left handed stylist on YouTube!! Lol
J Rivera: Very cool!
Alexandra De Hoyos: OMG YOU'RE LEFT HANDED!! please continue making videos lol.
099garcia: I just went to get my hair cut in this style but it turned out awful! I hate it so much...it's too "fat" towards the bottom and doesn't have that textured look, it's also too short. Can anyone help me out, how can I fix this?
Cynthia L: LOVE LOVE LOVE!!!!
Krystine Bushnell: When you're cutting the front sections are your fingers horizontal or are they parallel to the partings? Hard for me to see
KayleenIsKpopTrash: I don't like a line bobs, but this is sooo pretty
paolitna28: I always use a White Cape. To see Not black on dark hair.
christine zhang: did you give her layers?
Peggy Genoway: You should have used a light cape-can't see when it matches hair.
kathryn jarrett: thankyou more please of hair cutz
Cynthia L: LOVEEEEEEEEEEEEEEEEEEEEEEEEEEEEEEEEEEEEEEEEEE
Nerissa Farrell: I love you girl!!
Paola Ramirez: Wich was the second scissor use?
76 7: Good tutorial but too much talking!
Dana Gawlak: girl, you need to fix my hair..
Yala B: Do you stand to the side or behind her?
Chantal: wonderful !! Anybody wants to cut my hair ?!
JinJin Wins: what kind of scissors
Serena: why did I get an advert for hair extentions?
Denise D'Agostino: Hey can you cut my hair. WHERE DO YOU WORK
Pucca Pig: Qui est là grâce à Lufy ?
amina2205: u did the sec on top
დ슬잉: 구독하고 가요 허팝을 1째로 안 사람이 님이죠?
Sara Bb: qui est la par luffy
Emilie: #lufy