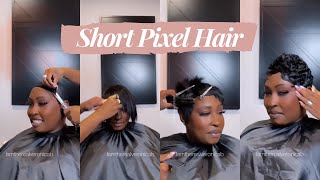
The Best Diy Sew In Technique For Fine Hair + Thin Edges| Leave Out| Detailed| Easy| Side Part
- Posted on 31 May, 2021
- Bob Hairstyles
- By Anonymous
Thank you for watching how I do a full sew in on my fine hair/thin edges. I hope this video is helpful!
Below are all the items I used to achieve this look:
Braiding Hair
https://www.amazon.com/Pre-Stretched-B...
Hair Weave Needle and Thread
https://www.amazon.com/Weaving-Threade...
Spandex Dome Style Wig
https://www.amazon.com/Stretchable-Spa...
Indique Virgin Hair Extensions- Remix Body Wavy 18” (4)
https://www.indiquehair.com/collection...
Amika- Glass Action
https://shop.saloninteractive.com/stor...
Toppik Hair Building Fibers
https://www.amazon.com/Toppik-Hair-Bui...=
THANK YOU FOR WATCHING! Like, comment and SUBSCRIBE!
IG: @Chaka_Starkes
https://www.instagram.com/chaka_starke...
Hi, i'm shaka starks and welcome to my channel. If you want to see how i got this look, definitely keep watching in this video, i'm showing you guys the best technique for fine hair and thin edges, i'm going to be showing you step by step. My braid pattern, how i lay my traps and position and sink, cannot see my thin edges, how i blend my hair and style um. So i do two braids at the top, a little trick that i do so that this braid doesn't slip back too far is i'll. Just start braiding like a regular box braid before i grab more hair and that helps around all the way around my head and i'm going to braid it down all the way to the end. Thank you there's my other. My last anchor braid, oh cool. What is that from? Where are you gon na die in his little piece, bro yeah, so i'm taking my time with my anger braids. I have like moved my edges out of the way, so i'm not pulling them out anymore than they already are um and then in the back. I just braid the rest of my hair just straight back. I don't use braiding hair for these braids um and then i just connect them together. Okay, so i am done braiding. Finally, finally, actually it didn't really take that long. So this is my braid pattern. These are my little braids. I have three braids. Actually, i'm gon na go ahead and connect these actually now so you can see the back, that's what it looks like so after i connect the braids. I just add some oil to my edges and in all of my parts it's pretty much the hack. The dome cap is basically what allows me to just make sure that my sew-in is nice and flat, and i can fit more hair onto my head. I'M going to just go ahead and do my needles first, one, two, three, four: five: five needles. So now i'm threading, my needle, so i don't have to stop a million times and i've sewed my braids up and i'm about to put this dome cap over my head and sew it down and don't get tired. I'M excited abby. Sometimes these be really small. So i'm gon na stretch it so i'm making sure this leave out section is out of the way so that, after i put on my dome cap - and i sew it - i don't accidentally cut my hair. This is a very important step. Make sure you can clearly separate it get a dome cap that is a little bigger so that once you sew it down, it's not stretching across because you don't want it to pull your braids you're going to be braiding down your tracks through the dome cap. Through your hair through the braids, so it's going to be secure. You don't need your dome cap to be super tight. It will also give you a headache. So just make sure you know it's just on there not really tight. I am going to sew around those perimeter, those anchor braids. So that's what you see me doing right now, i'm just feeling for the braids and sewing through another important step is make sure that your edges are brushed away from your braids so that you do not sew through your edges or sew through your leave out. So here i am just sewing around i'm going slow. I sped it up because it's repetitive, but i am taking my time and feeling where that braid is wow. So take your time when you're doing this, you can sit in front of the tv play. Some music watch a movie um, i'm not gon na lie. This does take a while, but like once you get used to doing it. You can do it yourself, you can save your money, you don't have to go to salon and use the dome cap because it just makes it easier. It'S kind of like the same technique as a quick weave, because you don't have to worry about sewing into your braids. You can just go right across be careful, so i am carefully cutting away the dome cap, i'm kind of just clipping in and letting it tear by itself. Um, i'm just cutting it. So it's open and then i'll go back and kind of be more detailed about where i cut it, but i just wanted to to kind of rip open so that i'm not cutting the stitches or the braids. You don't want to cut your thread because then that whole thing is going to pop off and that's the worst, so just be careful, you don't have to cut too close. You see me going back and being more detailed, but you just want to like rip that joint open and cut around. So i am basically pulling the dome cap and just making tiny little clips and letting it kind of rip by itself. So i'm finally done cutting away the dome cap. Now i'm just brushing down my edges again, i'm here for the dome cap, because if you're not a braider, it's going to make sure that your braids are nice and flat underneath it protects your hair, it's satin. So it's soft um and now i'm about to sew in my tracks, i'm showing you how um long this bundle is. I love this hair, but the bundles are really small, so i am gon na sew. I'M doubling my weft and i'm sewing at the bottom of my braid, so i'm sewing underneath the braid you're gon na see me in a second. I just use a clip to hold the other side up and i'm making sure that they are doubled and that they don't fall down because that's the worst when you end up sewing through one of the tracks, and you realize that they're not both together. So i'm just holding it together and sewing underneath that braid um i'm taking my thread and i'm going underneath the braid um underneath the wefts through the dome cap and around the braid. I don't, i think, that's pretty detailed, but you can just watch me. Do it a couple times so i'm taking the thread underneath that braid and around the weft through the dome cap through the braid. When i get to the end, i'm going to flip it, i'm going to again sew underneath pull it through. There are lots of videos on youtube on how to sew. I just want you guys to see the technique that i'm using um to make sure that my edges are not exposed. So here i'm just sewing in that first bundle going track by track flipping flipping that track and going back and forth. So i've finished that one threaded needle and i'm just going to take my other thread and needle and just continue where that stopped. I tied a knot and i'm going to show you in a few seconds how i secured that knot, but i'm still going back and forth flipping the wefts. I really hate cutting my bus because i feel like that's how you get a lot of shedding and it also makes it harder when you want to reuse your bundles. So here i am just wrapping around and around and i'm going to pull a knot through and then i'm going to cut it and just tie it. So that is secure, so that is one bundle all right. So i'm done with that bundle. I forgot to mention that i use the newest bundle because it's a little longer for the back section and i'm just combing through before i move on okay, so i have to have a team meeting, so i just threw on this hat and yeah um put some Lipstick on comment below if y'all are working from home and trying to get stuff done in between meetings i'll be back okay. So i'm back from my meeting i had to finesse that joint, oh ma'am. Can you think of it may of keeping on your hat? Please uh why? I don't know why. Why are you gon na take on my hat, i'm tired? Now and now, i'm just looking at my bundles to see which one is longer. I want the longer one in the back so that it ends up giving a layer of my friend is the hack, we're gon na take this joint around town. Okay, we're gon na! Take this joint! Oh, it smells so good. We'Re gon na take this joint around town and you're, not even gon na know. We don't have edges under there. You'Re not gon na know how to go now. How do you know now? I'M just gon na pin this here so now. I'M sewing in this front. Part this part is important. Y'All take your time. What i'm doing is. I am sewing underneath that braid again, so i'm not sewing on top of the braid. I lay that track right underneath the braid - and i just sew around the braid through the dome cap in front of the braid, so you're gon na see what i'm doing again. I'M not sewing on top of that braid. It is underneath that braid i use a pen to secure it and i'm just sewing around. I don't cut this weft. I actually just keep sewing to the back and then you're gon na see how i flip it before i go to the next side. I have a pretty long thread, so i just keep going i like to make my threads pretty long, not too long, because then they get tangled and that's annoying, but i'm taking my time and i'm going around my head and the tracks are still doubled. I forgot to mention that so here, you're gon na see me flip it over and i'm bringing it all the way back to the front. Um again i didn't cut this weft. I think it was a. It was already kind of cut that way, because i used this hair before so you're going to see me fold it and i'm going around this folded area, making sure that it's flat i go around a couple times and i'm just going to keep sewing. I do loop it through. I go down so downward and i'll pull it through the loop, and so i'm bringing this around to the front. And it's important that i'm folding in the back and i'm not folding the hair up front because i don't want to get that bump. So that is the end of that bundle and you can see it's nice and flat. I'M combing out any tangles that are close to the left, so i can make sure that i am sewing nice and flat and i get to the top and it honestly it was like the perfect length where it stopped right where i needed it to stop. So i'm just brushing out any tangles. That'S my second bundle y'all, so i'm looking to see which bundle is kind of longer, because i do want to lay them so that they end up kind of layering and blending. So i'm doing the same thing on this side. I'M going to double that weft and take it right up to the front of my anchor braid, i'm using a bobby pin to make sure it doesn't move. So i can sew it down and i have a clip in the front and i'm gon na start sewing. Underneath that braid again so that the hair goes toward my face and i'm just gon na sew all the way around starting underneath or yeah, underneath that braid not through the braid not over the braid, underneath that first anchor braid making sure that that hair is laying Toward my face, this is super important if you're a girl with thin edges, because you want that hair to fall forward so that it's not exposing you, okay, so just take your time and just keep sewing, making sure that that hair is going forward and underneath that Anchor braid - this is probably the most important part as far as the way you're positioning your tracks. So again, i'm folding in the back, not at the front, and i just keep going back and forth folding that track until i get up to the top. Once i get up to the top, i start to just use um single tracks like i'm, not doubling the track anymore, because i don't want it to be as bulky or full at the top. I want it to be flat, so i'm just going back and forth in the back. I'M flipping in the back, so here is where i start to just like single tracks um. So i'm not doubling them. These are just shorter pieces that were already cut, but if you're using new bundles, you just want to measure and make sure that it is the right length across. So you don't have to fold them, and so they'll be nice and flat at the top. And i just continue to sew in kind of like a u shape um around. Until i get close to my leave out and then you'll see me lay my last few tracks, but i'm just going around that leave out in a u-shape with single tracks. As i start to get closer to the top, i will cut these tracks just to make sure that they're flat, i hate, cutting the wefts, but at the top it's kind of necessary just so that you don't have any like bulkiness. So i'm back with, like maybe like two tracks left, i'm not sure, so this is pretty much the only time when i cut my wefts and i measure to make sure it is the right length and it goes around, and so that's what you see me doing. I let the weft go a little bit over the braid, so you'll see that in a minute i do kind of leave like a little flap. So i'm sewing this isn't my last track on this side, but it is my last track on the shorter side. You'Ll see exactly what i mean so i'm going kind of behind the braid on this side and i'm just going to sew around where my leave out is, and i'm using some water just to make sure that there's no tangles and it's flat here and it makes It easy to see where i want to sew so this braid i'm sewing right under that last braid and when i go around, i am going to put the track over the braid and i'm going to sew underneath the braid it's kind of hard to explain, but Just you'll you'll see in a second what i mean so i take the track. I hold it over almost all the way to that part, and then i just sew so it's nice and flat. This is my last track on this side. Um now i'm gon na just stitch right through this little piece. I recommend not cutting it until you see how far it goes over so then i'm gon na clip it, but i am gon na leave like a little tiny flap just to lay. I didn't want to sew through there, because that part of my hair is super fragile and i didn't want to create a lot of tension, but i leave a little bit and i just let it lay over there, so i'm, finally to the last track on this Side, i measure out a piece i put it pretty much right up to that part and i sew flat. Okay, i kind of hold it down and i sew all the way under the braid a little. I pull that track a little bit over the braid so that i get as close to the part as possible, and i just sew it down until i get to the front i'll leave the little flap like i did on the other side, you'll see in a Second, so here's a little flap that i was talking about it's like a half, a centimeter that i just leave to lay over that part. Because again i don't want to knot it right at the top of my hair because it's super fragile there. But i do just let it lay and like after i tie my scarf down it's flat. I don't really worry about it moving and i just knot it and just clip that last thread and i'm done sewing guys, i'm just making sure that everything is flat and i didn't like catch anything i am done. Finally, i'm just gon na spray, it all spray. It all down, so we can all the curls can kind of blend together. So now i am taking out my leave out i'm about to blend it guys, i'm so happy to be done with this sew in it took a minute you see. My son was in the background i had to stop for a meeting like is yeah but yeah, so i am brushing through, and i'm just gon na make sure that my part is perfect. You just kind of kind of play with it and make sure that there is enough hair on each side to cover your tracks and that's what i'm doing and i'm gon na flat iron it in a second. But i just want to make sure that my part is perfect and it is how long it is. You can see that yeah girl, we can't see the situation on the side. Okay, um. So now i'm just gon na go through real, quick and kind of just trim it like the tiniest bit. I don't want to cut off the length, but i do want to make sure that it's blended, so i'm just clipping on an angle down and that's it, and this is it. This is it. This is it. Finally, i'm done i'm done yo. This took forever. So now i'm going to bla. This looks good. Okay, you can flip the wind can blow the wind can't blow. I mean you still! It'S still. You know giving a little okay, okay, what? What? What? Oh? Okay? Oh, oh, oh! Okay, all right! So now about the flat iron, also using some glass action. This is like a serum that um it's by amica. I think that's how you say it um. This is from here in space two, i'm like it goes up to 450., pretty much gon na use it on 450, because i don't plan on flat ironing my hair every day, um, i'm just gon na brush. I think that's a nice blend. I said jerome in the i hatch, jerome and hat all right. Let me stop and let me put my tongue in my mouth all right. That'S my husband put your tank in your mouth all right! So i'm just taking a cleanser, oh a little drop, putting it on top and this might seem like it's unnecessary, but i'm just gon na it's necessary to me all right, there's not really anything there and yeah. So now, i'm just gon na take this hair. You see how little leave out it is, but it's covering okay. I just go through with one pass around my leave out um and i just straighten it first and then you'll see me curl it to kind of blend it with the curl pattern. Eight, just gon na make sure i'm covering make sure that all the tracks are covered. Okay, so now i'm gon na go grab the lead out and then grabbing a little bit of the weave and i'm just gon na basically just curl it together. All the way down like that, i'm gon na do that here doing the same thing. On the other side, just curling it in and blending it grabbing a little bit of the weave and curling it together, so that that curl just clumps together and now i'm just curling the ends. I don't really like that. The ends are kind of like straight, but i don't curl the whole thing. I keep it, it's normal like wavy texture and i just basically curl it at the ends and you'll see me brush it together and that's all. I do also use a curling wand for this. I don't have one i feel like. That would be a little easier to keep that wavy pattern, but you can see or curling iron i'm using my flat iron. I pretty much use my flat iron for everything and that's what i do. Okay, so i like to kind of do this - i like to take my comb and go forward and then like kind of like mold it like that, and i will like put it behind my ear so that it does that situation and then for this i'll, like Comb it up towards the my face, and i will actually actually so i like to also just like clip it there, so that it kind of stays like that and then for this i'll comb it towards my face, make sure everything is covered, comb it towards my Face and i'll just take my iron right here and i'll just give it a little like lift right there. This part is absolutely optional. I'M going to take this hair fibers and i'm going to take my comb i'll. Take this i'll, put it right there and i'm just going to dust it with this. Actually never did that before, but i just wanted to try it. Try it try it and now, i'm just you know gon na finish, finessing eco styler! I don't like it like. A heavy hold and i just get the teensiest. This is like an extra detail that you do not have to do, but i like to do it because it's fun, it's like i like to do it, because i want to take this little spoolie and i just you know swoop that little situation there, i'm just Brushing it forward and swooping it back, okay over it back and then and then same thing over here that part. That'S it that's the nest from the best. That'S it girl, that's it! My birthday, hair is my birthday. It'S my birthday, yeah, my birthday, my birthday you're. My birthday hi so yeah. I hope you enjoyed this. Let'S get into some slow, mo's, okay, get into some slow-mo's. You see! You see that you see that you see that. Okay, you see that all right, that's what we want. We don't want to be exposed. Okay, thank you. Thank you. Thank you so much for watching if you made it to the end of this video you're a real one. I know this was very detailed and super long, but i hope it was helpful. This is what i do. I feel like there aren't any videos on, like you know, for sew-ins, for girls with no edges or for fine hair, so i hope this is helpful. I kind of just figure this technique out on my own, so try it. Let me know if it works, for you be sure to like this video comment and subscribe and look out for new videos. Look out for more hair videos, home decor and lifestyle. I'M going to be doing a full review on this hair so make sure that you subscribe to my channel, so you don't miss it. Thanks and i'll see you in my next video you


Comments
Britt R: i never see anyone with my hair type doing protective styles i really appreciate your videos i don’t feel alone anymore! i only see natural women with super curly long and thick hair and their styles just don’t work for me.
Kluermoi: When I say you did the damn thanggggggggggg with this sewin!!!! Ooooh I miss them! Definitely going to try this way
XOXO Brit: I watched this whole video. After years of staying away from extensions, you got me wanting a sew in again. This is exactly how I used to do mine. I charged my clients $200 a pop for the same style. You are saving so much money and your hair is healthy!
Nik Rhoden: We have the EXACT same hair type and hairline! I haven't done a sew-in, in like FOREVER!!! I WILL DEFINITELY BE DOING THIS FOR THE FALL! THANKS SO MUCH FOR THIS VIDEO!! GREAT JOB!
N Martin: Wow, this actually gave me hope! I have not seen a sew-in done so neatly in a long time. It looks beautiful ❤️
Shalonda H.: I can tell that you were extremely proud of your work and you should be! Amazing job! And your baby is so adorable Thanks for sharing!
Monique Falu: Love your transparency and Confidence! Your hair came out Gorgeous ! Creme of nature has edge control with color. That may help your edges look fuller, especially when it's windy out. Your son is a cutie pie! Great video
Dawn H: I appreciate that you are showing a quick sew-in temporary weft for fine tin hair. Just curious why no one ever tells the public ho great single row separated hand-tied sewn in wefts are when they're made permanent with some between growth maintenance when keratin bond clear is used and after they have stayed sewn-in and glued/bonded; how you just pull out the last string ti free up the movement (as long as you installed them the correct direction and didn't forget to take the correct thread out so that only one would be left - so you get the eyelash singles bonded with keratin glue effect of real. movement of the hair without bondage. I'm pal red Indian with water waved and staring hairs that are fine and a big head so every other method mentioned on the internet is about fat sticky adhesive that takes months to get out and looks terrible when the wind blows and basically glueing a wig to the head without poking the cap and pulling hairs through. If you glue down all the hair on braids changes are some 1/4 of the. hair will stick but you got to pull that cap off the scalp after taking out the blanket stitch and why cut it when it would look more natural to go round and round? Why don't hair stylist and people who know how to do a real one just tell how great they are done the right way?
Sheta B: Love this!! A trick with the topik for your edges, add edge control or gel. Spray a Lil hair spray, then add the topik. Smooth with finger or edge brush. It’ll stick to the product and will last all day.
Kathy Powell: Thank you for the tutorial. My hair is exactly like yours. I did my sew in but didn’t leave enough out on the side. Awesome job
Marche' Partee: Thank you, Thank you, THANK YOU!! One thousand times thank you! No one, I mean NO ONE EVER thinks about women with thin edges! I mean everyone thinks that thin edges come from wearing wigs or tight hairstyles like braids, but I am here to tell you that is incorrect. I was born with and always have had fine hair and thin edges. My mother's hair is the same way. So, I find it hard to emulate a weave that anyone does on YouTube when their hair is thick and the full thickness of their hair grows all the way to where their hair stops. You have brought back my faith in the YouTube hair community and please continue to bring more content like this. YOU'RE THE BEST!
angela anderson: Wow!!! You were extremely patient with yourself and taking time to ensure that you were not placing anymore tension on the edges of your hair. The end results were fabulous!!! I loved it!! It seemed very tedious but I like how turned out!!!❤️
Rashida Daye: Followed your video to do a sew in for my high school daughter. It was her first sew in as she’s very picky about it looking as close to her own hair as possible. I hadn’t done a sew in years but your video helped. It came out really good she was very pleased. Thanks for the video.
G Taylor: OH WOW… THANK YOU!! I have the same hair line and I hide behind headbands and I would love a sew in and thanks to you I have the confidence to go out and get me a see in. I am going to be dancing just like you HBD
Janice hudson: ""wow! Omg nice job first time I' actually saw someone do an extremely spectacular hard excellent skills with sewing they're hair I'm so glad I clicked on to this formative video!! Thanks young beautiful lady for sharing your video with so many people's I'm quite sure they also appreciate this vid, bc I know I do so much gave me some good options flawless!! God bless you & you're family
Cheryl Clarke: Absolutely gorgeous hair! Natural and beautiful look and easy to follow instructions! BTW-Handsome husband and beautiful baby. Love your videos. They are really cute and very informative!
Dawn T: You're a darn professional and you make this look so easy!!! I can't do this!!! I wish I could! New subbie here! ❤
PrincessTerrail: You did an amazing job! And gave me hope to try this myself! Thank you.
P Raiiin: Thank you so much for doing this video that many of us need … I’m so grateful that you made this girl ❤️ really appreciate you
Tiffany Harrell: you did such a great job girl! I would have never known this was a sew in
lirobinght: You are absolutely fabulous with your sew-in. Fantastic job and video. Thank you
Katherine Wold: Wow, that looks fantastic! I thought you would be using a lot more 'weaving' hair, but you could probably braid your whole head without any extra. I am amazed you could do your own head of hair in such a varied design without cross braiding it. Excellent!!!
ela ela: Amazing Thank you, you are stunning. And for anyone that don't have edges you are giving out so much HOPE!! :))))
kay: Flat iron the edge of your track, it presses it super flat so it can lay even flatter in the front. Very nice and easy install. Very doable for beginners
Jasmine Jones: I appreciate you soooo much for this! My edges are naturally thin due to genetics but I love me a good sew in. You gave me so much hope
CurvaceousQT4U: I ABSOLUTELY LOVE THIS VIDEO! your energy is captivating and I just love this technique. So helpful.
L’ Dougoux: You made me have such fond memories of long ago dying my hair while my son’s visit from Daddy to me!.. thanks for showing us ladies with fine hair how to weave it!.. L
Dvine One: I haven't done something like this in a long time. I use to do that with the bonding glue back in the day... Going to try this after I'm done with my newest hair style I just did. Thank you for bringing back something I had forgot about doing.... New sub here... Yay!!!!
Leah Watson: Girl you did a wonderful job and it's hard to do a sew in on your own hair A+ for me❤❤❤
Moe B.: THANK YOU!!!! I needed this video. And not to mention, you are gorgeous!
Chillin’ with Rae: Aren’t you cute!!!! What a great video! It’s very humbling for you to do this to help people with fine hair and thinning edges. God has a blessing in store for you sis!!!!! Rae❤️
Z Toure: I really appreciate this video...I was extremely depressed about the effects that this pandemic has wreaked on my hair and edges thank you
Dorian Phillips: This is gorgeous . I have thin edges as well. I have to try this on my hair. You do a good job of covering and blending!
La-Toya: It turned out great! Looks just like it's growing outta your scalp to me. I also like the fact that you only curled the ends of the weave. #AmazingJobBoo
Monica Ivy: It looks very natural...great job!
X A: If this was a sport, you'd get a gold medal! Amazing work
Meccamarie Tv: Loved the video would love u to make more videos like this to show the different ways you cover up your edges ! Imma new subbie
InfluencingU: Thanks for sharing. Yeah you definitely did a good job. My edges are thin on both sides as well. Im going to try this for sure.
Tiffany Ray: Thanks for sharing. As others have commented, this was helpful for me. I was thinking of wearing hair like this with our similar texture hair. :) Subscribing for more tips!!
Roxane Howard: Girlfriend you're so right you gotta be super careful because I accidentally cut my own hair preparing my own weave too and it came out beautiful but YOUR turned out super stunning and beautiful. Love watching YOU
Kendra Smith-McLeod: Thank you for this! My hair line is thin & I be wanting to wear sew ins. Im gonna give this a try.
Diandra D: Thank you so much for your video! I have had fine hair and thin edges since birth. I cannot wait to try this technique on my hair
Kashana Whidby: You did an amazing job on your sew in! Your hair looks beautiful & you can't see your edges! Thanks for sharing!
Lesley Waddell: I give credit to you guys for the way you can do all these different hairstyles to your own hair and the out comes always look
KeiJoy : This video gave me so much hope for my hair. I really appreciate you doing this
Scorpio GirlVA: I know the feeling of finally being done after hours of doing hair! She said we don't want to be expose!
wendy: I love ❤ love ❤ this video. My edges..... oh, the edges I have left (lol) have just flew the coop. Outstanding work and it turned out just gorgeous .
T Williams: You did an excellent job!
Rosie: Love it!! Thank you for doing this!!!
Amari: I LOVEEEE ITT. You definitely did a great job. I need to use this technique. Do you use anything for your thinning edges that you have seen improvement in?
83sthigpen: Really great job on your sew in. It looks awesome!!
Pmomma100: You are hilarious. Girl got that hair finished and was feeling herself!!!! Loved it!!!!! Thank you for showing your technique. You are right, there are not many vids for our edges.
michelle lay: I love how u did your sew n and blended your leave out part it looks so natural
miss shae: You did your thing! Make me want a sew in
Blacky Mo: Cool things !A tip to also help is an oil tube for daily use or at least 4 times a week. I had simular issues i made a point to put grease of choice on my edges everyday before i go on about the day. Also vitamins and biotin helps. Give it 3 to 6 months
25 Sigma: I have the same hairline/edges. I learned something with wigs. Hard to explain.. I create edges with the front by cutting it a perfect length and pressing it down forward with gel and it looks great as long as you don't start sweating. Who doesn't sweat though but it works. Thank your for sharing the video
Trenice Coleman: I really appreciate this video. I have no edges and was looking for a sew in style that would cover that area up...
Judicia Campbell Robinson: Thank you: I follow step by step and it paid off
Dolores Freeman: Thank you for this sew in. I have the same problem with my hair. But thanks to you, no more.
Songbird0623: Thank you for this video!!!! My edges is tow-up from the flo-up!! Lol. I love your energy!!! Thank you again
Kimberly Mercer: This was so dope ❤ Thanks girl
Shavonte Kelly: This bom, I like your technique, the extra hair left out of the extension I understand. SMART! LOVE IT
Tyra Dee: This!!!! Girl, thank you❤ you did that!
Elicia Washington: Beautiful! good job!
Kris: Thank you so much for doing this!
Theresa Escoffery: Thanks for making such a detailed video. So helpful.
Hey Miss West: This is perfect omg I needed this you saved me so much money I'm gonna do this with quick weave tho like with glue.
Gloria's Ahobrase3 Kitchen: Very helpful video, great job
Raaven36: You did that to perfection!
Simone Champney: Girl going back to sewing-in, Thank you because I have that same problem with my hair Looks Good on period (LOVE IT)
Sade Sanchez: It came out beautiful
Earth Angel0016: Great job. Your hair looks amazing.
Lara Nini: I have an honest question, do you ever think of taking a break from a braid down just so your edges can come back? I ask because I finally did a braid down for a wig but my edges are thinning a little after taking them out
Sarah Amos: You did a good job. It took a while. But the results were so great . Happy Birthday girl!
CammieRenee V: We have the same hair type. I immediately subscribed when I saw your name. My cousin name is Chaka . Your hair turned out gorgeous
Blossom Bouquet: This was a very helpful video. Thank you!
SCENT of BEAUTY: You are so talented. What a great investment in yourself. Inspiring.
Brushed By A Diva: You go girl! I love your transparency
Deez Nailz 2020: Wow!!! Fabulous job!
KrieMarie: Appreciate the transparency
One & Only J. Korbyn: I think you did an amazing job.
Regina Holbert: I'm in awe! I could never do this.
Carissa S: new subbie!!! awesome job I love this tutorial
Denise C: Yesss so beautiful, I have the same type of hair even the thin sides. Thank you..
Baby Girl: I’m so happy YouTube recommended this video to me. I just subscribed! I needed this ☺️ thank you!
Leah Lee: You did a great job got me feeling like I can do my own and I am lol.. yess I work from home
Kerieka Levy: There is not much channels like yours on YouTube that shows real people with real problems. I too have thin edges and I am very insecure about my hair and watching this video make me have hope
Sheilia Was: Amazing this looks like your natural hair absolutely amazing very talented !! Very Nice !
Latricia Williams: Great video/work, idk how some ppl can find a way to thumbs down anything
Jamie M: Life Saver!!! Thank you for this video!!
D A R L I N G 2: My edges was like yours but I used the yeast infection cream/ monistat with wild growth oil and 6 months later after having no edges for 5 years I now have edges as of they never left me years ago
Marcia Grant: Yaaasss looks good girl! Will try this one! My edges are thin thin thin
Latandra Taylor: I think you did a good job on your hair. Some people r just rude with their comments & need to keep them to themselves. Keep doing you sis!
Yolie Bee: You’re so very skilled. God bless you girl
Denee Dubwa: You look amazing! Aw, thank you for sharing this video. ❤️❤️ Edit: How is the hair holding up if you don’t mind?
Grace Freeman: That's gorgeous!!!
Made In Designz Slay: Yes. Working 4rm home. I love your hairstyle ❤
Brigitte Bindelit: Oh my god! You are beautiful what a technique ! I used to make my own Braids. There 'nothing compares to sewing. Kiss from France .
Gea cance: Beautiful work from a cosmetologist!! TFS!!
Torya Macchiato: Thanks for the info I love the final result