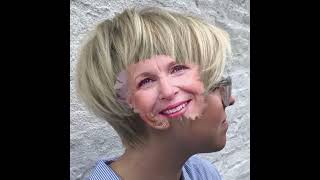
Turning A Graduated Bob Into A Layered Bob Tutorial
- Posted on 20 January, 2019
- Bob Hairstyles
- By Anonymous
SIGN UP FOR FSE ON DEMAND:
SHOP FOR MY SCISSORS: https://freesaloneducation.com/product...
SHOP YS PARK COMBS:
http://freesaloneducation.com/collecti...
SHOP CARVING COMB RAZORS:
http://freesaloneducation.com/collecti...
SHOP ERGO BRUSHES:
http://freesaloneducation.com/collecti...
SHOP FOR MY SALON FURNITURE AT MINERVA BEAUTY:
https://www.minervabeauty.com/FSE
My Website
http://www.freesaloneducation.com
FOLLOW ME ON:
Instagram ► http://instagram.com/freesaloneducatio...
Twitter ► https://twitter.com/saloneducation
Facebook ► http://facebook.com/freesaloneducation...
Snapchat ► MattBeckFSE
Business Contact: [email protected]
-------------------------------------------
Thanks for being Part Of The FSE FAMILY!
I guess we're gon na start off this haircut by taking a right-hand side parting down to mid crown and then a cross mid crown and down the parietal Ridge. What this is gon na do is give me a little bit of an offset kind of a symmetrical rectangle on the top of the head. Then I go straight down Center back and separate. The two sides clip it away, and now I'm gon na work diagonal forward. Partings and start my cutting, so I want to work with the head shape here. The whole point of that is, I'm collapsing the shape so we're creating more of a layered Bob. This is from a previous haircut where we did a complete horizontal graduated Bob. Now we're switching it to a vertical diagonal forward, layered Bob, which is going to take out a lot of the weight in the haircut so depending on how your guest wants to wear their hair. There'S two different options for you. So, just working bringing everything straight back to the previous section, so I'm working my way across the back, just bringing it back slightly about an inch back to the previous parting. To make my cut now, I work vertically, so I shift from diagonal forward to vertical when I get to right behind the ear, and I work that all the way back, bringing everything straight back to a stationary guide at this point, what this is going to do Is push a ton of weight to the front? So that's something that we're gon na address later in the haircut, but just keep that in mind when you're over directing something all the way back to a stationary guide. You'Re gon na have a lot of weight as the end result when the hair falls forward so working diagonal forward. Still this, the big switch here is that my fingers are now pointing down. On the other side, my fingers were pointing up. The reason for that is. It allows me to comb my new hair towards the middle of the head towards the guide you never we talked about this over and over again. You never want to comb the guide to the new hair, because that shifts the guide from where it lives and if you do that, you're making the guide shorter, which is gon na, make one side of your hair cut shorter. So, to keep consistent, you need to comb the hair the same exact way on both sides of the head, so working vertically. Another key thing to look at is how the head shape curves up around the crown. That'S obviously going to give us our graduated point, so we we're layering the hair past the occipital bone to low crown, and then, when we get to the mid crown part, you can see that the elevation of the hair is actually more at a zero degree angle. So that's gon na give us our weight line there, bring in everything straight back, pushing that weight forward, just keeping nice clean sections, I'm using the fine teeth of the comb. That'S helping keep more tension on the hair and that's pretty much it. It'S a pretty simple, structured haircut, and I think this is a very common haircut that you'll see people doing in the salon. The big thing that I want to go over in a little bit is how we can kind of make adjustments to that to make it have a more modern feel so we're gon na go through the back. We'Re gon na work diagonal back through the crown area. What I want to do is take and just blend in the crown to the bottom more around the occipital high occipital bone area, so I'll take my guide from top of the occipital bone just and then just follow it straight up, so keeping that weight line in There but just blending it a bit everything's being over directed back to that one point, so you can see that there's a slight bit of over direction coming away from me, which is going to push that kind of weight around the corner, and it's going to be A little bit longer right behind the ear which I like that feeling so everything's going to come back to that guide is going to be stationary there. So you can see in the bottom left diagram how I kind of angle, the haircut so we're cutting short to long, just keeping a little bit of extra length in there. You comb everything back until you run out of hair and then you're good to go. Alright guys so we're gon na start off on our dry cutting portion of the haircut I'm going through with my vibra straight iron, just polishing out the ends of the haircut. What this is doing is allowing me to see where the weight seems heavy and where we need to go in and just lighten it up a little bit, so I'm gon na take a horizontal section throughout the side. I already noticed that this side is heavy. The sides are going to be heavy because we over directed everything back to a stationary guide. So now I want to go through and diffuse the weight, so I go through horizontal elevate, the hair as high as I possibly can, and just work using a Mizutani puffin dry cutting scissor. I love this scissor. It'S a five and a half inch blade. It goes in nice and deep into the section and just diffuses any weight. That'S build up that I don't want so going through horizontally in the back as well doing the same thing, elevating it nice and high not trying to take or create a line. At this point, just diffusing some of the weights, so what I'll do is I'll? Take that section I'll actually look in there and see where the density seems heaviest and then, if I see a really dense spot, that's where I'll do most of my point cutting. So I'm not going through there evenly and cutting I'm going through there and actually visually looking to see where it's really heavy so right there. You can see that part's heavy, so I'm going to go through and diffuse that a little bit same thing on the top work. That line out a little bit go a little bit deeper, just removing that weight. Creating that texture and a lot of movement and modernizing the haircut so same thing here going through you can see how the ends you can see light through there and then, as it gets a little bit deeper. There'S it's more dense, so you're just going in there and polishing and removing that now we're going to do the same thing, but we're gon na actually cut a line, but a nice broken line, because I want to create a more side angled fringe in the front. Nothing crazy, I'm not trying to create a short bang in the haircut, but just something softly lays across her cheekbone. So working a diagonal forward section over directing it to myself to a stationary guide. But the guide is is really diffused because we're doing some deep point. Cutting they're now going through slide cutting using the same scissor. This is a good look at the Mizutani puffin, just going through gliding through the hair. The reason a dry cutting scissor is so good is because the blade is so thick that it has a ton of power when you go in to cut hair, so it can get through pretty much anything and that's what makes it a great dry cutting scissor. So I'm just going through, you can see how I push the top away and then I slide cut and then I pull the top back around. That'S because I wanted to almost disconnect the underneath. You don't have to go through and slide cut the entire side of the head. What you want to do is go in and just diffuse. The bottom then push the top over and it makes it look nice and soft. Then I'll, go through a little tease. Cutting connect, it all together same thing on the opposite side, just going through slide, cutting just to break up and add that texture into the haircut I'm always going through and working with my hands. When I move it with my hands, it just allows me to see kind of how it's gon na fall and how that texture is gon na move within the haircut. The last thing I'm going to do. I got my Mizutani type Z, dual texture scissor, so both sides have teeth and I just go through and glide into the back portion, just to add again more texture and movement, and then I always blow out the hair to get all those loose hairs out of It and to kind of bring life back into the haircut. That'S how it's, how I see it so we're going through I've got the ergo paddle brush working through it, and then I just finish it with a little bit of hairspray and she is good to go. So I hope you guys like this haircut. If you do, let me know in the comments. Let me know what you want to see next and thanks for watching


Comments
Rain: I love this. This is the perfect transition from a "g- bob". I have one client that finally wanted to change it up a bit and have more length and this is how I cut her hair. You can really help them not have an awkward grow out with this cut. You can play with the length, too. Gorgeous cut.
Zsófia Lukács: Looks really good! It's so relaxing to watch you cutting hair. :D Would you make a shoulder-length layered haircut with short shaggy straight fringe, please? (I think there isn't a video like this on the channel, but sorry if I'm wrong. :) )
Frankie Kendrick: Love it and thanks again for sharing your talent
e11eohe11e: I'd like to see a grown out pixie transition cut. A lot of women (myself included) struggle with finding a good cut and style during the awkward mullet phase. While a few of your videos explain how to fix the back, they leave the front too long and a lot of pixies don't have that length in the front to overdirect back.
Arlene Augusta Hair: I have been doing this cut so much in the salon. I’m actually beginning to like this haircut .
Rachel Bailey: I have tried the tease cutting on a client and then used a more traditional way of cutting texture with texture shears. She said she liked the results of tease cutting on her hair better.
Lewnidas Orfanos: I would love to see a round graduation from you Matt!awesome haircut always watching your tutorials!!!!
Rebecca Milton: Great tutorial. Thank you. Very helpful.
Isabel Lopez: ENHORABUENA GRACIAS POR COMPARTIR TUS TÉCNICAS Y POR PONER LOS DIBUJOS DE CORTE . SALUDOS APRENDIENDO MUCHÍSIMO CONTIGO
Shabana Shahzad: I always love to see ur all hair cuts tutorials .Amazing and awesom especially long bob hair cut
Joanne Zomer: Forgot to say thank you for putting up the hair diagram for us the picture explains everything ❤️
9antonieta: Beautiful cut!!
Sharyn: Beautiful!
someone 730: hey matt @Free Salon Education ,might sound crazy but can you do this length with a blunt U shape and the shortest layers would be front the face so it move naturally from the face (from left to the right side), I would be happy to see you do a video for that, aah no pressure I can wait for forever or never lol but someone can hope, especially someone with high intensity and curly hair only on the top of the crown area and wavy thinner hair below the crown area. thanks!
Jutta 🌺🐝: Great tutorial again, thank you!
Handbags & More Handbags Oh My: Great haircut! I’ve been cutting hair since 7th grade mostly family members and friends. I’m not a professional but I’ve cut this style on my mom & daughter. I finish with the texture scissors like you but I’ve never tried point cutting. I’ll have to try that.
Legend Inas07: Amazing techniques thank you
bea ram: I wish I could get a haircut from you!!!
Kate Redsull: Please can you explain how you know how short to take the hair and how high the graduation should be for different bobs?
beachy keen: You explain things really well
Jintee Konwar: Beautiful hair cut I like it very much
Barb Butler: Excellent look and cut.
SUSAN BEAUTY SALON: Very helpful videos keep it up
Merve Molla Hasan: Das ist super wie immer ❤
Ina: Where I am from, there are no stylists who do a good job like yours.
veronica Nava: gracias por mostrarnos los esquemas, es mas sencillo.
adang1688: This is a very charming Bob.
Alessia Corr: Molto utile lo schema disegnato
Amy Berthod: Wow great haircut, thank you Matt
Gary Harden: Looks awesome
Blee Beautiful: Thank you for sharing
Serge Korkomaz: What is the real difference between having diagonal vs vertical sections ? Iam lost plz help
alexa sotelo: Great job god bless your hands all the time
Jennifer Angelie Nazario Velez: Love it!!!.♥
Maria Lopez: Can I use my texted shears for removing weight
yamini teenu: Cuting style super...☺
Wade’s girl: Great job!
Ali Salmani: So Amazing Bob haircut sir
Jackie Martinez-Kaufman: I’m glad you dry the hair a lot of videos leave the hair wet I can’t see the result
Joanne Zomer: Thank you ❤️
Shyrlene Oscar: Show Arrazouu
yamini teenu: Semma bro ...Nice ....I like u r citing style. ..
The final Touch: Very good
Areej Hussam: I love it
Michelle: Looooovvveeee thank you!!!!
B. A.: Amazing
Beblessednotpressed: Thank you
Irfan Khan: Good job.
Alex Santana: I can spot a pivot point manikin a mile away!
Reta Jowa: Hi This is Rita from iraq My dream is to learn cutting hair, I was wondering if it's possible that I can study in the place that you studied Thanks
steve hau: Ur the best Matt
Arsewell: Moving waaaaay too fast.
Akil Malik: Osem hair cut
Hussein Abdullah: I like u Form iraq
Mamang Singsit: i want to be lik u