How To Cut A Perfect Short Graduated Bob With A Line - Haircut Tutorial
- Posted on 05 March, 2019
- Bob Hairstyles
- By Anonymous
SIGN UP FOR FSE ON DEMAND:
SHOP FOR MY SCISSORS: https://freesaloneducation.com/product...
SHOP YS PARK COMBS:
http://freesaloneducation.com/collecti...
SHOP CARVING COMB RAZORS:
http://freesaloneducation.com/collecti...
SHOP ERGO BRUSHES:
http://freesaloneducation.com/collecti...
SHOP FOR MY SALON FURNITURE AT MINERVA BEAUTY:
https://www.minervabeauty.com/FSE
My Website
http://www.freesaloneducation.com
FOLLOW ME ON:
Instagram ► http://instagram.com/freesaloneducatio...
Twitter ► https://twitter.com/saloneducation
Facebook ► http://facebook.com/freesaloneducation...
Snapchat ► MattBeckFSE
Business Contact: [email protected]
-------------------------------------------
Thanks for being Part Of The FSE FAMILY!
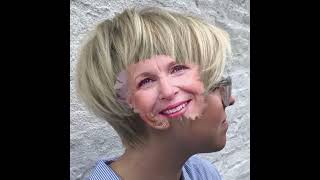
What'S up guys welcome to today's video, so guess what today we are going to cut a pretty cool haircut? Let me actually grab that haircut and show you what its gon na be. So this is the haircut that we're gon na be working on. I know it's a little crazy style, but we had some fun with some spray wax to talk about that in a second, but just the lines that we're gon na create in this cut, you can see how it passes around. We do sort of like a round. Graduation and actually it is a round graduation and we pull it into the back. We create this point so ton of technical things that you're gon na learn in this cut today. Also, my new friends at evo sent me this box of products, so today we're gon na kind of build this haircut around using some of those products as well. So let me unbox some of these products and share with you guys what they said. Not only did they send a ton of really great products, but this box is hilarious. Speed-Dating, the perfect arena to get a bite-sized taste without the instant life commitment Evo, is committed to no commitment. Unless you want to commit, then we are fully committed or not. I mean we like you, but no pressure who wants to conform to the standard social relationships we get where you're coming from, unless you want something more which we're up for, but you know whatever the funniest part about. That is the fact that that's exactly, I think, how I explain things, so it made no sense, but it makes sense alright. So we got a ton of products here we have a dry spray wax which I use in this style. I also use the lockdown, so I will talk about those in the video the rest of these products. I have not used yet so I have experience with these too, not so much for these I'll most likely be doing future videos with these products so that you guys can kind of learn more about them, but for now we're gon na stick to these to this Haircut, I don't want to waste any more time. I'M super excited to show you guys this technique. They get Evo for the products. Let'S get started, alright guys, so we're gon na get started with the haircut today. I'M super excited to bring you guys this round. Graduation key things here, just to start it off is the sectioning sectioning is pretty standard, parietal Ridge back to mid crown, wrapping it around creating a u-shape on the top of the head splitting it to the vision line and then breaking up into two panels. In the back now, I'm gon na start working on the right hand side. First now, my finger angle is really important in this haircut, making sure that that finger is pointing in the direction you want to go with your shape or the outer perimeter line. So what I wanted to do first in this cut is really create, and this is a kind of a Sassoon inspired start to this cut and it was in their graduation series. So what I wanted to do was create a hard line, then build a graduation off of that. And that's where I took for one of the videos, then we're gon na go and I'm gon na put my little spin on it, which is taking the top and doing some dry cutting to really create a bunch of texture on top of the head. So taking a very classic shape and then modernizing it or just giving it my own touch, not necessarily making it modern, but just giving it my own Flair at the end. So the way that you create the line is just keeping everything at a low elevation. Pretty much we'll call it zero degrees, but I don't like to say zero degrees because I think the degrees confuses people. I just want to keep at the lowest elevation possible because the lower your elevation, the stronger the line, is going to be at the bottom. So I start off cutting that line notice as well, that finger angle is kind of pointing up more towards the nose than it is down towards the chin, and what that's gon na do is start to bring that line up. This haircut, I think, is cool and it stands out because, typically we follow the jaw line. I wanted to go kind of from the back up to the more of the cheekbone area and kind of enhance that a little bit. So that's my take on this haircut. So now I've got my hard line. You can see that graduation built in there, but it's super heavy, so I'm gon na go through and now just elevate it slightly still keeping it as a graduation, but and and then follow the round of the head to keep my round shape right. So if you look at the outer perimeter line or the line that runs horizontally, that's gon na be the shape that we're creating so just going up through there taking small half-inch sections or partings and then bringing them out and graduating them up now. Your initial guideline comes from your line at the very bottom at the hairline right, so just make sure that's why you want that strong perimeter line first, then you go in and you will graduate from there so you'll notice that my fingers are pointing down. I think this is a key thing and a lot of people struggle with hand, positioning and haircutting. I always think about my thumb - is pointing in the direction I'm going. So if I'm moving to the right, then my thumb will be pointing to the right and you'll notice that when I take this section then I what I want you guys to notice is that when I go to the left side now of a sudden, my fingers Are pointing up my thumb is pointing to the left because that's the direction I'm moving in that way. That just keeps me consistent in my combing and the more consistent you are with combing the more consistent your haircut is gon na, be so taking a little bit of the old hair grabbing, some of the new hair making sure you have a clean guideline in there And you don't want to take too thick of a section too many people grab too much hair at once and in some cases that works, but in precision cutting when you grab too much hair and you're over directing it too much you're, building totally different you're pushing Weight every single time you do that. I guess it's the easiest way. I can say it so just be very careful with how much weight how much hair you're grabbing in your section and it's mostly because of the over direction, not because you can't see your guide so we're finishing up the right hand side. What I'm going to do is I'm going to speed up the video as we do the left hand side, because it's exactly the same. The only difference is make sure you watch my hand, positioning and where my thumb is pointing and that's the only change that we make, but we cut our line all right. So now we're gon na kick off the blow joy using the lockdown product from Evo. The thing I love about this product is: it's not only a smoothing treatment, but it has a little bit of hold. It gives style control and it's designed for frizzy and unruly hair. So if you have anything like that - and this is definitely a good product for you so check out this up in the blow-dryer - I'm gon na do a flat, wrap technique really working the head shape, especially because this is a round shaped haircut. I want to work the round the head back and forth doing a little bit of leafing just to add a little bit of volume and just working my way through the blow-dry. Now I'm using the Ergo Diamond Head paddle brush love this brush one of my favorites because I love a paddle brush, but I love a mini paddle brush even more so. If you want to check one of those out go to free salon, education.com, you can get yourself one of those brushes and then I'm going through with the Paul Mitchell, Pro Tools, iron and just working some iron work in there to smooth everything out, and then I Let down the top, and I start to blow-dry you might ask: why did I blow dry, the bottom first and then blow-dry the top I like to keep it separated, get the bottom exactly the way I want it and then let down the top blow it dry. Then I can smooth that out so now we're gon na finish this haircut really just personalize it using a tease, cutting technique. What the tease cutting technique does it creates a really soft edge to your line. So basically, what I do is I elevate the hair now when I put the scissor into the hair, it's a half closed of the scissors. So as I move the scissor into the hair, I'm actually half closing it which pinches the hair in there and it actually removes the hair that way, I'm not just sliding the blade along the hair. I really want to make sure that I'm cutting. So when you practice this technique, practice it on a doll head or some of you don't like you want to make sure that you practice the technique sliding in and half closing the scissor and then releasing and then slide in half close the scissor and release, and Then I'm working around the head shape from the mid crown area all the way around following the round of the head to keep this a round feeling haircut. So now, as I get to the front of the head shape, the only thing is really going to change. Is I bring it over to me instead of continuing to follow around the round of the head, so I'm going to push a little extra length right into that front center of the cut, because then I'm gon na go in after this and I'm gon na cut It a little bit different. So as I worked the left-hand side, the body position gets a little bit different, so what happens is now I scoop underneath and I pull it towards me. My key thing here is that I really want to make sure that every time I take a section, I'm doing it the same way as I did on the opposite side and not the same way as like my hand, positioning is the same, but the same way Is I'm pulling the hair the same way, so I was pulling it back to me on the ones on the right side, and now I'm pulling it back to me on the left side. As we get to the front, I over direct it a little bit back and we pushed that weight to the front and then you're going to be able to see now as we move into it. What I'm gon na do in the top of the haircut so now we're gon na start putting in our outer perimeter line now a lot of people think that the line happens in the wet cut the wet cut. What we were doing at the beginning is just really we were establishing our shape and establishing our length, but not necessarily the outer perimeter line of the haircut. So what I do is, I start in the back and I work my line up to behind the ear and then I go to the very front of the head and I start to decide exactly where I want that to hit, which is around the cheekbone area. So I define the line in the back, I get it started and then I go to the front and I connect it into the back and that seems to work the best for me so just using the tip of the scissor and then, as I get that Line in I go through, and I just kind of chop away at it until I get to line exactly the way that I want so notice. All the tiny little details that go into creating this outer perimeter know that this did not take me. The two minutes that you're watching this probably took me ten to fifteen minutes of just really going around and cutting in that perimeter line. Now I just finish up with a little bit of point, cutting just to take out a little bit of density in the shape. Just to soften everything, and then in the very front I go back in with some tees cutting to finish off this technique and that's a heavy stroke you can see. But what that does just removes a ton of weight lightens up. The bang gives it a side. Bang kind of feel to it so decide which direction you want that to go in, pull it all over there and cut it. So I'm gon na finish up with shebang-a-bang a dry spray wax from Evo I'm gon na spray. That, in add a ton of texture. You can see this is the calm version of the style, so lots of texture in there, but still that nice perimeter line and really love the shape. And then I go and really blast it with the product, because I want to just create a ton of texture in this thing. Give it some volume give it some movement, and this to me is something that would be so great. On curly, hair straight hair works on pretty much everyone so try it out. Let me know tag me at free sauna, education on social media, so I can see your work or your version of this cut. Thank you so much for watching. If you have any questions post them in the comments below see you on the next video


Comments
Gretchen Trumper: Love it!!! Now I need a client who wants this cut! It looks like a lot of fun!!
robert björnesjö: Nice cut! And it works so good with the highlights u did before on her
Autum Calhoun: Your cuts are so clean and neat ❤
Suvarna Patil: As always I appreciate you for the video you make it so easy to follow up the haircut , Thank you Sir.
Liz Tapia: Love that hair cut and how you explain step by step.
Jennifer Shelley: This is gorgeous Matt, love it! The branding of those products, so funny
Deshaine: It would be cool to show a slow motion from a variety of angles of the tease cutting technique.
Angela Maria Martins Ribeiro: Vc é um cabeleireiro fantástico mas gostaria de entender o que vc fala poderia fazer uma legenda em português por favor ?
Bernie Kennedy: these are always my fav All bobs are skills well done Ateam
Tammie McLean: I learn something every time thank you
Joanne Baik: Amazing haircut
ganan Kazim: جميل جدا
Johnee Livingston: I really want to try this cut on someone......I'll keep you posted
Kaif Mirza: I am big fan of you Your work technique is to amazing
Very KinkyCurl: really nice
Chi Lionhearted Encounters: Very nice. How did you create the v at the back
Muffet Bonitto: Hi Matt beck. I really enjoy all your hair cuts, am from Kingston Jamaica. I will love to come to one of your bobs cutting class. I send you messages. I know you are busy.Am a styles too. Please contact. Thanks
Michelle Strauss: So so love this
Khadija khadija: رائع جداا موفق بإذن الله
Sri Sai Krupa: U r done the hair style is good but how to use scissor show one video broooooooooo☺☺
Zubaida Qayyum:
Hasina Begam:
Chetan Yadav: Thanks sir
pune: Nice sir
Judi Jordan: I wish you lived in sc!!!!
Saranya Suwannapho: ดีมากใด้ดูแบบให ม่.ใหม่
Antoinette Scott: Do u want my hair to cut ,4 free?