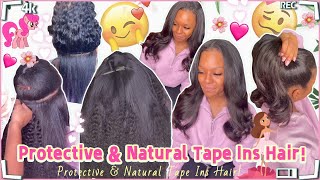
Watch: Most Natural Weave Install || Flawless Deep Side Partrose Gold Bob! // Kim Naeema
- Posted on 30 April, 2017
- Bob Hairstyles
- By Anonymous
THANK YOU FOR WATCHING!
DON'T FORGET TO SUBSCRIBE!
***LIKE*COMMENT & SHARE***
CHECK ME OUT ON:
- INSTAGRAM: https://www.instagram.com/kimnaeema/
-INQUIRY: [email protected]
I CREATED THIS SLEEK BOB WEAVE INSTALL TO BE AS NATURAL AND FLAWLESS LOOKING AS POSSIBLE WITH NO BUMPS OR LUMPS AND THE BEST PART IS THAT YOUR HAIR IS PROTECTED !!
HAIR USED:
MODEL MODEL POSE
HUMAN HAIR MASTER MIX PINK ROLL 3 PCS.
COLOR:
ROSEGOLD PINK (OTROSEGOLD)
PRODUCTS:
30 SECOND HAIR BONDING GLUE
ROBERT'S DIAMOND BOND PROTECTIVE SHIELD
HAIR BOUGHT FROM:
BEAUTY COLLECTION
3372 KEELE STREET UNIT D
TORONTO ONTARIO M3J 1L5
LINK:
http://www.hairstopandshop.com/shop/pc...
John 14:6 “I am the way and the truth and the life.
No one comes to the Father except through me.
❣ To God Be All The Glory! ✞
✞♫❣ Imagine, Dream, & Inspire ❣♫✞
LOVE YOU, KIM NAEEMA
Ok, so these are the cherry, blossoms they're in season, and it's so sad you guys because they only bloom for two weeks. So this is my opportunity for showing you, the hair and the cherry blossoms, as it was my inspiration for this hairstyle. So I'm starting off with freshly washed and conditioned here and it's been molded and now I'm going to separate my hair, which is I'm taking out a sliver of hair which will be used as my leave out for the install. So here is my leave out. It'S going to be sort of a deep side parting and on the front I have a little bit of my hairline out as well, and then here I'm going to be adding the protective. This is a protective cap or shield. We call it a liquid cap, I'm going to apply that all throughout my hair, and this is going to protect the hair during this install. The liquid cap took about 30 minutes to completely dry and it's hard as a rock. You could beat it like a drum and now I'm going to go ahead and apply. My 30 second super hold hair glue onto the track, and I'm going to be installing the first track towards the back, and Here I am just applying a little bit of glue. Not too much you don't want to do it too much in excess, but just enough glue onto the track and I'm going to attach it right at the back row of my head. So now I have five rolls on completed in the back. I just want to take a second just to show you the hair. This is the hair by model models. The hair is super cheap. You guys, I got at my local Beauty Supply er for only 15.99. This is a human hair blend mix or they call it a master mix in the pink rose gold color, I'm going to be passing my flat iron through the hair, as it comes pulled right out of the pack and then I'm going to install the rest of The hair and I'm going to leave out a section on the sides for later on. So I'm continuing to add the tracks onto the liquid cap and I'm just dropping that track right by my ear, because I have my section that I'm leaving out on the sides and as I make my way up, I'm going to continue to just drop the track By my ear as I'm leaving the sides out right above my brow, I'm going to start to swing my bang, so I'm going to start from the front and start to curve as I install these tracks. So I'm going to start creating my bangs. Now and again, I'm going to show you my leave out just that sliver for coverage in the front and at midpoint during this install I'm going to do the closure piece, I'm just going to be creating AV part closure and I'm just going to cut away this Excess, as you can see, this is just going to be a simple V part closure. I find it easier to do it this way in the middle of the install and as you can see, I dropped that track by my ear, because I want the sides to be left out and I only have a little bit left to go. So I'm going to be completing that off-camera I'll be filling in the bang area by curving the tracks around, and I will be back with the styling and cutting I'm going to cut this hair in a long side, which is that side and I'm going to cut Right above the scrunchie, which is where I'm going to create the shorter parts of the bob cut, and I'm just going to even out this section by cutting it just a little bit shorter. Because I want it to be even with the back and towards the front. I'Ve separated the bangs, because here I'm going to razor cut this, and my technique is just to twist the bang and hold it off to the side and razor cut it. This creates the swing and also a wispy swing. Bang effect I'll be doing some finishing touches with some finger wave actions off to the side. I must say that the style is coming together very nicely. I had to remould it um and this is what it looks like now, but I still need to get back into it and do some curling to apologize for my foundation to be bleeding during the finger wave process. But it's alright and I'm going to go ahead and begin to low heat setting and curl this human hair blend just to bump it a little bit. So I'm going to be taking my smaller curling iron and I'm just going to be passing it through lightly. With some loose wave curls and after all, this is done - I will see you in the finish results. This is the finished result of this Bob. I did cut this side a little bit shorter and this side is longer and let me go ahead and show you a 360 of this install just to show you here. So I did a little finger wave action here. So that's the reason why I left the sides out in the back. I had it later a little bit. I just want to do a close-up shot of this deep side, curved part realness for you guys, because I want to show you how you can still protect your entire hair and have a realistic and natural hairline. So let me go ahead and show you the close-up of this parting. Look how real that parting! Is you guys, and you can also flip it to the front or flip it off your face, because I have the natural hairline throughout this install. This is a fabulous protective style and it's a great temporary protective stuff in the sense that your hair is covered underneath and you're only leaving a sliver of your natural hair only to create that natural hair line and parting, and you can actually wear this all between Two weeks to a month, it all depends on how long you would like to wear this cell, so I actually do like this protective install. So I picked up this here at my local Beauty Supply and I do believe it is a new beauty. Supply store actually like this beauty supply, because their prices are way cheaper than any other beauty supply store. I'Ve been to so, if you are in the GTA or if you are Torontonian, I will link the name and the address in the description below and if you're, not a Torontonian or from the GT area, I will still link a online vendor for you guys so That, if you're interested in purchasing this hair, you can click the link and be able to select the hair online. Now this hair from model model comes in many different colors, but because it's pink, I know it's going to be a little bit different right. It'S like it's going to be a little bit outside the comfort zone, but, as a matter of fact, this rose gold pink is actually nice under complexions and it's it still. It'S still conservative. In a sense, it's not like a bright out there color. So I think it's actually something that you know if you have my skin tone or even a little bit lighter or darker than me, I do believe you could pull this color off, so don't be scurred to try this um this robo. This rolls gold pink. You guys so if you had any particular questions about the liquid cap method and or any other protective installing that um that you're curious about go ahead and leave it in the comments section below. And if you had any suggestions for any videos that you might want to see on this channel go ahead and also leave it in the comment section below and I'll do my best to respond to you guys. So that's it you guys for this video tutorial. I hope you enjoyed this video and I hope you found the video to be helpful and useful and if so, do please give it a big thumbs up for me and also please hit the notification button. You guys for all my video uploads, because I will continue to put out videos every now and again, probably weekly. So thank you guys for watching. I do appreciate your time for tuning in to my channel and until my next video, as always be blessed taking care of yourself and I'll talk to you guys soon. Bye, guys,

Comments
Su-ënaah Lee (Beautiful Contradiction): I just did this same style and I love it!
Crystal White: Beautiful cut and color!!! i love it!!
Rea Postell: I'm in love with this hairstyle
Rose Faulkner: Love it.
Davina-Pearl DOTMH: Omg thank you for the store info, ill check it out :) and the bible verse at the end just warms my heart :)
Kimberly lusby: Amazing!!
Itsmy Ownvevo: What product did you use to create edges?
LovableMe137: Love it
Chree H: Yass kute and thats the hair i ise when i do thesse styles its great for short styles you go girl
Nesia Mbow: wow 1st time seeing this type of installation! Niceeeeeee
Juleen Forbes: Very nice, looks pretty on you.
kimmoy harris: Your very well spoken I must subscribe
Katherine Winston: If you keep the style go a month how do you wash it will it affect the liquid cap or the tracks?
Royalty Patterson: Very good job
Shirley Daniels: I like your technique, but would have love to see the closure on top.
Celia King: Sweet i love it... Great choice of music for your intro..(Calypso/soca)
Le4che:
Kierra Malone: Very nice. Great tips and tricks.
Rehima: Awesome! Since it wasn't on camera, how do you blend your leave out? What products? Heat?
jessica matsebula:
Błånćo💕: Love your cheek bones
Nessa Obert: Pretty
red roses: Thats cute
Brandy Gardiner: wow
Guyanese Cutee: this is so lit that my songgggggggg love love this video
Naseema Henry: Ur channel is awesome.. Wow first I found someone with a such a similar name as mine ur is naeema n mine is Naseema maybe I ave found a sister
Se Joga Maria!: How many packs do you use?
Davina-Pearl DOTMH: and you have a new subbed btw :)
Valaida Hazel: Cute
cece718: how many inches of hair was this ,an,8 or,10,inch
Veronica Tinch: Is your hair natural
Elleh LA: My song....who di hell is Kim!