Flat Large Knotless Braids , Details And Tips For Beginners
- Posted on 03 December, 2021
- Braids Hairstyles
- By Anonymous
P R O D U C T S U S E D
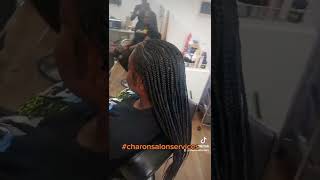
These large knotless braids are so flat and seamless. Quality braids period lol . I used about 2 /3 packs of african sensationnel braiding hair , length 58 inches color 1b . I have 16 braids in hair total . This style only took me 3 hours to do.
-LINK TO HAIR : https://amzn.to/3Ek5NIT
-Shine n jam : https://amzn.to/3pqOlft
-Bellatique gel : https://zoebeautysupply.com/products/b...
-Instant control gel : https://amzn.to/3IgtunO
DISCLAIMER: some of these links may be #affiliatelinks
O T H E R V I D E O S
* VLOGGING IN MY CITY CHARLOTTE NC *
* THE BEST GELS TO BRAID WITH*
C O N N E C T W I T H M E O N
INSTAGRAM : @the.ebonyjay
LINK: https://instagram.com/the.ebonyjay?ig...
INSTAGRAM HAIR PAGE : @jae.braided
LINK : https://instagram.com/jae.braided?igs...
EMAIL : [email protected]
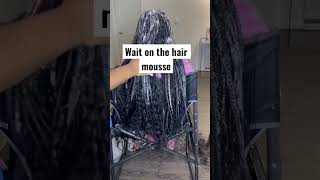
Hey y'all welcome back to my channel. If you haven't been here before, make sure you subscribe um. This video is going to be about tips for doing large, knotless braids large braids are usually way harder to do than smaller braids. So i'm going to give you guys all the tips that i know all the tips that i think are very important when doing large, knotless braids make sure you watch the whole video to listen to all the tips that are going to be along with this video Um and yeah, let's get started so the gels that i'm using for this video is instant control. I'Ve never used this gel before what i will say is in between the style. I did happen to stop using the gel just because it just really looked not like it was giving a white cast, but it did look, make the style look dry and i don't like to add too much oil to my client's hair. After i get done. I don't want to overdo the oil just because of the gel, so i noticed it was just really tacky for me. I wasn't really a fan of it. So you'll see what i ended up using instead going back to what i usually use when i do large knotless braids make sure when you guys are parting, you are completely pulling the hair. Apart make sure you're brushing the hair that needs to go up up and the hair that needs to go down down. This will help. You see your part clearly absolutely clearly. This is going to really enhance the way you see that part, also, by grabbing the hairs like pulling the hairs down and up it'll help, you just see the part really clearly because, of course, your scalp moves. So this is why i twist all the hair together, how i'm holding it at the bottom, because once i braid that it's going to be tighter, so it's going to prob. The part is probably going to look different, so you want to make sure that you're pulling looking and just doing it up until that part is absolutely crisp. Oh right here is where we're going to start braiding, so you want to make sure that you put gel on all four sides of that braid make sure you get it on the side, the top the other side, and especially the bottom. Some people like to put the gel in between um. I think if i have enough gel me, just combing it through like this, is you know it's good for me, make sure you get all those edges, nice and flat kind of like you're, about to do almost like a ponytail, so make sure you get all you Brush all the not brush but comb, all those sides, the left, the top the right underneath all of it. Then you want to make sure that, after you get a good comb through that you are gripping it see that left hand. I have a good grip, then that right hand i did kind of like a really hard grip on it to make it flat part. My little pieces into three make sure i'm staying up close to her head do not lose your grip. Y'All, do not usually lose that grip, i'm gon na slow it down, so i'm grabbing it like a ponytail with the right hand and then immediately grabbing it with the left and then starting to make those three little parts still having that grip on those hairs still Have a good grip on it. That middle piece is very important: make sure that it lays absolutely flat when you braid, see how i switch in the pieces make sure it's all there all laying absolutely flat - and this is where i start braiding um, hmm. So uh is so after that first row on the bottom, where the nape is um. I start on the second row, but first i part it all down the middle. Then i just wanted to show you guys the how i part it so basically, once i part auto in the middle, i just part one side of her head and then put that top section away, and then i'm gon na do the same thing. On the other side, now above her ear, i should have three rows below her ear. I have that one row so all together, i'm gon na basically have four rows. First uh. So your next mission on the next row is to make sure you put a braid in between the braids on the bottom. So, as you can see, i'm making a section to do a braid right there in the middle right there in the middle. That way, that braid falls in between the two on the bottom. This is going to help to not give your braids that spacey look and to make sure that there is a braid covering every basically part underneath. So you are layering the braids, but you don't want them to be on top of each other. Um, hmm um. So this is under that braid. I'M just showing you guys that i decided to go back to my shine and jam. That'S what i usually use - and i usually mix it with this other gel - i think it's called - i think it's pronounced bellatique, i'm not sure, but i'll show you um on the camera um in just a few clips. So after doing that middle middle braid, i'm going to put two braids on the right hand, side and i'm gon na put two braids on the other side of her head. So this is me working on that last braid on the right side of her head and on the left side of her head. I'M gon na put two other braids. Make sure you do it symmetrical. Everything should be symmetrical. What you do on one side of the head you should be doing on the other is um. First, oh, is um um. Now i'm going to show you how i add hair i'm trying to show you as slow as possible right here. I just add that piece of hair to the middle and to the right side - and i literally keep on braiding as if i didn't just do that, don't let adding hair trick you guys up. It is really simple. Now a lot of people don't know this, but this is how i seal the braid. I just get a thin piece of hair, put that behind two fingers over the braid and pull basically like a knot, so i'll slow it down, for you get a really thin piece of hair. Make sure it's long enough and you're going to want to put two fingers out you're going to put the hair on top over the braid, get behind the braid and pull it through so, like i said before above her ear, she's gon na have three rows. So this is me, showing you just a draft of what the rows are going to look like that braid above her ear that second row and that third row, in my other hand, closed captioning, okay, uh, so that braid we have right there. On top of that braid, now it's going to be a part, so we're going to put three braids on the right hand, side of her head and then on the left side, we're going to put three braids as well, so it should be six braids and total. So here is that gel. I was telling you guys about that. I mixed in with the shiny jam, it looks way lighter than the other gel and it just it just does a really good job never leaves a white cast and it gives a really nice hold, which i absolutely love. Now we're gon na work on the top make sure you get in front of your client to see if that middle part is in the middle. I get behind my client make sure it's in the middle get back up at the front. Look at that part pull it apart, see how many times you need to do it to get it absolutely crisp and absolutely in the middle. Now up top here on our last row, we are going to have three braids, so three on the left and then three on that right side, where the pink hair pin is at so on that last row we should have six braids, just like we had underneath So make sure that this braid is going in between the other braids underneath it so that way, we're layering and not putting it right on top of each other. Um. Hmm, true me, is closed captioning. So now this braid is coming to an end. Our last braid make sure that you spray your client's, hair dip it and you should be all set. This is the end of the video make sure you like comment and subscribe. Let me know what you guys want to see. Next,
Comments
Goddess B: I only wear large knotless & I’ve always had struggles with parting but this is super helpful and easy to go along with, Thank you for this I have now have a tutorial I can always go off of when I do my hair
Adrienne Williams: Great angles. Great explanation. My hair is finally long enough to do the knot less box braids without rubber bands. This video gave me exactly what I needed. Thanks Sis! ❤️
Chazin Brown: This is an excellent video for beginners! I was really fearful of offering knotless services but this has helped tremendously! I do have three questions: how many pieces of hair did you add in to complete the one braid? How many pieces of hair do you have laid out on the rack? How do you measure the hair out to ensure each piece is even with the next? Thats where I struggle: splitting the hair up to be used.
Elyse Murillo: Thank you so much for such an easy to follow tutorial. I’ve always done twists on my niece for the last 2 years but now she’s old enough to want braids…. This is the exact style she chose. I’ve got all the supplies so wish me luck. Luckily if it’s Janky she’s only 6 so she won’t notice
dee caz: Just beautiful easy to follow and beginner friendly. Just love it so much.
A: This is a great tutorial!!! I don't know how to braid (especially at the base & how you start the braid bc my fingers just could never get it) but I just mimicked your hands on my hair and I got it! I can probably finally learn how to cornrow this way too Going to try to do knotless on myself today and I think this is the best tutorial so far. Imma try to update this comment if 1. I actually did braid my hair lol and 2. If it turned out pretty good
Latasha Leslie: You did that and made it look super easy and simple..I feel like I can actually do feed ins right now...
Sequoia Day: I love how you added small pieces verses big. You let her natural thickness be 90% of the braid doesn’t even look like u added anything
Kayce: This really taught me how to knotless braid !! Thank you !!
Shauna Amaral: You have truly inspired me and gave me courage. Just watching your video to keep going and continue to stay on my braiding journey. You have a big skill and awesome technique and tips. You braid so neatly and explain what your doing very well. Thank you.
Ashley 🦋🤍!: This style turned out hella cute boo!! Thank you so much for the tutorial I very much needed it.
Life as Laya: You helped me so much with the parting and how to add the hair in, can’t wait to try these !! definitely subscribed
FearfullyNwonderfullymade: Your tutorial is so simple and seems very easy. I am definitely going to try this style on my daughter's hair. thank you so much.
Aura Reid: I never thought to seal off the ends like that. Definitely adding that step. Her hair looks really pretty! Thanks for making this.
Who I wanna B: Instant control dries as it goes.. I love it!! It’s very good on natural hair❤️a lot of places don’t carry instant control in stores. You did A Nice job!
XO: One of the simplest videos I've seen on knotless braids. Nice work. ❤
divine grace: I love how you did them. My mom always did that for me
Cici J.Obas: I'm a beginner. Very well explained, I like how you talk so calm! Thank you so much. Can't wait to do it on my daughter's hair.
Ms. Fitz: I’ve been braiding since the 90’s and have not gotten the concept of knotless... Me: My box braids don’t have knots LOL. So, I came across your video and did one head and it was perfect! Excellent Tutorial.
Queen Qui: I love how detailed your video was thank you for sharing your knowledge
Belle Trice: By far the most detailed video on how to do braids for beginners I've seen so far! ❤️❤️ Thanks ❤️❤️
Ciara Cox: As just starting out learning how to do knotless braids your tutorial helped me the most on improving on my grip. Thank you so much! I will def keep watching more of your videos. I’m trying to work on how to keep my braids consistent, like how ur braids look the same and the same length. Any tips?
CALI JEWEL: Amazing job! I'm doing my daughter's hair like this today❤️
Zania Worthey: This was amazingggg , thanks so much
She Loves Them So: Excellent tutorial. Enjoyable. I find you clear, concise and well spoken. One of the best braiding videos that I’ve seen on the Tube.
Cierra Pace: You did a beautiful job thank you for this video
j.: Thank you Sou do Brasil e estou aprendendo, gostei da forma que você ensinou além da forma que você fala e mostra, fica claro até mesmo para mim que ainda não sou fluente em inglês
slimmmmz: The parting helped alot. I'll be doing mine tomorrow
Ashley 🦋🤍!: Whenever you have a client who books for small or medium knotless you think you could show us a tutorial! I been struggling with knowing how my small & mediums are supposed to look!!
Savorn Keo: Thank you for this slow tutorial. I will be trying this on my daughters hair
Julia Collins: Thank you, thank you! I’ve been studying how to do jumbo knotless for hoursss and this is the most clear, concise tutorial I’ve come across!! My daughter has long thick hair and this video is perfect! Thanks so much!
Tayonne Taylor: Omg amazing love this tutorial
Tiffany: This was so helpful!
Lisa Marie Anthony: You teach very well. Thank you for sharing.
nyla09kidz: Love the hair neatly done
AC McGowan: Clean , neat job so well done.
Catherine Epps: Absolutely beautiful before and after ♥️
Tammi Fields: You did an Amazing job! So Neat and Pretty!!!
Tiana Littles: So thorough, thank you!
Ronda B: This is an excellent video, one of the best I've ever seen with regards to braids.
TeeOverCoffee: I've watched tons of videos on this, and hands down, this is the BEST one I've seen.
Mya Rodriguez: Very detailed tutorial. I luv your method.
Victoria Paige: Out of all the yt & TikTok videos this was the most helpful video I seen in the past week thank you. Now my only problem is prepping the braiding hair… like knowing how much to add in.
Destiny Velasquez: You’re so good at showing details!!!!!!!
Margarita Vanegas: So perfect like the way u showed step by step
Ayanda Peitunia: I like how the braids came together , NICE !
Itsjennijen: When I braid a simple platt, I naturally braid over each piece instead of under; what's your advice on training my hands/fingers to braid under instead of over?
faith primer: Beautifully done ❤️❤️❤️
sugaryspicex1: Very nice detailed tutorial
Trina Bee: I LOVE IT!!!
lady B: Thumps upEbony I love the way how you do your thing 10/10 for me keep going girl....
Miss In: Beautiful grip amazing video!
Nikili Henderson: Excellent tutorial
Noemi Sanchez: Thank you so much!!! ❤️
Fearfully Made: You did an excellent job of explaining each step.
Miss Badazz1980: Beautiful and uniform!!
bongisizwelucia Zulu: I like the way that you make us understand how to braid ❤ Nice job ❤
Keepee: What a small world. I went to that high school. Great tutorial! Thanks
Nathou Beauty: Thank you love cliente always assume that big braids are easier so you should do it for free lol beautiful work
Skye Salaman: Looks pretty good
Asia Ver'na Cobb: I love this video.❤❤❤❤❤ Awesome job. Beautiful hair. I miss wearing my air in braids.✌✌
Oonagh72: You are an excellent educator. You are very gifted. One question I have is: How do you work the math out to determine how much extension to add and when? Thank you.
Royalty Goddess: These are beautifully done and you did an amazing job on your tutorial. I'm a mom of four girls and the cost of braids are very expensive; so learning to do them myself is imperative. How thick is the hair your adding and how often do you add the hair?
Rafaela Novaes: Hi I'm from Brazil, your video is great....I'll try to do it on my daughter...congratulations I loved it,
Simone Brown: I'm gonna try this
Annibal Sanchez: Im so glad you spoke up. I cant stand instant control, it always cast white snd it looks dry later. It also itches later.
minyoongles: I love you so much for this tutorial lol ❤️❤️
Skye Salaman: Exactly what I wanted
Certainly Cierra: This was a beautiful tutorial. It's the details, like how you secure the very bottom of the braid. Whewww babyyy
Michelle Allure: These look so cute! where did you get the braiding stand?
Boujet Beauty Company: I love how in debth this was. Thank you so much
issues: your hands are so beautiful! these braids are clean. ive got the knotless technique down but they dont all come out without skipped loops for theee life of me. still working on it 25 yrs later lol. what is her hair type tho?...its similar to mine and idk how to define it. edit: i do another technique but my boxes never seem to be close enough to the scalp. braiding the natural hair first then feeding the hair in might solve that for me.
Boh Gwanyama: BEST AND NEATEST TUTORIAL!
Meggans POETICAL Breeze: Ty for showing the actual product that's being used ... I'm thankful for all the videos I watch to where they show how to achieve the style but I appreciate it more when everything that was used is shown... I will be subbing you...
Boo F.: That products looks good I've been lookin for a new product use on braids...good job
Bree Shenanigans: I’m happy I found this video! I braid under also.. I just could not figure out everybody else hand placements..
Mss Arawela: Wow nice I liked it ❤️
irene stanciel: Great video. Very helpful..
Leslie Wicks: BEAUTIFUL PERIOD ❣️
david baptiste: I love how you added small pieces verses big . you let her natural thickness be 90% of the braid doesn't even like u added anything.
Ella Daniel what around turnd around: Wow very beautiful❤
Lear G: The neatest I ever seen , Great job
Goddess N The Flesh: Thanks for sharing ❤️
Gabriel G: Question: why when I do my wife’s braids, whether feed-in cornrows or box braids, the braids aren’t fluid/flexible? The bend and stay bend, is it because I don’t dip them in hot water or am I braiding too tight? Don’t get me wrong, they look bomb, it’s just that they curl/bend and aren’t fluid like everyone else.
Sonya Babineaux Burton: I so want to try that edge control! Where did you get it?
Ashley 🦋🤍!: Omg thank you so much for the knot tutorial I was struggling gurl!
Nikki Talley: This is how big I part for jumbo. Great outcome.
alexis smith: so for the rows it’s : first row : 2 braids second row : 5 braids third row : 6 braids last row ( at the top ) : 6 braids ??? is that right ?
JaCinda Wilder: ❤ love this
Bratty Jada: What edge control are you using for the braid when your doing it
BhrattMara: This lady who hair you was doing has long healthy hair I love it
Popp'N It With Pre: I loved this video. I’m a hairstylist as well ❤️ how do you record or prop your camera? I want to start a channel. This inspired me
Shauna Amaral: Love your skill and technique
Aziz Bhai: This hair is so soft and nice
Bxrbie Lifestyle💗: Can I still follow this tutorial even though my hair is shorter than the client’s?
Leslie Terry: You laid those raids out they are nice job.
Sharon Dickenson: Neat and nice
Michelle Hamler: Did you spray it before or after you dipped it? And what did you spray it with?
Sidney Baldwin: Love these
Wooseline Laura: Thank you so much for the video