How To Box Braid Your Own Hair Ft. Btl Braiding Rack
- Posted on 13 August, 2022
- Braids Hairstyles
- By Anonymous
Currently, you are watching Easy DIY Ombre Box Braid Tutorial On Natural Hair Ft. BTL Braiding Rack
BTL PROFESSIONAL Glitter Braiding Rack
Available in Two colors, use this braiding hair rack to organize your braiding hair.
60 Spool Rack
Easy to Clean & Sanitize
Durable plastic material for long time use
Easy to organize, separate, and grab hair/thread
Stylish Gold glitter design on Pink or Purple plastic
Can be folded or hung on the Wall
*Braiding Rack Link: https://magiccollectionshop.com/shop/o...
If you have any questions, please ask them down below. As usual, Thanks so much for watching, subscribing, and for liking. God bless.
~~~~~~~~~~~~~~~~~~~~~~~~~~~~~~~~~~~~~~
**CONTACT FOR BUSINESS PROMOTIONS: [email protected]
~~~~~~~~~~~~~~~~~~~~~~~~~~~~~~~~~~~~~~~
Please ask any questions in the comment section. Also, leave a comment and let me know what you think.
~~~~~~~~~~~~~~~~~~~~~~~~~~~~~~~~~~~~~~
Thanks for watching. Road to 100K
Remember to Subscribe, Like, and Share. Love ❤️ you guys and appreciate you all so much!!!
I'm Forever thankful
~~~~~~~~~~~~~~~~~~~~~~~~~~~~~~~~~~~~~~
Make sure you watch the video in the highest quality (HD/ 4K) to get the best out of it.
~~~~~~~~~~~~~~~~~~~~~~~~~~~~~~~~~~~~~~
Other ways to support my channel:- https://www.paypal.com/donate/?hosted_...
~~~~~~~~~~~~~~~~~~~~~~~~~~~~~~~~~~~~~~
CONTACT INFORMATION FOR PROMOTIONS ⬇️
Email: [email protected]
~~~~~~~~~~~~~~~~~~~~~~~~~~~~~~~~~~~~~~
Follow me on my other social media websites
~ Instagram- @karrill
~ Snapchat- Karrill
~ Facebook- Karrill DaDiva
~ TikTok- Karrill
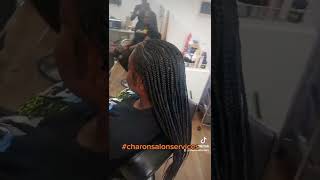
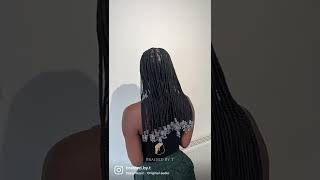
Foreign, hey guys welcome back to another video on my channel. This is your girl, Karrill DaDiva. Today, I'm going to be doing some box braids in my hair, as you can already tell from the title and to assist me and speed things up, I'm gon na be using my BTL glitter braiding rug. They have them available in two colors purple and pink. Definitely this will help to organize your braids and make the process a whole lot easier. It has 60 spokes on it, which means, depending on the size, you're doing it here. You may not have to replenish it at all and on the bottom of two of the legs, it has two little suctions, which I'm gon na show you how great these are. So here I'm gon na demonstrate to you guys how I place my braiding rack on the table without it moving or without worrying that it will tip over. I push it down into the table with the little suction piece. That'S on the bottom of it and there I'm moving it and you see it didn't move at all. I'M gon na go ahead and do the other side and show you guys and because it won't move. I don't have to worry about anyone on bumping into it or accidentally snagging on a piece of the hair and it tips over which that happened to me before with other braiding rack. But this it never happens and there you have it. Btl have the hookups and the link will be in the description box. This is the braid in here that I'm gon na be using today it's 32 inches long, it's black and brown ombre and um. I found this in my local beauty supply store. Just in case, you guys are wondering it was like eight dollars something per pack. I got three packs because I'm not sure how much I'm gon na need, but I'll tell you how much I use at the end of the video. The pack comes with six pieces in it and I split all those pieces into which means I get 12 braids from one pack. Now I'm gon na go ahead and add them all onto my braiding rack after I had them all on there. I grabbed my BTO braid in gel, of course, and my BTL braiders band that I'm gon na be putting on my hand. This is gon na hold my gel on it. So when I'm braiding, my hair hair is easily accessible, I love the smell of it. So I couldn't help myself from smelling it again. I'M gon na go ahead and scoop some out and put it onto the breader's bun and then I'm gon na start. My hair, I'm gon na section off my hair in the front. So I part it down the middle first to make it easier to do so now, I'm gon na go ahead and take out my first section in the back and I'm just gon na do one straight sweep across with my comb, and this is how I usually Get the back to be nice, and straight now, I'm gon na go ahead and separate it in two, because this is the size that I'm gon na be doing. My braids I like to add jam on the roots of my hair, because this make it look really. Nice and sleek and smooth - and I also brush it in with my comb - it makes it look so nice. This is how I hold the braids as I get them ready to attach to my hair. I will demonstrate again in another clip, but just look and see exactly what I'm doing now. I'M gon na grab my hair tight at the Rose and my pointing finger and my thumb finger are the two fingers that's going to be doing most of the magic here. I use my thumb finger and pointing finger to hold it nice and tight, as I use my pointing finger to part through the section of hair, while I braid them in this is gon na make the braid going very tight at the root, and this way I Won'T need rubber band and talking about rubber band. I'M gon na have to do a video using rubber band doing my box braid, because somebody asked me to do that, but I keep forgetting to do it now. I'M gon na continue to braid it down and for this one I'm gon na braid it all the way to the end. I said that because, as most of you guys already know, when I'm doing my box braid, I don't braid it all the way to the end until I'm done putting in all the braids and that's what it looks like braided all the way down to the end. This color is so amazing, I'm in love already moving on to the second one and, as I said before, after applying the jam onto the root of my hair, I use the comb to Sleek it in because this make it look so nice again, I grabbed the Roots of my hair, nice and tight, and while I'm braiding it, I use my pointing finger to section the braids as I go through. This is where I'm gon na stop this one and I'll show you in another clip exactly what I did to the end to prevent them from unraveling before getting back to them. Now I'm up to the second row and for this row I'm gon na be doing three. So what I'm gon na do is I'm gon na part of the sections before I start braiding them doing it. This way will help me to get them even and closer to the same size. Tell me here. I am showing you guys how I do this thing. I split the hair with one side bigger than the other, and then I Loop them around each other. Just like so now, I place two of my fingers between the two pieces of braids further away from my left hand and the piece in my left hand, I bring them between my pointing finger and my middle finger and that's it so easy. And now I'm ready to start my braids once again grabbing it tightly at the root and using my pointing finger to section the braids add in some of my hair in with the braid in here as I go along, as you can see, I add Jam as I go along and this will help my hair to blend in with the synthetic hair. Also, I braid the hair a little ways down before I reposition my hand onto the other side, where it's easier to continue braiding the rest of the hair going away here, I'm showing you guys from a different angle how I hold the hair to start it off Because I know a lot of you guys are having problem with doing this. I'Ve seen it in my comments, so I have to show you guys as much time as I can in different ways that I can, because I want you to get it foreign for this row, which is the third row up. I'M gon na be doing it in four, so I'm gon na section it in the middle first and then I'm gon na do two on each side. So this is what I do with the ends to prevent them from unraveling. While I finish them off, I put an elastic band on them. I'M up to the last row in the back. This will be the fifth row and for this row I'm gon na be doing two. Now I'm doing the last one in the back and for the back. I have 15 total this section that I'm taking out I'm only gon na be doing one here because it's small enough for one to go there for the second row. I skipped over that one. I did two and this row that I'm in right now, which is the third row I'm doing two and the next row, which is gon na, be the last row on this side. I'M doing two also so for this side, I'm doing seven in total, I'm gon na go ahead and finish off the last two on this side, foreign, but I only have two left to go over here, because I did them all off camera. Just so you guys know after I was done with the braids, I dipped them in hot water, like I usually do when I do my box braids, so I had 15 braids in the back 14 in the front, which makes it a total of 29 braids, and Here I am with the very last one: I'm not gon na be adding the oil and mousse to my hair, like I usually do on camera. I ended up added them, but I did not do it on camera. So just pretend that you saw me add them. Okay, make sure you add them to yours, I'm gon na finish the ends of my braids off camera. I do my makeup and I will be back to show you guys the finished look. This is a finished look guys. I did my edges also. Normally, I would add some hair jewelry to it, but I didn't feel like doing that today. I like the color, and I want that to stand out as much as possible. This is the back of it. The lens is nice, it's long, but believe me they had a longer length. I would have gone with it because me. I really love long hair and this here is beautiful. So, since I know you guys would like to know doing, this, hairstyle took me about five hours. Also, I used two packs and a half of here to complete the style. I will link all the products that I use today in the description box, including all the products from BCL, but as usual, if you guys have any question, please feel free to leave them down in the description box below I'll get back to them. As soon as I possibly can definitely make sure you go over to BTL and get yourself one of these, because it's very helpful, it will help you to organize your hair. It will help you to add the same amount of hair every time to each braids. People ask me that all the time so yeah this is a very helpful thing to have also don't forget to use my discount code, because I want you to save some money on your purchase. You could use this discount code on their entire site for their hair products and save yourself some money. If you find this video helpful, please give it a thumbs up. I would really appreciate that. Also, if this is your first time on my channel, I would love it if you would subscribe and hit the notification Bell, so you will be notified whenever I post a new video. Thank you so much for watching I'll, see you in the next one bye. I will love you
Comments
GDaEssence: One can never go wrong with such a classic look!
Shauna Evans: I’m going to try and braid my own hair, thank you so much for this video.
Marsha J: Watching your videos taught me how to braid. I tried to learn for years but your video finally made it happen. Thank you!
Alicia C_: Thank you for this vid, im going to braid my hair with some hair similar too the same color.... and now seeing it in live,, it's going to be beautiful!!
Rose G: Hi Gorgeous, I enjoy watching you do box braids,I learn something new every time, great job as always, take care.
Alicia C_: I just brought my first bottle of BTL braiding gel, im excited. Getting ready to braid my hair!!
Dayna Bledsoe: This color is beautiful on you love the size of these are nice as well !!!
KeechieP: I’m still learning Hun! Lol Thanks for all your help
NYFIAH: I enjoy watching your videos especially your braids !! Bomb
Ngoo O: Absolutely beautiful. Thanks for your sis
LilacBlondeNyGemiGirl: Absolutely beautiful ❤️!!!
British Robinson: You look fantastic! New subbie most definitely!
sequnia Redding: You always come through with a slay
malikah carroll: Beautiful and enlightening video thank you so much for sharing
Lorna Harvey: gorgeous
DrPhylCunningham: Makeup is fIre and the hairstyle is very nice you should definitely have more subscribers. I'm a long timer.
mitreda ectaus: My next style box braid ginger color You so so gorgeous
Brigite Green: Beautiful
LEONIE Hamilton: Hi beautiful love your hair and makeup
Mula A: love the colour
MissMakamba: Please is thjs the only grip method you're acquainted with?and also can u share a detailed parting tutorial. Thanks!
Kate W:
Connie Brown🌺: That color is so pretty
princesskacian22: Yes yes
princesskacian22: Yes