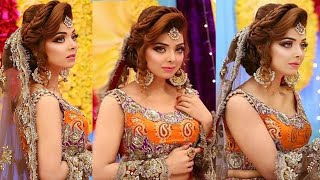
10 Trendy Ways To Style Knotless Box Braids|| Y2K/Tiktok Inspired
- Posted on 06 February, 2022
- Braids Hairstyles
- By Anonymous
For today’s video I showed you guys 10 different trending ways to style your knotless box braids
Thanks for watching
✰ Socials:
IG: @mimi_eletu
SNAPCHAT: princessderin10
TIKTOK: princessmimi_1
TWITTER: princessmimi__
✰ Music:
Music by WABI SABI - city breeze - https://thmatc.co/?l=AC40B3A9
Music by .irg - want u right back (feat. Jeremy Latshaw, Jerry Fisherman) - https://thmatc.co/?l=937BFD29
Music by Bmyshadow - Nostalgic - https://thmatc.co/?l=35173791
Music by Cook Thugless - am who i am - https://thmatc.co/?l=8DF66302
✰ FAQ
how old are you? 16
what grade are you in? 11th
ethnicity? Nigerian
✰ FOR BUSINESS INQUIRIES
_________________________________
SHARE!
SUBSCRIBE!!
What'S up youtubers me here and i'm back with another video, as you guys can tell from the title for today's video i'm going to be doing different ways to style box braids! Okay, as you guys can see, i got not like box braids in and when it comes to styling. I like do that. I, like i love to style my hair in different ways, especially i love to like especially styling, like trendy ways and they're, like a bunch of turns on tick tock going on, so i'm gon na show you guys how to style it based on each trend. I don't know how many stuff i'm gon na be doing. I'M just gon na be going with the flow and see how that takes us. First, that we're gon na do we're gon na be doing is the hearts. I don't even know what this that was called, but i'm just gon na show you what it looks like this is a picture i'm gon na be showing you guys how to do this style. First thing you guys are gon na need is like a bunch of rubber bands. I actually just bought this because normally i never have this much. I'M gon na need two and you're also gon na need small rubber bands. Like this. Like this, i have a box of boom bands, so i just it's just easier for me to get to it, but you guys are going to need to get those small rubber bands if you really want to do this style, so i'm just going to i'm just Going to show you guys how to do this now, first thing: you're going to need to do is get your hair into. I don't know what this is called. Pigtails ponytails, i don't know, get your hair into two side. Ponytails, keep it on the side like that and do the same thing don't take like the whole thing, as you guys can see, i left some out right at the back, so you're gon na. Do that same thing to the other side? Just so you know you. Don'T need to leave like two pieces that fray you can always take the two pieces in, but i like when there's always two pieces at my front. Next you're gon na do to get the hearts and the side ponytails you're gon na grab your tiny rubber band. I'M gon na grab two because my braids are pretty big, so i'm gon na grab two strands, preferably like towards the middle i'm gon na grab the two stir strands bend it like this, create like a center right. There bend it and take the rubber band and wrap it around, and while we're going to do that to the other side, that's done you can see like your you, your braids already form the heart so yeah. This is the heart side. Ponytail onto now we're gon na move on to style number. Two now for style, number, two for style number: two you're going to take your hair, like half of your hair and you're, going to put it up in like a high ponytail, then you're gon na wrap that you can either use a hair tie to tie it Up but i prefer wrapping my braids, so i can have like height to it, so yeah you're, just gon na wrap that up like this and it's gon na. Look, it's gon na look like this. You can either choose to leave it like this and just have like a high. What'S it called, i don't know what this is called, but you can have like a high half ponytail going on or you can put hearts in it. So i'm going to show you guys how to put the hearts in it, like usually you're, going to grab your two rubber bands come towards like more towards the left side. Pick out, two braids set a middle center and wrap the rubber band around. I don't think you guys can see my head right now, so i'm gon na try to raise you guys up a little bit. Okay, okay, i think that's good you're, just gon na wrap the rubber band around and just spread it out, and it's gon na make a heart just like that. Okay, it's gon na make a heart just like that. If you want, if you don't want it to be that high, because maybe you don't want to stand out that much, you can just tug on the ends of the rubber band to reduce the size like that, then just spread it out a little more and now You'Re going to do the same thing towards the right side of your hair grab. Two rubber bands have two ribbons in my hand, grab two rounds. If you have curly tips like mine, you're gon na want to kind of bring those tips to the full to like the front. Just to give you like a nice curly look right there. Could i just bring it to the front like that. So now you have two hearts in a high ponytail. Now we're gon na move on to style number three for style number: three we're to be doing three little pigtails. You can always have a heart and no hearts, but i'm going to show you guys both ways. So i need two pigtails you're going to leave some hair out front, but, like usual, if you don't want to leave your any hair out front, you can just go without hair up front, but i always look better with hair up front you're going to split your Hair down in the middle just like this and separate it so when you've separated it you're going to take your hair tie and kind of just string it and make sure it's like straightened, wrap your hair tie and you're gon na wrap around your braids. But if you wanted to have a tighter grip, i'm not really looking for a tighter grip right now. But if you want to tap it tighter grip you're going to use your hair tie to tie it up. So we're going to do that. They'Re going to tuck in the wrap or if you use your hair tie, that would have been better. They are going to do the same thing on the other side. Straighten it out, take hair, wrap it around or use a hair tie and tuck it. Now you can always choose to leave it like this, because this is like a super cute look, but you can also take your braids fold it in half just like this one and a half if you have curly tips or if you have beads at your end, This would be so cute fold it in half then you're gon na from, like the half point, you're gon na, take your hair tie and just tie it up so you've, wrapped it up you're, just gon na try to pull it to make it super tight because You don't want it to be coming out. This would like look cuter if you had short hair or like beads at the bottom of your hair, but my hair is a bit longer, so prefer people with long hair, you're going to take the curly tips and just kind of wrap it out, wrap it around. One more time my hair stuck to my knuckles just take the curly tips and wrap it around your braids. The puffy did they're gon na bring out the curly tips to the front, just like this and you're going to like hold it up. Take your hair tie and wrap it around again. That'S wrapped around you're gon na tug, your curly tips to the front or your beads and voila. You have that going on you're gon na do the same thing to the other side this. So this is what it looks like if you have like smaller braids. It'S gon na look a lot nicer, but i love this. This is what it's gon na look like your curly tips are gon na show off at the front, so now we're gon na move on to style number; three, actually, no style number, four for style number! Four! I don't know what this style is called. I just see it one time and it kind of just stuck to me, but for style number four you're going to grab hair from the right side of your head and pull it to move it to the right side, to kind of give like a bang you're Going to pull up some hair, take your take a tiny rubber band and just tie it to hold it in that one place just like that. You'Re gon na just move that out of your way now you're going to take your hair from this side. Just take like a small portion, mainly just on the right side and always leave hair at the back. Just like that leave here at the back in case, you just want to have it at the back you're going to grab the hair, put a hair tie on it or, if you don't have a hair tie, just wrap it around so you're going to tie that Real tight, not real tight. You don't want to give yourself a headache, just kind of tight and you're going to try to move it upward while you're doing this, okay and you're going to do this three more times to the center. I grabbed too much hair. So i'm gon na to center tie it or wrap it around for the third side, you're gon na. Take that and do the same thing wrap it around or use a hair tie on it and for those three ponytails you can like you're gon na, take it and wrap it around to kind of create like a bend two nut just like that, and now for You'Re gon na grab the hair that you left on the side. You'Re gon na grab it you're still holding on to the rubber band you're gon na grab. It move it to the back and at the back you're, just gon na pick up a random hair. That'S lying there, probably from the corner, take it and just tie. If you wanted to look a lot, tighter you're just going to make it a lot tighter, but i want to make a lot tighter right now because i don't want to have a headache. But this is what it looks like i don't know what this is called. I just seen it once it kind of just stuck to me, but absolutely love this. If you're trying to go for like that's not supposed to happen, we're just gon na pretend that's not happening. I absolutely love this. If you're trying to go for like a more unique look, you could always like put hearts on each of them like the way i taught you guys to put hearts so now we're gon na move on to style number five style number five is just going to Be your regular side part. You can never go wrong with a side part i feel like. I always look good with side parts, but everyone always looks good in the side part. So it's just a little side. Part just move your head to the side and yeah. You got your simple, easy, fast side, part style number: six is your normal middle part yeah. The next thing we're going to be doing is called bubble braids, but we're not actually braiding your hair bubbly we're just burning we're just gon na make the braids into bubbles. What you're gon na need to do is, if you like, keep two hair at the front. If you don't don't, if you have smaller box braids, i have big box braids. So if you have small ones, you can you're just gon na split your hair in the middle. If you have a small one, you're going to use your entire braid for this, but i'm not going to use my entire braid. So i'm just going to take a portion split it up in the middle split it up in the middle. Take a portion kind of tight. Take your hair tie and kind of like hair tie it to like a lower place, so you're not going for your regular high side. Ponytails hair tie look you're just gon na hair tie it down here. You'Re gon na do the same to the other side. Now that you have done now that i have that done on both sides, you're gon na take the hair. You can use your big hair tie for this, but i'm gon na use the small ones. It keeps like different colors to have like different aesthetic kind of look, so i'm gon na be using color blue. That'S the rubber bands right here, you're gon na grab two or bands, or you can always grab one you're gon na, take a portion of your hair. Like this, you can take it small, you can take it. Big kind of depends how you want it to look. I'M gon na. Take it small and wrap the rubber bands around just that small space. Now that i have that wrapped around twice you're going to do that same thing, all the way to the tips of your braid, but i have curly tips, so i'm going to put it all the way to where my curly tips stop and that's it. I'M gon na do the other side off camera. To show you guys what the entire thing looks like. This is what it's gon na look like this looks super cute and just gon na you can always bring these to the front and just rock it like this. It'S super cute. Now we're gon na move on to style number i lost count, but i think it's style, number, nine or eight style number nine. I think i'm not sure i think it's done over now we're gon na move on to star number nine now for style, number, eight or nine, i'm not sure they're going to be doing a messy bun, not necessarily messy, but i'm going to be doing a bun With a swoop so for this, we're going to need to grab hair from the right side and move it to the right side and take a portion and just tie it down with a hair tie to keep it out of your way. Now next you're going to do you're going to take the rest of your hair, put it up like really high up kind of, depending on how you like it, i like it to be high up, so i'm gon na pull it all the way up and we're Gon na take our pony our swoop that we left aside and you're gon na move it to the right move it to the left, like this bring this side all the way up and wrap it around. Just like this you're gon na wrap it around and make sure no hair is falling out because hair is falling out for me and if you have a hair, pin you're gon na pin it down, and this is what style number nine looks like now. We'Re gon na move on to style number, ten for style number, nine or ten, i'm not really sure where i stopped, but for style, number, nine or ten you're gon na keep your soup out of the way. Just like this you're gon na grab the rest of your hair and put it in a really high, really high ponytail. I struggle to put it in like a high ponytail, because my hair is like a lot as you guys can see it's thick. So i'm gon na show you guys a like hack. I use not really a hack, i just throw all my hair over. I don't know if you guys can see me, but i just throw my hair over just make sure everything's packed just like this. Then i take a piece of hair from the back and just wrap it around then you're gon na grab the rest. You can always leave it like this and just untie this one and just kind of go like this, but i don't like it like this. So i'm just gon na grab the rest of the hair and wrap it around grab the soup that we kept the side take out the rubber and we're gon na swipe. It move it to the left, take it from the side and wrap it around push it up. So it's not really obvious. So you just wrap it around. You can always take a pin if you have a pin, but i don't have a pen and you tuck it in just in case. You want to like you're moving a lot and you don't want it to come out you're going to take a bin you're going to pin it up, but i don't have a pin, and so i'm just gon na leave it just tucked in so. This is what style number nine looks like it's giving very much cinderella. I love this. It'S like if you ever wan na, have like a super classy look. This is like a go-to. This looks so nice. Now we're gon na move on to the final we're gon na we're gon na move on to the final style for style number 10. What you're gon na need to do is split your hair up in the middle all the way down. You'Re gon na leave two in the front or as many as you want, so i'm gon na leave like three couple in the front. I'M gon na leave these in the front and i'm gon na tie it up. Now i'm going to take each side and tie it up in a high pony now that you have that done, you're going to take your braids you're, going to split it into two or three or four kind of just depends on how many braids like how big Your braid are so i'm going to split it and i'm going to take this and just braid it and do the same thing to the other side and after you've done the same to the other side. You'Re just going to pick up one braid at a time wrap it around. Take another braid, wrap it the opposite direction and take another break and wrap it towards the direction you wrap. The first one and it's just gon na look like that. You'Re gon na. Do the same thing to the other side, as you guys can see, one side is bigger than the other, because i made my braids bigger. So if you have that mistake, you're just going to try to redo it again, but i'm not going to do that. So this is what it looks, like kind of just looks like a braid bun, a braided bun. If you took your time and made your braids tighter and smaller, it's gon na look super nice and that's the last stuff for this video. Thank you guys so much for watching, don't forget to like comment and subscribe. If you like this kind of content, make sure you keep coming back to my channel, because this is mostly what i do on here. So thank you. So much for watching and i'll see you guys in the next video bye

Comments
Christabel Allison: These styles are so good! I'll try them all cause I need to be more expressive with my hair. Loved the video and you're so beautiful ❤️
Myah Smith: I absolutely LOVE the style at 6:42!
priscilla esho: you’re legit so gorgeous, thank you for this
Angel Omolayo: Finally!!!!thank you I needed this
ItGirl Morgan: Off topic…but how do you get the glowing words, I been looking for those for months
Catlover222: Ur SOOOO BEAUTIFUL IM GASPINGGGGG
Emily Ash: These r cute !
Angie’s World:
Taniya M.: your hair color is so cute! do you remember what hair colors you used?
Sam Sam:
Omorede Ekhosuehi: you're so cute
alamaaya: ty girl
zeona.ymani _: Pretty pretty girl
ukyuu: 14:10
ukyuu: 17:30
DEO.INDEEE: whens ur bday?
Elemi Blacq: 2:50
Nayscraz: 1:22