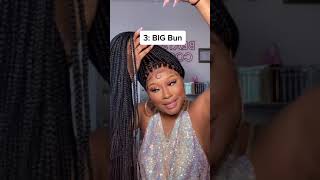
Natural Knotless Braids With Beads Hairstyle *No Added Hair* | Makiya Banks
- Posted on 20 April, 2022
- Braids Hairstyles
- By Anonymous
Thank you all for tuning in into today's VIDEO! ❤️ If you have any questions for me please let me know in the comments below. New videos every week! Please go LIKE , COMMENT & SUBSCRIBE More videos will be coming soon :) Follow me on all of my social media platforms:
Twitter: makiyabankss
Instagram: https://www.instagram.com/makiyabanks/...
Snapchat: makiya_banks
Tik Tok: makiyabanks
Business Inquiries: [email protected]
FAQ :
How old are you? - 21
What is your birthday? - September 21 (Virgo)
What do I film with? - Sony ZV-1 or iPhone XR
What do I edit with? - IMovie (MacBook Pro 2019)
sub count: 4.5k subs
#makiyabanks #knotlessbraids #beads #naturalhairstyles
#hairstylesin2022 #trendyhairstyles #protectivehairstyles #minibraids #minitwist #braids
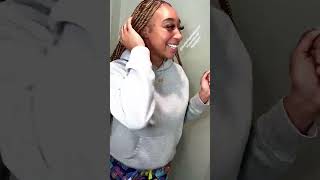
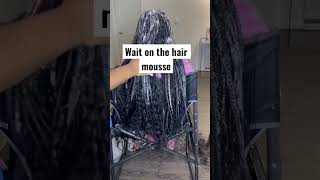
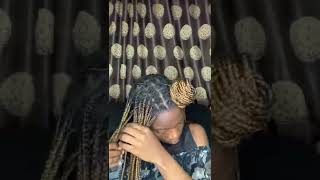
What'S up, you guys welcome back to my channel and if you guys are new here, make sure you like comment subscribe turn on your post notifications, so you can be notified with every video i post and also make sure you follow me on all my social media Platforms, it will be in the description box below, as y'all can see, got a new hair styling. I had tried the hairstyle with the beads and everything with my hair, and i like it it's so cute, like i thought i was gon na get a little girl, but i think it's pretty cute, though, really cute really cute as a tutorial on this hairstyle that Y'All can do at home, and you know it's real easy, real simple. You know, but um we're gon na get straight into this video um make sure you guys like comment and subscribe to my channel we're on the road to 5k. So, let's get there, everything in detail is going to be in the video just keep on watching all right. You guys welcome back so here's my hair after just freshly washed and i put some weaving in it. So what we're about to do now is blow dry. My hair and i like to do it while it's like soaking wet soaking easy, so it could be more easier to like glide through with the blow dryer, because my hair is just super thick, so i've been having a wedding just to get it. You know re-detangled and stuff before i used to blow dryer and then from now i'm just going to be just blow drying my hair, all right. So now that is done. This is how my hair looks after it's blow-dried. Yes, my hair is just getting so long and i love it. I just be feeling myself so now, i'm about to be part of my hair, so i'm going to be separating the front of the back and then i'm going to make two sides of the front. So basically kind of like three parts total and then now i just kind of parted. My first section i'm going to show you guys, like a better clip of it doing it and i'm going to be using the shining gel to part my hair and like slick it down. So now. At this point, i'm just using a comb just to smooth down the shine and jam through my hair and then pretty much i'm going to be parting into squares and then pretty much separating and i'm really just going to be braiding down like that's it. And here's. Just another part of me, you know part of my hair and putting the shining gem through the roots combing it out, smoothing it out, so it can be like nice and flat and i'm just going to be braiding all the way down. Um, my braids are kind of pretty tight. Just so you know they can last longer, so that's pretty much why they look a little smaller, but throughout my hair, they're gon na look thicker, because i feel like there's parts of my hair, that's just more thicker than their areas. Now that i move to the front, so i'm still trying to make sure my parts are like you know as decent as possible because um mind you my main parts in the middle, but i'm still trying to make sure i have a side part going. So whenever i want to do like a flip over method, i can still do that and i'm just still just braiding my hair from this point on pretty much this bray bray braid. This is really the easiest part. Well kind of having a part on your own is can be difficult, but i mean you get used to when you keep doing it like you. Just got ta set up your mirror pop your mirrors up, so you can see the the funny back of your hair on different angles. Oh, but this is the event edge control that i'm using towards the front of my hair, so it can be the most sleekest and i'm just using the comb just to smooth that through as well. So definitely the front. I wanted to look like top notch. Okay, my hair is pretty much almost done. I got one more half lift and we're good. It will be good, so all righty, my hair, is now complete. Look at my hair. Look at the name. You know it's going somewhere super flat. So that's the goal here. Oh, my back is okay, it's okay! I like the front better, but anyways i got these beats from my local beauty supply store, so i got more like wooden. Clears neutrals like that vibe and then, of course, you're gon na need some rubber bands as well. For the um beads and here's one example of what i did so i used three beads for each part and that's how it looks so what you want to do is so you can look at your ends. If it's a little frizzy, you want to smooth it out with the shiny gem or the edge control, whichever as much hold as you need to like sleek it all the way down and i'm going to do is fold the end of my hair and just like Fold it up, so it can just be kind of like flat and pointy if you can see, and it makes it easier to slice the beads in because i do not have the little white thing. You guys know what i'm talking about little white little things that you use to put on a little girl's hair with the beads. I don't know what it's called but um. I don't have that so i'm just kind of like hand doing it, but yeah i'm adding three to each part and then what i'm gon na do is fold the end of my hair. I feel like my fingers is blocking it, but i'm gon na show you guys again. So basically i folded the ends of my hair over that bead and i kind of just made it a fold and i'm rubber banding it. So it can stay in place. If you guys get what i'm saying but here's another example of me doing it so, like i said, make sure you put some product on the end of your um hair. So it can be smoothed out and then it'd be easier to slide the um beads in so now. What i'm doing is taking that in folding it over the bead and then just rubber band and get all together rubber, bending the bead and my hair together. So you guys can keep on watching watch it get sped through. So you can see how my hair looks overall when it's done um. I will say this style took me about um. Well, i was really much doing it pretty much doing it in gaps. As you can see, i kind of chose change locations, but um, i would say the style would take about two and a half hours to do with the braiding on like doing it yourself and then adding the bees hands on it probably would have been less. If i had the little white thing so to place the beads on, so i will highly recommend getting that, but if not there is still possible, so this is just a harder way to do it. I guess, and that is it so i'm pretty much done with my hair and then you guys also can add some mousse so like some oil to it, so you know give it some extra shine, so you can always do that, make it extra shiny, extra crispy. So but yeah, thank you guys for watching my video hope you guys enjoyed it and learned something new um. Let me guys know what you guys think of the hairstyle would y'all try it would you know, give it a shot, you know, but yeah. I think it's a really cute hairstyle for the summer for sure this is giving like either vacation. Like i wear this on vacation too, like i think it's really cute, you wear um just over the summer, you know good summer hairstyle, very protective style too. So i'm keep this until kind of really when i get tired of it so probably up to a week a variety give it a variety but yeah. Let me give you guys the details of the hair. My lashes has fallen off. Okay, but yeah here go the beads, so y'all know what that's how to go for kind of like the wooden neutrals look. So that's why i gave it was given you can find these beads at your local beauty. Splash store. I don't know you got this exact. One, but they might have that kind of style, but probably not the exact ones. But i got these from my local beauty, supply stores and the only thing is, you know the little little white thing that when you put in beads like with the little kids that little white thing i didn't have that because it didn't come with the pack. So i kind of just have to hand put them in each one which isn't bad. You just got ta kind of put like some edge control at the ends and then fold your hair and slide it through. So it kind of be pointy enough to go slide through. That'S really what you got to do. It wasn't really that bad, though so anyways guys um, that is it for this video. Thank you guys. So much for watching and i'll talk to you guys. You
Comments
Rash: your hair is sooo beautiful I love the look!!! what leave in did you use?
LadyjaKeshay: you did great
Starr Child: Cute! It's given me a "Bohemian" vibe. Nice!
kiyathebrattt: i love the braids, and we have the same name
Bella Obas: Awesome!!!!!
A drop of Hannah: PLS TELL ME WHERE YOU BOUGHT THE CLEAR BEADS THAT ARE THAT SIZE!! i cant find them anywhere lmao