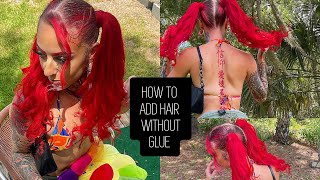
Watch Me Install These Fall Inspired Ginger Knotless Box Braids | Tutorial
- Posted on 14 October, 2021
- Braids Hairstyles
- By Anonymous
Hey y'all! With the fall season approaching, I decided to install some ginger knotless box braids! This is a short tutorial on how I got the look! I hope y'all like it and find it helpful!
All Products Used:
- 2 packs of Xpressions 3x pre-stretched braiding hair 48 inch (color 30)
- 2 pack of Freetress 3x pre-stretched braiding hair 48 inch (color copper)
- Ebin 24 Hour Edge Tamer Extra Mega Hold
- Detangling and parting combs
- Hair clips
(All can be found at your local beauty supply store)
* Took me about 7 hours in total to finish!*
CONNECT WITH ME!
TWITTER: https://twitter.com/theendiataylor
INSTAGRAM: https://www.instagram.com/theendiatayl...
SNAPCHAT: yonngg_beauty
#boxbraids #knotlessbraids #hairtutorial #ginger #fall
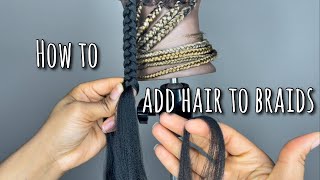
Hi you guys, so i guess we can just jump into this. So as always, i'm starting off with freshly blow dried hair, and i already did the whole back half of my head. So this is what it looks like so far. Basically, what i did is, i just split my hair into four parts. I always do this when i braid my hair and yeah, so i guess i'll get into showing you guys what i used. So i used two colors and the first color is the color 30, and this was in expressions and then the second color i used was this freetress and it's the same length and the freetress is in the color. Copper hopper was too red and then the other one, the 30. It was too light. So i thought, if i combined them both, then it would be like the perfect color so yeah, but i got three packs each of those and it was actually too much hair. I actually only ended up using four packs, so i used two packs of each color all right and now i'll get into everything that i'm using to do this style. So obviously, you're gon na need some combs and then i have clips and then the last thing i always use this when i braid or do any style really it is this even 24 hour edge control all right. So now that that's out of the way, i'm going to show you guys exactly how i achieve like the knotless look. So first, i'm just going to take this section down. Take my wide tooth comb and just comb this part out and there's nothing in my hair. Like my hair is product free, it's literally just blow dried and that's it and once that's combed out, i'm just going to start parting, my sections, so i think this front part is going to have like four rows. So i'm just parting accordingly, you're just gon na watch me struggles apart and make it straight, and a good tip that i like to use that a lot of braiders use is once you get like your desired part. Take whatever edge control, you're using and kind of put it on the part, and then i hope i'm making sense. But you can see me doing it: you're just going to take some edge control, whichever whatever you're using apply it on the part and then go back over the part, and then it helps to just make your part as crisp as possible. All right. So once i part that out, i'm just going to section off the other piece of my hair that i'm not going to use and this piece is going to be split up into two braids. So i'm just parting that off and doing the same technique with the edge control and once i have it all ready now we're going to start. So i'm just going to comb that piece out and then i'm going to take a little bit of the edge control and just put it around the perimeter of this piece and just make sure everything is like slicked up and everything is going into. The braid. Make sure there's no flyaways, no like kinks or anything just out, so i'm just looking that up and once i get that together, i'm gon na take my piece, so you can kind of see in the back. But to save time i separated my parts out like my hair out before i started braiding just so i could just grab and go. But what i have here is a mixture of both of the colors, so i took like an even amount of both and put them together and, like i said, one was too light. One was too dark, and so i put them together to get like the perfect. Like color that i needed and since they're just separate kind of i'm just going to take the hair and kind of move it around and like mix the hair together as best as i can, and once i get it all mixed since we're doing knotless. As you know, you have to like add hair in as you go so in order to make that easier for myself. What i did was i take a piece of hair that i have and i'm just sectioning like small parts off and the parts are slightly getting bigger. I don't know if you can tell or not, but i'm just sectioning off like a tiny bit another tiny bit. A little bit more tiny bit - and this is the order in which i'll add the hair in in order to achieve the knotless look, and so once i'm ready to start braiding, i just applied a little bit more edge control and i'm just going to start plaiting. My hair and you don't want to go down too far, so you literally just want to do like two plaits before you add in your first piece of hair. So i'm just doing that and once i get to where i want to add the hair in i'm. Just going to take that first piece line it up with the pieces of my hair that i have and then i'm just going to braid it into the braid and once i do that for about two or three plaits, i'm going to take the next piece of Hair and i'm going to do the same exact thing, i'm just going to add the hair in and braid. And here again you see me taking another piece and i'm adding in, and you add in slowly just because you don't want your braid to go from having no hair to like having hair. So you just want to add gradually and slowly so it looks natural. So you'll just keep seeing me add hair until everything is in there and then i'm just gon na braid, the entire braid down, and once i'm done. This is what the braid looks like super cute and yeah. So that is really it. That'S the technique basically, and i'm gon na show y'all one more time. I'M not gon na talk during this one, but i'm just gon na show y'all one more braid just to make sure that y'all, like you know, got it and then i'm just gon na. Let y'all watch and i'll check back in with y'all once everything is finished like a button uh is, is oh klp tell me: where have you been young boys hey? This is all right, so this is the finished product. This is what it's looking like. This is how everything turned out, and now what i'm gon na do, since i didn't have anything on my hair, is i'm just gon na take this wild growth, oil and i'm just gon na oil, my scalp really fast, so i'm just putting the oil everywhere and Then i'm gon na rub it in make sure my scalp is getting really moisturized and now i'm going to take some mousse. You can use any mousse, but i'm just taking this random mousse that i have and i'm putting some in my hand and then i'm just putting it on my braids, and this just gives the braids like a fresh like finished. Look i like to do this when i'm done with my braids, but i'm just rubbing it in making sure it gets on all of my braids and now it is time to dip my ends. So once i come back, the ends are dipped. I didn't do it on camera, because self-explanatory boil hot water and you're good, but yeah. So this is the finished look. This is how everything turned out. I really like them. I really like the color. I hope you guys like this but yeah. I also inserted like a little video i took after i got done, but that is the look and i will see you guys in the next video you
Comments
xxxxcecexxxx: Thank you for the inspiration ♥️
Janeen Council: Good job! Love the color
Charlene Thomas: Awesome, so cute
Marcus Life: Yasssss I love how much your growing
fzuks: Nice skin hair on point
Susan Sidakwa: ♥️♥️♥️