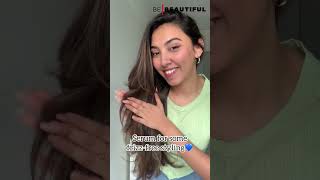
Goddess Knotless Box Braids | How To Do Them On Yourself | Diy Tutorial 2020 | Jas Mcqueen
- Posted on 02 August, 2020
- Braids Hairstyles
- By Anonymous
We are back today with another hair video!! This one is focusing on Goddess Knotless Box Braids!! More detailed tutorials of knotless braids is listed below!! I really liked how this style turned out!! Let me know in the comments if y'all want to see me complete any other hairstyles!!
✨Other Videos You May Like ✨
How to: DIY Knotless Braids
Link: https://youtu.be/tBC4WwvpSJk
Detailed tutorial for completing your own Knotless Braids!
Link: https://youtu.be/apPvf0LGTJU
~~~~~~~~~~~~~~~~~~~~~~~~~~~~~~~~~~~~~~~~~~~~~~~~~~
Products:
Freetress Prestretched Hair
Link: https://amzn.to/3b3iWKi
Freetress Deep Twist Crochet Hair
Link: https://amzn.to/2PhOHmP
Thread/ Yarn holder (used as hair separator)
Link: https://amzn.to/2x8LIaT
Parting Combs
Link: https://amzn.to/2JXkbMw
Goody's Sectioning Clips
Link: https://amzn.to/3fvamCZ
Shine n Jam Conditioning Gel (Extra Hold)
Link: https://amzn.to/35827sC
Perm Rods
Link: https://amzn.to/2ShTTJn (assorted sizes)
Link: https://amzn.to/35dzeLK (purple color)
Tropical Roots Sculpting Foam
Link: https://amzn.to/39DSHWA
24 hour Edge Tamer - Extreme Firm Hold
•
•
•
~~~~~~~~~~~~~~~~~~~~~~~~~~~~~~~~~~~~~~~~~~~~~~~~
LETS STAY CONNECTED!!
Follow me on IG:
https://www.instagram.com/jasmcqueen11...
Pinterest:
https://www.pinterest.com/jasmcqueen11...
For business / collaboration inquires, please email:
~~~~~~~~~~~~~~~~~~~~~~~~~~~~~~~~~~~~~~~~~~~~~~~
Jas McQueen Popular Playlists
Curly Natural Hair Chronicles
Link: https://www.youtube.com/playlist?list=...
Braided Hairstyles Tutorials
Link: https://www.youtube.com/playlist?list=...
Splits / Flexibility Journey
Link: https://www.youtube.com/playlist?list=...
Shopaholic Jas - Luxury & Style Ideas
Link: https://www.youtube.com/playlist?list=...
~~~~~~~~~~~~~~~~~~~~~~~~~~~~~~
**FTC Legal Disclaimer: Some links found in the description box are affiliate links. As an Amazon associate, I earn if a qualifying purchase is made at no extra cost to you. •
•
#jasmcqueen #goddessbraids #knotlessbraids #boxbraids #diy #braidstyles #best #feedin #feedins #feedinbraids #beginner #friendly #beginnerfriendly #withme
•
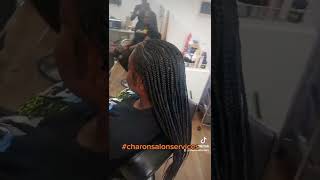
Hello youtube. My name is jazz, welcome or welcome back to my channel y'all. Do not talk about my hair, okay, because you're gon na watch me transform into something amazing. Now i am going to be doing knotless braids today. I'Ve already done a video on knotless braids. I will link that down below last time. It took me about eight and a half hours to complete it took way too long. Last night went ahead and prepped everything. I will show you what i'm using in a minute, but my hair is already parted off, and this is why your girl looked like something off the little rascals. So if you are interested in watching me complete these knotless braids, then just keep on watching all right. Y'All, so this is everything i will be using today um. This is going to be the freetress braiding hair, which i love. It doesn't tangle, really well and it's affordable. This is what i'm going to use. If i decide to do the guidance brace y'all, this hair is six dollars a pack. Okay, i only bought one because i wasn't sure probably will have to go back to the store, but i refuse to buy more than one if i didn't need it. Um. The tropical root setting foam, i'm gon na, be using that to like just set the hair and then this for edge control, and if you get your hair braided, you know about the shiny jam. This stuff is at walmart and it is everything i think it's like. Five dollars for like this uh jug, and then i have already prepped my hair that i'm going to use this right here is a thread yarn spool kind of thing, but i use it for just separating out my hair. This is about, i wanted to say two and a half bundles of the freetress braiding hair. That'S already separated out so yeah. That'S my prep work. Let'S get started all right! Y'All want to start off by saying that i already deep conditioned detangled and blow dried. My hair, i also did the parting last night - we're going to start off today with using the shining gem to make my parts more precise and whenever you are doing knotless braids, you want to separate your straight hair out into three small pieces, so you can feed That in whenever you're feeding in the extensions you're going to add the inner piece to the middle tail of your braid and you're going to do that three times with each piece until you get a full looking plait since i've already done a video on knotless braids. This video will focus more on the goddess braid method, so now you're going to take your deep twist freetress, hair and separate that out, you do want to make sure that you use some shine and jam or gel to pull those pieces back together since they get Frizzy, when you're separating them out so you're going to go ahead and do your knotless braid like regular and then, whenever you get down to a certain part in the braid you're, going to want to add that crinkly hair. For me personally, it was a little difficult to add because my hair was already crinkly, so i had a hard time deciphering, which piece of hair was mine and which piece of hair was the extension. Once you separate out the crinkly hair you're, going to use a hair clip to kind of move those pieces up, the braid just kind of get them out the way, because, honestly, you will braid it back into the braid and all your hard work will be in Vain and once you're done braiding to the end you're going to remove those clips and then look at your braid, i like to have the crinkly hair coming out of opposite ends of the braids just so it makes it look more full also, whenever you're, adding in Your crinkly hair, you do want to braid down at least four or five times once you attach it so that crinkly hair doesn't slip out of your braid. So, as you see here, i'm adding in the crinkly hair and i'm braiding down about four or five times and then i'm going to try to locate the crinkly hair and then take a hair clip and move it up the braid to separate it out. My way and, like i said earlier, you do want to have the pieces coming out of opposite sides of the braid. I do like to try to stagger mine just so. It comes out looking more full for me personally, i didn't add too much curly hair, because it's really hot in alabama - and i didn't have time to be dealing with a bunch of free hair with these braids. But if you are a person who likes your curls more full, then you can add as much curly hair as you like for the next couple of minutes. You'Ll see several examples of how i do the knotless braids and adding in the deep twist hair for the goddess braid. Look, it's not a game foreign all right y'all! I got the top done that took three hours and so um here is what we're looking like. Now, i'm not sure if i'm going to keep the ends straight or go ahead and rot them, because i don't know how to add this curly hair in the bottom, so yeah we on the way. So, as you can see in the back of my head, i did not add any curly hair because i got lazy. I was just thinking nobody gon na see that girl, but, as i got closer to the middle, i did start adding the curly hair back in once i did start adding the curly hair back into the middle braids. I made the curls a little more fuller, just because i didn't add any curls to the back braids, all right y'all, so i am done um. It took five hours to do this. Originally, i was thinking it was gon na take four, but this hair was just like confusing me like the curly hair was like really confusing me um. What i'm about to do now is curl the ends um with some rods. Hopefully they turn out. Okay um. If it doesn't, then oh well, because i'm still going to rock it, i'm not changing it. So i'll be back. So when it came time to add the perm rods, i did separate out all of the crinkly hair, just because i was unsure how that would act when i added the hot water, so i just separated it out to be safe. I ended up rotting. The straight ends and placing them in hot water to set them. Please be careful with this because you will burn yourself girl once i took it out the water, i unraveled the perm rod and, as you can see, those are really pretty curls and they kind of look very similar to the crinkly hair that was added throughout the Braid, so i was very happy with the way it turned out now. We'Re gon na lay our edges. As usual. Ladies y'all know the edges have to be laid after. I lay my edges. I'M going to be using the tropical root setting foam to make sure there are no flower ways throughout the braids and to make the curls more defined. So after i finish placing the setting foam throughout my hair, i am officially done so here is a finished. Look of my hair y'all, i'm very happy with how it turned out, with the exception of some crooked parts, but it is not being redone. Okay, all right, y'all! I am officially finished and i will say i am in love with this. You know i at first was thinking that this hair was going to annoy me and it kind of is, but i might just have to get used to it and be a little more careful with it, but y'all. Just to recap what i did um. I used the straight kanekalon freetress hair braided it in, and then i used the deep twist freetress hair. I think it's crochet hair, just kind of braided it in and kind of pulled it out and then for the bottoms i didn't want to like use the curly hair again. So i just kind of like rotted the bottoms to give it that curly look. So it can kind of match. Hopefully it look alright, but i'm i'm proud of it. It only took me, i think, six hours so yeah. This is my record because every other time i've done that list has been seven or eight hours. So if you like, the video go ahead and give it a thumbs up and if you want to see more from me, go ahead and subscribe and hit the bell, so you get notified whenever i post all right. Y'All have a good day. You


Comments
Sincerely Timia: These came out good! I wish I had the patience to do my own braids
Curls and Positivity: This came out so cute! I haven't mastered the knotless braids yet, but you made this look so simple!
Ashley Cuevas: Came out so good!!! It was smart prepping everything the night before because whew parting is a whole job in itself I don’t know if you have done passion twists already but would love to see that!!
Fine Natural Hair ROCKS: This look is absolutely stunning and you have beautiful hair !!You made this look so easy lol
CoCoButterCurls: I wish I could do my own knotless braids. These came out so nice one day I may have to give it a shot
Miriam Michelle: They came out super cute girl!❣️You got everything all laid out and readyI definitely don’t have the patience or time for my hair most of the time Wash n go’s are my go to!
Laid Back Luxe: You have way more patience than I do! I would love to be able to braid my own hair. It looks great!
AshieLauren 365: Wow you did this so effortlessly. They look great!
It's Keena: It came out so pretty!
Ariel June: Also I’ve never seen someone start braids from the top of their head first and then do the back half. Super cool! The front half is always my favorite part to do
Marian Elise: Yesss this came out so cute! I just have to find the time to do it lol
Ariel June: Yass they look amazing!! and omg that only took 6 hours?? Wow girl that’s amazing
Marsha Wald - Art of Living Maui: Love it!
Life with Lokie: Hihi Jas! you have beautiful hair! And goddess braids indeed! Thaks for sharing ❤❤
SHAUNTELL’S LIFE: I love it!!! These braids are a lil bigger than the other ones you did.
Alysa Nicole: Really cute!!
kinkyamiee: So beautiful...and your hair is long. Last time i made this hair, it took me 6hours, i was so exhausted...great job dear.
Ariel June: Girl I’m so glad you didn’t put those curly pieces in the hot water that’s what I did to mine last summer and they ended up looking like dreads
Natural Daniah: U have such the cutest hairstyles
Soukeye Seck: Did you only need one pack of the curly hair?