How To| Detailed Diy Knotless Box Braids Tutorial | For Beginners | Natural Hair | South African
- Posted on 07 June, 2021
- Braids Hairstyles
- By Anonymous
Hi everyone, thank you for clicking on my video.
I am doing a tutorial on how to do DIY knotless braids using the feed-in method. How to do them yourself. This video is highly recommended for beginners.
The products used in this video are;
Native Child Milk & Honey
Perfect Touch Styling Gel
Needle
Navy Butterfly Collection ( 8 Packets used )
-------------------------------------------------------------------------
For collaboration / PR
FOLLOW me on:
Instagram: https://www.instagram.com/nontando_kha...
Twitter: https://twitter.com/Teigh_do
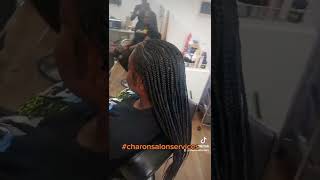
Best of all, i would like to say there was no need for god to give me a big hit. Now, don't get me wrong, my head is cute. It looks good on me. I like it. I love it. There'S just no need for it to be this big anyway. Welcome to my channel part, and i'm just going to be showing you how i did that um it's morning time. I did this last night and i'm doing this again second day so yeah. Let me just get straight into it: without rambling, too much i'm using the perfect touch. Styling gel, i am using a needle to cut my hair. If you have a comb that has um, i think they call it the red tail, comb or needle tail comb. Don'T know what they call it. You can use that to part. Your blue lines makes it more neat, and i used i already applied this last night, but i'm gon na apply it again. The native child, moisturizing cream um. Just to make sure that my hair is nice and moist, because i'm gon na keep it in this style for quite some time and we're going to put this here aside so that we focus with this here. So i'm applying the gel on the base of my hair and also at the roots, so i'm using the navy, butterfly collection cause. I bought nine packs. I am on my um fourth peg, and this is the last of the fourth peg, and this is how much um the full pack covered. I will let you know at the end, how many packs i use okay. So this is the last of the pick, but i'm not going to be using this much. This is the one that i will be using right if you want it to be thicker. Obviously, you're gon na have to use more than this. If you want it to be, slimmer have to be less than this. So with this one i'm going to be taking small pieces of the hair like this, and then i'm going to put it aside, take a small section of the hair. This put it aside. It'S the hair that i will be grabbing some make sure that you place it where you can easily access it when you are now braiding your hair right um, like i said, i'm doing this for the first time i like, starting at the back when i'm doing Something for the first time this gives me time to kind of perfect what i'm doing um, even though what i did is not perfect. I'M just saying like it gives me time for my hands to get the to get in the rhythm to get in the groove of how i must do the hairstyle right, so i'm still separating them. Those are very, i think i separated them to two four. Six. Seven eight to seven sections, so you need to make sure that they equal, you can start with the smallest um and then continue, but i feel, like you work better when they're equal. So this is the hair. I am going to do going to take three strands. Make sure not to eat up your edges, so i just like leaving a little bit of edges or whatever it is that's left of my hairline, but let's because i'm not gon na be too tight. Let'S take it with and then work from there. So you can brush your edges out if you want or you can just braid with them, so i'm taking three strands as you can see. I have three strands i like, starting with the one, on my right hand, side and that's the way i place. My synthetic hair, all right so i'm gon na, have something like this all right. I'M gon na have something like this make sure you grab from the roots but don't pull too much. Then i take the hair on that was on that left. I grab it and i put it in the middle, as you can see, put it in the middle and then i start to braid. Just make sure that you have everything from the root, but also making sure that you're not pulling too much. So when doing a braid, you work with these fingers, so it is the index finger the middle finger and your thumb, please don't mind the cuticles and the thumb, which is the ones that you work with the most all right. Okay, so now that we did our first braid, i'm going to go ahead and add the hair i'm adding the hair. These are my three strands. Adding the hair underneath, as you can see so now, use i'm using my right hand to push down the middle here using my right index to push down the middle here. When i push it down, i'm going to use my right middle finger to pull the hair on the left hand, side and grab it to the middle. So now, when i do that, i do the same thing. On the left hand side i take. I take my index finger. My index finger to this one right push the hair that is in the middle back and then i use my middle finger on the left hand side to pull the hair from the right, which is basically um. What we'll be doing throughout the only difference is that we'll just keep on ending here right. So, as you can see, i just keep on adding here, so i added um beneath the braid and then i just braid with it. I just braid with it as if it was there the entire time right. So i just braid a few times before, adding more hippies. Maybe you can just braid twice or three times and then you add some hair all right. Take the middle finger grab the hair on the left. Take the index finger, push the head down, take the middle finger grab the hair from the right. Take the index finger, push the middle head down, take the middle finger, get the hair from the left and then we just keep on adding a hair just keep on adding hair. So you see i have. These are the original place times. I'M going to put the hair like this in the middle of these two and i'm going to continue push the hair the middle finger down grab. It grab the hair on the other side. So, let's push use the index finger index finger, push the hair down the middle head down and then the middle finger grabs the hair from the other side. I really hope my explanation makes sense because i'm not good at explaining, but i tried to make this as thorough as possible and i hope it does help someone. So, basically, that's what i will well that's what i did throughout my entire head and there you have it and you just break down as you go down as you go down like this, make sure you pull to unravel. Okay, so here's the braid, here's how it looks like so we are left with. As you can see, this one is smaller, so it's gon na borrow from at least two, so i'm gon na put this in my mouth. I won't be able to explain it, but i will be showing you how i am doing it. You see they're, not equal okay, so we take this separate it into three into three strands. That is the gel. So do hmm so so index finger right hand index finger, pushes down the middle hand, the middle here down and then right hand middle finger, grabs. The hair on the left left hand index finger, pushes the hair in the middle down left hand, middle finger, grabs the hair on the right to the middle, and i just do the same thing. Over and over. I dip my hair in warm water off camera because there's no way for me to do it on camera. So hmm, you


Comments
Ciiru Muthui: I wish I could braid my hair, this so nice wow!
feelgoodfatso: Definitely going to try this. Thanks!
Koketso Nkanyane: New subie love your content ✨
Keneilwe Katlego: The opening comment cracked me up!! Otherwise the braids look amazing
Nontando Mohosana: Okayyy sis can we first talk abt how cute you are whuuu❤
Nontando Mohosana: Okayy so did you cute the hairpiece or?