How To: Diy Knotless Box Braids || Relaxed Hair
- Posted on 09 October, 2020
- Braids Hairstyles
- By Anonymous
#DIYKnotlessBraids #BoxBraids
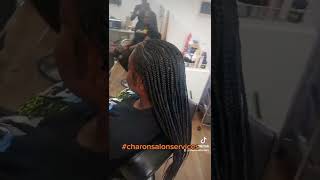
Hey loves, in this video go theought my DIY knotless braids. This is a tensionless and sleek hair style that is so easy to do on your own.This took me 2 days to do but I tried to film it as informatively and clearly as possible.
This video is How To: DIY Knotless Box Braids || Relaxed Hair.
***Watch InHD***
Stalk me on:
Instagram: https://instagram.com/theee_amanda?r=n...
Twitter:
PR & Collaborations email: [email protected]
*About me My name is Amanda Manka a girl passionate about healthy hair. Started my healthy hair journey February 2020
-Last Relaxer (5 July 2020) . I relaxed my hair twice a year
-I wash my hair 4 times a week
-trim my ends every 3 months
*NB: Choose to be kind in the comments❤️. Theirs a different between judgement/arguments and stating your opinion in a kind and constructive manner. THANK YOU.
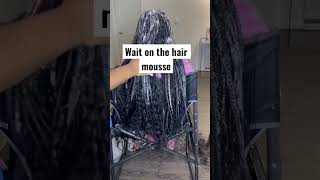
I knew uncle joey would step up. Look emma look who's back, hey loves, welcome and welcome back to my channel, it's your girl amanda back at it again with another video. So in today's video - yes, i know my hair is looking a little crazy okay, but your girl is getting some braids, i'm finally getting some braids. I know i said i'm taking a break from braids till november, but i'm tired, okay, i don't know if you guys can see all of this on my head and all that new growth over there, but i need a break okay. So today i'm going to be doing uh some knotless braids and i thought let me do a tutorial because i feel like the first tutorial i did on nautilus braids. I wasn't that informed on how to do them properly, but i feel like i've learned now. I'Ve did the ones before if i can get a picture i'll put it right there, and i think i look real cute okay, so in today's video we are going to be doing just that. So what i'm going to do is i'm going to do the back of my hair off camera and then i'm going to come and show you guys a little tutorial with the front on my hair just so that this video is not 65 million trillion hours long. So, let's get right into this video, okay, guys! So to start off, you need to separate your hair prior to braiding it because you need to make sure that you are starting from the smaller section of hair going up to the biggest section of hair. This will give you that seamless um, look that i will basically show you guys when i start braiding, but it will give you that seamless finish and that seamless look that you want for your knotless braids. So you need to make sure that you are parting and having um lines as straight as possible, because with nautilus, braids people can really see what's happening on the scalp, and you want to make sure it looks as neat as possible depending on what you can do. It took me a little while to get these lines straight, but it is possible with just a little bit of time. Okay, so after parting, my hair and getting my line straight, i like to moisturize and seal my hair underneath the braids just to make sure my hair is moisturized and ready for the plate. Uh, let's get into it. So you need to separate your own hair into threes and start braiding. The way you would a three strand braid. I like to do this for a five count. If you don't know what i'm saying just look in the video and from that five count of braiding my hair, i start to add the fiber, starting with the smallest piece of fiber. I put it as a hook and connect that to my hair, i really don't know how to explain to you guys how i connect it. But if you look at the video slow it down and replay it, i'm sure you'll see and get exactly what i'm saying. I then braid the hair with the fiber for a two count, and then i start adding on the other pieces of hair that i have until i get my desired thickness. The thing i like about knotless braids is that you can add as much fiber as you want to get your desired thickness and it won't be weighing down or pulling on your hair. It really is tensionless on the hair, and that seamless finish i was talking about when you start from a smaller pieces of braid, adding it getting bigger. Is this right here like, as you can see, so it's really important to do so, um, starting at a smaller braid and going up and up and up in size with the amount of fiber. You are adding just to get this seamless finish so after this i braid my hair continuing because i have gotten my desired length and because i am trying to do an ombre effect once i get to um almost the end of the braid or when it's getting Tapered and starting to look uh when the braid is starting to get smaller again, i start to add my different color braiding hair. I know my explanation may not be as clear as i want them to be, but i really do hope that this video shows you exactly what i am talking about, so with the addition of the blonde hair to my tips. I also start to add on, but this time it doesn't really matter um if you're, starting from a smaller piece of adding fiber to a bigger one, you can just start at any size um depending on basically what you're trying to achieve in the size you're trying To achieve and just keep adding bit by bit until the black and the blonde match each other in thickness blending on and getting as long as you want. This will give you that ombre effect that basically, i have of the two tone colors. You just need to take your time and practice this um, basically style of braiding yeah. So i'm going to uh redo this a couple of times just to show you guys exactly what i meant and hopefully that a couple of times when i repeat it, you probably you're, going to get a hand of what i'm talking about so before. I repeat what i had done. I just wanted to show you guys that why it is important to start from adding smaller pieces of fibers going up and not just adding fibers of any size. So in this braid, i'm just going to add any size fiber to the beginning of the braid, and i just want you guys to see how it looks when you're not starting from a small piece to a larger piece. So, as you can start to see already, the braid is not looking seamless, it's not looking as smooth as the other one. It'S looking very bumpy, it's going from really skinny from my hair being braided to all of a sudden having a huge chunk from nowhere. And if you look at the two braids there really is a huge huge difference. So i do say you guys um. Please do start with a smaller pieces of a smaller piece of braiding hair going up in size just to give you that seamless, tapered, look, knotless braids are really easy. Really fine and you can be as creative as you like. Just make sure your lines are straight. So or straight as possible, so it can look as neat as possible here i just wanna emphasize and show you guys properly how i'm doing my ombre effect on my braids. So what i did is, i took a whole large packet of black and i spot or i folded that into three pieces and cut that braid in three pieces, and then i pulled the um pieces after cutting them. I pulled them just so they wouldn't have that. Blunt edge and then fix that up and that's what i started off my braiding with and that's how i get that almost uh finishing effect at the end like that and from there i start to add my blonde just so that the black and the blonde um Kind of fade, so the black kind of fades into the blonde and then fades away. So with the blonde i added exactly the same way. I was adding the black hair. I um put it underneath the finger and just start to do a two count. Add another piece, a two count add another piece right, so yeah guys. This is a pretty simple method. If you didn't understand what i was saying, please do watch um and re-watch and re-watch this part of the video just to see how i was adding it. This is basically how it looks when you are done. It looks very seamless, very nice and very clean okay. So let's run down a knot. Let'S braid one more time you are going to take your hair, the square that you have parted and separate that into three pieces right once you have taken your hair, you are going to braid that hair the same way. You would do a three strand braid on your own hair, and i do this for a five count. Okay, after i have braided my own hair for a five count, i like to take the extension piece, the smallest extension piece after separating them prior, i take the smallest extension piece and start adding it to my hair for a two count. Each time until i get my desired thickness off the braid, because i had cut the black hair into three, what starts to happen is the further i go down. The braid starts to taper off a little bit and starts to get thin, so it gets this thickness. Then it starts to get thin so right before it gets thin. That is where i start adding my blonde pieces of hair. By doing this, you get the black fading into the blonde and then fading away, and you get that ombre effect. It still remains the same thickness and doesn't affect the way the hay looks. I really do hope you guys were able to get something from what i was saying and the videos are going to play along and you guys are just going to see exactly what i'm saying and hopefully get something. I know i've said this, but i really do want you guys to be able to attempt this on your own. I'M trying to teach um people how to braid their hair through um youtube through a video is not the easiest thing to do so. I really was trying to make this as kind of easy as possible, even though it's not as easy to braid your own hair, but yeah guys continue watching. So so, when we come to the end of our braids just to seal it off and get rid of that feathery, look, we dip them into some hot water. Please be careful with the hot water, always have a t-shirt or a towel just to quickly wipe it off, and we have come to the end of our video guys. These are my braids. These are my knotless braids. I am so excited because they look amazing. They look amazing. I really really really do hope that you guys did get a few tips and tricks in this video and you will be able to implement them into your own braiding uh session uh. Please do comment down below if you guys were helped by this video comment down below how i could have improved, to help you guys better but yeah. Thank you guys for watching bye.


Comments
Lelo M: Gang gang.... notification squad
E: Hey! I just wanted to say thanks for giving detailed tutorials and relaxed hair info. I’m sending love from Zambia
Tic-ing Timebomb: fabulous as always ❤️❤️❤️❤️
Laone Mokgosi: Trying this soon. you made life easier.
Lubelihle Khumalo: Job well done