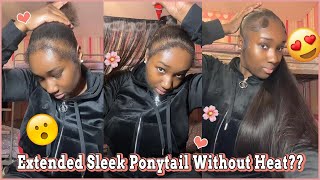
Fulani Inspired Natural Hair Tutorial Ft. Heat Free Hair Clip Ins|| Easy
- Posted on 27 July, 2017
- Braids Hairstyles
- By Anonymous
Hey Beauties! Thanks for coming back to check out another video! I'm super excited to bring you another natural hair tutorial featuring these clip ins I bought a while back from Heat Free Hair!
UPDATE: until end of August my schedule is to upload every other week as I will be on vacation!
_
Nappy Headed Jojoba DIY Moisturizer!
https://www.youtube.com/watch?v=SIh8ut...
Products Used:
- Rat Tail Comb
- Bobby Pins
- Water in a spray bottle
- Moisturizer (see above link)
- Shea Moisture Curling custard
- Denman Brush
- Tangle Teaser
- Miss Jessie's Soft Curls
- Heat Free Hair Clip Ins
- Hair Jewelry (Beauty supply & TopShop)
_
B U S I N E S S:
__
☆ C O N N E C T ☆
○ Instagram: @KenyaAisha
○ Snapchat: KenyaAisha
○ Twitter: @Kenya_Aisha
Hey guys, can you hear back up another video if you've never seen my face before go ahead and click that subscribe button below? But if you have welcome back today we're doing another natural hair video. I know it's been like three weeks. I'Ve been in a little bit of a hiatus. I'Ve just had a lot to do, but I just wanted to come back with a different type of video. It'S a little too hot to be filming makeup videos all the time, so I figured I'll just do another natural hair video, especially since I'm gon na be going upstate for the weekend, and I figured I'd like to have my natural hair out for my birthday weekend. Either way, obviously this is all my hair, I'm using her hair company extensions in the 3c style. My hair is 4c, but you know something a lot easier to work with, especially since I'm gon na be around a pool and pools me and shrinkage either way. I hope you guys enjoy this video stay tuned for how to get this look and I'll see you guys in the next one, hey guys. It'S me looking crazy over here, don't mind my peel-off mask. I was getting ready to go somewhere after, but I'm just telling you that my hair is stretched right now and it twists out in the front and the back is pinned in some twists to the back of my head, but you should totally do flat twists. Cuz! That'S way easier than doing what I did so basically you're gon na part, your hair and maybe a little neater of a part than what I did kind of from behind your ear on one side. So the behind your ear on the other side, and that should be the right amount of hair that you'll need in the front. So here I'm just gathering all my hair to see where I want to part it, and I take a rat tail comb and then I part one side and I'm gon na make this same exact part. On the other side, the easiest way for me to measure where it was was just kind of do that swoop from one side to the other side. But I think I still ended up making sure that it was even by creating a different part, either way. You'Re gon na put the top amount of your hair away in either a clip or a hair tie for now, because we're gon na braid the two sides. So I think I was explaining here that I had tried this the day earlier. The night before and I braided both sides forward, but I liked the way it looked better if I pulled it back, so I'm gon na braid one side forward, one part of it forward and one part back so right now, I'm just spraying some water. Just to loosen up my hair and then I'm gon na go in and spray some moisturizing spray, so that was the water and then this one's my you know little concoction of moisturizing spray and I actually made that with the instruction of the nappy-headed ho ho bug. I will leave the video the link to the video below, where she kind of says what she puts in it, because I love that stuff and I'm taking a metal rat tail comb because it's easier to use and I'm gon na create a part. So I'm just gon na split what I had into so now that you have two equal parts and then you're just going to clip one part away. So now I'm taking some eco styler gel that little amount is fine enough. You'Re, just gon na put it near your roots, because you want to make sure that the hair looks neat over by the roots. Now I'm warning y'all, I'm about to plant myself right here on video because I know damn well. I cannot cornrow, but I'm gon na attempt. That'S what that quotations was about me, pretending that I could corner room either way. If you can't do that, it's fine, if you do a flat twist, but you know I tried so I am just going to cornrow as much as I can and soon as the hair kind of lifts off of my head, then I'm going to twist the rest Of the way, just because you know I have fairly thin strands, so, if I didn't twist it, then it would be really small, so so we're gon na do the same to the other piece except we're gon na take this piece and we're going to cornrow it Backwards and once I finished cornrowing that backwards, I decided that I was going to take the end piece, the twist part of that and just pin it into the rest of the twists that I have back there, because I'm gon na put some clippings over there. So you're not gon na be able to see it anyways they just put a little bit of gel at the end, so I'm showing you all of that right now. So this is what your style should look like. So far up we're going to do the same exact thing on the other side with all of the moisturizer and the water and then when we split it in half rotation and twist to the bottom. If you have enough hair, obviously and keep braiding or you can add in here and then we're gon na cornrow, the top piece towards the back and just like earlier you're gon na pin back to the back of your head. So now we're gon na slow it down and we're going to take our middle piece of hair and we're going to put that into a ponytail first, I'm going to wet it with regular water just to a little more pliable. You know the of course. You style Harrison pencil step. One is dry, so I'm wetting it here making sure that all my parts and all little pieces are up, especially because I have a few short pieces. The back isn't that important, because you're not really going to see it but and then I'm going to take my eco styler gel. I'M going to take about that much every time that I dip into the little pot and I'm going to slick that to my head. As much as I can we're now, I'm gon na take a soft bristle brush and I'm going to comb of that all and smooth it out add some more gel as needed, and I'm gon na take it and put it into a little ponytail and now that My arms are tired: I'm going to split that pointy tail in half and make two just large chunky twists out of what we're then gon na. Take those two twists and wrap them around. I didn't use the bobby pin and I just thought it was easy, just to kind of wrap the ends and tuck them and if that was totally fine, so I'm gon na use the combination of a rat tail comb, a really thin one and an old toothbrush And I'm going to do the little baby hair thing that we all do now if hearing the words old toothbrush is really surprising to you. I suggest you stop watching this right now, because this video is not for you. That'S how we do our edges y'all so either way. You'Re, just gon na see me refining these, making them how I want and then, if you watch me normally you'll know that I like to wrap my hair with a leg of a stocking that I could instead of those silk scarves. Sometimes I use six silk scarves, but it takes forever to dry. That way - and I like this - because it's a little more breathable, so I put one over my edges and I'm putting another one over the bun so that Italy solutely - and this is me telling you that I'm gon na take like 20 minutes to let this dry And go: do my makeup and take off this damn facemask do what I need to do and and then this is me, coming back like 40 minutes later thinking that I could have done my makeup in like 20 minutes, and that was such a lie. I don't know who I thought I was basically that's what I'm shaking my head either way. I wrapped the ends of those braided pieces behind just to stretch them a little more and now I'm taking off my hair tie. I took off the other hair tie just because it was giving me a headache, loss over makeup, so I'm taking off the hair tie that was kind of laying half of the bun down, but most of my baby hairs. So it looks a little smoother. It was still a little wet at that point, so you could leave it longer if you wanted, and now we're just gon na start defining the curls of those clippings. So the clippings that I'm using are from her hair company. No, no, no, the clippings that I'm using are from heat free hair. I keep messing that out. There'S too many HS there from heat free hair, it's the 3c style. I do have 4c style hair, but the 3c style is just easier to use, especially since I was gon na be like around a pool and stuff. So so this is me clipping them in and then I'm gon na define the curls. So what you're gon na need for this is a Denman brush and a tangle teezer. That'S what I use you could probably just use one. So the ones I'm using, I think, I'm using all of the of the ones that have either three or four clips and, like later you'll, see that I move this one up, because it was four clips and it was too long for like the bottom of my Head so I'm taking water and I'm spraying that in just you don't want it like sopping wet. You just want it kind of damp enough to move. Then I'm taking some curl enhancing smoothie, but you can use any like sort of hair milk or something and I'm mixing it with the Miss Jessie's soft curls. Now this isn't the one that I usually use. I just couldn't find the one that I actually use but, and then I take my Denman brush and my tangle teezer. I like to use a Denman brush to detangle and the tangle teezer, to define the curls and I know that's completely backwards. But that's the way that I find that works best. So this is me going through with the tangle with the with the Denman brush and then I'm defining the curls with the tangle, teezer and you'll, see at the end that it looks really nice and curly. And that's how I'm gon na do all of the clip ins that I'm gon na put in so I did the other side of that and then I moved it up a little bit just so I can put a smaller piece at the bottom, so I'm gon Na explain it one more time so that we can make sure that we're all clear before I fast-forward the rest of them. So I'm gon na pin that first piece up and do the bottom piece. So I'm going to clip it on to where the twists are. Then I spray the hair with water, and I take my mixture of my hair milk and the Miss Jessie's curls and I put it on there and then I detangle with the Denman brush and then the tangle teezer. So this one you'll see that I put it on this way, but I ended up turning it the other way, because I needed it to be upside down so that you can see the clips. So I just did the same process over and over again and I'm explaining to you now how I take that and I'm doing it backwards upside down. So I just took that same piece that I just did so. The first two are gon na be facing down the first two tracks of clip-ins are gon na be facing down, and the last two are gon na be facing up. It'S the easiest way to do. This is kind of to bend your head over and put the clip in so that they hang down so that you understand what I mean. So I put that in and then I'm doing the same thing with the next piece and you're gon na put this knot. All the way up on to where your part is because you have to clip your button part in and I'm going to turn that back and I'm going to do the same exact thing spray it with water. Put everything that I need to in it detangle it different angle, teaser. I don't know why. I do you think of that dry that wasn't a good idea. The only difference between all the other ones - and this one is that when you detangle it, you want to make sure that you kind of do it in sections when you define the curls with your tangle teezer. You want to do that in sections, because you don't want the hair to kind of like play to one side and then the other hair just lead to the other side, and then you can see all the tracks. So that's what I'm showing you now, I'm doing! Little pieces, so I'm doing this one and then I'm gon na do that one and I'm gon na brush it the way that I want it to lay so that it kind of like it's more prone to lay that way and I'm gon na do the same Thing to the other side, and I'm back so now I have a few clippings for my bun piece. I'M just telling you that I'm gon na do the same thing to those off-camera and I'll, be right back and I'm back and I'm showing you the other pieces that I have and now these are longer than my other piece, cuz they're from another clip inset. But it's the same type of hair, same style, so I'm gon na clip this one in the backwards way. So I'm showing you that I'm bending it! So that's what I mean by backwards and I'm gon na clip it behind the bun and then I'm gon na flip the hair forward and start to wrap it around that little bun that I have so that all of the hair to sort of matches - and you Know it's up to your discretion here you can decide if you want to wrap more pieces and make it a bigger bun. I ended up actually doing that. Just a pin with a bobby pin where you want your other pieces to hold down, and obviously you can use bobby pins to shape your button. This sort of looks like a cone right now, but later I fix it. So now you all know the Fulani women use those braids to put some beads on it and make it look yes as hell. So I went to the beauty, supply store and of course they didn't have beads, like my beauty. Supply store, never has anything. So I ended up just getting those little hair, jewelry pieces and I kind of stuck it on. I also have those hair rings, so I decided to do silver just because my hair rings were silver. I got those from Topshop, I think they came with feathers on it, but I took it off because I didn't want feathers like sticking out of my head so and then I put the little pieces of hair jewelry at the end because I didn't have beads, but I would totally do some beads and then I stuck one of the pieces of hair jewelry in the top of my hair. That is it you guys, thank you guys so much for watching this video. I hope you enjoyed it for the rest of the summer, just as a notice, I'm going to be uploading every other week, just because I've got a lot going on. I'M gon na be going on vacation for things and things it's just a lot to do. So. I'M gon na be uploading every other week until the end of August, if you have any requests, obviously put them in the comment box below. Thank you guys. So much for everything and I'll see you in the next video
Comments
Princess Jonah: Super cute!!! I love this hairstyle!!!
StellaAdora: OMG I grew up around a lot of Fulani, love the hair style!!!! very reminiscent of how they wear their hair. I love it
Mahfuza Ahmedin: Omg I love this! Sooooo beautiful!
Randomly Oni C: Flawless!!! I know your arms were on fire lol This style definitely fits you!
JustJumet: i love this style on you. your background is dope.
Chimdi Ihezie: So pretty!
TuTu4UrInfo: Hey, thanks for sharing. Can you provide an update on the ? Do you still use them?
Briana Martin: omg ~ lovvvve this style on you <3!
JBrad&Chas Tv: What length and how many sets of clips ! Love this !
Sidra Stanley: Love it !!!
Shirl_JB: Loveee
laurentien00: I a so amazed by your biceps and shoulders, they are of Alpine proportions. I wonder how you did get those biceps. I love it when you flex them as they pop out so high. Very attractiveand beautiful.
Sandra Kumi: I love it
Coach Brown : Pretty
Noble Samadhi: Hey I know your grown and I'm a child but I was wondering if you would like to collab with a hair video?
Kayla Whaley: is this the for kurls texture or for coils texture?
Britney BlueBird: what length is this?