Diy Braided Wig Hat With Glue Gun| Beginner Friendly| Fabulously Nappy
- Posted on 11 November, 2020
- Braids Hairstyles
- By Anonymous
#diywighat #braidedwighat #fabulouslynappy
Welcome nappy beauties and thanks for tuning in. I tried making a braided wig hat for the first time but ran out of braiding hair. I think I did a good job regardless.
I hope you find this entertaining and very helpful too.
Click this link to subscribe to my channel https://youtube.com/channel/UCiyqy-A_I...
LIKE, COMMENT, SHARE the video, and SUBSCRIBE to my channel for more.
See you soon...
xoxo
~______________________________________~
*Watch my previous videos*
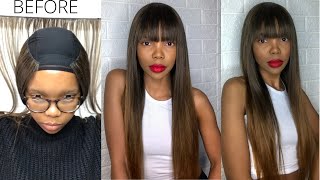
DIY headband wig | Throw on and go - https://youtu.be/igB816eaNlQ
How I do my nonprofessional makeup - https://youtu.be/1XAjznQGArM
Cousin gets gifts for passing exams - https://youtu.be/pPypvjrgiKk
Connect with me
~______________________________________~
~ If I’m Not Here, I’m Here~
YouTube channel https://youtube.com/channel/UCiyqy-A_I...
TikTok ~ https://www.tiktok.com/@fabulous_rozy
Personal Instagram~https://www.instagram.com/fabulous_roz...
Business Instagram~ https://www.instagram.com/_nappy_beaut...
Facebook Page~https://www.facebook.com/fabulously.na...
~______________________________________~
Thanks for reading through the description till here
Stay safe and blessed
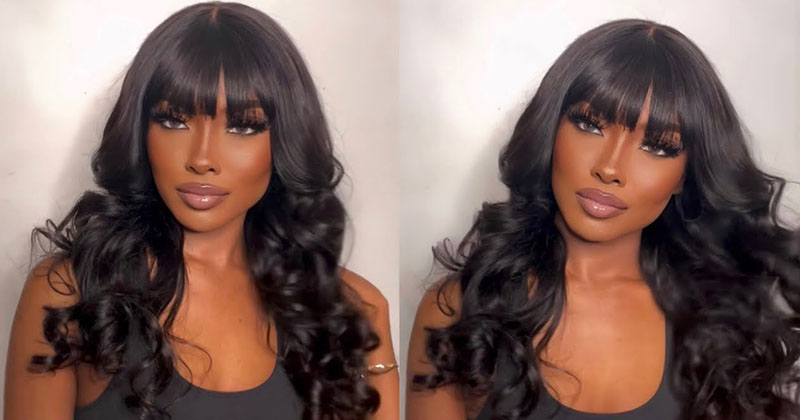
Um hi happy beauties, it's your girl, fabulously nappy and i'm back with another video for you. Thank you for tuning in. If you are new to my channel, please make sure you hit that subscribe. Button subscribe to my channel turn on your post notifications so that each time i post a new video, you will be notified and comment watch. If you are an old subscriber. Thank you for tuning in again uh in today's video. I will be showing you how to make a braided wig hat, so i think, as you can see, this part was already done. That'S because i started doing the sewing method like using the needle and try to sew down the braid, but that didn't work out so well, so i decided to take it down, but then, since this part was already well laid, i decided to leave it there. So i am going to go in with my glue gun instead to complete it okay, so this is. This is how it came the packaging. So that's my glue gun, i'm just gon na plug it in let's plug in at the red light, showing that it's on, so i'm just gon na. Let that heat up! This is the pad that came with it to set it on so that in case the glue melts and it's dropping it drops on this - it's easy to clean up, so it came in the packaging. I'M just going to set that aside. So i've got i'm using the clear glue. Sticks, i'm just going to insert that back there. Okay! So i'm going to let that heat up and while it's heating up i'm going to put on my thumb, covers these um. As you can see, it's got some glue on it. I'Ve used it before already so this just keeps the glue away from my fingers. So all you need for this style is some braided hair and your cap, you need a mannequin head. If you're doing the you're doing with the glue gun, you need a glue gun, you need some, i think, that's it. But if you're going to go with the needle, if you're going to sew it down, then you'll need a needle and thread. So you need the braided hair, you need a cap, it's a baseball cap and you record anyone that you you like, so you take. You turn it inside out, make sure you turn it inside out turn it inside out we're going to work in here. This part that is already laid i did along this line - you don't put on you, don't put anything on this strap here and put anything there, because this will help you to be able. This will help you to adjust the caption to the fit of your head. So don't put anything there just go over here as i've done, and i did that really close so that my hair underneath does not show so. I use some pins to pin this cap on the mannequin head just so that the cap doesn't move around, should just stay on the same spot, and this is the braided hair that i'm using so look on his heart. So i'll just get started. Put that there like that and hold it in place. Let me turn this, so you can see better. Take a braided hair. You put some glue on it. Then you press it down where you want it to be, so i just put that there press it down for some seconds. You need to press it tight so that it's firm. Alternatively, you can just put the glue on the cap instead, and then you take the braided hair and just press it there like that. Okay, you should be careful, because this thing is, the glue, is hot, just be careful and careful not to burn yourself as well. Okay, so i'm just going to continue that process. Take a braid put some glue on it. You can put the glue on the braid or on the cap itself. Anyone that you prefer, then you just press it down. So i'm just going to continue that. Take some braided hair and just press it down one after the other, and you have to be quick because the glue kind of dries fast as well so don't put it on the cap and take forever to put down the hair. I should put the glue on the cap and just go in with the hair, just make sure that you press this down well, so that it dries, it gets the stuck to the cap properly, okay guys, so this is bad. I ran out of really hair and my cap isn't completely yet. I still have a long line to do here. That'Ll be at least 10 more braids, and this look up. This side is not complete yet, and i am completely out of braiding hair braided hair, but i'll do some more and complete the week with the cap later on, but that's just about it. So all this i did these ones myself, so i'm just going to do some more later on and then complete the cap, but for now we're just going to stay like that, i'm not going to use it until i'm i've completed it. So i'm just going to i'm just going to keep it aside, because i can't do that today, but when i do that i'll, probably post the pictures on i'll post, the pictures on instagram so be sure to follow me on my instagram. I will leave the link down in the description box, but i'll put my handle somewhere on the screen so that you can check and follow me on instagram um, so yeah, that's just it i'm so sorry. I couldn't finish it, but oh well. So this is how we're looking i'm just gon na flip it. So this is the part where i said you don't need to don't put anything on it so that you can adjust the you can adjust the fitting on your head. Just like that, you see no spaces between, so you cannot see too okay. So when you're all done, which i'm but i'm not you can see, the side is scanty. This side is full, so when you're done it should be like this okay, so this is about it. So that's all! Oh, let me just get this glue gun out of the way. Okay. So that's all about this video, i hope you'll like it and i just want to know have you tried this wig hack before? If you have, let me know down in the comment section how yours turned out and if you intend to try it, then, when you do tag me on in a business instagram, i'm going to leave the link down in the description box so be sure to check That out the link to my business instagram of my personal instagram and my facebook page. So if you're posting on facebook tag my facebook page, if you're posting on instagram and well, that's it all done. I hope you enjoyed this video make sure to give me a big thumbs up uh comment down below share the video to your friends, everyone and well i'll, see my next video bye. You

Comments
Nicole Aladrian: Great job!
Rahab Ngwembam: Good job Rozy. I love the creativity.
Renae axb: This is brilliant!!!
Radine Strachan: You did a great job
The Seattle Rose: Never tried it, but I might try.
anjuma felicia: Very good