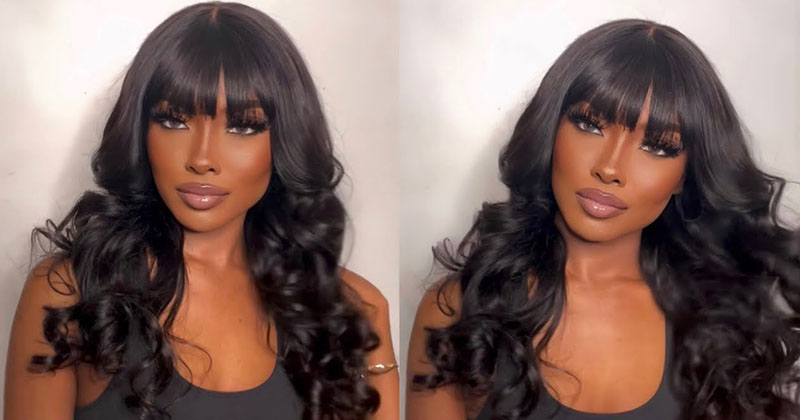
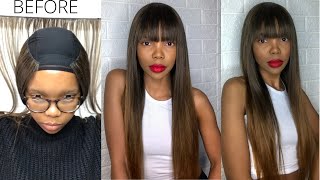
Easy Jumbo Box Braid Wig Tutorial ! Beginner Friendly!
- Posted on 18 February, 2019
- Braids Hairstyles
- By Anonymous
HEEEEYYYYY GIRL HEEEEEYYYY!
In this video I am going to be showing you how I easily make and install a braided wig! This tutorial is very beginner friendly for those who already know how to braid hair.
Thanks For Watching!
Interact With Me On Social Media!
INSTAGRAM: MochaMeech
TWITTER: MochaMeech
SNAPCHAT: Bball_Beauty
BUSINESS INQUIRIES: [email protected]
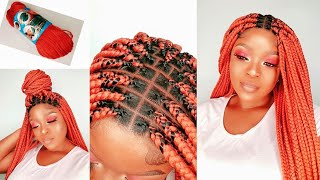
Yeah, my sister don't tell me these braces because he'll and they are, but they are cute, y'all - feel like Joey off a Friday, great, hey, girlfriends, I'm going to go back to my channel. So, as you guys can see by the title of this video, I'm going to be showing you how to do a easy, braided wig, you guys this is like as beginner freely as beginner for the kids. I go into a lot of detail in this video, but I try not to make it too long and I do show how I install this as well. I really feel like this Brady unit you guys, because I don't like to see through the process of braids and I like to change my hair line. So I think a Brady week would be the best option for me also like this Brady wig is not like super super heavy. I know sometimes like when you get braided weeks, they're heavy and they hurt your neck and all this other stuff. But nevertheless, you guys, if you are interested in seeing how I achieved this, look without further ado, let's hop right into this video well for starters, you're, obviously gon na need a mannequin head, then you're going to need a full lace. Wig, I'm just gon na use. This old one that I'm never gon na wear again so you're gon na need a full lace. Wig we're obviously gon na need your braiding hair. It'S gon na need clip a comb that allows you to part like really nicely and sharp parts you're gon na need. Tweezers you're going to need some type of mousse or something for your baby hairs. If you want baby hair, you can use hair gel or any kind of gel and you're also going to need rubber bands. Okay guys. So I know this looks like it would technically be the front of the wig, but in all actuality this is the very nape of the neck. So the reason why I pull it so far up on the mannequin is because once I start braiding, I don't want that nape area to get smaller, because then it's not gon na cover the entire back of my head and then the wig won't fit. So what I'm gon na do is I'm gon na pull that back part up all the way to the top, and then I'm going to use T pins and I'm going to place like as many t pins as I can to pull that name apart and stretch It out and then I'm also going to place them throughout the week as well and, like I said this is going to prevent the wig from getting smaller and not fitting. Once you're finished with your braids right here, you guys I'm going to be part in the very nape of the neck in a rectangle. So what this is gon na be is. This is gon na be three braids. This is gon na, be my three lowest braids on the week. Now I'm going to take this rectangle right here and I'm going to part it in in an additional three smaller rectangles. So this larger rectangle section is going to become my three lowest braids and you guys will see that now, I'm gon na get my braiding hair and I'm gon na stretch out those ends. You guys and the reason why I'm doing this is because you don't want blunt ends at the bottom of your braids, and this way you don't have to burn them. You don't have to tie them. You don't have to glue, I don't know whatever people. Do you? Don'T have to do that you'll, just braid all the way to the end, so you guys will see how I'm just stretching this hair out and stretching it out and making the ends all uneven. That they're gon na be the same length but they're gon na they're. Not gon na, be so blunt and straight across so now we're going to section off our hair and you want to take one-third of this entire pack of hair, and you want to section it away from the rest of the hair. Now I won't get too in-depth with how you put the hair together. I'M gon na give you a visual, as you guys can see, but I'm not gon na. You know get too descriptive about it, because this isn't really about how to braid like this video. You should already know how to play with hair extensions or with braiding hair, so yeah, you guys, I'm just gon na take this section and then I'm just gon na start braiding. Also you guys, I am gon na leave the rubber band on here, while I'm braiding. Some of these, I did not do that for every single braid, just because I'm not necessarily a beginner braider, but I think that this is the easiest way and it's the quickest way, considering all your sections will be parted off. If you go through and put rubber bands on them first before you break them, but again that's completely optional and also the reason why I used a pack of hair per braid is one because I wanted the braids to be big and then two because of the Size of the section so make sure that the amount of braiding hair you're using is equivalent to the section size that you're using now. As you guys just seen, I sprayed that free spray on this braid and what that's going to do is it's going to adhere to that hair and keep flyaways from happening and again, I'm gon na braid all the way down to the very bottom of that braiding. Here you guys, as you guys can see, it gets really skinny at the bottom. So I do braid all the way down and then the very very ends I will leave out because we're gon na just end up dipping that in the hot water in the end, as you guys can see, I did add a couple of red braids as well, And really, the only reason why I did this was because I already had this hair and they didn't make sense to go, buy extra packs of black hair when I already have red hair on hand. So again, this is completely optional. You do not have to do this, you can do one solid color, but it's definitely your preference. Also after I finished that first row of braids I did go ahead and reposition the wig the correct way on the mannequin, as you guys can see. That first row is now on the nape and it's not so high up near the occipital bone. So yeah you guys so I just continue to braid. But now the wig is in the right position and also I start to make triangular parts instead of square ones, because I just think that it looks better, but again, that's completely optional. Also, you guys. I cannot stress this enough because I do not want you to braid a whole wig and then try to put it on and it doesn't fit. If you guys look at that black braid next to the red one that I'm braiding there right above it, there are T pins all in the hair. There are also T pins all at the bottom nape of the neck steel, as I'm braiding every braid that I do. I'M gon na continue to reposition those t pens to make sure that that wig maintains its elasticity and that it does not get smaller. You guys so that is super important now that I'm near the top of the wig I'm going to go ahead and section out my baby hairs. Also, you guys, I did add some small braids in between the large braids in the front only because I just wanted to add a little pizzazz and be extra on my wig. Again, that's completely optional. You do not have to do that unless you want to okay, you guys Lourdes is good. We are on our last braid now he really didn't take me that long, but I'm just glad to be done. Braiding honestly, you guys so. Nevertheless, I want to share some numbers with you all really quickly. If you are going to attempt this style, I would honestly just suggest if you don't already have a full lace wig that you can use if you're going to buy one. Please purchase an eight or a ten inch, one that would be the most cost efficient and it would be the smartest go-to if you're, just gon na put braids in it also um. As far as packs of hair are concerned, I don't know I know I had. Maybe like less than 20 braids, I might have had like 15 braids, so two dollars a pack for 15 braids, that's like 30 dollars and then say you find a super cheap $ 50, full lace, wig, that's $ 80! You guys, I feel, like that's so much better than buying a braided wig off of a website and paying three hundred four hundred dollars for it. When you can just do it yourself, okay, so yeah. I just wanted to share that with you all and our wig is complete. You guys, I'm so happy with the way this turned out. All my brains are the same length. Everything looks good so now we're going to go ahead and we are going to dip our hair in boiling hot water. This is also a very important step because we don't want our braids to be all stiff and a hot mess. You guys. So please be very careful on this part and also, if someone is there to help you get some assistance and please don't burn your fingertips off because it will be a wrap like yo. Ass is grass. If you don't got no finger tips, you can't take Sunday, and so just yeah be careful all right, you guys. So this is pretty much the usual we're gon na go ahead and put the wig on make sure it fits properly. As you guys can see. My baby hairs are still separated. Everything looks good, I'm gon na just go ahead and start putting my adhesive on you. Guys can also saw a an elastic band on here. You can also wear this wig glueless. If you guys want to see how to do that, then just let me know - and I will get that video up for you - guys ASAP so yeah, I'm just gon na. Do this the exact same way that I would do on my other wigs and you guys um. This wig is like fresh out of the pot, so y'all, please just just let the wig dry for you throw it on your head, like I was just so ready for this video to be done. The wig is soaking wet, not the actual cat, but the braids and it just was a disaster, but I mean aside from that. I do think that this turned out really well my makeup. It just so be your ass on point today. I don't know what was going on, but today was a good day. So yeah I'm gon na go ahead, keep repositioning this week until I get it exactly where I want it, and I'm gon na go ahead and lay, and then I'm gon na slay these baby ears and yeah again baby hairs are completely a hundred percent optional. Now I feel like for me that they make the wig look more natural, but if you don't want baby hairs, then you don't have to have them. I would just go ahead and braid that extra hair into your braids, instead of leaving it out now, I'm just gon na apply my handy dandy, silk scarf and I'm going to lay those baby hairs and set them, and I'm also going to melt that lace. So yeah, I'm just gon na apply this and I'm gon na leave it on one. You can either leave it on overnight. You can leave it on just for 20 minutes, however long it takes to dry. That'S how long I will leave it on and now I'm just gon na go ahead and play around my hair a little bit and also gon na add a couple little accessories to it. I got these at the dollar. I don't always want to say the Dollar Tree when I'm talking about the booty supply. I got these from my local Beauty Supply. They were a dollar ninety-nine and I got these because they are the Jumbo ones. They are not the small, tiny ones you guys so yeah. You should be able to find these at your local Beauty Supply you're. My jacket is so my pants after this video were so like. I don't know why didn't just let this wig dry, but please just let the bridge dry, you guys or wring them out with a towel as much as possible, because it's just so unnecessary for all your clothes to be soaking wet just to wear this week. This is the back of the wig you guys, I didn't want to leave y'all hanging a natural yatta back, okay, so here's the bag. Thank you guys so much for watching. I really love and appreciate you all all the comments and the likes and just interactions period. You guys, please do not forget to Like comment and subscribe if you enjoyed this video, follow me on Instagram and Twitter, at mokomichi, and also on snapchat at b-ball, underscore beauty i'll, be sure to put that in the description box below. I love you guys again and until next time, peace
Comments
Josette Grady: Thank you . I need to do this and you make it look easy
Vernessie M. Joseph-Burbank: very pretty and natural-looking
Naanaach: Really nice!!! I loooooooveeeeee it !!! :)
Mickisha868: New subscriber! Love it!
Shana J: You look very pretty in those ! This gonna save me so much time ! Does it still look good and natural in a ponytail ?
Alexe Lewis: Hi where did you get the full lace wig from?
Henrique Figueiredo: Love it! Can I have one?
Carli Noel: Can you make a video for adding a band to make the wig glueless?
Mackenzie Cook: Hey girl new subie, you are so pretty How did you lay the back of the wig? And can you do a video with your stocking cap method? Also what kind of glue do you use?
wylesiavm: These are so cute on you
ItsEssence: FUCKING WOW
Empress Libra ♎️:
Oma Golden: Pls do you mind sharing were you got the hair from?
Kennise Marchè: Omg
Ayoo_RaeB: Do you need braiding hair or can you use an old long straight wig and just braid that and BTW: You're Gorgeous
Jasmine Champagne: First video that made since, thanks!
Lidya Janette:
Kennise Marchè: Do the video with the band !
Table Book: Slay
Queen: GIRL SLAAAAY
Rocky icelynn: Was this full lace wig bleached already?
carolyn mcneil: Really nice is the wig heavy
VPfyi: Lil girl......you badddddddd FYI I looked 4ya Instagram but it’s not available